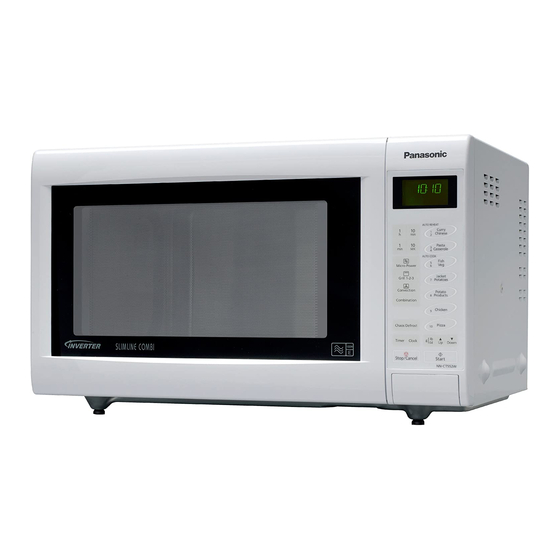
Panasonic NN-CT579S Operating Instructions Manual
Microwave/grill/convection oven
Hide thumbs
Also See for NN-CT579S:
- Operating instructions & cookery book (120 pages) ,
- Service manual (28 pages) ,
- Operating instructions & cookery book (113 pages)
Table of Contents
Advertisement
Available languages
Available languages
Operating Instructions
Bedienungsanleitung
Gebruiksaanwijzing
Mode dʼemploi
Manuale di istruzioni
Instrucciones de funcionamiento
Instrukcja obsługi
Návod k obsluze
Kezelési útmutató
Microwave/Grill/Convection Oven
Mikrowellengerät mit Grill/Heißluft
De Panasonic Microgolf/Warme Lucht Oven
Panasonic Four à Micro-ondes Multifonctions
Forno a microonde e Convezione
Horno Microondas/Convección
Kuchenka mikrofalowa z funkcjami Grill/Konwekcja
Mikrovlnná / Horkovzdušná trouba/ Gril
Grillezös / légkeveréses mikrohullámú sütö
NN-CT579S
®
Advertisement
Table of Contents

Related Manuals for Panasonic NN-CT579S


Summary of Contents for Panasonic NN-CT579S
- Page 1 Instrucciones de funcionamiento Instrukcja obsługi Návod k obsluze Kezelési útmutató Microwave/Grill/Convection Oven Mikrowellengerät mit Grill/Heißluft De Panasonic Microgolf/Warme Lucht Oven Panasonic Four à Micro-ondes Multifonctions Forno a microonde e Convezione Horno Microondas/Convección Kuchenka mikrofalowa z funkcjami Grill/Konwekcja Mikrovlnná / Horkovzdušná trouba/ Gril Grillezös / légkeveréses mikrohullámú...
- Page 2 IMPORTANT SAFETY INSTRUCTIONS: Before operating this oven, please read these instructions carefully and keep for future reference. WICHTIGE SICHERHEITSANWEISUNGEN. Bitte sorgfältig durchlesen und zur weiteren Bezugnahme aufbewahren. BELANGRIJKE VEILIGHEIDSINSTRUCTIES. Lees ze a.u.b. zorgvuldig door en bewaar ze zodat u ze opnieuw kunt raadplegen wanneer nodig. INSTRUCTIONS DE SÛRETÉ...
-
Page 3: Installation And Connection
Installation and Connection Examine your microwave oven 8. The power cord should not touch the outside of the oven. Keep the cord away from hot sur- Unpack the oven, remove all packing material, and faces. Do not let the cord hang over the edge examine the oven for any damage such as dents, of a table or work top. -
Page 4: Safety Instructions
Safety Instructions Use of your oven While the oven is in Microwave/Heater 1. Do not use the oven for any reason other operation, the cooling fan always rotates to than the preparation of food. This oven is cool the electric components. After the specifically designed to heat or cook food. - Page 5 Important Information 1) Cooking Times 6) Liquids • Cooking times given in the cookbook are • When heating liquids, e.g. soup, sauces and approximate. The cooking time depends on beverages in your microwave oven, the condition, temperature, amount of food overheating the liquid beyond boiling point and on the type of cookware.
-
Page 6: Outline Diagram
Outline Diagram [14] [13] [15] [10] [12] [11] Door Release Button Press to open the door. When you open the oven door during cooking, the cooking is stopped temporarily without clearing earlier made settings. The cooking is resumed as soon as the door is closed and Start Pad pressed. The oven lamp lights as soon as the oven door is opened. -
Page 7: Control Panel
Control Panel NN-CT579S Display Window Time Pads Microwave Power Pad Grill Power Pad Convection Pad Combination Pad Auto Defrost Pad Weight Select Pads Clock Pad (10) Delay/Stand Pad (11) Auto Weight Program Pads (12) Panacrunch Program Pads AUTO / 10min... -
Page 8: Oven Accessories
Oven Accessories The following chart shows correct use of the accessories in the oven. Glass Tray Metal Tray Wire Rack Panacrunch pan Microwave Grill Convection Combination Cooking Modes The diagrams shown below are examples of the accessories. It may vary depending on recipe/dish used. Further information can be found in the Cookbook. -
Page 9: Controls And Operation Procedure
Controls and Operation Procedure Word Prompting Plug In These models have a “88:88” unique function “Word Prompting” which Press “FRANCAIS” In French guides you through the operation of your Press “ITALIANO” In Italian microwave. After plugging in the oven press the Start Pad until Press In German “DEUTSCH”... -
Page 10: Microwave Cooking And Defrost
Microwave Cooking and Defrost There are 6 different microwave power levels available (see the chart below). Use of accessory: Glass Tray This chart shows approximate wattage for each power level. Press Power Level Wattage Max time available once 1000 W 30 minutes twice MIN (DEFROST) - Page 11 Grilling The Grill Pad provides 3 Grill settings. Use of accessory: Wire Rack Press Power Level Wattage once 1 HIGH 1300 W twice 2 MEDIUM 950 W 3 times 3 LOW 700 W Metal Tray Glass Tray inoperable 10min 1min •...
-
Page 12: Cooking By Convection
Cooking by Convection This feature offers a choice of convection temperatures 100 - 220°C in 10°C increments. For quick selection of the most commonly used cooking temperatures, the temperatures start at 150°C and count up to 220°C then 100°C. Use of accessory: Wire Rack Metal Tray Glass Tray... -
Page 13: Combination Cooking
Combination Cooking There are 2 combination settings: 1) Grill 1, 2 or 3 + Microwave 600 W, 440 W, 250 W or 100 W 2) Convection 100 - 220°C + Microwave 600 W, 440 W, 250 W or 100 W Use of accessory: Convection or Grill + Microwave Wire Rack... -
Page 14: Auto Defrost
Auto Defrost With this feature you can defrost frozen foods according to the weight. Select the category and set the weight of the food. The weight is programmed in grams. For quick selection, the weight starts from the most commonly used weight for each category. -
Page 15: Auto Weight Programs
Auto Weight Programs This feature allows you to cook most of your favourite foods by setting the weight only. The oven determines Microwave power level, Grill setting, Convection temperature and cooking time automatically. Select the category and set the weight of the food. -
Page 16: The Oven
Auto Weight Programs Recommended Program Category Word Prompt Accessories Instructions Weight For cooking fresh vegetables. Place the prepared vegetables in a suitable sized container. FRESH Cook Fresh Sprinkle with 6 tbsp (90 ml) of 300 - 1500 g Vegetables water. Cover them lightly with VEGETABLES pierced cling film or a lid. - Page 17 Auto Weight Programs Word Recommended Program Category Accessories Instructions Weight Prompt For reheating, crisping the base and browning the top of FROZEN- Frozen 150 - 600 g frozen purchased pizza. PIZZA Pizza Remove all packaging and place the pizza in the panacrunch pan. 1 Press For reheating, crisping the base and browning the top of...
-
Page 18: Panacrunch Pan
2. Always place the pan in the centre of the quiches, pies, breaded products. Your glass tray and ensure it does not touch Panasonic Panacrunch pan works in three the wall of the oven cavity. Failure to do ways: heating the pan by absorbing... -
Page 19: Delay Start Cooking
Delay Start Cooking By using Delay/Stand Pad, you are able to program Delay Start cooking. 10min e.g. 1min inoperable • • Press Set the delay time by Delay/Stand pressing Time Pads (up Pad. to 9 hours 59 minutes). 10min 1min •... -
Page 20: Stand Time
Stand Time By using Delay/Stand Pad, you can program Stand Time after cooking is completed or use to program the oven as a minute timer. 10min e.g. 1min • • Set the desired cooking program Press and cooking time. Delay/Stand Pad. -
Page 21: Questions And Answers
A: Yes. You can cook your favourite recipe just as you would Q: Can I easily cook my favourite in a conventional oven. Check instructions in the recipes using Panasonic Cookbook for suggested oven temperatures CONVECTION/GRILL? and cooking times. En-19... - Page 22 Questions and Answers A: The oven has programmed DEMO MODE. Q: “D” appears in the display and the oven This mode is designed for retail store dis- does not cook. Why? play. Deactivate this mode by pressing microwave pad once and stop/cancel pad 4 times.
-
Page 23: Care Of Your Oven
Care of Your Oven 1. Turn the oven off before cleaning. 8. The roller ring and oven cavity floor should be cleaned regularly to avoid 2. Keep the inside of the oven, door excessive noise. Simply wipe the seals and door seal areas clean. bottom surface of the oven with mild When food splatters or spilled liquids detergent and hot water then dry with... -
Page 24: Technical Specifications
Pursuant to the directive 2004/108/EC, article 9(2) Panasonic Testing Centre Panasonic Service Europe, a division of Panasonic Marketing Europe GmbH Winsbergring 15,22525 Hamburg, F.R.Germany Manufactured by Panasonic Home Appliances Microwave Oven (Shanghai) Co.,Ltd, 898 Longdong Road, Pudong, Shanghai, 201203, China. - Page 25 Aufstellen und Anschließen Überprüfung Ihres Mikrowellengerätes 4. Das Gerät nicht in unmittelbarer Nähe eines Gas- oder Elektroherdes aufstellen. Das Gerät auspacken, Verpackungsmaterial ent- fernen und auf Beschädigungen wie z.B. 5. Die Stellfüße dürfen nicht entfernt werden. Stoßstellen, gebrochene Türverriegelungen oder 6.
- Page 26 Fähigkeiten oder mangelnder Erfahrung Gerät nicht betrieben werden, bevor es vom oder Kenntnis gedacht, es sei denn, sie wer- Panasonic-Kundendienst repariert worden ist. den durch eine für ihre Sicherheit verant- wortliche Person in die Benutzung des 2. Führen Sie weder eine Änderung oder Gerätes eingewiesen oder von einer solchen...
- Page 27 Sicherheitshinweise Entlüftungsbetrieb ein. Dies ist keine Fehlfunktion, Gebrauch und Ausstattung des Gerätes sondern dient zum Abkühlen der elektronischen 1. Das Mikrowellengerät nur zur Bauteile. Sie können währenddessen die Gerätetür Nahrungsmittelzubereitung benutzen. Dieses öffnen und das Lebensmittel herausnehmen. Der Gerät ist speziell zum Auftauen, Erwärmen und Entlüftungsbetrieb schaltet sich automatisch ab.
- Page 28 Wichtige Informationen 1) Kochzeiten Dies kann zu Verbrennungen führen. Sie vermei- • Die Kochzeit ist abhängig von Beschaffenheit, den einen Siedeverzug, indem Sie beim Erhitzen von Flüssigkeiten in Gläsern oder Tassen immer Ausgangstemperatur und Menge des ein hitzebeständiges Glasstäbchen mit hinein- Lebensmittels sowie von der Art des verwende- stellen oder größere Gefäße mit einem Deckel ten Kochgeschirrs.
-
Page 29: Schematische Ansicht
Schematische Ansicht [14] [13] [15] [10] [12] [11] [1] Türöffner Drücken Sie diese Taste, um die Tür zu öffnen. Wird während des Garvorganges die Tür geöffnet, ist der Gerätebetrieb unterbrochen, das Programm bleibt aber erhalten. Wird die Tür wieder geschlossen und die Starttaste gedrückt, läuft der Garvorgang weiter ab. Die Garraumbeleuchtung schaltet sich ein, wenn die Tür geöffnet wird. - Page 30 Bedienfelder NN-CT579S Digitaldisplay Zeiteinstellung Ein-/Austaste für Mikrowelle Ein-/Austaste für Grill Heißluftbetrieb Taste Kombinationsbetrieb Automatisches Auftauen Plus/Minus-Tasten Uhrzeiteinstellung (10) Vorwahlzeit/Standzeit-Taste (11) Taste für die Gewichtsautomatik zum Garen (12) Panacrunch- Gewichtsautomatikprogramme AUTO / 10min (13) Starttaste: Drücken der Starttaste beginnt den Betrieb des Geräts.
- Page 31 Gerätezubehör Die nachfolgende Tabelle zeigt den korrekten Einsatz des Zubehörs. Glasdrehteller Fettpfanne Grillrost ä ungsteller MIkrowelle Nein Nein Nein Grill Heißluft Kombination Betriebsarten Die nachfolgenden Diagramme zeigen einige Beispiele für den Gebrauch des Zubehörs in den verschiedenen Betriebsarten. Abhängig vom Rezept/Kochbehälter können die Angaben jedoch abweichen.
-
Page 32: Tastatur Und Bedienung
Tastatur und Bedienung Digitale Laufschrift “88:88” Starttaste “FRANCAIS” In Französisch drücken Starttaste “ITALIANO” In Italienisch drücken Starttaste “DEUTSCH” In Deutsch drücken Starttaste “NEDERLANDS” drücken In Holländisch Starttaste ESPANOL In Spanisch drücken Starttaste drücken “POLSKI” In Polnisch Starttaste “ CESKY” drücken In Tschechisch Starttaste drücken... -
Page 33: Einstellen Der Uhr
Tastatur und Bedienung Einstellen der Uhr: Beispiel: Einstellen der Uhr auf 14:25 14 Mal Zweimal 10min 1min 5 Mal nicht einstellbar • Drücken Sie die • Drücken Sie die Uhrtaste. • Drücken Sie die entsprechenden Der Doppelpunkt blinkt nicht Uhrtaste. Uhrzeittasten zum Einstellen der kor- Der Doppelpunkt rekten Uhrzeit. - Page 34 Mikrowellen - und Auftaubetrieb Das Gerät verfügt über 6 verschiedene Mikrowellen-Leistungsstufen. Die Wattleistung der einzel- nen Leistungsstufen entnehmen Sie bitte der nachfolgenden Tabelle. Zubehör: Glasdrehteller Die in der Tabelle angegebenen Wattleistungen sind die ungefähren Werte für jede Leistungsstufe. Wattleistung Drücken Leistungsstufe Max.
- Page 35 Grillbetrieb Mit der Grilltaste wird eine der 3 Grillstufen eingestellt. Zubehör Hoher Grillrost Leistungsstufe Wattleistung Drücken 1300 W Einmal HOCH 950 W Zweimal MITTEL 3 Mal 700 W NIEDRIG Fettpfanne Glasdrehteller nicht einstellbar 10min 1min • Drücken Sie die • Stellen Sie die •...
- Page 36 Heißluft Bei dieser Betriebsart können Temperaturen sowie 100 bis 220°C in 10°C - Schritten eingestellt werden. Zur schnellen Einstellung der am häufigsten verwendeten Temperaturen, beginnen die Temperaturen bei 150°C, bis 220°C, gefolgt von 100°C. Zubehör: Zum einstufigen Kochen. Bei Verwendung des Glasdrehtellers. Fettpfanne Hoher Grillrost Fettpfanne...
- Page 37 Kombinationsbetrieb Es stehen Ihnen zwei verschiedene Kombinationsbetriebsarten zur Verfügung: 1) Grill 1, 2 oder 3 + Mikrowelle 600 W, 440 W, 250 W oder 100 W 2) Heißluft 100-220° + Mikrowelle 600 W, 440 W, 250 W oder 100 W Zubehör: Heißluft oder Grill + Mikrowelle Grillrost...
-
Page 38: Automatisches Auftauen
Automatisches Auftauen Mit dieser Funktion werden tiefgefrorene Speisen in Abhängigkeit ihres Gewichts aufgetaut. Wählen Sie zunächst die entsprechende Lebensmittelkategorie aus und geben Sie dann das Gewicht der Speise ein. Das Gewicht wird in Gramm programmiert. Zur zeitsparenden Auswahl beginnen die Gewichte mit den gebräuchlichsten Werten in den jeweiligen Kategorien 1-2-3 •... - Page 39 Gewichtsautomatik-Programme Diese Funktion gestattet Ihnen die Zubereitung der meisten Ihrer Lieblingsspeisen, wofür Sie lediglich das Gewicht der Lebensmittel einzustellen brauchen. Vom Gerät werden Mikrowellen-Leistungsstufe, Grillstufe, Heißluft-Temperatur und Garzeit automatisch eingestellt. Wählen Sie zunächst die entsprechende Lebensmittelkategorie aus und geben Sie dann das Gewicht der Speisen ein. Das Gewicht wird in Gramm programmiert.
- Page 40 Gewichtsautomatik-Programme Mindest-/ Digitale Programm Kategorie Zubehör Hinweise/Tipps Laufschrift Höchstgewicht Zum Garen von frischem Gemüse. Geben Sie das vorbere- itete Gemüse in eine geeignete Form. Fügen Sie 6 Eßl. (90 ml) FRISCHES Frisches Wasser hinzu. Decken Sie das 300 - 1500 g Gemüse mit perforierter Gemüse GEMUESE...
- Page 41 Gewichtsautomatik-Programme Digitale Mindest-/ Programm Kategorie Zubehör Hinweise/Tipps Laufschrift Höchstgewicht Zum Erhitzen, Knusprigbacken des Bodens und Bräunen von GEFRORENE Tiefgefror 150 - 600 g tiefgefrorener, vorgefertigter -ene Pizza PIZZA Pizza. Entfernen Sie die (1 mal Verpackung und legen Sie die drücken) Pizza in den Bräunungsteller.
- Page 42 Bräunungsteller Wichtige Hinweise: Das Konzept Bei einigen Lebensmitteln, die mit Mikrowellen 1. Heizen Sie den Bräunungsteller maximal 8 zubereitet werden, kann der Teig anschließend Minuten vor. immer noch weich und wenig knusprig sein. 2. Stellen Sie den Bräunungsteller immer in Der Ihrem Gerät zugehörige Bräunungsteller die Mitte des Glasdrehtellers und vergewis- läßt Pizzen, Quiches und andere Teigwaren...
- Page 43 Gerätebetrieb mit Vorwahlzeit Mittels der Vorwahlzeit/Standzeit-Taste können Sie eine Vorwahlzeit zum später einset- zenden Gerätebetrieb eingeben. z.B. 10min 1min nicht einstellbar • Stellen Sie durch Drücken der • Drücken Sie die Zeittasten die gewünschte Vorwahlzeit/Stand Vorwahlzeit ein (bis zu 9 Stunden 59 zeit-Taste.
- Page 44 Standzeit Mittels der Vorwahlzeit/Standzeit-Taste ist es möglich, die Standzeit nach dem Garen einzuprogrammieren oder das Gerät als Minutentimer zu programmieren. 10min z.B. 1min • Stellen Sie das gewünschte • Drücken Sie die Garprogramm und die Garzeit ein. Vorwahlzeit/ Standzeit-Taste. 10min 1min nicht einstellbar •...
-
Page 45: Fragen Und Antworten
Steckdose defekt, Arbeitet das Gerät jedoch ord- nungsgemäß, ist wahrscheinlich Ihr Mikro-wellengerät defekt. Wenden Sie sich in diesem Fall unbedingt an einen Panasonic-Kundendienst. A: Beim Betrieb des Mikrowellengerätes können Fernseh- und F: Das Mikrowellengerät verur- Radiostörungen auftreten. Es handelt sich um ähnliche sacht Fernsehstörungen. - Page 46 A: Ja. Sie können beliebige Rezepte genau wie mit einem F: Kann ich mit dem Heißluft- herkömmlichen Backofen nachkochen. Vergleichen Sie /Grillbetrieb einfach beliebige hierzu die Hinweise im Panasonic-Kochbuch für empfohlene Rezepte nachkochen? Temperaturen und Garzeiten. A: Die Fehlermeldung weist auf ein Problem bei der F: Das Gerät stoppt den...
-
Page 47: Pflege Des Mikrowellengerätes
5. Ist das Bedienfeld verschmutzt, säu- 11.Das Mikrowellengerät darf bern Sie dieses mit einem trockenen, ausschließich von einem qualifizierten weichen Tuch. Verwenden Sie keine Panasonic-Kundendienst geprüft oder scharfen Reinigungs- oder repariert werden. Scheuermittel. Damit es nicht zu 12. Die Luftabzüge immer freihalten. -
Page 48: Technische Daten
Gemäß der Richtlinie 2004/108/EC, Artikel 9(2) Panasonic Testing Centre Panasonic Deutschland, eine Division der Panasonic Marketing Europe GmbH Winsbergring 15,22525 Hamburg, Deutschland Hergestellt von Panasonic Home Appliances Microwave Oven (Shanghai) Co., Ltd, 898 Longdong Road, Pudong, Shanghai, 201203, China. Cz-24 D-24... - Page 49 Installatie en aansluiting Uw magnetronoven controleren Pak de magnetronoven uit en verwijder alle ver- 15cm pakkingsmaterialen. Controleer de mag- netronoven op beschadigingen zoals deuken, beschadiging van de deurafsluiting of scheuren in de deur. Waarschuw onmiddelijk uw leverancier wanneer schade wordt geconstateerd. Vrije Gebruik het apparaat niet als het beschadigd is.
- Page 50 Installatie en aansluiting WAARSCHUWING 4. Indien het netsnoer defect mocht raken, dient 1. De deurafdichtingen en de plaatsen het altijd door een origineel netsnoer vervan- hieromheen moeten met een vochtig doek gen te worden. worden schoongemaakt. 5. Kinderen, zonder toezicht, mogen alleen dan Voordat het apparaat in werking gesteld wordt, de magnetronoven bedienen als specifieke dient het apparaat nagekeken te worden op...
- Page 51 Veiligheidsinstructies Het draaiplateau Werking van de oven en grill 1. Voordat u de eerste keer gebruik gaat maken 1. Gebruik de magnetronoven nooit zonder het van de HETE LUCHT-, COMBINATIE- of draaiplateau. GRILL functies, wrijf dan eerst de eventueel 2. Gebruik nooit een ander glazen draaiplateau resterende olie in de oven weg en schakel de dan deze, die bij het toestel geleverd werd.
-
Page 52: Belangrijke Informatie
Belangrijke informatie Kooktijden Vloeistoffen • De in het kookboek opgegeven kooktijden zijn • Indien vloeistoffen, zoals soepen, sausen en bij benadering weergegeven. Factoren die drank opgewarmd worden in uw mag- invloed hebben op de kookduur zijn: de begin- netronoven, kunnen deze bij het bereiken van temperatuur, de hoeveelheid, grootte, afmetin- het kookpunt gaan overkoken, zonder dat er gen en vorm van het voedsel en van de materi-... - Page 53 De magnetronoven [14] [13] [15] [10] [12] [11] Deur ontgrendeltoets Druk de toets in om de deur te openen. Indien u de ovendeur tijdens het koken opent, stopt de magnetronoven met koken zonder het ingestelde kookprogramma te wissen. Het koken gaat weer normaal door, zodra de deur wordt gesloten en de starttoets wordt aangeraakt.
-
Page 54: Het Bedieningspaneel
Het bedieningspaneel NN-CT579S Uitleesvenster Tijdtoetsen Vermogenstoets Grill toets Hete lucht toets Combinatie toets Automatische ontdooitoets Gewicht - Instelling Kloktoets (10) Programmeer/standaardtijdtoets (11) Automatische programma's met gewichtinstelling (12) Panacrunch (pan-krokant) automatische programma's met gewichtinstelling AUTO / 10min (13) De starttoets: Met een druk op deze toets stelt u de 1min magnetronoven in werking. - Page 55 Toebehoren De tabel hieronder vermeldt welke accessoires voor welk programma gebruikt moeten worden. Glazen Metalen Metalen rooster Panacrunch Pan draaiplateau draaiplateau Magnetron Grill Hete lucht Combinatie Kookmethoden De hieronder getekende toebehoren die u bij de hete lucht- en combinatiefunctie vindt, worden alleen als voorbeelden gegeven.
- Page 56 Bediening en gebruiksprocedure “88:88” Stap-voor-stap display Aansluiten Druk op “FRANCAIS” In het Frans Druk op “ITALIANO” In het Italiaans Druk op “DEUTSCH” In het Duits Druk op “NEDERLANDS” In het Nederlands Druk op ESPANOL In het Spaans Druk op “POLSKI” In het Pools “...
- Page 57 Bediening en gebruiksprocedure De klok instellen: Voorbeeld: Voor het instellen van 14:25 14 maal tweemaal 10min 1min niet operationeel vijfmaal • Druk de kloktoets in. • Druk nogmaals de kloktoets in. • Toets de juiste tijd in door de De dubbele punt De dubbele punt houdt op met betreffende tijdtoetsen aan te gaat nu knipperen.
- Page 58 Koken met de magnetronfunctie en ontdooien Er zijn 6 verschillende niveaus voor het vermogen aanwezig (zie de onderstaande tabel). Gebruik van de accessoires: Glazen draaiplateau Deze tabel geeft het gemiddelde vermogen weer dat voor ieder vermogens- niveau gebruikt kan worden. Indrukken Vermogen Wattage...
- Page 59 Grillen Bij het grillen kunt u een keuze maken uit drie standen. Gebruik van de accessoires: Metalen rek Indrukken Stand Vermogen 1 HOOG 1300 W 2 MIDDEN 950 W 3 LAAG 700 W Metalen Glazen draaiplateau draaiplateau niet operationeel 10min 1min •...
- Page 60 Koken met de Hete Lucht Deze toetsen bieden de mogelijkheid om een temperatuur van 100 - 220°C te selecteren met een verhoging van steeds 10°C. Voor een snelle selectie van de meest gebruikte temperatuur begint de temperatuur op 150°C en telt door tot 220°C, en 100°C. Metalen rek Gebruik van acces- Metalen draaiplateau...
-
Page 61: Combinatie Koken
Combinatie koken Er zijn 2 combinaties voorgeprogrammeerd: 1) Grill 1, 2 of 3 + Magnetron 600 W, 440 W, 250 W of 100 W 2) Hete lucht 100 - 220°C + Magnetron 600 W, 440 W, 250 W of 100 W Gebruik van accessoires: Hete lucht of Grill + Magnetron Metalen rek... -
Page 62: Automatisch Ontdooien
Automatisch ontdooien Deze functie biedt u de mogelijkheid om het voedsel te ontdooien, al naar gelang het gewicht. Kies de categorie en stel het gewicht van het voedsel in. Het gewicht is geprogrammeerd in grammen. Voor elke categorie, is het meest voor de hand liggende gewicht geprogrammeerd. 1-2-3 •... -
Page 63: Automatisch Koken
Automatisch koken Met deze ovenfunctie wordt het mogelijk om uw favoriete gerechten te bereiden. Het enige dat u moet doen is het gewicht instellen. De oven bepaalt automatisch het magnetronvermogen, de hete lucht temperatuur en de kooktijd. Kies de categorie en stel het gewicht van het voedsel in. Het gewicht is geprogrammeerd in gram. - Page 64 Automatisch koken VERSEStap Programma Geadviseerd Programma voor stap dis- Toebehoren Instructies/Tips gewicht nummer play Voor het koken van verse groenten. Plaats de voor bereide groenten in een daar- voor geschikte schaal en voeg zes eetlepels (90 ml) Het koken water toe. Sluit het geheel af VERSE 300 - 1500 g van verse...
- Page 65 Automatisch koken Programm Stap voor Programma Geadviseer Toebehoren Instructies/Tips d gewicht nummer stap display Voor het opwarmen, knap- perig maken en bruinen van DIEPGEVRO- de bovenkant van de Diepvries 150 - 600 g gekochte, bevroren pizza. Pizza Verwijder al het verpakkings- PIZZA materiaal en plaats de pizza (1 x drukken)
- Page 66 Panacrunch Pan ook met guiches, taarten en pan de zijwanden van de oven niet raakt. brood producten. Uw Panasonic Panacrunch Het niet in het midden plaatsen van de pan Pan heeft drie mogelijkheden: het verwarmen...
- Page 67 Voorgeprogrammeerde start Deze functie maakt het mogelijk, de uitgestelde begintijd van het koken, vooraf in te stellen. 10min b.v. 1min niet operationeel • • Stel het aantal uren/minuten in waarna de Druk op de magnetronoven met koken moet beginnen programmeer/ door de tijdtoetsen in te drukken (tot 9 uur 59 standaardtijdtoets.
- Page 68 Wachttijd Door het gebruik van de Programmeer/Standaardtijdtoets kunt u de wachttijd programmeren nadat de bereiding heeft plaatsgevonden of deze gebruiken om de functie als een kookwekker te gebruiken. 10min b.v. 1min • Stel de gewenste kooktijd en het • Druk op de gewenste kookprogramma in.
-
Page 69: Vraag En Antwoord
Vraag en antwoord V: Waarom kan de oven niet A: Als de oven niet draait, dienen de volgende punten gecontroleerd ingeschakeld worden? te worden: 1. Is de stekker van de oven goed aangesloten? Neem de stekker uit het stopcontact, wacht tien seconden en stop de stekker weer in het stopcontact. - Page 70 Vraag en antwoord A: Ja. U kunt uw meest favoriete recepten net als in een gewone oven V: Kan ik op eenvoudige wijze mijn bereiden. Controleer de instructies in het Panasonic Kookboek voor favoriete recepten in de geadviseerde oventemperaturen en kooktijden.
-
Page 71: Onderhoud Van Uw Magnetronoven
Onderhoud van uw magnetronoven 1. Schakel de magnetronoven uit voordat u 7. De loopring en de holle ruimte in de oven- deze gaat schoonmaken. bodem dienen ook regelmatig schoonge- maakt te worden, om geruis tijdens het 2. Hou de binnenkant van de magnetronoven, werken te voorkomen. -
Page 72: Technische Specificaties
Uit hoofde van richtlijn 2004/108/EC, artikel 9(2) Panasonic testcentrum Panasonic Service Europe, een afdeling van Panasonic Marketing Europe GmbH Winsbergring 15,22525 Hamburg, F.R. Duitsland Geproduceerd door Panasonic Home Appliances Microwave Oven (Shanghai) Co., Ltd., 898 Longdong Road, Pudong, Shanghai, 201203, China. Nl-24... - Page 73 Installation et branchement 5. Ne retirez pas les pieds du four. Vérifiez lʼétat du four à micro-ondes 6. Ce four est destiné uniquement à usage Déballez le four et débarrassez-le de lʼensemble domestique. Ne lʼutilisez pas à lʼextérieur. du matériel dʼemballage. Examinez soigneuse- ment lʼappareil afin de détecter toute déformation, 7.
- Page 74 Installation et branchement AVERTISSEMENT 1. Nettoyez les joints dʼétanchéité de la porte à lʼaide dʼun linge humide. Vérifiez si lʼappareil ne présente pas de défauts au niveau des joints dʼétanchéité. Si cʼest le cas, ne lʼutilisez plus avant que ceux-ci aient été réparés par un technicien agréé par le fabricant. 2.
-
Page 75: Consignes De Sécurité
Consignes de sécurité vous pouvez retirer les aliments pendant que Utilisation du four le ventilateur tourne. 1. Utilisez le four exclusivement à des fins culi- Lampe du four naires. Ce four est spécialement conçu pour réchauffer ou cuire des aliments. Ne l'utilisez Si vous devez remplacer la lampe du four, pas pour réchauffer des produits chimiques adressez-vous à... - Page 76 Informations importantes 1) Temps de cuisson 6) Liquides • Lorsque vous réchauffez des liquides, notam- • Les temps de cuisson indiqués dans le ment de la soupe, des sauces et des bois- manuel de cuisson sont approximatifs. Les sons dans votre four à micro-ondes, ils peu- facteurs qui peuvent faire varier ces temps vent dépasser le point dʼébullition sans que de cuisson sont : le degré...
-
Page 77: Schéma Descriptif
Schéma descriptif [14] [13] [15] [10] [12] [11] Touche d'ouverture de la porte Appuyez sur cette touche pour ouvrir la porte. Si vous ouvrez la porte du four pendant qu'il est en marche, il s'arrête de fonctionner sans toutefois que les instructions de programma- tion soient annulées. -
Page 78: Panneau De Commandes
Panneau de commandes NN-CT579S Fenêtre dʼaffichage Touches de durée Touche de puissance micro-ondes Touche de gril Touche de chaleur tournante Touche de cuisson combinée Touche de décongélation automa- tique selon le poids Touches de poids Touche dʼhorloge (10) Touche Minuteur... -
Page 79: Modes De Cuisson
Accessoires Le tableau suivant vous permettra d'utiliser correctement les accessoires du four. Plateau de Plateau noir Trépied Métallique Panacrunch verre Micro-ondes Gril Chaleur tournante Combiné Modes de cuisson Les illustrations ci-dessous sont fournies à titre d'exemples d'accessoires. Ils peuvent varier en fonction de la recette ou du matériel utilisé. Consultez le livre de recettes pour de plus amples informations. - Page 80 Commandes et mode d'emploi Affichage du mode d'emploi mode d'emploi “88:88” Branchement Appuyez sur “FRANCAIS” la touche En français Appuyez sur “ITALIANO” la touche En italien Appuyez sur “DEUTSCH” la touche En allemand Appuyez sur la touche “NEDERLANDS” En néerlandais Appuyez sur la touche ESPANOL...
- Page 81 Commandes et mode d'emploi Réglage de lʼheure : Exemple : Pour régler lʼheure sur 14h25 14 fois deux fois 10min 1min inactive 5 fois • Appuyez sur la touche • Appuyez sur • Affichez lʼheure en pressant les Horloge. la touche Horloge. touches de durée appropriées.
-
Page 82: Cuisson Et Décongélation Aux Micro-Ondes
Cuisson et décongélation aux micro-ondes Votre four propose 6 niveaux de puissance différents de micro-ondes. Accessoire utilisé: Plateau tournant en verre Le tableau ci-dessous indique la puissance en watts approximative correspondant à chaque niveau. Appuyez Niveau de puissance Watts Temps maximum disponible 1 fois 1000 W 30 minutes... -
Page 83: Cuisson Au Gril
Cuisson au gril Vous disposez de 3 puissances de gril. Accessoires utilisés : Trépied métallique Appuyez Niveau de puissance Watts 1 fois 1 FORT 1300 W 2 fois 2 MOYEN 950 W 3 fois 3 DOUX 700 W Plateau tour- Plateau noir nant en verre inactive... -
Page 84: Cuisson En Chaleur Tournante
Cuisson en chaleur tournante Cette fonction offre un choix de températures de chaleur tournante de 100 à 220°C par pas de 10°C. Pour une sélection rapide des températures les plus utilisées pour la cuisson, les tempéra- tures commencent à partir de 150°C jusqu'à 220°C et ensuite 100°C. Accessoires utilisés : Trépied métallique Plateau noir... -
Page 85: Cuisson Combinée
Cuisson combinée Le mode Cuisson combinée offre 2 types de combinaisons possibles : 1) Gril 1, 2 ou 3 + Micro-ondes 600 W, 440 W, 250 W ou 100 W 2) Chaleur tournante 100 à 220°C + Micro-ondes 600 W, 440 W, 250 W ou 100 W Accessoires utilisés : Chaleur Tournante ou Gril + Micro-ondes Trépied métallique... -
Page 86: Décongélation Automatique
Décongélation automatique Cette fonction vous permet de décongeler des aliments surgelés selon leur poids. Sélectionnez la catégorie dʼaliment et affichez son poids. Le poids s'affiche en grammes. Pour accélérer la sélection, lʼaffichage indique dʼabord le poids le plus fré- quemment utilisé avec chaque catégorie dʼaliment. 1-2-3 •... - Page 87 Touches de cuisson automatique selon le poids Cette fonction vous permet de cuire plusieurs aliments simplement en affichant le poids. Le four détermine automatiquement la puissance des micro-ondes, la puissan- ce du gril, la température de chaleur tournante et la durée de cuisson. Sélectionnez la catégorie dʼaliment et affichez son poids.
- Page 88 Cuissons automatiques selon le poids Mode défi- Poids Touche Catégorie Accessoires Utilisation lant min-max Pour cuire des légumes frais. Placez les légumes préparés dans un récipient de taille adé- Cuisson LEGUMES quate. Ajoutez 6 c. à s. d'eau 300 - 1500 g (90 ml) et couvrez le tout à...
- Page 89 Réchauffages automatiques selon le poids Mode Poids Touche Catégorie Accessoires Utilisation min-max défilant Pour réchauffer une pizza cuite PIZZA Pizza et surgelée. Déballer entièrement 150 - 600 g SURGELEE et posez la pizza sur le surgelée Panacrunch préchauffé. (1 pression) Pour réchauffer une pizza fraîche réfrigérée.
- Page 90 Panacrunch REMARQUES : A quoi sert un Panacrunch La cuisson aux micro-ondes donne parfois une 1. Ne préchauffez pas le Panacrunch pendant croûte molle et pâteuse. Le Panacrunch, lui, plus de 8 minutes. permet de faire brunir et rendre croustillants les 2.
-
Page 91: Mise En Marche Retardée
Mise en marche retardée La touche Minuteur permet de retarder le démarrage d'une cuisson. 10min 1min inactive • Appuyez sur la • Réglez le temps de retardement sou- touche Minuteur. haité en appuyant sur les touches de durée (jusquʼà 9 heures 59 minutes). 10min 1min •... -
Page 92: Fonction Minuteur
Fonction minuteur Cette touche vous permet d'utiliser la fonction Minuteur de votre four ou de program- mer un temps de repos après une cuisson ou une décongélation. 10min 1min • Pressez la • Choisissez la cuisson souhaitée et sa touche durée. -
Page 93: Vos Questions - Nos Réponses
Vos questions - nos réponses Le four a été programmé en mode DEMO. Ce mode est Q : La lettre "D" apparaît sur l'afficha- ge et le four ne fonctionne pas. destiné aux revendeurs. Pour le désactiver, pressez 1 fois la Pour quelle raison ? touche Micro-ondes puis 4 fois la touche Arrêt/Annulation. - Page 94 Q :Puis-je facilement cuisiner mes plats préfé- rés comme s'il s'agissait d'un four tradition- rés en mode CHALEUR TOURNAN- nel. Consultez les instructions fournies TE/GRIL ? dans le manuel de cuisson Panasonic pour connaître les températures et les durées de cuisson conseillées. Fr-22...
-
Page 95: Entretien De Lʼappareil
Entretien de lʼappareil 1. Débranchez l'appareil avant de le nettoyer. Lavez-le à l'eau savonneuse chaude ou dans le lave-vaisselle. 2. Etant donné que les ondes agissent sur les molécules des aliments, il est 8. Nettoyez régulièrement l'anneau à important que votre four soit constamment roulettes et la sole du four pour éviter que propre. -
Page 96: Fiche Technique
Conformément à lʼarticle 9(2) de la directive 2004/108/CE Panasonic Testing Centre Panasonic Service Europe, une division de Panasonic Marketing Europe GmbH, Winsbergring 15, 22525 Hambourg, Allemagne Fabriqué par Panasonic Home Appliances Microwave Oven (Shanghai) Co., Ltd, 898 Longdong Road, Pudong, Shanghai 201203, Chine. Fr-24 Fr-24... - Page 97 Installazione e connessione del forno alla rete elettrica Esaminate il vostro forno a microonde Togliere il forno dall'imballo avendo cura di rimuo- vere tutto il materiale da imballaggio, ed esami- 15cm narlo per accertare che non vi siano danni quali ammaccature, rotture delle chiusure o incrinature della porta.
- Page 98 Installazione e connessione del forno alla rete elettrica Avvertenza 4. Se viene danneggiato il cavo dell'apparec- chio, deve essere sostituito con un cavo 1. Le guarnizioni della porta e le zone cir- speciale fornito dal fabbricante. costanti devono essere pulite con un panno 5.
- Page 99 2. Non adoperare un vassoio di vetro diverso da protezione antiruggine. Questo è l'unico caso quello originale Panasonic, che è stato studia- in cui il forno deve essere usato vuoto. to appositamente per questo forno.
- Page 100 Informazioni importanti Tempi di cottura Liquidi • I tempi di cottura indicati nel ricettario sono • Quando si riscaldano dei liquidi (come ad es. approssimativi. Il tempo di cottura dipende zuppe, salse o bevande) nel forno a dalle condizioni, dalla temperatura, dalla quan- microonde, può...
-
Page 101: Il Vostro Forno
Il vostro forno [14] [13] [15] [10] [12] [11] Pulsante di apertura della porta Premere per aprire la porta. Se si apre la porta del forno durante il funzionamento, la cot- tura viene temporaneamente interrotta ma le impostazioni selezionate in precedenza non vengono cancellate. -
Page 102: Pannello Di Comando
Pannello di comando NN-CT579S Finestrella del display Pulsanti di impostazione tempo Pulsante modalità Microonde Pulsante modalità Grill Pulsante Convezione Pulsante Cottura Combinata Scongelamento Automatico Pulsanti Selezione Peso Pulsante Orologio (10) Pulsante Ritardo / Attesa (11) Pulsanti programmi automatici a microonde in base al peso... -
Page 103: Accessori Del Forno
Accessori del forno La seguente tabella mostra il corretto uso degli accessori per il forno. Vassoio di vetro Vassoio in metallo Supporto metallico Piatto panacrunch Microonde SÌ Grill SÌ SÌ SÌ SÌ Convezione SÌ SÌ SÌ SÌ Combinazione SÌ SÌ SÌ... - Page 104 Uso dei comandi e funzionamento del forno Visualizzazione della lingua: “88:88” Collegare alla presa di corrente Premere “FRANCAIS” IN FRANCESE Premere “ITALIANO” IN ITALIANO Premere “DEUTSCH” IN TEDESCO Premere “NEDERLANDS” IN OLANDESE Premere ESPANOL IN SPAGNOLO Premere “POLSKI” IN POLACCO “...
- Page 105 Uso dei comandi e funzionamento del forno Se il tasto Delay/Stand (Attesa/Riposo) è premuto 4 volte, la Procedura guidata sarà disattivata. Per riattivarla, premere il tasto Delay/Stand (Attesa/Riposo) 4 volte. Esempio: Impostazione delle ore 14:25 Impostazione dell'orologio: 14 volte due volte 10min 1min 5 volte...
-
Page 106: Cottura E Scongelamento Con Il Forno A Microonde
Cottura e scongelamento con il forno a microonde Vi sono 6 diversi livelli di potenza per il forno a microonde (vedi la seguente tabella). Uso degli accessori: Vassoio di vetro La tabella mostra il valore in watt di ogni livello di potenza. Premere Livello potenza Watt... -
Page 107: Uso Del Grill
Uso del grill Il pulsante Grill consente tre posizioni di impostazione. Uso degli accessori: Supporto metallico Premere Livello potenza Watt una volta 1 ALTO 1300 W due volte 2 MEDIO 950 W tre volte 3 BASSO 700 W Vassoio Vassoio in in metallo vetro inoperable... -
Page 108: Cottura A Convezione
Cottura a convezione Questa funzione offre una scelta tra temperature di convezione di 100 a 220°C, con incrementi di 10°C. Per la selezione rapida delle temperature di cottura più comunemente usate, le tempera- ture iniziano a 150°C, con conteggio sino a 220°C, quindi a 100°C. Uso degli accessori: Vassoio in metallo Supporto metallico alto... - Page 109 Combinazione modi di cottura Esistono 2 diverse impostazioni per la cottura combinata: 1) Grill 1, 2, o 3 + Microonde 600 W, 440 W, 250 W o 100 W 2) Convezione 100 - 220°C + Microonde 600 W, 440 W, 250 W o 100 W Uso degli accessori: Grill o Convezione + Microonde Supporto metallico...
-
Page 110: Scongelamento Automatico
Scongelamento automatico Questa caratteristica permette di scongelare automaticamente i cibi congelati in funzione del loro peso. Selezionare la categoria e impostare il peso dell'alimento. Il peso deve essere programmato in grammi. Per una selezione rapida, il peso inizia da quello utilizzato più frequentemente per ogni categoria. -
Page 111: Programmi Automatici A Peso
Programmi automatici a peso Questa funzione permette di cucinare la maggior parte dei propri alimenti preferiti impostan- done unicamente il peso. Il forno determina automaticamente il necessario livello di potenza delle microonde, la potenza del grill, la temperatura di convezione e il tempo di cottura. Selezionare la categoria e impostare il peso dell'alimento. - Page 112 Programmi automatici a peso Indicazione Peso Programma Categoria Accessori Istruzioni in lingua raccomandato Per cucinare verdure fresche. Disporre le verdure preparate in un recipiente di dimensioni adat- te. Versare sopra 6 cucchiai da Cottura VERDURE cucina (90 ml) di acqua. Coprire verdure 300 - 1500 g leggermente con pellicola...
- Page 113 Programmi automatici a peso Peso Indicazione in Programma Categoria racco- Accessori Istruzioni lingua mandato Per riscaldare, rendere croc- cante la base e dorare la parte PIZZA Pizza superiore di pizza acquistata 150 - 600 g congelata congelata. Rimuovere comple- SURGELATA (premere 1 tamente la confezione e porre la pizza nel Piatto Panacrunch.
- Page 114 2. Porre sempre il piatto panacrunch al centro quiche (torte salate), focacce e pane croccanti del vassoio di vetro e assicurarsi che non e dorati. Il piatto panacrunch Panasonic lavora tocchi le pareti interne del forno. In caso di in 3 modi diversi: riscaldando il piatto (che...
-
Page 115: Cottura Con Avvio Ritardato
Cottura con avvio ritardato Utilizzando il pulsante Ritardo/Attesa si potrà programmare l'avvio ritardato della cottura. 10min ad esempio 1min non operativo • Premere il pul- • Impostare il tempo di ritardo sante premendo i pulsanti di Ritardo/Attesa. impostazione tempo (fino a 9 ore 59 minuti). -
Page 116: Tempo Di Attesa
Tempo di attesa Con il pulsante Ritardo/Attesa si potrà programmare un tempo di attesa a ultimazione della cot- tura o programmare il forno come un timer a minuti. 10min ad esempio 1min • Impostare il programma ed il tempo di •... -
Page 117: Domande E Risposte
Domande e risposte R: Quando il forno non si accende, verificare i punti seguenti: Perché il forno non si accende? 1. Il forno è stato collegato saldamente alla presa di corrente? Estrarre la spina dalla presa di corrente, attendere 10 secondi e reinserirla. - Page 118 Sì. Potrà cuocere le sue ricette preferite proprio come in un forno di Posso cucinare facilmente le mie tipo tradizionale. Consultare le istruzioni nel Ricettario Panasonic ricette preferite con le funzioni per le temperature forno ed i tempi di cottura consigliati.
-
Page 119: Cura Del Forno A Microonde
Non usare detergenti con- za autorizzato Panasonic. centrati o abrasivi sul pannello di 12. Tenere sempre sgombre da ostacoli comando. Quando si pulisce il pannel- le aperture di ventilazione. -
Page 120: Caratteristiche Tecniche
Ai sensi della direttiva 2004/108/CE, articolo 9(2) Panasonic Testing Centre Panasonic Service Europe, una divisione di Panasonic Marketing Europe GmbH Winsbergring 15, 22525 Amburgo, Germania Prodotto da Panasonic Home Appliances Microwave Oven (Shanghai) Co.,Ltd, 898 Longdong Road, Pudong, Shanghai, 201203, Cina. It-24 It-24... - Page 121 Instalación y conexión Examine su horno microondas Desembale el horno, retire todo el material de 15cm embalaje y compruebe que no tiene abolladuras, que la puerta no está resquebrajada y que sus cierres no están rotos. Si el horno tiene algún daño, comuníquelo de inmediato al distribuidor y no proceda a instalarlo.
-
Page 122: Instrucciones De Seguridad
Instalación y conexión Advertencias 4. Si el cable de alimentación eléctrica de 1. Los cierres de la puerta y sus alrededores este aparado se estropea, debe sustituirse deben limpiarse con un paño húmedo. por el cable específico del fabricante. Es preciso examinar el aparato por si tiene 5. - Page 123 Instrucciones de seguridad Accesorios Funcionamiento de la resistencia 1. Antes de utilizar las funciones El horno viene equipado con distintos acceso- CONVECCIÓN, COMBINADO o GRILL por rios. Utilícelos siempre conforme a las directri- primera vez, limpie el exceso de aceite que ces suministradas.
- Page 124 Información importante Tiempos de cocción a. Evite el uso de recipientes de lados rectos • Los tiempos de cocción dados en el Libro de y cuello estrecho. cocina son aproximados. Aproximados b. Evite el recalentamiento. cocción depende del estado, la temperatura y c.
-
Page 125: Esquema General
Esquema general [14] [13] [15] [10] [12] [11] Botón de apertura de la puerta Púlselo para abrir la puerta. Cuando abra la puerta del horno durante la cocción, ésta se detiene por unos momentos, pero no desaparecen los ajustes programados con anteriori- dad. - Page 126 Paneles del mandos NN-CT579S Visor Selector de tiempo Bóton de potencia Bóton de grill Bóton de convección Bóton de grill + convección Descongelación automática por peso Selector de peso Bóton del reloj (10) Bóton de retardo/espera (11) Programas automáticos en función...
- Page 127 Accesorios del horno En la siguiente tabla se muestra el uso apropiado de los accesorios del horno. Bandeja de Bandeja Parrilla Bandeja cristal metálica pizzas Microondas SÍ Grill SÍ SÍ SÍ SÍ Convección SÍ SÍ SÍ SÍ Combinado SÍ SÍ SÍ...
- Page 128 Mandos y modo de funcionamiento Función Chivato Conecte “88:88” Pulse “FRANCAIS” En Francés Pulse “ITALIANO” En Italiano Pulse “DEUTSCH” En Alemán Pulse “NEDERLANDS” En Holandés Pulse ESPANOL En Español Pulse “POLSKI” En Polaco “ ČESKY” Pulse En Checo Pulse “ENGLISH” En Inglés Estos modelos disponen de la original función de "Información en pantalla", que sirve de guía para utilizar el microondas.
- Page 129 Mandos y modo de funcionamiento Puesta en hora del reloj: Ejemplo: Para establecer 14:25 14 veces dos veces 10min 1min no disponible 5 veces • Pulse el botón del • Introduzca la hora pulsando los • Pulse el botón del reloj. Los reloj.
-
Page 130: Cocción Y Descongelación Con Microondas
Cocción y descongelación con microondas El horno dispone de 6 niveles diferentes de potencia de microondas (consulte el cuadro que se incluye a continuación). Utilización de accesorios: Plato de cristal Este cuadro muestra la potencia aproximada en vatios para cada nivel de potencia. Pulse Nivel de potencia Potencia en vatios... -
Page 131: Utilización Del Grill
Utilización del grill El botón de grill ofrece 3 ajustes de grill. Utilización de accesorios: Parrilla Pulse Nivel de potencia Potencia en vatios una vez 1 HIGH 1300 W dos veces 2 MEDIUM 950 W 3 veces 3 LOW 700 W Bandeja Plato de metal... -
Page 132: Cocción Por Convección
Cocción por convección Esta función permite seleccionar temperaturas de convección de 100 - 220°C en incrementos de 10°C. Para una rápida selección de las temperaturas de cocción más usuales, sus valores comienzan por 150°C y van aumentando hasta 220°C, después pasan a 100°C. Utilización de accesorios: Parrilla Bandeja metálica... -
Page 133: Cocción Combinada
Cocción combinada Hay 2 posibles combinaciones: 1) Grill 1, 2 o 3 + Microondas 600 W, 440 W, 250 W o 100 W 2) Convección 100 - 220°C + Microondas 600 W, 440 W, 250 W o 100 W Utilización de accesorios: Convección o Grill + Microondas Bandeja metálica Parrilla... -
Page 134: Descongelación Automática
Descongelación automática Con esta función puede descongelar alimentos congelados en función de su peso. Seleccione la categoría e indique el peso de los alimentos. El peso se programa en gramos. Para agilizar la selección, el peso comienza por los pesos más habituales para cada categoría. 1-2-3 •... -
Page 135: Programas Automáticos Por Peso
Programas Automáticos por Peso Esta función le permite cocinar la mayoría de sus alimentos favoritos con solo indicar el peso. El horno determina automáticamente el nivel de potencia de microondas, el ajuste de grill, la temperatura de convección y el tiempo de cocción. Seleccione la categoría e indique el peso de los alimentos. - Page 136 Programas Automáticos por Peso Peso Programa Categoría Chivato Accesorios Instrucciones recomendado Para cocinar verdura fresca. Coloque la verdura ya limpia en un recipiente de tamaño apropi - ado. Rocíela con 6 cucharadas Cocinar VERDURA (90 ml) de agua. Cúbrala ligera- verdura 300 - 1500 g mente con una tapadera o con...
- Page 137 Programas automáticos por peso Peso Programa Categoría Chivato recomenda- Accesorios Instrucciones Para calentar, dejar crujiente la base y dorar la superficie PIZZA de las pizzas congeladas Pizza 150 - 600 g congelada preparadas. Retire todo el CONGELADA envoltorio y coloque la pizza en (pulsar 1 vez) la Bandeja para panacrunch.
- Page 138 La Bandeja para cristal sin que toque la cavidad del horno. panacrunch de Panasonic funciona de tres for- Si rozaran, podrían producirse chispas y mas distintas: se calienta la bandeja mediante dañarse el interior del horno.
- Page 139 Cocción con retraso de inicio Puede programar la cocción con retraso de inicio utilizando el botón de retraso/reposo. p.ej. 10min 1min no disponible • • Establezca el tiempo de retraso pul- Pulse el botón de sando los botones de tiempo (hasta retraso/reposo.
-
Page 140: Tiempo De Reposo
Tiempo de reposo Puede utilizar la tecla de retraso/reposo para programar el tiempo de reposo tras haber finaliza- do la cocción o para programar el horno como temporizador. 10min p.ej. 1min • • Establezca el programa de cocción y Pulse el botón de el tiempo de cocción que desee. -
Page 141: Preguntas Y Respuestas
Preguntas y respuestas P: ¿Por qué no se pone en marcha R: Cuando el horno no se ponga en marcha, deben comprobarse el horno? los siguientes puntos: 1. ¿Está bien enchufado? Extraiga el enchufe, espere 10 segun- dos y vuelva a enchufarlo. 2. - Page 142 Libro de cocina CONVECCIÓN/GRILL? de Panasonic. P: El horno deja de funcionar en R: El mensaje en pantalla indica que hay un problema con el sis- tema de generación de microondas. Póngase en contacto con el microondas y aparece en pan- talla “H97”...
-
Page 143: Mantenimiento Del Horno
Mantenimiento del horno 1. Apague el horno antes de limpiarlo. 2. Mantenga limpios el interior del horno, los 8. El aro giratorio y la base de la cavidad del cierres de la puerta y las áreas donde estos horno deben limpiarse con regularidad para se encuentran. -
Page 144: Especificaciones Técnicas
Según la directiva 2004/108/CE, artículo 9(2) Centro de Ensayos de Panasonic Panasonic Service Europe, una división de Panasonic Marketing Europe GmbH Winsbergring 15,22525 Hamburg, República Federal de Alemania Fabricado por Panasonic Home Appliances Microwave Oven (Shanghai) Co.,Ltd, 898 Longdong Road, Pudong, Shanghai, 201203, China. Es-24... - Page 145 Ustawianie i podłączanie kuchenki mikrofalowej Sprawdź kuchenkę mikrofalową 6. Kuchenka przeznaczona jest wyłącznie do Rozpakuj urządzenie i sprawdź czy nie ma użytku domowego. Nie używaj jej na widocznych uszkodzeń, jak na przykład wgnieceń, zewnątrz. wyłamanych rygli drzwiczek albo zarysowań 7. Unikaj używania kuchenki mikrofalowej w drzwiczek.
- Page 146 6. Posiłki oraz płyny nie mogą być podgrze- zowanego punktu serwisowego firmy wane w zamkniętych naczyniach, ponieważ Panasonic. może to wywołać ich eksplozję. 2. Nie próbuj regulować lub naprawiać 7. Należy zwrócić szczególną uwagę, aby woda drzwiczek, obudowy panelu sterowania, lub inne ciecze nie przedostały się...
- Page 147 Zalecenia dotyczące bezpieczeństwa Korzystanie z kuchenki Działanie wentylatora chłodzącego Jeśli, po użyciu, kuchenka jest gorąca, wentylator 1. Nie używaj kuchenki do jakiegokolwiek innego włączy się na około minutę, aby schłodzić elek- celu niż przygotowywania posiłków. Kuchenka ta tryczne elementy urządzenia. Jest to normalne i została specjalnie zaprojektowana do podgrze- dlatego, gdy wentylator jeszcze pracuje, możesz wania lub gotowania żywności.
- Page 148 Informacje ważne 1) Czasy gotowania ostrożności: a) Unikaj stosowania naczyń o płaskich • Czasy gotowania podane w książce ściankach z wąską szyjką. kucharskiej są wartościami przybliżonymi. Czas gotowania zależy od rodzaju żywności, b) Nie przegrzewaj płynów. temperatury i ilości żywności oraz rodzaju c) Wymieszaj ciecz przed włożeniem naczy- naczynia.
- Page 149 Wygląd zewnętrzny [14] [13] [15] [10] [12] [11] Przycisk otwierania drzwiczek Naciśnij przycisk, aby otworzyć drzwiczki. Gdy otworzysz drzwiczki podczas gotowania, gotowanie zostanie chwilowo przerwane, bez kasowania wcześniejszych ustawień. Gotowanie zostanie wznowione, gdy tylko drzwiczki zostaną ponownie zamknięte i naciśniesz przycisk start. Oświetlenie wnętrza kuchenki włącza się, jak tylko drzwiczki kuchenki zostaną...
-
Page 150: Panel Sterowania
Panel sterowania NN-CT579S Wyświetlacz Przyciski ustawiania czasu Przycisk ustawiania mocy Mikrofal Przycisk ustawiania mocy Grill Przycisk ustawiania trybu Konwekcja Przycisk ustawiania trybu Kombinacja Przycisk automatycznego rozm- rażania Przyciski regulacyjne Plus / Minus / Wybór wagi Przycisk zegara (10) Przycisk Opóźnienie/Odstawienie (11) Przyciski automatycznych programów z... - Page 151 Akcesoria kuchenki Poniższa tabela wyjaśnia prawidłowe zastosowanie akcesoriów kuchenki. Szklany talerz Metalowy talerz Grill Panacrunch talerz obrotowy Mikrofale Grill Konwekcja Kombinacja Tryby gotowania Rysunki pokazują przykłady zastosowania akcesoriów kuchenki Mogą się one różnic zależnie od wybranego przepisu/potrawy. Dalsze informacje podano w książce kucharskiej. Konwekcja Mikrofale Grill...
- Page 152 Elementy sterujące i procedura obsługi Naciśnij Podłącz do sieci “88:88” (Stan wyświetlacza) (Wyświetlanie kolejnego języka) Naciśnij “FRANCAIS” Język francuski Naciśnij “ITALIANO” Język włoski Naciśnij “DEUTSCH” Język niemiecki Naciśnij “NEDERLANDS” Język holenderski Naciśnij ESPANOL Język hiszpański Naciśnij “POLSKI” Język polski Naciśnij “...
- Page 153 Elementy sterujące i procedura obsługi Ustawianie zegara: Przykład: ustawianie godziny 14:25 14 razy 2 razy 10min 1min 5 razy nieaktywny • Naciśnij przycisk zegara. • Wprowadź godzinę, naciskając • Naciśnij przycisk Dwukropek przestanie migać i odpowiednie przyciski czasu. zegara. Dwukropek zacznie Godzina zostanie wyświetlona na wyświet- zostanie wprowadzona godzina.
- Page 154 Gotowanie i rozmrażanie w kuchence mikrofalowej Kuchenka posiada 6 różnych poziomów mocy mikrofalowej (patrz poniższa tabelka). Korzystanie z akcesoriów: Szklana tacka W tabeli przedstawiono orientacyjną moc dla poszczególnych poziomów mocy. Naciśnij Poziom mocy Maks.dostępny czas MAKS. 1000 W 30 minut 2 razy MIN.
- Page 155 Grillowanie Przycisk grillowania ma trzy dostępne ustawienia. Korzystanie z akcesoriów: Wysoki ruszt Naciśnij Poziom mocy 1 MAKS 1300 W 2 razy 2 ŚREDNIA 950 W 3 razy 3 NISKA 700 W Metalowa Szklana tacka tacka nieaktywny 10min 1min • Ustaw czas gotowania •...
- Page 156 Gotowanie z termoobiegiem Funkcja umożliwia wybór temperatur Konwekcji od 100° - 220°C z przyrostami co 10°C. Aby można było szybko wybrać najczęściej stosowane temperatury, ustawianie rozpoczyna się od 150°C , aż do osiągnięcia 220°C, następnie przechodzi do 100°C. Korzystanie z akcesoriów: Grill Metalowy talerz Szklany...
- Page 157 Gotowanie kombinacyjne Są do dyspozycji 2 kombinacje ustawień: 1) Grill 1, 2 lub 3 + Mikrofale 600 W, 440 W, 250 W lub 100 W 2) Konwekcja 100 - 220°C + Mikrofale 600 W, 440 W, 250 W lub 100 W Użycie akcesoriów: Konwekcja lub Grill + Mikrofale Grill...
- Page 158 Automatyczne rozmrażanie Dzięki tej funkcji można rozmrażać zamarznięte produkty według ich wagi. Wybierz kategorię i ustaw wagę produktu. Wagę programuje się w gramach. Szybkie ustawian- ie wagi jest możliwe dzięki temu, że jej zakres zaczyna się od najczęściej używanej wagi w danej kategorii. 1-2-3 •...
- Page 159 Programy automatyczne z uwzględnieniem wagi produktu Ta funkcja umożliwia gotowanie ulubionych potraw po ustawieniu tylko wagi. Kuchenka automatycznie określa poziom mocy mikrofalowej, ustawienie grillowania, temperaturę termoobiegu i czas gotowania. Wybierz kategorię i ustaw wagę produk- tu. Wagę programuje się w gramach. Szybkie ustawianie wagi jest możliwe dzięki temu, że jej zakres zaczyna się...
- Page 160 Programy automatyczne z uwzględnieniem wagi produktu Zalecana Funkcja Akcesoria Wskazówki Program Kategoria podpowiedzi waga Do gotowania świeżych warzyw. Włóż przygotowane warzywa do pojemnika odpowiedniej wielkości. Gotowanie SWIEZE Polej je 6 łyżkami stołowymi (90 ml) świeżych 300 - 1500 g wody. Przykryj lekko ponakłuwaną WARZYWA warzyw folią...
- Page 161 Programy automatyczne z uwzględnieniem wagi produktu Zalecana Funkcja Akcesoria Wskazówki Program Kategoria podpowiedzi waga Do podgrzewania, nadawania kruchości na spodzie i przyru- MROZONA mieniania wierzchu zamrożonej, Pizza 150 - 600 g zamrożona PIZZA kupionej pizzy. Usuń opakowanie i włóż pizzę do wcześniej pod- 1 Naciśnięcie grzanego Panacrunch talerza.
- Page 162 W przeciwnym razie, uzyskując taki efekt jak w zwykłej kuchni. może nastąpić iskrzenie, które może Twój talerz Panacrunch firmy Panasonic uszkodzić wnętrze kuchenki. działa na trzy sposoby: podgrzewa talerz, absorbując mikrofale, podgrzewa żywność 3. Talerz Panacrunch używaj zawsze na bezpośrednio przez mikrofale oraz opieka...
- Page 163 Gotowanie z opóźnieniem Za pomocą przycisku opóźnienia można zaprogramować opóźnione rozpoczęcie gotowania. 10min 1min nieaktywny • Naciśnij • Ustaw czas opóźnienia, przycisk naciskając przyciski czasu opóźnienia. (do 9 godzin 59 minut). 10min 1min • Ustaw żądany program i czas • Naciśnij przycisk gotowania.
- Page 164 Czas odstawienia Za pomocą przycisku opóźnienia można zaprogramować czas oczekiwania po zakończeniu gotowania lub używać kuchenki jako minutnika. 10min 1min • • Ustaw żądany program i czas Naciśnij przycisk gotowania. opóźnienia. 10min 1min nieaktyw • • Ustaw żądany czas, naciska- Naciśnij przycisk jąc przyciski czasu (do 9 Start.
- Page 165 Pytania (P) i odpowiedzi (O) P: Dlaczego kuchenka nie włącza O: Jeśli kuchenka nie włącza się, sprawdź następujące się? punkty: 1. Czy wtyczka jest dokładnie włożona? Wyjmij wtyczkę z gniazdka sieciowego, zaczekaj 10 sekund i włóż ją ponownie. 2. Sprawdź specjalnie zainstalowany zwykły lub automatyczny bezpiecznik.
- Page 166 O: Tak. Możesz gotować swoje ulubione potrawy tak samo jak w kon- P: Czy mogę gotować moje ulubione wencjonalnym piekarniku. Sprawdź instrukcje podane w książce potrawy korzystając z funkcji kucharskiej Panasonic odnośnie zalecanych temperatur kuchenki i KONWEKCJA/ GRILL? czasów gotowania. P: Moja kuchenka przerywa O: Oznacza to, że wystąpił...
- Page 167 Konserwacja kuchenki mikrofalowej 1. Przed czyszczeniem kuchenki, wyłącz ją. 8. Pierścień z rolkami oraz zagłębienie w dol- nej ściance kuchenki powinny być regu- 2. Utrzymuj w czystości wnętrze kuchenki, larnie czyszczone, aby uniknąć nad- uszczelki drzwiczek oraz powierzchnie miernych szmerów. Wystarczy przetrzeć wokół...
-
Page 168: Dane Techniczne
Zgodnie z dyrektywą 2004/108/WE, artykuł 9 ust. (2) Centrum Testowania Panasonic Panasonic Service Europe, oddział Panasonic Marketing Europe GmbH Winsbergring 15, 22525 Hamburg, Niemcy Producent: Panasonic Home Appliances Microwave Oven (Shanghai) Co., Ltd, 898 Longdong Road, Pudong, Shanghai, 201203, Chiny. Pl-24 Pl-24... - Page 169 Instalace a připojení Prohlídka mikrovlnné trouby 4. Neumísťujte mikrovlnnou troubu v blízkosti elektrického nebo plynového sporáku. Vybalte troubu, odstraňte veškerý balicí materi- ál a ověřte, že nedošlo k jejímu poškození, na- 5. Patky se nesmějí odstraňovat. př . k promáčknutí, poškození dveřních zámků 6.
- Page 170 Instalace a připojení VÝSTRAHA 5. Dětem dovolte používat mikrovlnnou troubu bez dozoru pouze pokud se jim dostalo ná- 1. Těsnění dveří a jeho okolí se čistí vlhkým ležitých pokynů, aby byly schopny používat hadříkem. Spotřebič je nutno prohlédnout troubu bezpečně a chápaly nebezpečí spo- a zjistit, zda nedošlo k poškození...
- Page 171 Bezpečnostní pokyny Použití mikrovlnné trouby Provoz motoru ventilátoru Při provozu mikrovlnné trouby v režimu Micro - 1. Nepoužívejte mikrovlnnou troubu pro jiné wave/Heater (topné těleso) se ventilátor vždy účely, než je příprava jídla. Mikrovlnná trou- otáčí a ochlazuje elektrické komponenty. Po ba je navržena výslovně...
- Page 172 Důležité informace 1) Délka vaření a) Nepoužívejte nádoby s rovnými stěnami a úzkými hrdly. • Doba vaření uvedená v kuchařce je pouze b) Nepřehřívejte tekutiny. přibližná. Délka vaření závisí na okolnos- tech, teplotě, množství potravin a typu nádo- c) Zamíchejte tekutinu před umístěním ná- bí.
- Page 173 Popis mikrovlnné trouby [14] [13] [15] [10] [12] [11] Tlačítko pro otevření dveří Dveře otevřete stisknutím. Když otevřete dveře během vaření, vaření se dočasně pozastaví aniž by se zrušilo předchozí nastavení. Vaření se ob noví po zavření dveří a stisknutí tlačít- ka Start.
- Page 174 Ovládací panel NN-CT579S (1) Okénko displeje (2) Tlačítka pro nastavení času (3) Tlačítko režimu Microwave (4) Tlačítko režimu Grill (5) Tlačítko režimu Convection (6) Tlačítko režimu Combination (7) Tlačítko pro automatické rozmrazování (8) Tlačítka pro nastavení hmotnosti (9) Tlačítko hodin (10) Tlačítko Delay/Stand...
- Page 175 Příslušenství mikrovlnné trouby V následující tabulce je uvedeno správné použití příslušenství v mikrovlnné troubě. Skleněný talíř Kovový talíř Drátěná mřížka Pánev panacrunch Microwave (mikrovlnné vaření) Grill (grilování) Convection (konvekční vaření) Režim Combination Režim vaření Následující diagramy uvádějí příklady příslušenství. Může být různé podle použitého receptu nebo jídla. Další informace najdete v kuchařské...
- Page 176 Ovládací prvky a provoz Našeptávač slov Nastaveno “88:88” Siskněte “FRANCAIS” ve francouzštině Siskněte “ITALIANO” ve italštině Siskněte “DEUTSCH” v němčině ve holanctině Siskněte “NEDERLANDS” Siskněte ESPANOL ve španělštině v polštině Siskněte “POLSKI” Siskněte “ CESKY” v češtině “ENGLISH” Siskněte v angličtině Pokud 4krát stisknete tlačítko Prodleva/Odstavení, průvodce činností...
- Page 177 Ovládací prvky a provoz Nastavení hodin: Příklad: Nastavení na 14 hodin 14krát dvakrát 10min 1min nečinné pětkrát • Stiskněte tlačítko • Zadejte čas stisknutím přísluš - • Stiskněte tlačítko Clock. Dvojtečka přestane blikat ných tlačítek pro nastavení času. Clock - nastavení hodin Dvojtečka začne Čas se zobrazí...
- Page 178 Vaření a rozmrazování v mikrovlnné troubě Mikrovlnná trouba nabízí šest různých úrovní výkonu (viz tabulka níže). Použití příslušenství: Skleněný talíř Tabulka uvádí přibližný počet wattů pro každou úroveň výkonu. Počet stisknutí Úroveň výkonu Wattů Maximální doba jednou 1000 W 30 minut dvakrát MIN (DEFROST) 270 W...
- Page 179 Grilování Tlačítko Grill nabízí 3 stupně nastavení grilu. Použití příslušenství: Vysoká drátěná mřížka Počet stisknutí Úroveň výkonu Wattů jednou 1 HIGH 1300 W dvakrát 2 MEDIUM 950 W třikrát 3 LOW 700 W Kovový Skleněný talíř talíř nečinné 10min 1min •...
- Page 180 Vaření v režimu Convection: Tato funkce umožňuje nastavení konvekční teploty od 100 do 220°C zvyšováním po 10°C. Pro umožnění rychlého nastavení nejběžnějších teplot vaření je počáteční teplota 150°C a po navýšení do 220°C následuje 100°C. Použití příslušenství: Drátěná mřížka Kovový talíř Skleněný...
- Page 181 Vaření v režimu Combination V tomto režimu jsou dvě možnosti nastavení: 1) Grill 1, 2 nebo 3 + Microwave 600 W, 440 W, 250 W nebo 100 W 2) Convection 100 - 220°C + Microwave 600 W, 440 W, 250 W nebo 100 W Použití...
- Page 182 Automatické rozmrazování Tato funkce umožňuje rozmrazovat zmrazené potraviny podle hmotnosti. Vyberte ka- tegorii a nastavte hmotnost potravin. Hmotnost se programuje v gramech. Hmotnost v každé kategorii začíná nejčastěji užívanou hmotností, aby bylo možné provést volbu co nejrychleji. 1-2-3 • Nastavte požadovaný •...
- Page 183 Automatické programy s nastavením hmotnosti Tato funkce umožňuje přípravu většiny vašich oblíbených jídel s pouhým nastavením hmotnosti. Trouba určí výkon Microwave, nastavení režimu Grill, teplotu režimu Convection a dobu vaření. Vyberte kategorii a nastavte hmotnost potraviny. Hmotnost se programuje v gramech. Hmotnost v každé kategorii začíná nejčastěji užívanou hmotností, aby bylo možné...
- Page 184 Automatické programy s nastavením hmotnosti Doporučená Program Kategorie Nápo-věda Příslušenství Pokyny hmotnost Vaření čerstvé zeleniny. Vložte připravenou zeleninu do nádoby vhodné velikosti. Pokropte 6 po - Vaření CERSTVA lév ko vými lžícemi (90 ml) vody. čerstvé 300 - 1500 g Přikryjte děrovanou přilnavou fólií...
- Page 185 Automatické programy s nastavením hmotnosti Doporučen Program Kategorie Nápo-věda á Příslušenství Pokyny hmotnost Pro ohřátí, propečení těsta a zbarvení povrchu zakoupené ZMRAZENA Zmrazená 150 - 600 g zmrazené pizzy. Odstraňte veš - pizza PIZZA kerý obal a položte pizzu na pá- nev panacrunch.
- Page 186 Pánev panacrunch PRINCIP FUNKCE POZNÁMKY: Některé potraviny při přípravě v mikrovlnné 1. Nepředehřívejte pánev déle než 8 minut. troubě nemají barvu a jejich povrch je roz- 2. Pokládejte pánev vždy na střed skleně - měklý. Pánev panacrunch pracuje třemi způ- ného talíře a zajistěte, aby se nedotýka- soby: zahřátí...
- Page 187 Opožděný start vaření Tlačítko Delay/Stand umožňuje naprogramovat opožděný start vaření. 10min Příklad: 1min nečinné • • Stiskněte tlačítko Nastavte dobu zpoždění stisknutím tlačí- Delay/Stand. tek pro nastavení času (až do 9 hodin 59 minu). 10min 1min • • Zvolte požadovaný program vaře- Stiskněte tlačítko Start.
- Page 188 Doba odstavení Pomocí tlačítka Delay/Stand můžete naprogramovat dobu odstavení po dokončení vaření nebo jej můžete použít k naprogramování trouby jako minutový časovač. 10min Příklad: 1min • • Zvolte požadovaný program vaření Stiskněte tlačítko. a délku vaření. 10min 1min nečinné • •...
- Page 189 Otázky a odpovědi Ot:Proč se mikrovlnná trouba Odp.:Pokud se mikrovlnná trouba nezapíná, zkontrolujte ná- nezapíná? sledující: Je zástrčka trouby dobře zasunuta do síťové zásuvky? Vytáhněte zástrčku ze zásuvky, počkejte 10 vteřin a znovu ji zapojte. Zkontrolujte jistič a pojistku. Přepněte jistič nebo vy měň - te pojistku, pokud je vadná...
- Page 190 Ano. Své oblíbené recepty můžete připravovat stejně Ot.: Odp.: oblíbené recepty v režimu jako v obyčejné troubě. V kuchařce společnosti CONVECTION/GRILL? Panasonic najdete doporučené teploty trouby a dopo- ručenou délku vaření. Trouba je naprogramována na režim DEMO MODE, Odp.: Na displeji se zobrazuje znak Ot.: ktery je určen pro předvádění...
- Page 191 Údržba mikrovlnné trouby 1. Před čištěním mikrovlnnou troubu vy- Občas je nutné vyjmout skleněný ta- pněte. líř a vyčistit jej. Omyjte talíř v teplé vodě se saponátem nebo v myčce. 2. Udržujte vnitřek trouby, těsnění dveří Nosný vozík a dno mikrovlnné trouby a jeho okolí...
- Page 192 Podle nařízení 2004/108/EC, článku 9(2) Panasonic Testing Centre Panasonic Service Europe, společnosti Panasonic Marketing Europe GmbH Winsbergring 15, 22525 Hamburg, SRN Výrobce: Panasonic Home Appliances Microwave Oven (Shanghai) Co.,Ltd, 898 Longdong Road, Pudong, Shanghai, 201203, Čína. Cz-24 Cz-24...
- Page 193 Telepítés és csatlakoztatás Ellenőrizze mikrohullámú sütőjét 6. A sütő csak háztartási célokra használható. Ne használja szabadtéren. Csomagolja ki a sütőt, távolítsa el a csoma go - lást, és ellenőrizze, hogy nem láthatók-e sérü - 7. Ne használja a mikrohullámú sütőt nedves lések a sütőn, pl.
- Page 194 Telepítés és csatlakoztatás FIGYELMEZTETÉS! 5. Gyermekek számára csak akkor engedé- lyezze a sütő önálló használatát, ha azok 1. Az ajtó szigetelését és a szigetelés körüli megfelelő utasításokat kaptak, képesek a te rületet nedves ruhával meg kell tisztítani. sütő biztonságos használatá ra, és A készüléken ellenőrizni kell az ajtó...
-
Page 195: Biztonsági Utasítások
Biztonsági utasítások A ventilátor motor működtetése A sütő használata Amikor a sütőt a mikrohullám/melegítő funk - 1. Ne használja a sütőt semmilyen más célra, ció ban használja, a ventilátor folyamatosan csak étel készítésére. Ezt a sütőt étel me le - mű... -
Page 196: Fontos Tudnivalók
Fontos tudnivalók 1) Főzési idők folyadékok fel mele gedhetnek a for rás pontra, anél kül, hogy ezt bubo rék kép ző dés jelez né. • A szakácskönyvben megadott főzési idők Ez a for ró folya dék hirtelen kifutá sá hoz ve - közelítő... - Page 197 Áttekintő ábra [14] [13] [15] [10] [12] [11] [1] Ajtónyitó gomb Nyomja meg az ajtó kinyitásához. Ha kinyitja a sütő ajtaját főzés közben, a főzés ideiglenesen leáll a korábbi beállítások törlése nélkül. A főzés újrakezdődik, amint becsukja az ajtót és megnyomja a Start gombot. A sütő világítása bekapcsol, amikor kinyitja az ajtót.
- Page 198 Kapcsolótábla NN-CT579S Kijelzőablak Időgombok Mikrohullám program gomb Grill program gomb Hőlégkeverés gomb Kombináció gomb Automatikus kiolvasztás gomb Tömegkiválasztó gomb Óra gomb (10) Késleltetés/várakozás gomb (11) Automatikus tömegkiválasztó gombok (12) Panacrunch programgombok (13) Start gomb: AUTO / 10min Nyomja meg a start gombot a sütő...
- Page 199 Sütő kiegészítők A következő ábra bemutatja a tartozékok helyes használatát a sütőben. Üvegtálca Fémtálca Rács Panacrunch serpenyő Mikrohullám IGEN Grill IGEN IGEN IGEN IGEN Hősugárzás IGEN IGEN IGEN IGEN Kombináció IGEN IGEN IGEN IGEN Sütési üzemmódok Az alábbi ábra a tartozékokra mutat be egy-egy példát. A recepttől/ételtől függően más megoldás is lehetséges.
- Page 200 Kezelőszervek és a működtetés Szöveges utasítás Csatlakoztatás “88:88” Nyomja meg “FRANCAIS” Francia Nyomja meg “ITALIANO” Olasz Nyomja meg “DEUTSCH” Német Nyomja meg “NEDERLANDS” Holland Nyomja meg ESPANOL Spanyol Nyomja meg “POLSKI” Lengyel Nyomja meg “ CESKY” Cseh Nyomja meg “ENGLISH” Angol Ezek a típusok egy egyedülálló...
- Page 201 Kezelőszervek és a működtetés Órabeállítás: Példa: 14:25 beállítása 14 -szer kétszer 10min 1min 5-ször nem használható • Adja meg az időt a megfelelő • Nyomja meg az • Nyomja meg az Óra gombot. A kettőspont abbahagyja a Óra gombot. időgombok megnyomásával. A kettőspont Az idő...
- Page 202 Mikrohullámú sütés és kiolvasztás 6 különböző mikrohullám-teljesítményszint használható (lásd az alábbi táblázatot). Kiegészítők használata: Üvegtálca A táblázat az egyes energiaszintekhez tartozó hozzávetőleges Watt teljesítményt mutatja. Nyomja Energiaszint Teljesítmény Maximális rendel- kezésre álló idő egyszer Max. 1000 W 30 perc kétszer Min.
- Page 203 Grillezés A Grill gomb 3 grillbeállítást tesz lehetővé. Kiegészítők használata: Rács Nyomja Energiaszint Teljesítmény egyszer 1 MAGAS 1300 W kétszer 2 KÖZEPES 950 W 3-szor 3 ALACSONY 700 W Fémtálca Üvegtálca nem használható 10min 1min • Állítsa be a sütési •...
- Page 204 Sütés hőlégkeveréssel Ez a funkció 100-220°C közötti hőlégkeverés hőmérsékleti értékek kiválasztását teszi lehetővé 10°C-os lépésekben. A leggyakrabban használt főzési hőmérsékleti értékek gyors kiválasztása érdekében a hőmérsékleti értékek 150°C-nál kezdődnek és 220°C- ig emelkednek, majd a 100°C következik. Kiegészítők Rács használata: Fémtálca Üvegtálca Fémtálca...
- Page 205 Kombinációs sütés Két kombinációs beállítás van: 1) Grill 1, 2 vagy 3 + Mikrohullám 600 W, 440 W, 250 W vagy 100 W 2) Hőlégkeverés 100 - 220°C + Mikrohullám 600 W, 440 W, 250 W vagy 100 W Kiegészítők használata: Hőlégkeverés vagy grill + mikrohullám Rács Fémtálca...
- Page 206 Automatikus kiolvasztás Ennek a funkciónak a segítségével kiolvaszthat fagyasztott ételeket, azok súlyának megfelelően. Válassza ki a kategóriát és állítsa be az étel súlyát. A súlyt grammban kell megadni. A gyorsabb kiválasztás érdekében a súly az adott kategóriában leg- gyakrabban használt súlyértéken áll. 1-2-3 •...
- Page 207 Automatikus súlyprogramok E funkció segítségével legtöbb kedvenc ételét elkészítheti úgy, hogy csak a súlyt kell beállítania. A sütő automatikusan meghatározza a mikrohullám-energiaszintet, a grill- beállítást, a hőlégkeverés hőmérsékletét és a főzési időt. Válassza ki a kategóriát és állítsa be az étel súlyát. A súlyt grammban kell megadni. A gyorsabb kiválasztás érdekében a súly az adott kategóriában leggyakrabban használt súlyértéken áll.
- Page 208 Automatikus súlyprogramok Program Kategória Emlé keztető Javasolt súly Kiegészítők Utasítások Friss zöldségek főzésé hez. Helyezze az előkészített zöld- ségeket egy megfelelő méretű Friss zöld- edénybe. Öntsön rájuk 6 evőka - FRESH ségek 300 - 1500 g nál (90 ml) vizet. Részlegesen VEGETABLES főzése fedje be őket fedővel vagy per-...
- Page 209 Automatikus súlyprogramok Emlé - Program Kategória Javasolt súly Kiegészítők Utasítások keztető Vásárolt, fagyasztott pizza fel - melegítéséhez, aljának ropo - FROZEN Fagyasztott gós sá tételéhez és tetejének 150 - 600 g pizza barnításához. Távolítsa el a cso- PIZZA magolást, és tegye a pizzát a panacrunch serpenyőbe.
- Page 210 és ügyeljen arra, hogy az (lepényt), a pitét és a kenyérfé lé ket. A ne érjen a sütőtér falához. Ennek elmu- Panasonic Panacrunch serpenyő három- lasztása szikrázást idézhet elő, ami féleképpen működik: a serpenyő melegítése károsítja a sütőteret.
- Page 211 Késleltetett indítású sütés A Késleltetés/várakozás gomb használatával késleltetett indítású sütést lehet beprog - ramozni. 10min 1min nem használható • Nyomja meg a • Állítsa be a késleltetési időt Késleltetés/Vára - az Idő gomb nyomogatásá- kozás gombot. val (max. 9 óra 59 perc 10min 1min...
- Page 212 Várakozási idő A Késleltetés/Várakozás gomb segítségével beprogramozhatja a sütés befejeztét követő várakozási időt, vagy percszámlálóként programozhatja a sütőt. 10min 1min • • Állítsa be a kívánt sütési programot Nyomja meg a és időt. Késleltetés/Várakozás gombot. 10min 1min nem használható • •...
-
Page 213: Kérdések És Válaszok
Kérdések és válaszok V: Miért nem kapcsol be a V: Ha a sütő nem kapcsol be, ellenőrizze az alábbiakat: 1. Megfelelően csatlakoztatva van a sütő? Húzza ki a sütőm? csatlakozót a fali aljzatból, várjon 10 másodpercet, és dugja be újra. 2. - Page 214 Kérdések és válaszok K Elkészíthetem-e kedvenc V: Igen. Ugyanúgy el tudja készíteni kedvenc receptjét, mint receptjeimet a egy hagyományos sütőben. Olvassa el a Panasonic sza- HŐLÉGKEVERÉS/ GRILL kácskönyvben a javasolt hőmérsékletet és főzési időket. segítségével? V: A sütő DEMO üzemmódban van. Ez az üzemmód bolti K: „D”...
- Page 215 A sütő karbantartása 1. Tisztítás előtt kapcsolja ki a sütőt. 8. A görgőgyűrűt és a sütő alsó felszínét rendszeresen tisztítani kell a zajos 2. Tartsa tisztán a sütő belsejét, az ajtó mű ködés megelőzése érdekében. szigetelését és ajtó szigetelésének Egy szerűen törölje tisztára a sütő környékét.
-
Page 216: Műszaki Adatok
A készülék megfelel a 2004/108/EC direktíva 9(2) szakaszának. Panasonic Testing Centre Panasonic Service Europe, a Panasonic Marketing Europe GmbH divíziója Winsbergring 15, 22525 Hamburg, F. R. Germany Gyártotta a Panasonic Home Appliances Microwave Oven (Shanghai) Co. Ltd., Longdong Road, Pudong, Sanghaj, 201203, Kína. Hu-24... - Page 217 Panasonic Corporation Web Site:http://panasonic.com.net F00037X50EP IP1109-0 © Panasonic Corporation 2009 Printed in China...
Need help?
Do you have a question about the NN-CT579S and is the answer not in the manual?
Questions and answers