
Related Manuals for Digitus DN-16055


Summary of Contents for Digitus DN-16055
-
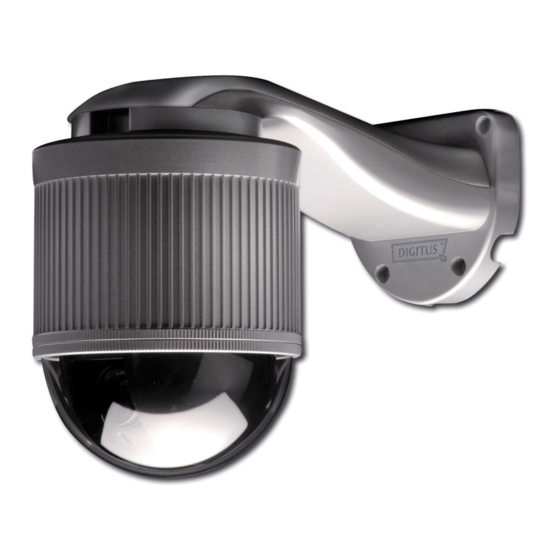
Page 1: Outdoor Speed Dome Camera
IP / CCTV OUTDOOR SPEED DOME CAMERA User’ s Manual DN-16055Please read instructions thoroughly before operation and retain it for future reference. The image shown above may differ from the actual product appearance. - Page 2 IMPORTANT SAFEGUARD CAUTION RISK OF ELECTRIC SHOCK CAUTION: To reduce the risk of electric shock, do not expose this apparatus to rain or moisture. Only operate this apparatus from the type of power source indicated on the label. The company shall not be liable for any damages arising out of any improper use, even if we have been advised of the possibility of such damages.
- Page 3 1.1 Description...............................1 1.2 Features ................................1 1.3 Package Contents ............................1 1.4 Specifications..............................3 2.1 CONNECTOR OVERVIEW ..........................4 3.1 Install the Hardware (For DN-16055).......................5 3.2 Assign an IP address and Access the Camera ....................7 4.1 The Live View Page ............................8 4.2 Address Book ............................9 4.3 Manual Record...
-
Page 4: Description
Support external microphone input Complete IP surveillance system, such as the Central Management System (CMS) software, Network-Attached Storage (NAS), Network Video Recorder (NVR), etc. 1.3 Package Contents ‧ DN-16055 ◎ In the camera package: è In the bracket package (Optional) : □ Bracket □... - Page 5 OVERVIEW Note: The DC12V 1A adapter, power cord and RJ45 network cable are not included with the sales package. Please prepare by yourself. ‧ Dimensions of DN-16055:...
-
Page 6: Specifications
OVERVIEW 1.4 Specifications SPECIFICATIONS* DN-16055 ▓ Network LAN Port LAN Speed 10/100 Based-T Ethernet DDNS, PPPoE, DHCP, NTP, SNTP, TCP/IP, Supported Protocols ICMP, SMTP, FTP, HTTP, RTP, RTSP Frame Rate NTSC:30, PAL:25 Number of Online Users Security Multiple user access levels with password... -
Page 7: Connector Overview
CONNECTOR OVERVIEW 2. CONNECTOR OVERVIEW 2.1 CONNECTOR OVERVIEW CONNECTOR DESCRIPTION Power Connector Connect the DC 12V adapter for power supply. Video Output Connector Connect to the video input connector of your monitor with a video cable (i.e. a RCA line with the BNC connector, or a coaxial line) for video output. - Page 8 INSTALLATION 3. INSTALLATION 3.1 Install the Hardware (For DN-16055) Before installation, you need the following items before installation: ‧ Bracket (supplied with the bracket sales package) ‧ The accessory packages supplied with the bracket sales package, including: (1) Wall mounting screws...
- Page 9 INSTALLATION STEP 3: Attach the PTZ network camera to the bracket. Turn the camera up side down, and put the power, video and RS485 data connectors through the hole of the bracket. Then, slightly secure the camera and the bracket with three M6 Nylok screws. STEP 4: Check the surface is horizontal or not.
-
Page 10: Assign An Ip Address And Access The Camera
INSTALLATION 3.2 Assign an IP address and Access the Camera Step 1. Install the Software Place the supplied Video Viewer AP software CD into your DVD- / CD-ROM drive. The installation process will automatically start. Follow the on-screen instructions to install the application programs. After installation, a “ Video Viewer”... -
Page 11: The Live View
VIDEO VIEWER BASIC OPERATION 4. VIDEO VIEWER BASIC OPERATION 4.1 The Live View Page After setting up the network information, login user name and password, double-click “ ” on the PC desktop to open and log into the Video Viewer control panel. You will see a screen similar to the following with 6 major sections: ‧... -
Page 12: Address Book
VIDEO VIEWER BASIC OPERATION 4.2 Address Book This view is displayed when the Video Viewer is activated for you to login / out the network camera from the current address list, or search the available IP address as follows: Ø Ø... -
Page 13: Manual Record
VIDEO VIEWER BASIC OPERATION Ø Ø Click to search and view the available IP address(es) for the network connection. You can choose one address to add into the address book, edit the details, or update the address list. Button Function Description Select from the available IP address list, and click this button. -
Page 14: Playback
VIDEO VIEWER BASIC OPERATION 4.4 Playback ” (Miscellaneous Control) → “ To play a recording, click “ ” (Status List), and select the “ Record” tab. A list of all the recordings will be shown by defaults, and you can also sort out the logs you want to speed up the search time. For details, please see “... -
Page 15: Snapshot
VIDEO VIEWER BASIC OPERATION 4.5 Snapshot To take a snapshot of the current view, click “ ” (Snapshot) on the main control panel. Once the current view is captured, you’ ll see an icon “ ” shown at the bottom right corner of the image display view. The snapshot will be saved in the path you specified in “... - Page 16 VIDEO VIEWER MISCELLANEOUS CONTROL PANEL 5. VIDEO VIEWER MISCELLANEOUS CONTROL PANEL Click “ ” (Miscellaneous Control) on the Video Viewer control panel, and 7 functions are available as follows: Click the button to show the current version of the video viewer. Button Function Description...
-
Page 17: Color Setting
VIDEO VIEWER MISCELLANEOUS CONTROL PANEL 5.1 Color Setting In the live view page, choose the desired network camera from the image display tab. Click “ ” (Miscellaneous Control) → “ ” (Color Setting) to go into the “ Color Setting” page, and you can adjust the brightness / contrast / hue / saturation for the selected network camera. -
Page 18: Record Setting
VIDEO VIEWER MISCELLANEOUS CONTROL PANEL Function Description ‧To quickly find the events you need, check or uncheck the event type “ System” / “ Manual” / “ Alarm” / “ Motion” , and select the log you want. ‧To view the earlier or later logs that are not shown in the current page, click “... - Page 19 VIDEO VIEWER MISCELLANEOUS CONTROL PANEL Hard Disk Overwrite Check this checkbox to overwrite from the oldest recorded data when the HDD is full. Record Time Range There are two options available for you to set the recording time: Weekly & Custom. Weekly Choose the time box(es) within which you want to enable the recording.
-
Page 20: Server Setting
VIDEO VIEWER MISCELLANEOUS CONTROL PANEL “ Update” . Record Path Select and view the location for saving the recorded video and snapshot pictures. To change the saving path for the recorded video clips or snapshots, check the drive you want, click the cell of “ Video Path”... -
Page 21: Account
VIDEO VIEWER MISCELLANEOUS CONTROL PANEL ” (Miscellaneous Control) → “ ” (Server Setting) → “ General” → “ Log” to go into the “ Log” page. In Click “ the “ Log” page, you can see all the logs for the network camera, such as “ Power On” , “ Reset Default” , “ Net Login” and “... -
Page 22: Online User
VIDEO VIEWER MISCELLANEOUS CONTROL PANEL Column Description For the functions each user level is allowed to access, please see the information below: Supervisor Power User Normal User Guest ● ● ● ● Address Book Miscellaneous Control ● Color Setting ● Backup ●... -
Page 23: Network
VIDEO VIEWER MISCELLANEOUS CONTROL PANEL Motion Trigger: In this section, you can select to enable the function of motion trigger. Before this function is enabled, you need to set the motion detection area first. For motion detection area setting, please refer to “ Detection” at page 31. Item Description Motion... -
Page 24: Ddns
VIDEO VIEWER MISCELLANEOUS CONTROL PANEL Function Description PPPOE PPPOE stands for Point-to-Point Protocol over Ethernet. Users can easily have the Internet service as long as they’ re ready for the following things: 1) Insert an Ethernet card into the PC. 2) Obtain the ADSL service via any ISP. - Page 25 VIDEO VIEWER MISCELLANEOUS CONTROL PANEL ‧ Then, you will see the screen “ Account Created” , and Dyndns will email the instructions to your specified E-mail address for enabling your account. You must complete the procedure according to the instructions in the mail. That is to must visit the confirmation address within 48 hours of the time that the e-mail was sent to complete the account creation process.
- Page 26 VIDEO VIEWER MISCELLANEOUS CONTROL PANEL ‧ Log in with your account information and click ” My Service” . ‧ Click ” Add Host Services” . ‧ Click ” Add Dynamic DNS Host” . ‧ Fill in and choose the desired host name. ‧...
-
Page 27: Sntp
VIDEO VIEWER MISCELLANEOUS CONTROL PANEL SNTP ” (Miscellaneous Control) → “ SNTP (Simple Network Time Protocol) is for time setting. Click “ ” (Server Setting) → “ Network” → “ SNTP” to go into the “ SNTP” page. Function Description GMT (Greenwich Mean Time) Once users choose the time zone, the network camera will adjust the local area time of the system automatically. -
Page 28: Mail
VIDEO VIEWER MISCELLANEOUS CONTROL PANEL MAIL ” (Miscellaneous Control) → “ ” (Server Setting) → “ Network” → “ MAIL” to go into the “ MAIL” Click “ page. Enter the detailed E-mail information and press “ Apply” to confirm. The information you set here will be applied when the function of E-mail notification is enabled in the "Trigger"... -
Page 29: Camera
VIDEO VIEWER MISCELLANEOUS CONTROL PANEL Camera ” (Miscellaneous Control) → “ ” (Server Setting) → “ Camera” to go into the “ Camera” page and Click “ access the following functions. Find the camera settings that best suit your image needs by testing. Function Description Backlight... -
Page 30: System
VIDEO VIEWER MISCELLANEOUS CONTROL PANEL System ” (Miscellaneous Control) → “ ” (Server Setting) → “ Camera” → “ System” to go into the “ System” Click “ page and access the following functions. Function Description Display Check to display the camera title, preset point title or not. And choose the display position. Camera: Check this checkbox to display the customized camera title that you setup in the “... - Page 31 VIDEO VIEWER MISCELLANEOUS CONTROL PANEL Function Description Specify the camera position (pan and tilt) and the lens zoom setting in the live view of the video viewer. Then press “ Add” button to assign the preset name of the preset point. After setup, press “...
-
Page 32: Cruise
VIDEO VIEWER MISCELLANEOUS CONTROL PANEL Cruise ” (Miscellaneous Control) → “ ” (Server Setting) → “ Camera” → “ Cruise” to go into the “ Cruise” Click “ page and access the following functions. In this page, you can setup the auto pan and sequence mode. Auto Pan (Check the “... -
Page 33: Tracking
VIDEO VIEWER MISCELLANEOUS CONTROL PANEL Tracking ” (Miscellaneous Control) → “ ” (Server Setting) → “ Camera” → “ Tracking” to go into the Click “ “ Tracking” page and access the following functions. In this page, you can setup the auto tracking function. When the locked target is out of the pre-defined surveillance area, the camera returns to the point it originally monitors after the preset tracking timeout. -
Page 34: Detection
VIDEO VIEWER MISCELLANEOUS CONTROL PANEL Function Description By pressing and dragging the slider, you can setup the left panning limit (0º ~ 360º) of the PTZ network camera. Limit 2 When the locked target stops moving longer than the pre-defined tracking timeout, the camera returns to the point it originally monitors after the preset tracking timeout. - Page 35 If you want to backup your system before upgrading the firmware version, select (For DVR and “ System Backup” in the “ Configure File” section, click “ … ” to specify the location DN-16055, for saving system backup, and click “ Backup” to start the backup process. AVI311 models only) Note: The network setting of the camera might restore to default values after upgrade.
-
Page 36: Status List
VIDEO VIEWER MISCELLANEOUS CONTROL PANEL 5.6 Status List Click “ ” (Status List) to view all the record list and login/logout event list (All), or search the desired log list(s) by date, or playback the recording of the selected log list (Condition). There are three types of logs: Record, Event and Backup. - Page 37 AP MISCELLANEOUS CONTROL PANEL ‧ Condition Button / Function Description Date Selection Choose the specific date range including the event / record logs you might want. (From / To) Record Type This section is enabled only when the “ Record” tab is selected. Select the record type you want to search (User / Alarm / Motion).
-
Page 38: Login / Logout Event List
AP MISCELLANEOUS CONTROL PANEL Login / Logout Event List Select “ All” to show all event logs (Login / Logout), or “ Condition” to search for the specific event log(s) by date. ‧ All ‧ Condition -35-... -
Page 39: Backup List (For Dvr Only)
AP MISCELLANEOUS CONTROL PANEL Backup List (For DVR only) The network cameras don’ t support network backup function. This function is available when the Video Viewer is connected to a DVR. You can remotely view the backup list and playback the selected item. Select “... -
Page 40: Playback Screen
AP MISCELLANEOUS CONTROL PANEL Playback Screen When you select and play the recorded data for a specific log, you will immediately go into the playback mode, and the following playback panel appears. Function Description Playback / Download This area shows the detailed playback / download information, such as the file name, Info Display record date and time, and the speed, etc. - Page 41 APPENDIX 1 DEFAULT VALUE APPENDIX 1 DEFAULT VALUE ‧ Default Value Items Default Value ‧ Default Network Settings: User Name admin Password admin Port IP Address 192.168.1.10 -38-...
Need help?
Do you have a question about the DN-16055 and is the answer not in the manual?
Questions and answers