Advertisement
Quick Links
B
E
L
T
D
R
B
E
L
T
D
R
IMPORTANT!
PLEASE READ THIS MANUAL CAREFULLY BEFORE USING THE BIKE.
For Customer Service, please contact: support@sunnyhealthfitness.com.
I
V
E
I
N
D
O
I
V
E
I
N
D
O
S
F
-
B
S
F
-
B
O
W
N
E
R
'
O
W
N
E
R
O
R
C
Y
C
O
R
C
Y
C
1
0
0
2
1
0
0
2
S
M
A
N
U
A
L
'
S
M
A
N
U
A
L
L
I
N
G
B
I
K
L
I
N
G
B
I
K
E
E
Advertisement

Related Manuals for Sunny SF-B1002


Summary of Contents for Sunny SF-B1002
- Page 1 ’ ’ IMPORTANT! PLEASE READ THIS MANUAL CAREFULLY BEFORE USING THE BIKE. For Customer Service, please contact: support@sunnyhealthfitness.com.
-
Page 2: Important Safety Information
Important Safety Information Please keep this manual for future reference. 1. It is important to read this entire manual before assembling and using the equipment. Safe and effective use can only be achieved if the equipment is assembled, maintained and used properly. It is your responsibility to ensure that all users of the equipment are informed of all warnings and precautions. -
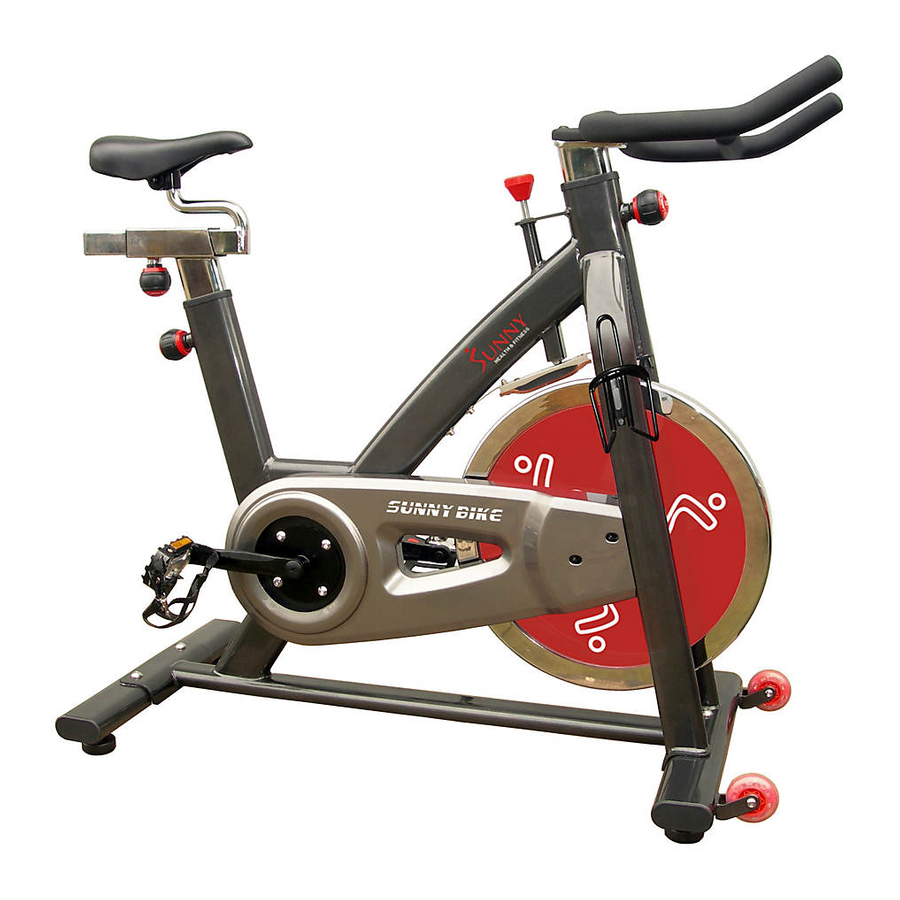
Page 3: Exploded View
EXPLODED VIEW S14-15-17... -
Page 4: Parts List
PARTS LIST DESCRIPTION DESCRIPTION Main frame 41L/R Pedal YH-76X 9/16 Saddle post Bearing 6004-2RS NBK Handlebar Jump ring d20 Wave washer d20*Φ26*0.3 Handlebar post Adjustable bolt Nut M10*1.25*H7.5*S14 Cover for middle axle Φ50*Φ32*33 Front stabilizer Knob M10*φ49*46 Rear stabilizer Seat slider Nut M10*H7*S17 Brake rod Screw M10*25*S6... -
Page 5: Hardware Package
HARDWARE PACKAGE #9 (M10*25*S6) 4PCS #10 (d10*Φ 20*2.0) 4PCS #19 (M10*25*S6) 2PCS #20 (d10*Φ 20*1.5) 2PCS... - Page 6 ASSEMBLY INSTRUCTIONS STEP 1: A. Unscrew the screws (74) with Allen wrench (77), then remove and discard the shipping rear tube (75) and the shipping front tube (76). B. You can save these parts for future packaging and transportation of the bike if desired.
- Page 7 STEP 2: #9 M10*25*S6 4PCS #10 d10*Φ 20*2.0 4PCS A. Secure front stabilizer (6) and rear stabilizer (7) to main frame (1) with screws (9) and washers (10).
- Page 8 STEP 3: #22 M5*12*Φ 2PCS #23 d5*Φ 2PCS A. Secure water bottle holder (21) to main frame (1) with screws (22) and washers (23). B. Secure pedals (41L/R) to the crank (36L/R). The Left pedal has reversed threading, and must be screwed counter-clockwise to tighten; the right pedal has normal threading and can be screwed clockwise to tighten.
- Page 9 STEP 4: A. Insert saddle post (2) into main frame (1), and adjust it to desired position, then tighten it with knob (16). B. Insert seat slider (8) into saddle post (2), and adjust it to desired position, then tighten it with knob (16). C.
- Page 10 STEP 5: #19 M10*25*S6 2PCS #20 d10*Φ 20*1.5 2PCS 19 19 A. Insert handlebar post (4) into main frame (1), and adjust it to desired position, then tighten it with knob (16). B. Secure handlebar (3) to handlebar post (4) with screws (19) and washers (20).
- Page 11 ADJUSTMENTS If the bike is unbalanced, please adjust it as indicated above. Unscrew the nut (48) by turning counter-clockwise (direction B), then rotate foot pad (15) until the bike is balanced. Lastly, tighten the nut (48) by turning it clockwise (direction A).
- Page 12 RESISTANCE ADJUSTMENTS Rotate the knob clockwise to increase the resistance. Rotate the knob counter-clockwise to decrease the resistance. Push down the knob to enforce the brake, and stop the bike immediately. If the brake pad is squeaking, please spray some silicon oil on the surface of the brake pad to reduce it.
Need help?
Do you have a question about the SF-B1002 and is the answer not in the manual?
Questions and answers