Advertisement
Advertisement
Table of Contents

Subscribe to Our Youtube Channel
Related Manuals for VolantexRC RANGER EX


Summary of Contents for VolantexRC RANGER EX
-
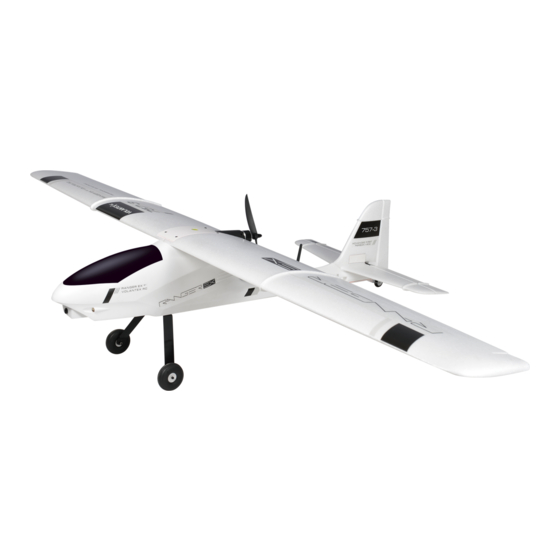
Page 1: Specifications
SEE YOUR WORLD PROFESSIONAL FPV PLATFORM FROM A NEW PERSPECTIVE Specifications Wingspan: 78.8 in (2000mm) Length: 46.5 in (1180mm)! Motor: 3715 / 1000KV out runner Brushless motor Servo: 9g servo * 4pcs & Metal Gear 9g Servo *2pcs Battery: 11.1V 2200mAh 25C Li-Po or above... -
Page 2: Safety Precautions And Warnings
Do not use with incompatible components or alter this product in any way outside of the instructions provided by VolantexRC Co., Ltd.. This manual contains instructions for safety, operation and maintenance. It is essential to read and follow all the instructions and warnings in the manual, prior to assembly, setup or use, in order to operate correctly and avoid damage or serious injury.! -
Page 3: Box Contents
flyability of your finished model depends on how you build it; therefore, we cannot in any way guarantee the performance of your completed model, and no representations are expressed or implied as to the performance or safety of your completed model. / 3 16 RANGER EX — Professional FPV Platform... - Page 4 7. Connect the push rod to push rod then connect it to servo and fix it by screw the servo horn and make the servo arm.! (PA2*5).! sure the surface flat. / 4 16 RANGER EX — Professional FPV Platform...
- Page 5 flat. 15. Join two side of main wing together via a carbon fiber tube. ! 16. Connect the main wing to the fuselage and fix it by 4pcs screws (PM4*25*4).! / 5 16 RANGER EX — Professional FPV Platform...
-
Page 6: Centering The Control Surfaces
‘in line’ with the vertical tail when it’s properly ‘centered’. However, if the rudder is angled off to the right or left you can adjust the length/position of the pushrod/clevis so the surface is centered ‘mechanically’ while the trim lever on the transmitter is centered. / 6 16 RANGER EX — Professional FPV Platform... - Page 7 FPV System Deployment! Ranger EX is professional FPV / UAV platform which designed for long range FPV, so except the capability of carrying big size batteries, it also have a lot of potential for all kind of camera installation. Here we are showing normally camera and UAV equipment deployment, please have a check the image below.!
-
Page 8: Center Of Gravity
), the model will be too responsive and difficult to control. If the C.G. is too far forward (nose- heavy), the model will be too stable and not responsive enough.In order to obtain the C.G. specified, add weight to the fuselage or move the battery position.Check the C.G.before flying. / 8 16 RANGER EX — Professional FPV Platform... -
Page 9: Battery Warnings
Continued discharging can result in reaching the 5.0V ‘ hard’ LVC which may cause permanent damage to the LiPo battery resulting in reduced power and flight duration during subsequent fights ( or failure of the battery entirely which is not covered under warranty). / 9 16 RANGER EX — Professional FPV Platform... -
Page 10: Flight Checklist
The difference between the two modes deals with the throttle and Elevator joystick different. Mode 2 transmitters have the throttle control on the left stick and the Elevator controls on the right stick. Mode 1 is in the opposite way.! 10 16 RANGER EX — Professional FPV Platform... - Page 11 CAUTION: Make sure that you must turn on the transmitter firstly and then you can connect the battery plug. If you want to turn off the transmitter you must ensure that the battery of the plane must be cut off first. 11 16 RANGER EX — Professional FPV Platform...
-
Page 12: Flying Conditions
fly in light winds, or depending on your experience and comfort level, in winds up to 5–7 mph.! DO NOT fly on days when significant moisture, such as rain or snow, is present. 12 16 RANGER EX — Professional FPV Platform... -
Page 13: Perform A Range Check
flying from grass the model will have to be hand launched.! ROG (Rise Off Ground) Tack Off ! If taking off from the ground, place the model on your “ runway ” with the nose pointing into the wind--this will ! 13 16 RANGER EX — Professional FPV Platform... - Page 14 To climb, add throttle and immediately take the flaps back out. Practice a few of these “ climb and glides ” to judge how far out you will need to be when its time to land.! 14 16 RANGER EX — Professional FPV Platform...
- Page 15 Disconnect the battery and remove it from the airplane. Then, turn off the transmitter. Allow the battery to cool before recharging, or allow the motor to cool before installing another battery for the next flight. Inspect the airplane to make sure nothing has become loose or damaged. 15 16 RANGER EX — Professional FPV Platform...
- Page 16 © 2014 VolantexRC Co., Ltd.
Need help?
Do you have a question about the RANGER EX and is the answer not in the manual?
Questions and answers