Table of Contents
Advertisement
Quick Links
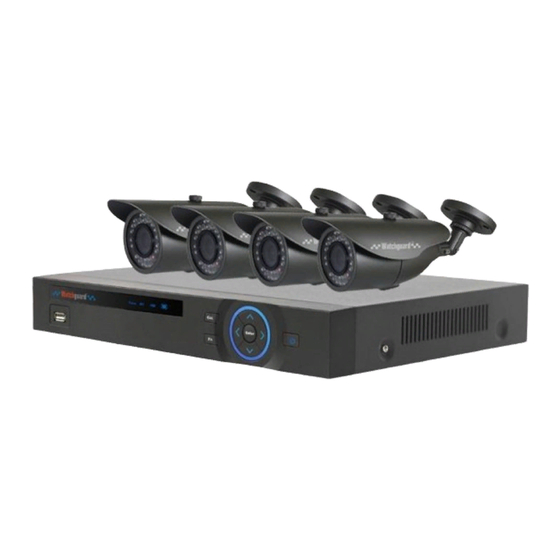
Professional Surveillance Pack
Digital Video Recorder with 4 Security Cameras
Digital Video Recorder
- Advanced H.264 Video Compression Technology
- Multiplex Operation
- Long Recording Duration
- Intelligent Video Motion Detection Recording
- Remote Network Surveillance & Backup Functions
- Easy to operate with remote or USB mouse.
- System Auto recovery after power loss (blackout)
www.watchguardalarms.com.au
MODEL: DVR4E(PACK)
„QUICK INSTALLATION GUIDE‟
N517
4 x 15m IR Day/Night Cameras
- High Quality Image sensor
- IR Night view range of 15 metres
- 650TVL Resolution
V4.0 260614
Advertisement
Table of Contents

Related Manuals for Watchguard DVR4E(PACK)


Summary of Contents for Watchguard DVR4E(PACK)
-
Page 1: Quick Installation Guide
www.watchguardalarms.com.au MODEL: DVR4E(PACK) Professional Surveillance Pack Digital Video Recorder with 4 Security Cameras „QUICK INSTALLATION GUIDE‟ N517 Digital Video Recorder 4 x 15m IR Day/Night Cameras - Advanced H.264 Video Compression Technology - High Quality Image sensor - Multiplex Operation - IR Night view range of 15 metres - Long Recording Duration - 650TVL Resolution... - Page 3 DVR4E Contents Before installation, please ensure you have all the parts listed below). 1 x 4ch Digital Video Recorder with 1TB Hard Disk Drive ● Advanced H.264 Video Compression Technology for High Quality Images ● Easy to Operate ● Can be Connected to a PC Network for Remote Viewing & Backup (Software on Disc) 1 x USB Mouse ●...
-
Page 4: Audio Out
Before installing this unit, please read through the following points: Do not place cords from the AC adapter where they can be pinched or stepped on. Leave at least 50mm of space between the DVR4E and other objects to allow air circulation. ... - Page 5 Connection Guide Mount the 4 Cameras as required and connect the supplied combination DC Power and Video leads. Connect the 4 x corresponding camera Video leads (Yellow) into the camera inputs at the rear of the DVR. Be sure to take note of the Camera input 1 – 4, as this will determine the camera channels.
- Page 6 Front Panel USB port. Connect to USB storage device, mouse etc. Alarm Alarm indicator light When an alarm occurs, the light becomes red to alert you. The blue light becomes on when the network connection is Network status indicator light abnormal or offline.
- Page 7 Main Screen Once booted, you will be presented with the screen below (camera may only be black if not yet set up).. Each camera view will have one or more symbols from below: Currently Recording Video Loss Motion Detected Camera Lock DVR4E only supports four cameras on screen.
-
Page 8: Set The Time And Date
Set the Time and Date When using your DVR for the first time, you will have to set the SYSTEM TIME. Right clicking anywhere on the screen will bring up the password menu. Use the mouse to enter the DVR4E admin password with the on-screen keypad. ... - Page 9 To Set Up Recording Rates Record Times: The DVR4E system is capable of storing up to 4 weeks of recorded footage based on 1Tb of storage and the 4 included Cameras set to D1 @ 10fps and CBR @ 512kb/s Right click to open the menu and select MAIN MENU, then select CAMERA followed by ENCODE.
- Page 10 Motion Detection Should you wish to use Motion detect recording, it can be set per camera, per time period and to detect in certain portions of the screen. Right click to open the menu and select “MAIN MENU”. Select “EVENT”...
- Page 11 How to Playback Video Footage on your DVR4E 1. Right click anywhere on the screen to bring up the menu and log on. Use the mouse to enter the DVR4Es admin password “888888” with the on-screen keypad. 2. Once logged in you can left click to open the menu and select SEARCH. 3.
- Page 12 How to Backup Video Footage on your DVR4E 1. Right click anywhere on the screen to bring up the menu and log on. Use the mouse to enter the DVR4Es admin password “888888” with the on-screen keypad. 2. Once logged in, you can now left click to open the menu, select MAIN MENU then BACKUP. 3.
- Page 13 Using a PC to find available IP Addresses Before setting up your DVR4E you will first need to find it an IP address. This process is to help you find what IP Addresses are currently in use on your computer network, and in turn which ones are still available.
- Page 14 Set Up the DVR‟s Networking Right click to open the menu and select MAIN MENU, then select SETTINGS followed by NETWORK. The device comes pre-configured to DHCP (which means it will automatically receive an IP Address). If you wish to manually give it an IP Address, un-tick DHCP and then enter the IP Address, Subnet mask, and Gateway.
- Page 15 Simple Configuration of your DVR for Remote Access by QR code To be able to set your NVR up for Remote Access, you will first require: An ADSL internet connection of 512/512 minimum (ADSL2 or NBN recommended). A network cable between your DVR and your Modem. ...
- Page 16 DMSS Mobile App by QR Code App available for Android, iOS, Blackberry, Symbian, Windows Mobile and Windows 7 mobile From your compatible Smartphone, access the App Marketplace and download the free App. This may also be listed as: iDMSS lite for Apple iOS iDMSS plus for Apple iOS gDMSS lite for Android gDMSS plus for Android...
- Page 17 Advanced Configuration of your DVR for Remote Access (optional) Important: Before Setting up remote access for your DVR, you will need a good understanding of computer networks. If you do not, please seek the assistance of a qualified I.T. professional. To be able to set your DVR up for Remote Access, you will first require: ...
- Page 18 Set up DDNS on your DVR (optional) DDNS is a service that will track your numeric IP address and allow you to attach an alphanumeric address. So for example. Instead of using “123.123.123.123” (the Google address) you would use “google.com”. Why use DDNS? Remembering a numeric IP address can be complicated, where an alphanumeric address is easy to remember.
- Page 19 DMSS Mobile App by IP Address (optional) App available for Android, iOS, Blackberry, Symbian, Windows Mobile and Windows 7 mobile From your compatible Smartphone, access the App Marketplace and download the free App. This may also be listed as: iDMSS lite for Apple iOS gDMSS lite for Android wDMSS lite for Windows Phone Configuration:...
- Page 20 How to enable ActiveX Controls Important: Before Setting up remote access for your DVR4E, you will need a good understanding of computer networks. If you do not, please seek the assistance of a qualified I.T. professional. We can only recommend using ActiveX Internet Explorer 5.5 or above, and strongly recommend the use of IE9 as unfortunately IE10 is not compatible.
-
Page 21: Troubleshooting
Troubleshooting Please refer to the FAQ table below for easy troubleshooting. The table below describes some typical problems and their solutions. Please consult these guides before contacting your DVR4E dealer. PROBLEM SOLUTION - Check power cord connection. No power - Confirm that there is power from the outlet. - Ensure that the 12V 5A is connected to the DVR4E - Ensure that motion detection is enabled for that Motion Detection not working... -
Page 22: Limited Warranty
Limited Warranty Cornick Pty Ltd (Seller) warrants its products to be in conformance with its own plans and specifications and to be free from defects in materials and workmanship under normal use and service for forty eight months from the date of original purchase. Sellers obligation shall be limited to repairing or replacing, at its option, free of charge for materials or labor, any part which is proved not in compliance with Sellers specifications or proves defective in materials or workmanship under normal use and service. - Page 23 PLEASE CUT OUT & RETURN THIS INFORMATION WITHIN 14 DAYS OF PURCHASE TO: RhinoCo Technology 9 Hannabus Place McGraths Hill NSW 2756 Australia M o d e l : D V R 4 E ( PA C K ) P r o f e s s i o n a l S u r v e i l l a n c e P a c k Wa r r a n t y C a r d Name Address Suburb...
Need help?
Do you have a question about the DVR4E(PACK) and is the answer not in the manual?
Questions and answers