Table of Contents
Advertisement
Quick Links
Advertisement
Table of Contents

Related Manuals for Watchguard SMS 2010 WGSMS2010


Summary of Contents for Watchguard SMS 2010 WGSMS2010
- Page 1 I N S T R U C T I O N M A N U A L V E R S I O N 1.12 MODEL: WGSMS2010 Watchguard SMS 2010™ Mobile Phone Monitored Alarm System via SMS with Wireless Detectors, Remote Controls & Siren RoHS N517 COMPLIANT Designed in Australia.
-
Page 2: Table Of Contents
Contents Contents ................................2 Quick Reference Guide............................3 1. Introduction ..............................4 1.1 Watchguard SMS 2010 Features ......................4 1.2 Main Components:..........................5 1.2.1 Optional Components – Compatible Sirens ................... 6 1.2.2 Optional Components - Accessories: ..................... 7 2. Installation ..............................8 2.1 Planning the Installation.......................... -
Page 3: Quick Reference Guide
NOTE: To receive a FULL list of all commands, send your PIN code to the Main Unit. Please note down the relevant details for the alarm system. i.e. The phone numbers that have been programmed into the system and the phone number of the actual Watchguard SMS 2010 (WGSMS2010) alarm system. -
Page 4: Introduction
As Australia's leading designer & manufacturer of quality wireless security systems we are proud to release our latest model that enables 2-way communication between you and your alarm via your mobile phone. 1.1 Watchguard SMS 2010 Features Features: • Quick and simple to install – very easy to use! •... -
Page 5: Main Components
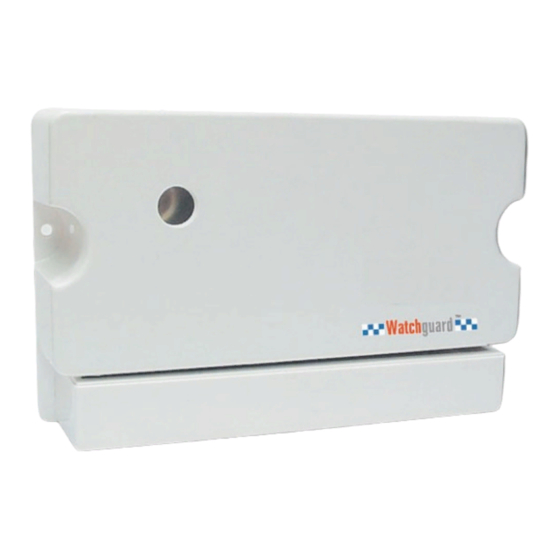
1.2 Main Components: The below components are included in the Watchguard SMS 2010 alarm system package: Main Control Unit & Keys Remote Controls 12V DC Power Supply Wireless Passive Infrared Detectors Wired Compact External Siren Mounting Materials... -
Page 6: Optional Components - Compatible Sirens
1.2.1 Optional Components – Compatible Sirens Wireless Sirens: Wireless Triggered Siren (AC Powered) Part # WSIREN Wireless External Siren with flashing blue strobe and backup battery. 10m of pre-terminated cabling for ‘plug-secure’, DIY friendly installation. Includes low voltage plug-pack. Sends tamper, low battery and supervision signals. -
Page 7: Optional Components - Accessories
1.2.2 Optional Components - Accessories: Wireless Keypad Part# WKP A wireless keypad can be placed inside the entrance to your premises, allowing people to arm and disarm the system using a PIN code instead of remote controls. This enables multiple user access without needing extra remote controls. -
Page 8: Installation
2. Installation 2.1 Planning the Installation To get the best possible protection from your Watchguard SMS 2010 alarm system, it is imperative that you follow the following guidelines on where to place the system components. Below is a diagram of typical locations to place the Main Control Unit and wireless accessories. -
Page 9: Setting Up The Sim Card
2.2.1 Setting up the SIM Card IMPORTANT NOTE: The Watchguard SMS 2010 requires a GSM SIM Card. You must purchase this from a telecommunications provider. Also, it must not be PIN code locked – please follow the instructions below to ‘deactivate (turn off) the PIN code’... -
Page 10: Wireless Pir Detectors
2.2.3 Wireless PIR Detectors This section shows you how to install wireless PIR detectors (PIRW3) for your system. a) Systems with packaged wireless PIR detectors should already be learnt into the Main Control Unit. If your detectors have a sticker with a zone number on the back, then they are already learnt into the system. - Page 11 b) Set-up and learn-in a wireless PIR detector Open the front cover of the detector and remove the plastic insulator from the battery. Wait 3 minutes for the detector to warm up. Set the dipswitch to ON for the zone you wish to learn the detector into. Press the ADD button on the Main Control Unit.
- Page 12 The detector is a high quality infrared movement detector, which is battery operated and communicates with the Watchguard SMS 2010 alarm system via radio frequency (RF) transmission. This detector is very easy to install, provides excellent detection sensitivity and has a long battery life (approximately 3 years). This detector transmits four different codes to the main control unit.
- Page 13 e) Perform a walk test Remove the front cover off the detector via the clip at the top. The green and red lights will flash together, 6 times, to indicate that the detector has entered test mode. Replace the front cover. The detector will stay in walk test mode for 3 minutes.
- Page 14 The Watchguard PIR detectors have a special firmware known as Dual Edge Sensing (DES). This enhances the reliability of the detectors in all environments. DES is explained further below: f) About Dual Edge Sensing (DES) Technology Side view detection pattern in optimal temperature environment...
-
Page 15: Wireless Panic Buttons
No trigger examples In this example, the PIR will not trigger. This is because the two pulse counts aren’t for two separate zones. 2.2.4 Wireless Panic Buttons This section shows you how to install wireless panic buttons (WPANIC) for your system. If your system came with wireless panic buttons, they should already be learnt into the Main Control •... -
Page 16: Wireless Smoke Detectors
This section shows you how to install wireless smoke detectors (SMODETW) for your system. Please read the Smoke detector mounting information section before permanently fixing the detector. As smoke detectors are optional accessories with the Watchguard SMS 2010 System, you will need to •... - Page 17 b) Set-up and learn-in a smoke detector Set the dipswitches to the zone you wish to learn the smoke detector as. In the picture on the left it is set to zone 1. Open the back cover of the detector. Insert the supplied 9VDC battery so that the contacts are touching.
-
Page 18: Wireless Reed Switches
However, if these detectors have previously been learnt in and require setting up, follow the Set-up a pre-learnt reed procedure for each of these detectors that you have. If the accessories are newly purchased (as in the case of a new Watchguard SMS 2010 System where •... -
Page 19: Wireless External Siren
2.2.7 Wireless External Siren This section shows you how to install a wireless external siren for your system. The External Siren should be mounted at the front or the front To Power Point side of the building so as to provide maximum visual deterrent Connect and to allow neighbours to identify that it is your system that to Power... - Page 20 a) Installing the Siren Unit (refer to pictures opposite) 1. Drill mounting holes (7mm diameter, 25mm minimum in depth) into the chosen wall. 2. If a masonry wall, use the green star plugs. Press each one into the 4 main mounting holes. 3.
- Page 21 Note: If for any reason your external siren does not beep when you arm & disarm your Watchguard SMS 2010, simply turn off the External Siren Key switch, wait for 10 seconds and then turn back on again. Now immediately (within 3 seconds) arm the system using your remote control. You should now hear 1 beep from the external siren.
-
Page 22: Wireless Solar Siren
2.2.8 Wireless Solar Siren This section shows you how to install a wireless solar siren for your system. The Wireless Solar Siren must be mounted in a position that provides both maximum visual deterrent and maximum sunlight coverage. The mounting position should be located at the front or the front side of the building so as to provide maximum visual deterrent and to allow neighbours to identify that it is your system that has been activated. - Page 23 a) Mounting a wireless solar siren Use the wall plugs and screws provided if suitable for your particular building construction. Remove the holding screw from the base of the unit and hinge off the front plate. Use the template provided to mark the position of the four fixing holes on the external wall.
- Page 24 2.2.9 Hard Wired External Siren This section shows you how to install a hard wired external siren for your system. The External Siren should be mounted at the front or the front side of the building so as to provide maximum visual deterrent and to allow neighbours to identify that it is your system that has been activated.
- Page 25 2.2.10 Compact Hard Wired Siren a) Mounting a Compact Hard Wired External Siren – W24-PLUG Remove the 2 screws from the main unit as per Fig 1. and remove front cover from the siren. Remove screws located on both sides of the cover Figure 1 Align the siren backing plate in your chosen location and mark the 3 mounting holes as per...
-
Page 26: Wireless Keypad
4 Digit PIN code. The Wireless Keypad is ideal for the following situations: Where you have a need for more than 8 remote controls that your Watchguard SMS 2010 Alarm can • accept, or for instances where you do not wish to supply remotes. - Page 27 b) Selecting a mounting location Choose a suitable location Hold the Wireless Keypad in the desired location. Press and hold the two buttons shown together for 3 seconds The alarm should start sounding. If the alarm did not sound then the Wireless Keypad relocated slightly closer to the main unit and retested.
- Page 28 The Wireless Keypad comes with the PIN 1 2 3 4 from the factory. This must be changed to your own Personal Identification Number. d) Changing the User PIN Press the button shown. Enter your current PIN. Note the factory default PIN is 1 2 3 4. Press the button shown.
- Page 29 f) Changing the house code Press the button shown. Enter your current PIN. Note the factory default PIN is 1 2 3 4. Press the button shown. The conformation light shown on the keypad will illuminate once and flash twice. Enter your new house code.
-
Page 30: Configure Arm/Disarm Confirmation Reports
2.3 Configure Arm/Disarm Confirmation Reports What are ‘Arm/Disarm Confirmation Reports’? Arm/Disarm confirmation reports notify you (by SMS) if your Watchguard SMS 2010 has been armed or disarmed. Overview By factory default the Watchguard SMS 2010 is set to ‘do not send confirmation reports.’... -
Page 31: Operation
To utilise your Watchguard Digital, turn the key switch to the ‘ON’ position. Two keys are provided with the kit, and it is suggested you keep them on each key ring with your remote controls. When you switch on the system, the LED on the Main Control Unit will flash once every 5 seconds to indicate that the unit is active. -
Page 32: Alarm Modes
4. Alarm Modes Below you will find an explanation of the different operational modes of your Watchguard SMS 2010 Alarm and when it is appropriate to use them. 4.1 Away, Home and Panic Modes Alarm Mode When to Use Indications... -
Page 33: Remote Control Functions
4.3 Remote Control Functions 4.3.1 Button 1 AWAY mode Press once to arm the system in normal AWAY mode. The siren will beep twice and the strobe will flash twice. The internal screamer will beep at 1-second intervals for the 30-second exit delay. HOME mode Press twice within 3 seconds to arm the system in HOME mode. -
Page 34: Programming
Set all dipswitches to off. Your Watchguard SMS 2010 can store a maximum of Seven (7) remotes in its memory. If you learn in an 8th remote, the 1st remote control will be erased. If you lose a remote control, or have one stolen, then all remotes... -
Page 35: Delete All Remotes
5.1.2 Delete all remotes Set dipswitches 1 and 2 to on. DELETE Press the DELETE button. Now all the remotes that you wish to keep must be added back in. Follow the procedure above To Add a New Remote. Set all dipswitches to off. 5.1.3 Add a detector Set the dipswitch to on for the zone you wish to add. -
Page 36: Delete A Detector
NOTE: If you attempt to learn in a device that is already learned in, it will be deleted and added to the new zone eg: If a WPIR is in zone 3 and you wish to move it to zone 5 relearning in zone 5 will delete it from zone 3 and add it to zone 5. -
Page 37: Turning Zone Supervision On Or Off
Turning on Zone Supervision enables contact between the supervised zone and the main control unit. Every 24 hours, the supervised zone transmits a signal to the main control unit, telling it that it is still functional. If the main control unit does not receive this signal while supervision is turned on, an SMS will be sent to each of the phones ‘written’... -
Page 38: Basic Sms Functions
‘000000DISARM’ (the software internally converts whole text to uppercase) 6. Messages that contain no valid PIN code that are sent to the Watchguard SMS 2010 will not be responded to (refer to Section 5.4.1 – ‘To Change your PIN code,’ to assign/change a PIN code). -
Page 39: Phone Number Memory
5.4 Basic Phone to Alarm Commands The following section contains information and instructions on 5.4.1 To Change Your PIN code Instructions below show you how to change you PIN code via SMS. You may wish to change the PIN code from the default code 000000, to something more secure and familiar to you. -
Page 40: To Add Phone Numbers To The System
5.4.3 To Add Phone Numbers To The System The Watchguard SMS 2010 alarm is able to be programmed with up to 5 different mobile phones, so when the alarm is armed or put in to panic mode and activates, it will send an SMS message to each of the phone numbers in the systems memory. -
Page 41: To Erase Phone Numbers From The System
5.4.5 To Erase Phone Numbers From The System The Watchguard SMS 2010 can erase numbers from its memory via SMS. This is useful when a phone number has changed and a new number needs to be programmed into the system – the old number must first be erased. -
Page 42: Sms Commands List
5.5 SMS Commands List SMS Command Example of Command in Use Possible Received Messages from Unit 000000ARM (or 000000A) - Alarm armed. (shortened to A) - Alarm already armed. DISARM (shortened to 000000DISARM (000000D) - Alarm disarmed. - Alarm already disarmed. PANIC 000000PANIC - PANIC ALERT! -
Page 43: Warranty Terms
6. Warranty Terms 6.1 Warning Limitations & Warranty While this system is an advanced design security system, it does not offer guaranteed protection against burglary, fire or any other emergency. Any alarm system, whether commercial or residential, is subject to compromise or failure to warn for a variety of reasons. For example: Intruders may gain access through unprotected openings, or have the technical sophistication to •... -
Page 44: Limited Warranty
This equipment, like other electrical devices, is subject to component failure. Even though this • equipment is designed to last as long as 10 years, the electronic components could fail at any time. The most common cause of an alarm system not functioning when an intrusion or fire occurs is •... - Page 45 We appreciate your confidence in our product, and you can be certain that we will do everything possible to ensure that you are happy with your decision and that you have years of satisfaction from your Watchguard SMS 2010 System. We take extreme care in the research, design and development of our products to ensure they meet your needs.
Need help?
Do you have a question about the SMS 2010 WGSMS2010 and is the answer not in the manual?
Questions and answers