Table of Contents
Advertisement
Quick Links
Digital Video Recorder (DVR)
- Advanced H.264 Video Compression Technology
- Multiplex Operation
- Long Recording Duration
- Intelligent Video Motion Detection Recording
- Remote Network Surveillance & Backup Functions
- Easy to operate with remote or USB mouse
- System Auto recovery after power loss (blackout)
www.watchguardalarms.com.au
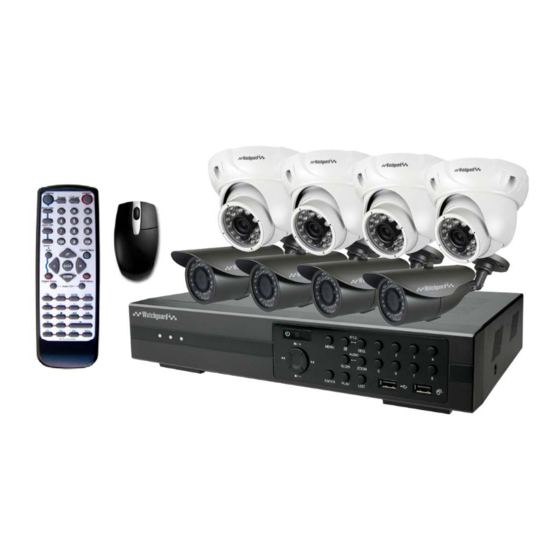
MODEL: DVR8ENTPACK4
Professional Surveillance Pack
Digital Video Recorder with 8 Security Cameras
'QUICK INSTALLATION GUIDE'
N517
4 x 15m Infrared Day/Night Bullet Cameras
- High Quality CCD Image sensor
- 14 x Infrared LEDs
- 650 TVL Resolution
4 x 15m Infrared Day/Night Dome Cameras
- High Quality CCD Image Sensor
- 650 TVL Resolution
Advertisement
Table of Contents

Related Manuals for Watchguard DVR8ENTPACK4


Summary of Contents for Watchguard DVR8ENTPACK4
- Page 1 MODEL: DVR8ENTPACK4 Professional Surveillance Pack Digital Video Recorder with 8 Security Cameras ‘QUICK INSTALLATION GUIDE’ N517 Digital Video Recorder (DVR) 4 x 15m Infrared Day/Night Bullet Cameras - Advanced H.264 Video Compression Technology - High Quality CCD Image sensor...
- Page 2 Package Contents (Before commencing installation, please ensure you have all the parts listed below.) 1 x 8 Channel Digital Video Recorder with 1TB Hard Disk Drive & PC Software for Remote View ● Advanced H.264 Video Compression Technology for High Quality Images and Small File Szes ●...
-
Page 3: Installation
Installation Before installing this unit, please read through the following points: • Do not place cords from the AC adapter where they can be pinched or stepped on. • Do not place heavy objects on cords, or cover cords with rugs or carpet. •... -
Page 4: Quick Start Up Guide
Quick Start up Guide • Make sure your TV/Monitor is ON and set to the appropriate AV channel if required • Switch the Power button located on the rear of the DVR after connecting a monitor and at least one camera. The Power LED will illuminate Green. -
Page 5: Password Input
Menu Display and Operation with USB Mouse The system supports operation via USB mouse (not included). See below for an explanation of how to operate your DVR using the mouse input. Connect USB Mouse - Connect your USB mouse to one of the USB ports on the DVR front panel - A mouse icon ( ) will appear on the screen if the mouse is detected properly. - Page 6 Right click anywhere on the screen or press the “MENU” button to bring up the main menu. Right click again to exit the menu. QUICK START: Click to set the status display, image settings, and date & time. DATE SETUP: Click to set the date display and daylight savings. SYSTEM: Click to set the system configurations.
-
Page 7: To Begin Recording
To Begin Recording Once you have successfully set the Date and Time, exit the OSD Menu by pressing the “MENU” button to return to normal viewing. By default, the DVR will begin recording when it is properly connected to the cameras and has an installed HDD. If it is recording, the recording icon “... -
Page 8: Recording Modes
Recording Modes The DVR offers three recording modes, MANUAL RECORD, EVENT RECORD and TIMER RECORD. MANUAL RECORDING (continuous recording): The DVR will begin recording when the cameras are properly connected and a HDD is installed. It is set to this mode by factory default. -
Page 9: Slow Playback
To Play Back Captured Video Footage Press “PLAY” button and the DVR will display the last recorded video. FAST FORWARD (F.F. ) & FAST REWIND (REW): You can increase the speed for fast forward and rewind on the DVR in the playback mode, •... -
Page 10: Searching For Data
Searching for data You can also use the search function of the DVR to look back though stored data via various events • Press “LIST” button on the front panel of the DVR or the “EVENT INFORMATION” button on the main menu to enter the search mode. - Page 11 Operation HDD: HDD is reading or recording “LED LIGHTS” HDD Full: DVR is powered on “MENU” Press “MENU” button to enter the main menu. “ENTER” Press “ENTER” button to confirm the settings. “LIST” Press “LIST” button to enter the search menu. “PLAY”...
-
Page 12: Configure Your Dvr For Remote Access
Configure your DVR for Remote Access Important: Before Setting up remote access for your DVR, you will need a good understanding of computer networks. If you do not, please seek the assistance of a qualified I.T. professional. To be able to set your DVR up for Remote Access, you will first require: ... - Page 13 Set up DDNS on your DVRENT What is DDNS? DDNS is a service that will track your numeric IP address and allow you to attach an alphanumeric address. So for example. Instead of using “123.123.123.123” (the Google address) you would use “google.com”. Why use DDNS? Remembering a numeric ip address can be complicated, where an alphanumeric address is easy to remember.
-
Page 14: Troubleshooting
TROUBLESHOOTING Please refer to the FAQ table below for easy troubleshooting. The table below describes some typical problems and their solutions. Please consult these guides before contacting your DVR dealer. PROBLEM SOLUTION No power - Check power cord connection. - Confirm that there is power from the outlet. - Ensure that the 12V 3A power supply is connected to the cameras and the 19V 2A is connected to the DVR Not working when pressing any button... -
Page 15: Limited Warranty
Limited Warranty Cornick Pty Ltd (Seller) warrants its products to be in conformance with its own plans and specifications and to be free from defects in materials and workmanship under normal use and service for twenty four months from the date of original purchase. - Page 16 We appreciate your confidence in our product, and you can be certain that we will do everything possible to ensure that you are happy with your decision and that you have years of satisfaction from your DVR8ENTPACK4. We take extreme care in the research, design and development of our products to ensure they meet your needs.
Need help?
Do you have a question about the DVR8ENTPACK4 and is the answer not in the manual?
Questions and answers