Table of Contents
Advertisement
Quick Links
Advertisement
Table of Contents

Subscribe to Our Youtube Channel
Related Manuals for Trojan X-TRAINER 400


Summary of Contents for Trojan X-TRAINER 400
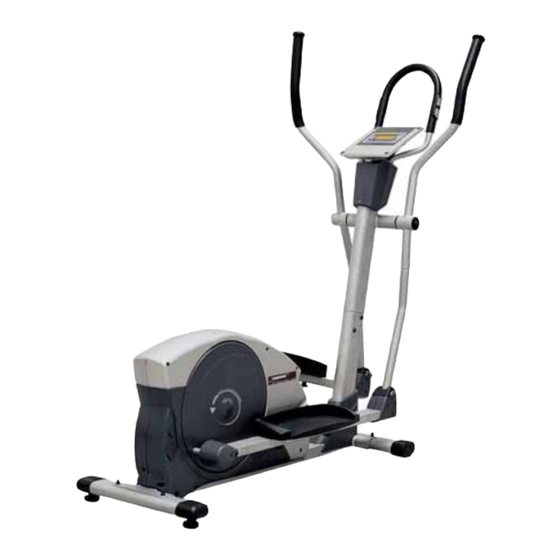
- Page 1 TROJAN ® X - T R A I N E R 4 0 0 MY SPACE MY TIME E L L I P T I C A L T R A I N E R ELLIPTICAL TRAINER CARE INSTRUCTIONS AND ASSEMBLY MANUAL...
-
Page 2: Table Of Contents
INDEX PAGE SAFETY INSTRUCTIONS PRE ASSEMBLY CHECK LIST HARDWARE LIST ASSEMBLY STEPS COMPUTER FUNCTIONS CONDITIONING GUIDELINES WARM -UP AND COOL-DOWN FREQUENTLY ASKED QUESTIONS PARTS LIST 10. EXPLODED DRAWING 11. TROJAN 1 YEAR LIMITED WARRANTY 12. TROJAN REPAIRS PROCEDURE... -
Page 3: Safety Instructions
2. Keep children and pets away from this equipment at all times. 3. The TROJAN X-TRAINER 400 ELLIPTICAL should not be used by persons weighing more than 110kgs. 4. The TROJAN X-TRAINER 400 ELLIPTICAL should be used by only one person at a time. -
Page 4: Pre Assembly Check List
2. PRE ASSEMBLY CHECK LIST Thank you for choosing the TROJAN X-TRAINER 400 ELLIPTICAL. We take great pride in producing this quality product and hope it will provide many hours of quality exercise to make you feel better, look better and enjoy life to its fullest. -
Page 5: Hardware List
3. HARDWARE LIST Description Ot’y Description Ot’y Carriage Bolt (M8 x 52mm) Allen Head Screw(M8 x l5mm) Carriage Bolt (M6 x 55mm) Washer For Pedal Hex Head Bolt (M8 x 20mm) Cap Nut (M8) Spring Washer (M6) Nylock Nut (M6) Spring Washer (M5) Knob Dawl Curve Washer(M6) -
Page 6: Assembly Steps
4. ASSEMBLY STEPS STEP 01 Attach The Stabilizer Front Wheel Caps (3) to Main Frame (1), using two Carriage Bolts (4), two Washers (5), two Spring Washers (6), and two Cap Nuts(7). Foot Covers (9) to Main Frame (1), using two Carriage Bolts (4), two Washers (5), two Spring Washers (6), two Cap Nuts (7). - Page 7 ASSEMBLY STEPS STEP 03 Attach The Handle Bar Housing on Central Post (15) until the exposed length is roughly equal on both sides. Handlebar Axle (17) sides, refer to “L” and “R” stickers on Handlebars (19). (12), two Spring Washers (6) and two Washers (16) as shown.
- Page 8 ASSEMBLY STEPS STEP 05 Install Left And Right Pedal Tube Spring Washer (6) at the Cross Frame (22) firmly. tighten it with Screws (12), Spring Washer (6) and Washer (27). STEP 06 Installation of the Right (34) and Left (28) Pedal on the Pedal Tubes (21 and 24).
- Page 9 STEP 07 Installation of the Front and Rear Pedal Cover (35, 36 and 39) on the Pedal Tubes (21and 24). fasten it with Screw (37). Pedal Tubes (21and 24) together and fasten them with Screws (37 and 38). STEP 08 Installation of The Computer (48) and Handle Bar Cover (50 and 51) on The Handlebar Post (15).
- Page 10 ASSEMBLY STEPS STEP 09 Attach the power STEP 10 Checks adjustments of the Left Pedal (28) and Right Pedal (34). Note: Please keep the tool set and the instructions in a safe place as they may be required for repairs or spare parts orders. outwardly with the Allen Head Bolt (64) and Washer (5), but also inwardly at the rear end of the cover with the Plastic Pad (65).
-
Page 11: Computer Functions
F6 is worst, you may keep training to improve. (For precise test result, please hold onto the handgrip with both hands during testing.) ANIMATION After power on, TROJAN FITNESS will move from right to left on the bottom line. CALENDAR In sleep mode, screen will display year, month, day on the bottom line. - Page 12 2. Screen will display segment with beep sound and wheel diameter “78.0” for 2 seconds. Welcome Sentence “TROJAN FITNESS” will move from right to left on bottom line then enter standby mode. 3. Press “TEXT MENU” to select functions CLOCK/DAY, BACK LIGHT BRIGHTNESS for you to set to select functions...
- Page 13 COMPUTER FUNCTIONS 6. USER DIFFERENT TRAINING MODE 6-1 After monitor is powered on and the screen enters standby mode, UO is flashing on the bottom line, user may press ▲ / ▼ to select Ul-U4 and MODE for confirmation. 6-2 After user selected, press ▲ / ▼ and MODE for personal data setting, NAME, GENDER, AGE, HEIGHT, WEIGHT. 6-3 After personal data setting screen, enter different training modes selection, MANUAL QUICK START is shown on the bottom line, user may press START to go to exercise directly.
- Page 14 COMPUTER FUNCTIONS 6-10 FITNESS TEST 6-10-1 Once the user selects FITNESS TEST, the training program is set up with a training time 12:00 at level 5. Press START button to start training. 6-10-2 During training, the user can not adjust training resistance level., and the monitor will record training distance during the 12 minutes period.
- Page 15 COMPUTER FUNCTIONS USB V2.O FEATURES 1. Keep exercise data in PC Hard-Disk for reference purposes. 2. Easy to use interface; instant Read/Write from PC and Exercise Computer. 3. Fully Analyse each exercise data; allows trouble shooting; Operate Menu and Setup instruction in “HELP” (PC software) 4.
-
Page 16: Conditioning Guidelines
6. CONDITIONING GUIDELINES How you begin your exercise program depends on your physical condition. If you have been inactive for several years, or are severely overweight, you must start slowly and increase your time on the equipment; a few minutes per workout. Initially, you may be able to exercise only for a few minutes in your target zone, however, your aerobic fitness will improve over the next six to eight weeks. -
Page 17: Warm-Up And Cool-Down
7. WARM-UP AND COOL-DOWN WORKOUT GUIDELINES Each workout should include the following three parts: A warm-up, consisting of 5 to 10 minutes of stretching and light exercise. A proper warm-up increases your body tem- perature, heart rate, and circulation in preparation for exercise. Training zone exercise, consisting of 20 to 30 minutes of exercising with your heart rate in your training zone. -
Page 18: Frequently Asked Questions
8. FREQUENTLY ASKED QUESTIONS Q1. My elliptical does not move as easily as indicated in manual 1. Ensure you have placed the stabilizer with the wheels in the front of the unit. Q2. My consol does not work? 1. Make sure you have connected it correctly and have placed the batteries in the consol. Q3. -
Page 19: Parts List
9. PARTS LIST Discription Q’ty Discription Q’ty Discription Q’ty 1480-01 Base Frame 1480-38 Screw (M4 x l6mm) 1480-75 Screw (M8 x 10mm) 1480-02 Front Foot 1480-39 Pedal Rear Cover 1480-76 Sensor Bracket 1480-03 Front Foot Cover (L & R) 1480-40 Hand Pulse Unit 1480-77 Sensor... -
Page 20: Exploded Drawing
10. EXPLODED DRAWING 1480-20... - Page 21 EXPLODED DRAWING 1480-21...
-
Page 22: Trojan 1 Year Limited Warranty
11. TROJAN 1 YEAR LIMITED WARRANTY Masstores (Pty)Ltd (“the Supplier”) hereby provides a limited warranty to the original purchaser of this product (“the Consumer”) that this product will be free of manufacturing defects in materials and workmanship which under normal,... - Page 23 The Consumer does not need to return the product to the store. The Consumer shall phone the Trojan hotline on 0861 Trojan (0861 876 526) and the Supplier’s authorized agent will at its discretion either repair the item at the Consumer’s residence or collect and repair the item at their premises.
-
Page 24: Trojan Repairs Procedure
12. TROJAN REPAIRS PROCEDURE 1. Procedure for repairs Should you experience any faults or breakdowns on your Trojan equipment, please adhere to the following procedure to have the fault rectified speedily and professionally. 0861 Trojan (0861 876526) to log the faulty product (under warranty or out of warranty) faulty product back to the service centre.
Need help?
Do you have a question about the X-TRAINER 400 and is the answer not in the manual?
Questions and answers