Table of Contents
Advertisement
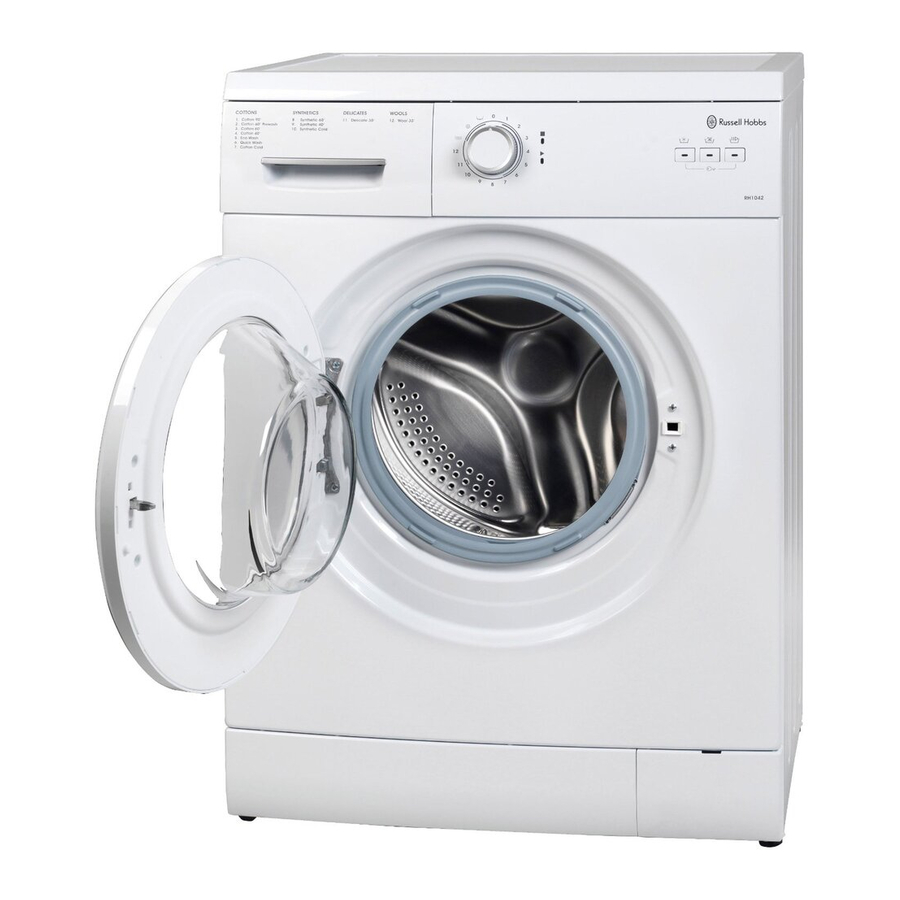
Washing Machine
Instruction Manual
Model number:
RH1042 (B)
For Customer Services & Spare Parts please call 0345 208 8750
Opening times: Monday - Friday 8am – 6pm & Saturday 9am – 1pm
www.productcareuk.com
or visit us at
IMPORTANT:
Before using your appliance, please read this
manual carefully and keep it for future reference.
Advertisement
Table of Contents
Troubleshooting

Subscribe to Our Youtube Channel
Related Manuals for Russell Hobbs RH1042


Summary of Contents for Russell Hobbs RH1042
-
Page 1: Washing Machine
Washing Machine Instruction Manual Model number: RH1042 (B) For Customer Services & Spare Parts please call 0345 208 8750 Opening times: Monday - Friday 8am – 6pm & Saturday 9am – 1pm www.productcareuk.com or visit us at IMPORTANT: Before using your appliance, please read this... -
Page 2: Table Of Contents
Contents Safety Instructions 3 - 4 …………………………………………………… Product Fiche …………………………………………………… Savings & Efficiency Information …………………………………………………… Before using the Appliance 7 – 8 …………………………………………………… Installation …………………………………………………… 9 – 13 Control panel …………………………………………………… How to Use 15 - 21 …………………………………………………… Program Table ………………………………………………….. -
Page 3: Safety Instructions
Safety Instructions Important note: Please read this booklet before installing and switching on this appliance. The manufacturer assumes no responsibility for incorrect installation and usage as described in this booklet. • This appliance can be used by children aged from 8 years and above and persons with reduced physical, sensory or mental capabilities or lack of experience and knowledge if they have been given supervision or instruction concerning use of the appliance in a safe way and... -
Page 4: Safety Instructions
Safety Instructions • Your appliance should only be used by adults in line with the information provided in this user’s manual. • Your machine is designed to be used domestically. Commercial use will cause your warranty to be cancelled. • Anyone’s intervention to your machine except for a qualified engineer, in anyway will cause your warranty to be invalid. -
Page 5: Product Fiche
Product Fiche Brand: Russell Hobbs Model: RH1042 (B) Rated capacity: 5.0kg Energy efficiency class: A+ Washing performance class: A (A: Higher G: Lower) Rated capacity (Cotton 60° full load) (kg) 5,0 Energy efficiency class A+ Energy consumption (kWh/annum)* 167 Water consumption (L/annum)** 9240... -
Page 6: Savings & Efficiency Information
Savings & Efficiency Information Some important information to get more efficiency out of your appliance: The amount of laundry you put in your washing machine should not exceed • the maximum amount indicated in the programme table. By avoiding overloading, your machine should run more efficiently. Not using the pre-wash feature for normal and lightly soiled laundry should •... -
Page 7: Before Using The Appliance
Before using your Appliance • Transportation screws which are located at the back of the machine, must be removed before using or running the machine. You will void the manufacturer’s guarantee if these are not removed before using or running the machine •... - Page 8 Before using your Appliance The Back of the machine Water inlet valve Transport bolts Remove all transit bolts before installation Outlet hose Power cable For Customer Services & Spare Parts please call 0345 208 8750 Opening times: Monday - Friday 8am – 6pm & Saturday 9am – 1pm www.productcareuk.com or visit us at...
-
Page 9: Installation
Installation Before operating the washing machine, remove the 4 transportation screws and rubber spacers from the back of the machine. If the screws are not removed, it may cause heavy vibration, noise and product malfunction (voiding the guarantee). Unscrew the 4 screws with a wrench, spanner or cross-tip screwdriver. Keep the four screws as they will need to be re-used if the machine has to be transported. - Page 10 Installation Feet adjustment • Adjust the level of washing machine by the adjustable feet. Please check if there is a gap between the four adjustable feet and the floor. If there is then adjust the level of the washing machine by turning the adjustable feet. Make sure that the machine does not sway and that it is completely level.
- Page 11 Installation Water drainage • The water outlet hose should be mounted at a height of minimum 60 cm, maximum 80 cm from the ground. • The end of the water outlet hose can be fitted directly to the drainage hole on the back side of the washer. •...
- Page 12 Installation Water • The appliance should be connected to the cold water mains using new hose sets. Old hose sets should not be reused. In using only one water tap or in case of only one water inlet valve, connect the inlet hose to the cold water inlet valve.
- Page 13 Installation Ordinary tap (not included) Screw-shaped tap (not included) For Customer Services & Spare Parts please call 0345 208 8750 Opening times: Monday - Friday 8am – 6pm & Saturday 9am – 1pm www.productcareuk.com or visit us at...
-
Page 14: Control Panel
Control Panel Drawer Programme Knob Programme ready light Programme end light Cold wash No spin Start/Pause cycle Programme Cotton 90 ̊ C Cotton 60 ̊ C With prewash Cotton 60 ̊ C Cotton 40 ̊ C Eco wash Quick wash 60 ̊... -
Page 15: How To Use
How to Use To obtain the best washing results, you must operate your appliance properly. This section gives you this important information. Preparing clothes for washing • Close zippers, snaps, and hooks to avoid snagging on other items. Remove pin, buckles, and other hard objects to avoid scratching the washer interior. -
Page 16: Starting The Programme
How to Use Child Lock Child lock is used in order to protect the washing cycle from the effects of unwanted button activations during the cycle. The Child lock is activated by pressing the first and third button on the control panel at the same for more than 3 seconds. When child lock is activated LEDs on the cold wash and no spin buttons will blink to indicate that Child Lock is active. -
Page 17: Detergent Drawer General View
How to Use Detergent drawer general view Your appliance is designed to use both powder and liquid detergent. When using liquid detergent, use the liquid detergent apparatus supplied with the appliance. You can use liquid detergent for all programs without pre-wash. -
Page 18: Choice Of Detergent And Placing Into The Machine
How to Use Choice of detergent and placing into the machine The amount of detergent you will put in your machine will depend on the following criteria: The amount of detergent needed is based on how dirty the laundry is. •... - Page 19 How to Use Loading clothes for washing • Drop items into the appliance loosely. Items should move easily through wash water for the best cleaning and wrinkle-free results. • Load appliance properly. • You should not load your appliance with an amount of laundry that will exceed the maximum laundry amount specified for this appliance.
-
Page 20: Placing Laundry Into The Machine
How to Use Placing laundry into the machine Open the loading door of your appliance. Check inside the drum of your machine. There might be laundry left inside from previous washes. If there is, empty your machine before selecting your program. Place your laundry into the machine by spreading them well. -
Page 21: Program Table
How to Use Programme Max dry load capacity (kg) Type of laundry Programme times (min) COTTON90°C Dirty, cotton and linen textile. COTTON 60°C (Prewash) Very dirty, cotton, coloured and linen textile. COTTON 60°C Dirty, cotton, coloured and linen textile. COTTON 40°C Dirty, cotton, coloured and linen textile. -
Page 22: First Wash
First Wash Before using the appliance for laundry, ensure you run the machine on a program of 90°C (Cotton program), with detergent and without laundry. Before Use • Ensure the inlet hose is connected correctly and turn the inlet valve from its closed position to the open position. -
Page 23: Trouble Shooting
Trouble Shooting All repairs to your machine should be carried out by a qualified engineer or contact • Product Care on 0345 208 8750. Before contacting a qualified engineer or Product Care, please see if the problem your machine • has developed can be solved with the help of the below: Fault Possible cause... - Page 24 Trouble Shooting Fault Possible cause Removing methods Your appliance does Water tap has been turned off. Turn the faucet on. • • not fill with water. Water inlet hose may be twisted. Check water inlet hose and • • untwist. Water inlet hose clogged.
-
Page 25: Error Codes
Trouble Shooting Fault Possible cause Removing methods As soon as the The end of the water drain hose is too Set the water drain hose to an • • appliance fills with low for the machine. appropriate height. See page water, water discharges. - Page 26 Error Codes Display Description Solution Checks to be carried out Err 04 The program end Communication error Switch the appliance off and unplug from the light blinks. wall socket. Leave the appliance for 2 minutes so that it can discharge. Insert the plug back in the wall socket, turn on the appliance, select the desired programme and press start.
-
Page 27: Maintenance
Maintenance The correct care of your appliance can extend its life. This section explains how to care for your washer properly and safely. When cleaning your machine, ensure that the machine is unplugged and the water supply is closed off. Cleaning your Machine Exterior Wipe up detergent, bleach and other spills with a soft, damp cloth or... - Page 28 Maintenance Non-use or vacation care Operate your washer only when you are at home. If you are on vacation or don’t use your washer for an extended period of time, you should: • Unplug the power supply cord or turn off electrical power to the washer. •...
- Page 29 Maintenance • Please Note: Unplug the appliance before cleaning the filter for your own safety . Cleaning the drain filter • This drain filter is used to screen foreign objects such as threads, coins, pins, buttons etc. • If the drain filter is not cleaned regularly (after every 10 times of use), a drain problem could be caused.
- Page 30 Maintenance Cleaning the detergent case • After a while detergent and fabric softeners leave a deposit in the case; • It should be cleaned from time to time with a jet of running water. If necessary it can be removed completely from the machine by pressing the catch downwards and by pulling it out.
- Page 31 Maintenance Flush stopper • Remove the detergent drawer. • Disassemble the flush stopper and clean the softener residues completely. • Refit the flush stopper after cleaning. • Check that the flush stopper is correctly positioned after replacing. Flush stopper For Customer Services & Spare Parts please call 0345 208 8750 Opening times: Monday - Friday 8am –...
-
Page 32: Stain Removal Information
Stain Removal Information Fruit: Stretch the stained area and pour on cold water. Apply glycerine and wipe over the stain. Wait 1 – 2 hours and rinse after wiping the stained area with a few drops of white vinegar. Grass stain: Rub over the stained area with detergent before washing. - Page 33 Stain Removal Information Alcoholic drinks: Wash the stained area under cold water, wipe with glycerine, then rinse with a solution of water and white vinegar. Shoe polish: Scratch out the stain taking care not to damage the material, rub over the stained area with a solution of detergent and water and rinse.
- Page 34 Stain Removal Information Blood stain: Leave to soak in cold water for about 30 minutes and hand wash with detergent. Cream, ice cream and milk: Leave to soak in cold water for about 30 minutes and hand wash with detergent. Mould: Clean the stained area as soon as possible and hand wash with detergent.
-
Page 35: Specification
Specification Maximum washing capacity (dry laundry) (kg) Spin speed (rev / min) 1000 Number of programs Operating voltage / frequency (V/Hz) 220-240 / 50 Water pressure (Mpa) Maximum:1 Minimum:0.1 Dimensions (HxWxL) (mm) 845x597x527 For Customer Services & Spare Parts please call 0345 208 8750 Opening times: Monday - Friday 8am –... -
Page 36: Connection To The Mains Supply
Connection to the Mains Supply For UK use only – Plug fitting details (where applicable): As the colours of the wires in the mains lead of this appliance may not correspond with the coloured markings identifying the terminals in your plug, proceed as follows: The GREEN/YELLOW wire is the EARTH and must be connected to the terminal which is marked with the letter E or by the earth symbol or coloured... -
Page 37: Warranty
Warranty This product is guaranteed for 12 months from the date of the original purchase. If any defect arises due to faulty materials or workmanship the faulty product must be returned to the place of purchase. Refund or replacement is at the discretion of the retailer. The following conditions apply: •... -
Page 38: Notes
Notes: For Customer Services & Spare Parts please call 0345 208 8750 Opening times: Monday - Friday 8am – 6pm & Saturday 9am – 1pm www.productcareuk.com or visit us at... - Page 39 Notes: For Customer Services & Spare Parts please call 0345 208 8750 Opening times: Monday - Friday 8am – 6pm & Saturday 9am – 1pm www.productcareuk.com or visit us at...
- Page 40 For Customer Services & Spare Parts please call 0345 208 8750 Opening times: Monday – Friday 8am – 6pm & Saturday 9am – 1pm or visit us at www.productcareuk.com Revision 4 This symbol is known as the 'Crossed-out wheelie bin Symbol'. When this symbol is marked on a product/batteries, it means that the product/batteries should not be disposed of with your general household waste.
Need help?
Do you have a question about the RH1042 and is the answer not in the manual?
Questions and answers