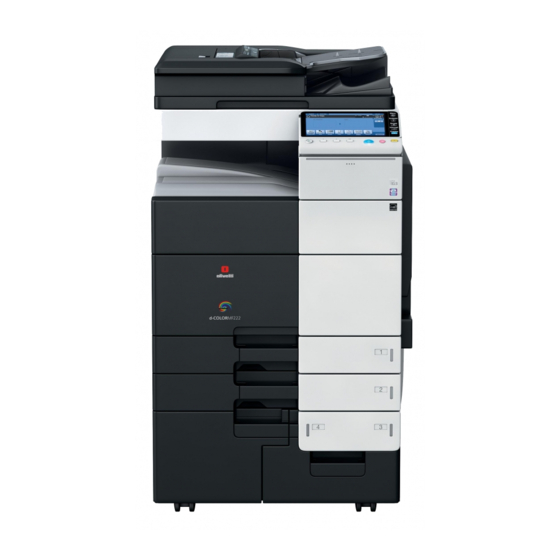
Olivetti d-COLOR MF 282 Maintenance Manual
Hide thumbs
Also See for d-COLOR MF 282:
- Operation manual (501 pages) ,
- Quick assist manual (315 pages) ,
- Operations (289 pages)
Table of Contents
Advertisement
Advertisement
Table of Contents

Subscribe to Our Youtube Channel
Related Manuals for Olivetti d-COLOR MF 282


Summary of Contents for Olivetti d-COLOR MF 282
- Page 1 d-COLOR MF d-COLOR MF2 2/d-COLOR MF d-COLOR MF452/d-COLOR MF552 Code: 57...
- Page 2 Olivetti S.p.A. Gruppo Telecom Italia Via Jervis, 77 - 10015 Ivrea (ITALY) www.olivetti.com Copyright © 2012, Olivetti All rights reserved The mark affixed to the product certifies that the product satisfies the basic quality requirements. The manufacturer reserves the right to carry out modifications to the product described in this manual at any time and without any notice.
-
Page 3: Table Of Contents
Table of contents Adding Paper Paper addition message......................... 1-3 Adding paper ........................... 1-4 Confirm the available paper types ..................... 1-4 Adding paper into Tray1 or Tray4 ...................... 1-4 Adding paper into the LCT (Built-in) ....................1-4 Adding paper into the Bypass Tray ....................1-4 Adding paper into the Large Capacity Unit (d-Color MF552/452) ............. - Page 4 Cleaning the outer covers and Original Pad ..................5-6 Contents-2 d-Color MF552/452/362/282/222...
-
Page 5: Adding Paper
Adding Paper... -
Page 7: Paper Addition Message
Paper addition message Adding Paper Paper addition message If a paper-out occurs during printing, a message appears to prompt you to add paper. Check the paper size and type, and add paper into the colored tray as shown below. d-Color MF552/452/362/282/222... -
Page 8: Confirm The Available Paper Types
Adding paper Adding paper Confirm the available paper types For details on the types of paper that can be loaded into the paper tray, refer to [User's Guide: Introduction]. NOTICE Do not load paper that is not supported in this machine. Not observing these precautions may lead to re- duced print quality, a paper jam, or a damage to the machine. -
Page 9: Checking Consumables Status
Checking consumables status... -
Page 11: Consumables Replacement Message
Checking consumables status Consumables replacement message Users will be informed of time to replace a Toner Cartridge, Drum Unit, or Development Unit via a message displayed on the screen. When it is almost time to replace a Toner Cartridge, an advanced warning message appears. Prepare a replacement Toner Cartridge based on the maintenance contract. - Page 12 When toner is depleted or when it is time to replace a Drum Unit , the message shown below appears. When this message appears, replace a Toner Cartridge or Drum Unit based on the maintenance con- tract. For details on the replacement procedure, refer to page 3-3. If the replacement time of a Development Unit has been reached, the message shown below appears.
-
Page 13: Checking The Consumption Level
Checking the consumption level Check the status of consumables (consumption level) using the Touch Panel. When necessary, each level can be printed in list form. Tap [Utility] - [Check Consumable Life]. Check the status of consumables. % To print a consumption level list, tap [Print List], select paper, and then tap [Start]. Reference If a warning such as for toner replacement or a paper jam occurs on this machine, it can be sent to a regis- tered E-mail address. - Page 14 d-Color MF552/452/362/282/222...
-
Page 15: Replacing Consumables
Replacing Consumables... -
Page 17: Replacing A Toner Cartridge
Replacing a Toner Cartridge Replacing Consumables Replacing a Toner Cartridge 3.1.1 d-Color MF552/452 The following example shows how to replace a Yellow Toner Cartridge. Tips Shake a new Toner Cartridge well, approximately 5 to 10 times, before installing it. If a Toner Cartridge other than for black is empty, printing can be continued forcibly using black. Tap [Continue], and then select a desired print job. -
Page 18: D-Color Mf362/282/222
Replacing a Toner Cartridge 7 CAUTION Handling toner and Toner Cartridge Do not throw a toner or Toner Cartridge into a fire. Doing so may cause hot toner to spray in all direc- tions, which may cause burn injuries. Be careful not to get the inside of the machine, your clothes, or hands dirty with toner. If any toner gets on your hands, wash it off using water or neutral detergent. -
Page 19: Replacing A Waste Toner Box
Replacing a Waste Toner Box Replacing a Waste Toner Box 3.2.1 d-Color MF552/452 New waste toner Tips Your service representative will recover your used Waste Toner Box. Place a cap on it and store it in a box. After replacing a Waste Toner Box, be sure to clean the Electrostatic Charger Wire for each color. For details on how to clean the Electrostatic Charger Wire, refer to [User's Guide: Troubleshooting]. -
Page 20: D-Color Mf362/282/222
Replacing a Waste Toner Box 7 CAUTION Handling toner and Waste Toner Box Do not throw a toner or Waste Toner Box into a fire. Doing so may cause hot toner to spray in all di- rections, which may cause burn injuries. Be careful not to get the inside of the machine, your clothes, or hands dirty with toner. - Page 21 Replacing a Waste Toner Box 7 CAUTION Handling toner and Waste Toner Box Do not throw a toner or Waste Toner Box into a fire. Doing so may cause hot toner to spray in all di- rections, which may cause burn injuries. Be careful not to get the inside of the machine, your clothes, or hands dirty with toner.
-
Page 22: Replacing A Drum Unit
Replacing a Drum Unit Replacing a Drum Unit 3.3.1 d-Color MF552/452 Unpacking the drum unit Tips Your service representative can recover your used Drum Unit. Put it in a black plastic bag and store it in a box by itself. A Drum Unit may be damaged due to exposure to light. -
Page 23: D-Color Mf362/282/222
Replacing a Drum Unit 7 CAUTION Handling toner and Drum Unit Do not throw a Drum Unit into a fire. Doing so may cause hot toner to spray in all directions, which may cause burn injuries. Be careful not to get the inside of the machine, your clothes, or hands dirty with toner. If any toner gets on your hands, wash it off using water or neutral detergent. - Page 24 Replacing a Drum Unit If an Drum Unit other than for black has reached the replacement time, printing can be continued for- cibly using black. Tap [Continue], and then select a desired print job. After replacing an Drum Unit, be sure to clean the Print Head Glass for each color. For details on how to clean the Print Head Glass, refer to [User's Guide: Troubleshooting].
-
Page 25: Replacing A Staple Cartridge
Replacing a Staple Cartridge Replacing a Staple Cartridge 3.4.1 Finisher FS-535 (Only for d-Color MF552) Tips This figure shows a Finisher FS-535 with Saddle Stitcher SD-512 and Punch Kit PK-521 installed. Do not remove staples that remain in the machine. Otherwise, the stapling function will activate but no sheets will be stapled. -
Page 26: Saddle Stitcher Sd-512 (Only For D-Color Mf552)
Replacing a Staple Cartridge 3.4.2 Saddle Stitcher SD-512 (Only for d-Color MF552) Saddle Stitcher Tips This figure shows a Finisher FS-535 with Saddle Stitcher SD-512 and Punch Kit PK-521 installed. Do not remove staples that remain in the machine. Otherwise, the stapling function will activate but no sheets will be stapled. -
Page 27: Finisher Fs-534
Replacing a Staple Cartridge 3.4.3 Finisher FS-534 Tips The figure shows a Finisher FS-534 with Saddle Stitcher SD-511 and Punch Kit PK-520 installed. Do not remove staples that remain in the machine. Otherwise, the stapling function will activate but no sheets will be stapled. -
Page 28: Saddle Stitcher Sd-511
Replacing a Staple Cartridge 3.4.4 Saddle Stitcher SD-511 Saddle Stitcher Tips The figure shows a Finisher FS-534 with Saddle Stitcher SD-511 and Punch Kit PK-520 installed. Do not remove staples that remain in the machine. Otherwise, the stapling function will activate but no sheets will be stapled. -
Page 29: Finisher Fs-533
Replacing a Staple Cartridge 3.4.5 Finisher FS-533 Tips The figure shows a Finisher FS-533 with Punch Kit PK-519 installed. Do not remove staples that remain in the machine. Otherwise, the stapling function will activate but no sheets will be stapled. NOTICE Be sure to replace the Staple Cartridge after the relevant message has appeared. -
Page 30: Punch Scrap Processing
Punch Scrap Processing Punch Scrap Processing 3.5.1 Finisher FS-535 (Only for id-Color MF552) Tips This figure shows a Finisher FS-535 with Saddle Stitcher SD-512 and Punch Kit PK-521 installed. 3-16 d-Color MF552/452/362/282/222... -
Page 31: Z Folding Unit Zu-606 (Only For D-Color Mf552)
Punch Scrap Processing 3.5.2 Z Folding Unit ZU-606 (Only for d-Color MF552) Tips The figure shows a Finisher FS-535 with Saddle Stitcher SD-512, Punch Kit PK-521, and Z Folding Unit ZU-606 installed. d-Color MF552/452/362/282/222 3-17... -
Page 32: Finisher Fs-534
Punch Scrap Processing 3.5.3 Finisher FS-534 Tips The figure shows a Finisher FS-534 with Saddle Stitcher SD-511 and Punch Kit PK-520 installed. 3-18 d-Color MF552/452/362/282/222... -
Page 33: Finisher Fs-533
Punch Scrap Processing 3.5.4 Finisher FS-533 Tips The figure shows a Finisher FS-533 with Punch Kit PK-519 installed. d-Color MF552/452/362/282/222 3-19... - Page 34 Punch Scrap Processing 3-20 d-Color MF552/452/362/282/222...
-
Page 35: Checking Counters
Checking Counters... - Page 37 Checking counters Checking Counters Checking counters The counter indicates the total number of pages printed on this machine on a function or color basis. Check counter information on the Control Panel of this machine. When necessary, counter information can be print- ed in list form.
- Page 38 Checking counters % Tapping [Coverage Rate] allows you to check the toner usage rate. (This information does not com- pletely match the actual toner consumption, and it consistently indicates a typical value.) % Tapping [Eco Info] allows you to check the ratio of color print jobs to all print jobs, and the ratio of paper saving as a result two-sided printing or the page combine function, and a transition of power consumption.
-
Page 39: Details Of Counter
Details of counter Details of counter Meter Count Check the total number of pages printed on this machine. Item Description [Total] Allows you to check the total number of printed pages. [Black] Allows you to check the total number of pages printed in Black mode. [Color] Allows you to check the total number of pages printed in Single Color, 2 Color, or Full Color modes. -
Page 40: Copy Counter
Details of counter Copy counter Allows you to check the total number of pages copied. (This value includes the number of pages on which data saved in a User Box in copy mode is printed, and the number of pages list-output in [Administrator Set- tings].) [Total] [Large Size]... -
Page 41: Print Counter
Details of counter Print counter Check the total number of pages printed through a computer. [Total] [Large Size] [Total (Copy + Print)] [Black] Indicates the total number Indicates the total number Indicates the total number of pages printed in Black of pages printed on large- of pages copied in Black mode. -
Page 42: Scan/Fax Counter
Details of counter Scan/Fax counter Check the total number of original pages scanned in the Scan/Fax or User Box mode as well as the total number of pages on which a file in a User Box or a received file is printed. Also check the total number of pages sent and received in the fax mode. -
Page 43: Other Counters
Details of counter Other counters Check the total number of scanned and printed original pages, total number of printed sheets, total number of pages printed on both sides, and the total number of printed pages regardless of functions or colors. Item Description [Original Counter]... -
Page 44: Checking The Total Number Of Printed Pages In This Machine
Checking the total number of printed pages in this machine Checking the total number of printed pages in this machine Use the total counter in this machine to check the total number of pages printed to date. 4-10 d-Color MF552/452/362/282/222... -
Page 45: Cleaning This Machine
Cleaning this Machine... -
Page 47: Cleaning The Slit Scan Glass
Cleaning this Machine Cleaning the Slit Scan Glass In d-Color MF362/282/222, perform this procedure when the Reverse Automatic Document Feeder DF-624 or Dual Scan Document Feeder DF-701. Open the ADF. Wipe stains off the Slit Scan Glass using a dry and clean cloth. NOTICE Do not touch the Slit Scan Glass. -
Page 48: Cleaning The Slit Scan Glass (Back)
Cleaning the Slit Scan Glass (Back) In d-Color MF362/282/222, perform this procedure when the Dual Scan Document Feeder DF-701 is installed. Open the ADF. Open the Opening and Closing Guide. % Release the lock lever of the Opening and Closing Guide, and open the Opening and Closing Guide. -
Page 49: Cleaning The Original Glass, Control Panel, Roller, And Output Belt
Cleaning the Original Glass, Control Panel, Roller, and Output Belt Wipe the surface using a soft, dry cloth. NOTICE Do not press the Control Panel hard, otherwise the keys and Touch Panel may be damaged. Tips Clean the Output Belt when the Finisher FS-535 is installed in d-Color MF552. d-Color MF552/452/362/282/222... - Page 50 Cleaning the outer covers and Original Pad Wipe the surface using a soft cloth moistened with a mild household detergent. NOTICE Never use solvents, such as benzene or thinner, to clean the Original Pad. d-Color MF552/452/362/282/222...
- Page 51 DIRECTIVE 2002/96/EC ON THE TREATMENT, COLLECTION, RECYCLING AND DISPOSAL OF ELECTRIC AND ELECTRONIC DEVICES AND THEIR COMPONENTS INFORMATION 1. FOR COUNTRIES IN THE EUROPEAN UNION (EU) The disposal of electric and electronic devices as solid urban waste is strictly prohibited: it must be collected separately. The dumping of these devices at unequipped and unauthorized places may have hazardous effects on health and the environment.
Need help?
Do you have a question about the d-COLOR MF 282 and is the answer not in the manual?
Questions and answers
I wanted to know which konica minolta bizhub machine can use the same parts as in ollivet mf282 plus in terms of compatibility l. In our country bizhub machines are common than ollivet, so I find it hard in terms of parts
The Konica Minolta Bizhub machines compatible with parts from the Olivetti D-COLOR MF 282 are:
- Konica Minolta Bizhub C284
- Konica Minolta Bizhub C284E
This answer is automatically generated