Table of Contents
Advertisement
Quick Links
Advertisement
Table of Contents

Related Manuals for Gorenje GOM711X


Summary of Contents for Gorenje GOM711X
- Page 1 DETAILED INSTRUCTIONS FOR USE OF MICROWAVE OVEN...
- Page 2 Instructions for installation and connection are supplied on a separate sheet. Instructions for use are also available at our website: www.gorenje.com / < http://www. gorenje.com /> Important information Tip, note...
-
Page 3: Table Of Contents
CONTENTS INTRODUCTION MICROWAVE OVEN Technical specifications Control unit (depending on the model) 10 IMPORTANT SAFETY INSTRUCTIONS 13 Before connecting the oven: PREPARING THE 14 BEFORE USING THE APPLIANCE FOR THE FIRST TIME APPLIANCE FOR THE FIRST USE 15 SWITCHING ON THE APPLIANCE FOR THE FIRST TIME COOKING STEPS 16 STEPS OF THE COOKING PROCESS (1–7) 16 Step 1: CHOOSING THE BASIC COOKING MENUS AND SETTINGS... -
Page 4: Microwave Oven
MICROWAVE OVEN (DESCRIPTION OF THE OVEN AND EQUIPMENT – DEPENDING ON THE MODEL) The figure represents one of the built-in appliance models. Since the appliances for which these instructions were drawn up may have different equipment, some functions or equipment may be described in the manual that may not be present in your appliances. Control unit Guides - Cooking levels... -
Page 5: Cooling Fan
WIRE GUIDES The wire guides allow preparation of the food on four levels (please note that the levels/ guides are counted from the bottom up). OVEN DOOR SWITCH The switches deactivate the microwave heating when the oven door is opened during the cooking process. - Page 6 OVEN EQUIPMENT AND ACCESSORIES Use the GLASS BAKING DISH for cooking with microwaves. It can also be used as a serving tray. In case of wire guides, the tray should always be inserted into the groove between the two wire profiles. Never use the grid, the shallow baking sheet or the deep baking tray or any other metal part or accessory when operating a system with microwaves!
-
Page 7: Technical Specifications
TECHNICAL SPECIFICATIONS (DEPENDING ON THE MODEL) A Serial number B Code/ID C Type D Brand E Model F Technical data G Compliance symbols The rating plate indicating the basic information about the appliance is located at the edge of the oven and it is visible when the oven door is opened. -
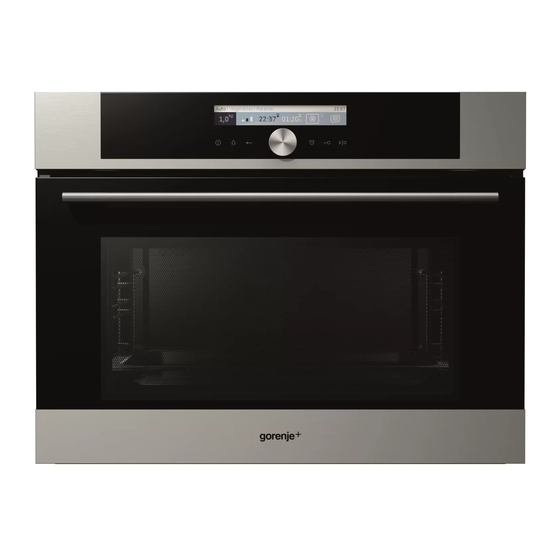
Page 8: Control Unit (Depending On The Model)
CONTROL UNIT MICROWAVES (Depending on the model) QUICKIES AUTOMATIC ON/OFF KEY OVEN BACK KEY Selection and LIGHTING ON/ CONFIRMATION OFF KEY KNOB Touch briefly to return to previous Select the setting by menu. rotating the knob. Touch and hold to Confirm your return to main menu. - Page 9 MY RECIPES EXTRA GENERAL FUNCTIONS SETTINGS MINUTE CHILD LOCK START/STOP DISPLAY – displays MINDER/ all settings ALARM Locking the control unit Long touch: START Long touch during operation: STOP NOTE: The keys will respond better if you touch them with a larger area of your fingertip. Each time you press a key, this will be acknowledged by a short acoustic signal.
-
Page 10: Important Safety Instructions
IMPORTANT SAFETY INSTRUCTIONS CAREFULLY READ THE INSTRUCTIONS AND SAVE THEM FOR FUTURE REFERENCE. This appliance may only be used by children aged 8 years and above and persons with reduced physical, sensory or mental capabilities or lack of experience and knowledge if supervision or instructions are provided to them concerning use of the appliance in a safe way and if they understand the hazards involved. - Page 11 Do not use abrasive cleaners or sharp metal scrapers to clean the oven as they may damage the finish or the protective enamel coating. Such damages may lead to cracking of the glass. Do not use steam cleaners or high pressure cleaners to clean the appliance as this may result in an electric shock.
- Page 12 Safe use of the microwave oven WARNING: If your oven allows combined operation (microwaves combined with other cooking modes), do not allow the children to use the oven without supervision of an adult person since the oven will reach very high temperatures in such operation modes. WARNING: If the door or door sealing is damaged, do not use the oven until it is repaired by an adequately trained service technician.
-
Page 13: Before Connecting The Oven
Make sure to only use the cookware that Be careful when heating alcohol-containing is suitable for use in a microwave oven. food, as a combustible mixture of alcohol Do not use cookware made of steel or and air may form inside the oven. Open the cookware with golden or sliver rims. -
Page 14: Before Using The Appliance For The First Time
BEFORE USING THE APPLIANCE FOR THE FIRST TIME Upon receiving the appliance, remove all parts, including any transport equipment, from the oven. Clean all accessories and utensils with warm water and regular detergent. Do not use any abrasive cleaners. Before using the oven for the first time, heat it with the upper and lower heater system at 200 °C for approximately one hour. -
Page 15: Switching On The Appliance For The First Time
SWITCHING ON THE APPLIANCE FOR THE FIRST TIME SETTING THE CLOCK After connecting your appliance or after an extended power outage, 12:00 will flash on the display. Set the time of day. Confirm each setting by pressing the KNOB. Press the KNOB to set the time. -
Page 16: Steps Of The Cooking Process
STEPS OF THE COOKING PROCESS (1–7) STEP 1: CHOOSING THE BASIC COOKING MENUS AND SETTINGS The process of preparing food in your oven can be controlled in several ways: Rotate the KNOB and select the symbol. The symbol will turn white. The NAME of the selected menu will appear at the top. - Page 17 A) COOKING BY SELECTING THE TYPE OF FOOD (Auto mode and Quickies mode) Confirm each setting by pressing the KNOB. Rotate the KNOB and select the Auto mode. Confirm the setting by pressing on the KNOB. Select the type of food and the dish.
- Page 18 B) COOKING WITH MICROWAVES Confirm each setting by pressing the KNOB. Rotate the KNOB and select Microwaves. Confirm the setting by pressing on the KNOB. Select the settings by rotating the KNOB and pressing it to confirm. Microwave system 2 Cooking power 3 Cooking duration 4 Delayed start 5 Step mode (see section STEP COOKING)
-
Page 19: Step 2: Timer Functions - Duration
STEP 2: TIMER FUNCTIONS – DURATION The "Duration" setting can be selected in the basic Microwave mode. Setting the cooking time In this mode, you can define the duration of oven operation (cooking time). Set the desired cooking time and confirm the setting. (Maximum operating time is 10 hours.) Cooking end time is adjusted accordingly. -
Page 20: Step 3: Step Cooking
STEP 3: STEP COOKING This mode allows you to combine three different cooking modes successively in a single cooking process. Choose different settings to cook your food just the way you want it. The "Step Cook" setting can be selected in the basic Microwave mode. - Page 21 Touch the START symbol to turn on the oven. The oven starts operating immediately, with the settings defined in Step 1. (A strip at the bottom of the display indicates the cooking step currently in progress.) After the set cooking time elapses, Step 2 and then Step 3 are activated, if specified.
-
Page 22: Step 4: Start The Cooking Process
STEP 4: START THE COOKING PROCESS The START/STOP key will flash before the start of the cooking process. Start the cooking process by briefly touching the START key. Rotate the KNOB to change the current settings during cooking. STEP 5: END THE COOKING PROCESS AND SWITCHING OFF THE OVEN Start the cooking process by pressing the START/STOP key and holding it for a while. - Page 23 SAVING USER-DEFINED PROGRAMS (MY RECIPES) Choose the symbol and enter the name by rotating the KNOB and confirming respective letters. If necessary, delete a character using the arrow; use the check mark or touch the START/STOP key to confirm the name. Select the type of food.
-
Page 24: Step 6: Selecting Additional Functions
STEP 6: SELECTING ADDITIONAL FUNCTIONS Choose Extra in the main menu to display the extra/additional function menu. Some functions are not available with some systems; an acoustic signal will indicate such cases. Aqua clean Use it to remove stains. Pour 0.6 l water into the deep baking tray and place it in the lower guide. -
Page 25: Child Lock
CHILD LOCK Activate it by touching the LOCK key (key symbol). The following message will appear on the display: "Child lock activated." Touch the key again to deactivate the child lock. If the child lock is activated with no timer function engaged (only clock is displayed), then the oven will not operate. -
Page 26: Step 7: Choosing The General Settings
STEP 7: CHOOSING THE GENERAL SETTINGS Choose Settings in the main menu to display the menu for various settings. Rotate the KNOB to navigate the menu. Confirm each setting by pressing the KNOB. Language Select the language for the text on the display. Time Set the time of day after the appliance is connected to the power mains for the first time or after being disconnected from the power... - Page 27 Setting during the cooking process In this menu, you can set the following: Oven lighting during operation - oven lighting is switched off when oven door is opened during operation. Other settings Factory settings After a power outage or after switching off the appliance, all extra user settings are restored.
-
Page 28: Descriptions Of Systems (Cooking Modes) And Cooking Tables
DESCRIPTIONS OF SYSTEMS (COOKING MODES) AND COOKING TABLES If your desired food cannot be found in the cooking table, find information for similar food. The information displayed applies to cooking in a single level. Cooking times are rough estimates and may vary subject to some conditions. When cooking larger chunks of meat, vegetables, or pastry, a lot of steam will be generated inside the oven, which in turn may condense on the oven door. - Page 29 MICROWAVE SYSTEMS MICROWAVES Microwaves are used for cooking and defrosting. Power levels: 90, 180, 360, 600, 750, 100 W. Place the glass baking dish into the 1st guide. Defrosting Type of food Weight Power Defrosting time (min) Ground meat ** 20-35 Cubed meat ** 20-35...
-
Page 30: Tables
Reheating Type of food Amount Power Reheating/ cooking (min) FOOD Escalopes/steaks 300 g Fish 200 g Mixed vegetables * 500 g Side dishes * 500 g Sauces * 500 g Soups/stews * 5 dl Pizza 500 g Chicken medallions 500 g Open sandwiches Popcorn 90 g... -
Page 31: Tables
Cooking Type of food Amount Power Cooking time (minutes) FOOD Chicken thighs ** 1000 g 20-30 Chicken wings ** 1000 g 20-30 Chicken braised in sauce * 500 g 1000 10-20 Chicken–whole ** 1500 g 45-60 Pork roast ** 1000 g 45-60 Pork chops ** 500 g... -
Page 32: Tables
Type of food Amount Power Cooking time (minutes) SIDE DISHES Rice **** 200 g 1000 10-15 Pasta **** 200 g 1000 10-15 Whole grain pasta **** 200 g 1000 10-15 Oatmeal **** 500 g 1000 5-10 Brown rice **** 200 g 25-30 Risotto **** 500 g... -
Page 33: Maintenance & Cleaning
MAINTENANCE & CLEANING Be sure to unplug the appliance from the power supply and wait for the appliance to cool down. Children should not clean the appliance or perform maintenance tasks without proper supervision. Aluminium finish Clean the aluminium finish with non-abrasive liquid cleaners intended for such surfaces. Apply the cleaner onto a wet cloth and clean the surface. -
Page 34: Conventional Oven Cleaning
CONVENTIONAL OVEN CLEANING You may use the standard cleaning procedure to clean stubborn dirt in the oven (using cleaners or an oven spray). After such cleaning, rinse the cleaner residues thoroughly. Clean the oven and the accessories after each use to prevent the dirt from burning into the surface. -
Page 35: Removing And Cleaning The Wire Guides
REMOVING AND CLEANING THE WIRE GUIDES Only use conventional cleaners to clean the guides. Undo the screw. Use a screwdriver. Remove the guides from the holes in the back wall. Take care not to lose the spacers fitted on the wire guides. Replace the spacers after cleaning;... -
Page 36: Replacing The Bulb
REPLACING THE BULB The bulb is a consumable and therefore not covered by warranty. Before changing the bulb, remove the trays, the grid, and the guides. Use a Phillips (cross) screwdriver. (Halogen lamp: G9, 230 V, 25 W) Undo the four screws on the cover. Remove the cover and the glass. -
Page 37: Troubleshooting Table
TROUBLESHOOTING TABLE Problem/error Solution There is no response of Disconnect the appliance from the power mains for a few the sensors; the display is minutes (undo the fuse or switch off the main switch); frozen. then, reconnect the appliance and switch it on. The main fuse in your home Call a service technician. -
Page 38: Disposal
DISPOSAL Packaging is made of environmentally friendly materials that can be recycled, disposed of, or destroyed without any hazard to the environment. To this end, packaging materials are labelled appropriately. The symbol on the product or its packaging indicates that the product should not be treated as normal household waste. -
Page 39: Cooking Test
COOKING TEST Food tested in compliance with the EN 60350-1 standard. Microwaves Dish Note Guide Power System Tempera- Time (from the ture (°C) (minutes) bottom) Custard 15-20 creams Sponge cake 1000 5-10 Meat loaf 20-30 90 W* Defrosting (auto 20:30 ground meat program) * Preheat for 10 minutes. - Page 40 SOLO MW_DM_45 en (11-15)
Need help?
Do you have a question about the GOM711X and is the answer not in the manual?
Questions and answers