HEATSTRIP Max THX2400 Operation, Installation, And Maintenance Manual
Outdoor
Hide thumbs
Also See for Max THX2400:
- Quick reference manual (2 pages) ,
- Quick reference manual (2 pages)

Related Manuals for HEATSTRIP Max THX2400


Summary of Contents for HEATSTRIP Max THX2400
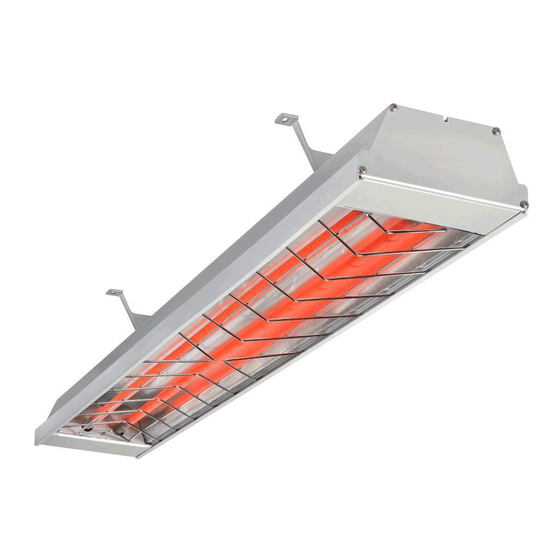
- Page 1 OPERATION, INSTALLATION AND MAINTENANCE MANUAL ® H E AT S T R I P M a x T h e h e a t e r t h a t i s a d e s i g n f e a t u r e !
-
Page 2: Product Overview
® spot heating in factories, warehouses and showrooms. Within your home, HEATSTRIP can provide comfort heating for undercover alfresco dining and BBQ area, patios, verandas, courtyards and balconies. - Page 3 High Output radiant heat The Heatstrip Max range of electric radiant heaters produces a high temperature radiant warmth that travels through the air directly to people and surfaces below – similar to the heat rays emited by the Sun. Radiant heating is the only viable option for outdoor or tough indoor sites.
- Page 4 MAXIMUM 3.5 m (For higher ceiling heights, units can be lowered using optional bracket kits or refer to the Heatstrip Max range) MOUNTING OPTIONS Suitable for ceiling, wall, beam mounting. Also available for extension mount using rigid fixing poles and chain mount bracket.
-
Page 5: Spot Heating Principle
® The top table shows how HEATSTRIP Max can be used over a table. ® The bottom table shows the flexibility of using HEATSTRIP to provide a comfortable environment, even when the layout of the area is very unusual. THX2400... -
Page 6: Radiant Footprint
Therefore, it is imperative that objects to be heated (ie. People), are within the direct radiant footprint of the heater. ® The diagram below shows the radiant footprint of HEATSTRIP Max, and is an approximate guide based on a fully enclosed, outdoor environment. -
Page 7: Selection Guide
Selection guide Prior to selecting the exact model and quantity required for your application, please ensure the correct range of Heatstrip heaters is being used. Below is an overview of the Heatstrip options. ® HEATSTRIP Classic (THH models) is a premium high temperature heater and is primarily used for outdoor rooms where there is 1,2 3 or 4 enclosed sides, with an ideal mounting height of 2.1 m to 2.7m. -
Page 8: Installation Requirements
For mounting heights more than 3.5m, we recommend the use of the optional accessories to reduce the height of the ®. heater to 2.4m-3.5 m. This will increase the effectiveness of your HEATSTRIP Refer to the Mounting Accessory section for more information. -
Page 9: Installation Location
Installation location —the below diagrams confirm the minimum recommended clearances. LIGHT OR SPRINKLER MUST 300mm MIN. NOT BE BELOW THE HEATER CEILING 150mm MIN. SURFACE BELOW HEATER FLOOR Angled Wall Installation LIGHT OR SPRINKLER MUST 300mm MIN. NOT BE BELOW THE HEATER CEILING 150mm MIN. -
Page 10: Mounting Options
Mounting options ® The installation of HEATSTRIP Max is simple and easy with the standard mounting brackets supplied. For other more challenging locations there are a range of mounting options available - refer to below diagrams. ® The HEATSTRIP Max can be mounted directly to the ceiling, angled downwards on a wall, suspended on chains or poles;... -
Page 11: Standard Mounting Brackets
Standard mounting brackets ® The HEATSTRIP Max comes with a pair of standard mounting brackets. These adjustable brackets allow direct ceiling or wall mount, and come with preset angle options of parallel, 22.5° and 45°. The flexible standard mounting bracket can be turned 90 degrees to mount onto a beam, it can also be used to suspend with chains. - Page 12 MOUNTING Fix the two mounting brackets to the ceiling or wall in the desired location (refer minimum bracket centre chart). Make sure the method of fixing (bolts or screws) will be more than strong enough to support weight of heater allowing for strong winds and other conditions.
- Page 13 FLUSH MOUNT ENCLOSURE ® The Flush Mount Enclosure is an ideal way to neatly install the HEATSTRIP MAX into a ceiling. They are avail- ® able for all HEATSTRIP MAX models, and are supplied as a one piece unit for mounting of heaters. Flush mounting can be used with plaster or wood lined ceiling materials.
-
Page 14: Twin Mounting Bracket
Twin mounting bracket The optional Twin Mount bracket allows for two (2) units of HEATSTRIP Max to be mounted side-by-side, either in parallel or angled as per the diagram on the right. This is ideal for applications when a wider heat coverage is required, or when there is mounting restrictions/limitations (such as running between 2 rows of tables etc.) - Page 15 End to end mounting bracket The end to end bracket allows multiple units to be joined in a straight line for maximum heat performance and aesthetic appeal. This is ideal for applications such as long rows of tables and assembly lines, where a constant heat coverage is required.
-
Page 16: Extension Mount Bracket
Extension Mount Bracket ® The Extension Mount bracket allows HEATSTRIP Max units to be lowered from high ceilings, using rigid con- nections. The brackets are for use with 25mm x 25mm x 1mm tube (SHS), supplied as a complete kit with brackets, pre-cut poles and connections. -
Page 17: Maintenance
Safety ® ® HEATSTRIP Max has an IP rating of X5. This means it is safe for water ingress from all directions. The HEATSTRIP can be safely hosed down. ® HEATSTRIP has undergone extensive testing both in laboratory conditions; in Thermofilm’s manufacturing facility in Melbourne and field trials in Australia and overseas. - Page 18 TT-MTM2 Wall Controller ® This controller is a custom designed and manufactured controller for HEATSTRIP heaters. It has been designed for ease of use and to provide low running costs of your heater. It provides both temperature control (allowing the user to turn the heat output up or down depending on the ambient temperature and conditions) and a timer for automatic heater shut-off operation.
- Page 19 Heater wiring schematic diagrams It is recommended to install an ON/OFF isolation switch before the controller and ensure the unit is turned OFF after use. As the minimum current rating for THX is 10Amps (THX2400), only 1 heater can be directly wired to the controller. When more heating units need to be connected from the same controller a relay will be required.
-
Page 20: Warranty Terms And Conditions
® Thermofilm warrants to the original owner that HEATSTRIP Max products will be free from defects in materials and workmanship for a period of 24 months from the date of purchase in accordance with the following warranty terms and conditions.
Need help?
Do you have a question about the Max THX2400 and is the answer not in the manual?
Questions and answers