Table of Contents
Advertisement
Available languages
Available languages
Lila
™
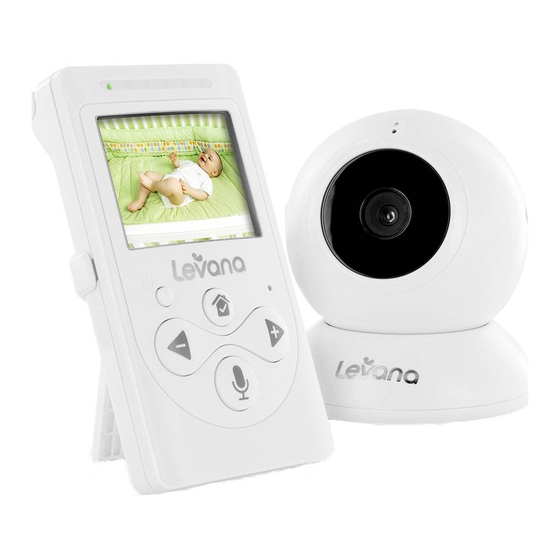
Digital Baby Video Monitor
Moniteur vidéo bébé numérique
Video Monitor Digital para Bebé
Manual / Manuel / Manual
CAUTION: Keep small parts away from children.
ATTENTION: Gardez les petites pièces hors de la portée des enfants.
PRECAUCIÓN: Mantenga las piezas pequeñas fuera del alcance de los niños.
mylevana.com
Advertisement
Chapters
Table of Contents

Related Manuals for Levana Lila


Summary of Contents for Levana Lila
- Page 1 Lila ™ Digital Baby Video Monitor Moniteur vidéo bébé numérique Video Monitor Digital para Bebé Manual / Manuel / Manual CAUTION: Keep small parts away from children. ATTENTION: Gardez les petites pièces hors de la portée des enfants. PRECAUCIÓN: Mantenga las piezas pequeñas fuera del alcance de los niños.
-
Page 2: Safety Instructions
SAFETY INSTRUCTIONS CAUTION: Keep small parts away from children. Strangulation Hazard: Children can become entangled in cords. Power cords should be kept more than 3 feet away from the crib and baby’s reach at all times. Baby monitors and cameras with power cords should never be hung on or near the crib. -
Page 3: Fcc Statement
FCC STATEMENT This device complies with part 15 of the FCC Rules. Operation is subject to the following two conditions: (1) This device may not cause harmful interference. (2) This device must accept any interference received, including interference that may cause undesired operation. FCC WARNING This equipment has been tested and found to comply with the limits for a Class B digital device, pursuant to Part 15 of the FCC Rules. -
Page 4: Warranty
® purchase against defects in workmanship and materials. This warranty is limited to the repair, replacement or refund of the purchase price at LEVANA’s option. This warranty becomes void if the product shows evidence of having been misused, mishandled or tampered with contrary to the applicable instruction manual. -
Page 5: Table Of Contents
TABLE OF CONTENTS SAFETY INSTRUCTIONS .......................2 FCC STATEMENT ..........................3 WARRANTY .............................4 WHAT’S INCLUDED ........................6 BUTTONS AND CONNECTIONS - MONITOR ................7 BUTTONS AND CONNECTIONS - CAMERA ................8 SETUP ...............................9 Battery installation ......................9 Get the Most Out of Your Rechargeable Battery .............9 Connecting Power to the Monitor / Charging Battery .........10 Connecting Power to the Camera ................10 Screen Icons ......................... -
Page 6: What's Included
LEVANA does not endorse any LEVANA products for illegal activities. Levana is not responsible ® ® or liable in any way for any damage, vandalism, theft or any other action that may occur while a LEVANA product is in use by the purchaser. -
Page 7: Buttons And Connections - Monitor
MONITOR LED SOUND BAR MICROPHONE LED lights show different levels VOLUME UP / MOVE RIGHT of sound BUTTON LCD SCREEN ANTENNA POWER / VIDEO ON-OFF BUTTON Extend to improve signal VOLUME DOWN / MOVE LEFT 10. SPEAKER BUTTON 11. REMOVEABLE STAND CLIP TALK TO BABY™... -
Page 8: Buttons And Connections - Camera
CAMERA MICROPHONE LIGHT SENSOR POWER ON/OFF BUTTON POWER LED PAIRING BUTTON SPEAKER INVISIBLE NIGHT VISION LEDs POWER INPUT CAMERA mylevana.com... -
Page 9: Setup
Avoid extreme heat or cold as this will affect the life of the battery. • Turn LCD screen OFF; press POWER button on the front of the monitor ONCE. • Lila menu settings that increase battery life: ™ Power Save Mode: After 1 minute of inactivity, monitor enters standby/sleep mode. -
Page 10: Connecting Power To The Monitor / Charging Battery
SETUP Connecting Power to the Monitor / Charging Battery Connect the small end of power adapter marked MONITOR into the DC input on the side of the monitor as shown in the diagram. DC Input Connect the other end of the adapter into an available wall outlet. -
Page 11: Screen Icons
SCREEN ICONS SIGNAL STRENGTH BRIGHTNESS STRONG DARK BRIGHT SIGNAL SIGNAL BATTERY STRENGTH POWER SAVE EMPTY CHARGING FULL CAMERA TALK TO BABY™ MODE PAIRING SUPPORT PAIRING VOLUME EXIT LOUD mylevana.com... -
Page 12: Operation
OPERATION Turn on the MONITOR Press and hold the POWER button on the front of the monitor. Pairing the Camera(s) and Monitor The camera and monitor come paired (connected) to each other automatically. However, if upon opening this package the devices do not automatically connect and transmit, you may do so manually. -
Page 13: Placement Of The Monitor
OPERATION Placement of the Monitor This monitor can be placed on a tabletop. • You can place the monitor on a tabletop by using the retractable table stand on the back of the monitor. When not in use, simply tuck the table stand away into the back of the monitor until you hear a "click". -
Page 14: Mounting The Camera On A Wall Safely
OPERATION Mounting the Camera on a Wall Safely: Before drilling the holes, it is important to check the reception and camera positioning in the intended location on the wall. Ensure you are hanging the camera no less than 3 feet away from baby’s crib. Note: Baby monitors and cameras with power cords should never be hung on or near the crib as it is a strangulation hazard. -
Page 15: Night Vision
OPERATION Night Vision INVISIBLE The camera is equipped with NEW Invisible IR (infrared) LEDs LEDs which keep the nursery dark. The LEDs are located on the front of the camera and allow you to see up to 12 feet in complete darkness so you can check on your baby at any time of night. -
Page 16: Monitor
MONITOR Volume – Use the navigational arrows to increase /decrease /mute the VOLUME. • Press the button to INCREASE the volume in LIVE VIEW; the VOLUME icon will display the volume level in the top left corner of the screen. –... -
Page 17: Using Power Save
MONITOR Using Power Save When in Power Save Mode, the monitor enters standby/sleep mode after 1 minute of inactivity. When sound is detected, the screen changes to live view. • To access live view manually when the screen is off, press the POWER button ONCE. -
Page 18: Setting The Brightness
MONITOR Setting the Brightness Brightness Mode sets the brightness of the screen. Reducing the brightness also extends the battery life. To set the Brightness Mode, press the MENU – button. Using the navigational arrows on the front of the monitor, highlight the BRIGHTNESS icon and press the MENU button once to select. -
Page 19: Troubleshooting
TROUBLESHOOTING ISSUE POSSIBLE SOLUTION Equipment does not function • Confirm that the camera and monitor are ON • The battery may be depleted; charge battery • The power adapters may not be properly connected No reception • Camera and monitor may not be properly paired; follow PAIRING instructions •... -
Page 20: Consignes De Sécurité
CONSIGNES DE SÉCURITÉ ATTENTION: Gardez les petites pièces hors de la portée des enfants. Risque d’étranglement: Les enfants peuvent se prendre dans les cordons. Les cordons d’alimentation doivent être gardés à plus que trois pieds de distance de la portée du bébé et de son lit à tout moment. Les moniteurs/caméras avec cordons d’alimentation ne doivent jamais être accrochés sur ou près du lit de bébé. -
Page 21: Déclaration De La Fcc
DÉCLARATION DE LA FCC Cet appareil est conforme à la partie 15 des règlements de la FCC. Son fonctionnement est soumis aux deux conditions suivantes: (1) Cet équipement ne doit pas causer d’interférences nuisibles et (2) Cet équipement doit accepter toute interférence reçue, y compris les interférences capables de causer un mauvais fonctionnement. - Page 22 USA 14227 Conditions de la garantie 1. Les produits de LEVANA sont garantis pour une période d’un an de la date d’achat originale contre les défauts de fabrication et de matériaux. Cette garantie est limitée à la réparation, le remplacement ou le remboursement du prix d’achat à l’option de LEVANA.
- Page 23 TABLE DES MATIÈRES CONSIGNES DE SÉCURITÉ ....................... 20 DÉCLARATION DE LA FCC ......................21 GARANTIE .............................22 CE QUI EST INCLUS ........................24 TOUCHES ET CONNEXIONS - MONITEUR ................25 TOUCHES ET CONNEXIONS - CAMÉRA ................26 MISE EN ROUTE ...........................27 Installation de la pile ....................27 Profitez pleinement de votre pile rechargeable ............27 Connexion de l’alimentation au moniteur / charger la pile ........
-
Page 24: Garantie
Les photos peuvent ne pas représenter exactement le produit. ©2012 LEVANA . Tous droits réservés. LEVANA®, le logo LEVANA®, LilaMC, et les autres marques ® de LEVANA® peuvent être déposées. Toutes les autres marques déposées sont la propriété de leurs propriétaires respectifs mylevana.com... -
Page 25: Touches Et Connexions - Moniteur
MONITEUR BARRE DE SON À DEL MENU / SÉLECTION Les voyants DEL indiquent les MICROPHONE différents niveaux de bruit VOLUME HAUT / SÉL. DROITE ÉCRAN ACL ANTENNE ALIMENTATION / VIDÉO Étendre pour améliorer le signal MARCHE/ARRÊT 10. HAUT-PARLEUR VOLUME BAS / SÉL. GAUCHE 11. -
Page 26: Touches Et Connexions - Caméra
CAMÉRA MICROPHONE CAMÉRA ALIMENTATION MARCHE/ARRÊT CAPTEUR DE LUMIèRE BOUTON DE JUMELAGE DEL D’ALIMENTATION DEL DE VISION HAUT-PARLEUR NOCTURNE INVISIBLES ENTRÉE D’ALIMENTATION mylevana.com... -
Page 27: Mise En Route
• Éteignez l’écran ACL; appuyez le bouton d’alimentation sur l’avant du moniteur UNE FOIS. • Réglages du menu Lila qui prolongent la vie de la pile: ™ Mode économie d’énergie: Après 1 minute d’inactivité, le moniteur passe en mode veille. -
Page 28: Connexion De L'alimentation Au Moniteur / Charger La Pile
MISE EN ROUTE Connexion de l’alimentation au moniteur / charger la pile Branchez le petit bout de l’adaptateur marqué MONITEUR dans l’entrée CC sur le côté droit du moniteur, comme indiqué sur le schéma. Entrée CC Branchez l’autre bout de l’adaptateur dans une prise murale disponible. -
Page 29: Icônes À L'écran
ICÔNES À L’ÉCRAN FORCE DU SIGNAL LUMINOSITÉ AUCUN SIGNAL SOMBRE LUMINEUX SIGNAL FORT PUISSANCE DE LA PILE ÉCONO ÉNERGIE CHARGE CHARGE CHARGE ACTIVÉ DÉSACTIVÉ ÉPUISÉE EN COURS TERMINÉE CAMÉRA TALK TO BABY™ AUCUNE CAM MODE SÉQ JUMELAGE SOUTIEN JUMELAGE 1 VOLUME QUITTE COUPÉ... -
Page 30: Fonctionnement
FONCTIONNEMENT Allumer le MONITEUR Appuyez et maintenez le bouton ALIMENTATION / VIDÉO MARCHE/ARRÊT sur la façade du moniteur. Jumeler la / les caméras et le moniteur La caméra et le moniteur sont jumelés (connecté) à l’autre automatiquement. Cependant, si les appareils ne se connectent pas automatiquement et ne transmettent pas lorsque vous ouvrez la boîte, vous pouvez faire le jumelage manuellement. -
Page 31: Placement Du Moniteur
FONCTIONNEMENT Placement du moniteur Ce moniteur peut être placé sur une table. • Vous pouvez placer le moniteur sur une table en utilisant le support rétractable à l’arrière du moniteur. Lorsqu’il n’est pas utilisé, il suffit de remettre le support rentrant jusqu’à ce que vous entendez un «clic». Placement de la caméra Cette caméra peut être placée sur une table ou suspendu à... -
Page 32: Installer La Caméra Au Mur En Toute Sécurité
FONCTIONNEMENT Installer la caméra au mur en toute sécurité: Avant de percer les trous, il est important de vérifier la réception et le positionnement de la caméra dans l’emplacement au mur prévu. Assurez-vous d’accrocher la caméra au mur pas moins de 3 pieds du lit de votre bébé. Note: Les moniteurs/caméras avec cordons d’alimentation ne doivent jamais être accrochés sur ou près du lit de bébé... -
Page 33: Vision Nocturne
FONCTIONNEMENT Vision nocturne La caméra est équipée de nouveaux DEL IR (infrarouge) INVISIBLE invisible, qui gardent la chambre du bébé sombre. Les DEL à l’avant de la caméra vous permet de voir jusqu’à 12 pieds dans l’obscurité complète, afin de pouvoir surveiller votre bébé à tout moment la nuit. -
Page 34: Moniteur
MONITEUR Volume – Utilisez les flèches de navigation pour augmenter / réduire / couper le VOLUME. • Appuyez le bouton pour AUGMENTER le volume en MODE D’AFFICHAGE; l’icône VOLUME affiche le niveau du volume dans le coin supérieur gauche de l’écran. –... -
Page 35: Utiliser Le Mode Économie D'énergie
MONITEUR Utiliser le mode économie d’énergie En mode économie d’énergie, le moniteur passe en mode veille après 1 minute d’inactivité. Lorsqu’un son est détecté, l’écran passe à la visualisation en direct. • Pour accéder la visualisation en direct lorsque l’écran est éteint, appuyez le bouton d’ALIMENTATION UNE fois. -
Page 36: Régler La Luminosité
MONITEUR Régler la luminosité Le mode luminosité vous permet de régler la luminosité de l’écran. Le mode luminosité prolonge également l’autonomie de la pile. Pour régler le mode luminosité, appuyez le bouton MENU . Utilisant les flèches de – navigation , cliquez sur l’icône LUMINOSITÉ... -
Page 37: Dépannage
DÉPANNAGE QUESTION SOLUTION POSSIBLE L’équipment ne fonctionne pas • Assurez-vous que la caméra et le moniteur sont ALIMENTÉS • La pile peut être déchargée; chargez la pile • Les adaptateurs ne sont pas connectés correctement Aucune réception • La caméra et le moniteur ne sont pas jumelés correctement;... -
Page 38: Instrucciones De Seguridad
INSTRUCCIONES DE SEGURIDAD PRECAUCIÓN: Mantenga las piezas pequeñas fuera del alcance de los niños. Peligro de Estrangulamiento: Los niños pueden enredarse en los cables. Los cables de alimentation deben conservarse a más de 3 pies de distancia de la cuna del bebé y fuera del alcance en todo momento. -
Page 39: Disposición De La Fcc
DISPOSICION DE LA FCC Este dispositivo cumple con la sección 15 de las Normas de la FCC. El funcionamiento está sujeto a las siguientes dos condiciones: (1) Este dispositivo no puede causar una interferencia negativa (2) Este dispositivo debe aceptar cualquier interferencia recibida, incluso una que pueda causar un funcionamiento no deseado. - Page 40 USA 14227 Condiciones de la garantía 1. Los productos LEVANA® tienen una garantía de un año desde la fecha de compra por defectos de fabricación y de los materiales. La garantía se limita a la reparación, el reemplazo o el reembolso del precio de compra, a criterio de LEVANA.
- Page 41 TABLA DE CONTENIDOS INSTRUCCIONES DE SEGURIDAD ................... 38 DISPOSICIÓN DE LA FCC ......................39 GARANTíA ............................ 40 ELEMENTOS INCLUIDOS ......................42 BOTONES Y CONEXIONES - MONITOR ................43 BOTONES Y CONEXIONES - CAMARA ................... 44 INSTALACIÓN ..........................45 Instalación de la batería ..................... 45 Aproveche al máximo la batería recargable ............
-
Page 42: Garantía
® responsable en absoluto de cualquier daño, acto de vandalismo, robo o cualquier otra acción que pueda ocurrir mientras el cliente utilice un producto de LEVANA ® Nos reservamos el derecho de cambiar los modelos, la configuración o las especificaciones sin previo aviso ni responsabilidad. -
Page 43: Botones Y Conexiones - Monitor
MONITOR BARRA DE SONIDO LED MICRÓFONO Las luces LED muestran diferentes SUBIR VOLUMEN / MOVER A LA niveles de sonido DERECHA PANTALLA LCD ANTENA ENCENDIDO Y APAGADO Extiéndala para mejorar la señal y escuchar BAJAR VOLUMEN / MOVER A LA IZQUIERDA 10. -
Page 44: Botones Y Conexiones - Camara
CÁMARA MICRÓFONO CÁMARA ENCENDIDO Y APAGADO SENSOR DE LUZ EMPAREJAMIENTO LED DE ENCENDIDO LED INVISIBLE DE VISIÓN ALTAVOZ NOCTURNA ENTRADA DE ALIMENTACIÓN mylevana.com... -
Page 45: Instalación
Apague la pantalla LCD: presione el botón de ENCENDIDO (POWER) en la parte frontal del monitor SOLO UNA VEZ. • Configuraciones de menú Lila para aumentar la vida útil de la batería: ™ Modo de ahorro de energía: Después de un minuto de inactividad, el monitor ingresa en el modo de suspensión/reposo. -
Page 46: Conexión Eléctrica Del Monitor / Carga De Batería
INSTALACIÓN Conexión eléctrica del monitor / carga de batería Conecte el extremo pequeño del adaptador de corriente marcada MONITOR a la entrada de CC al costado del monitor, como se muestra en el diagrama Entrada de CC Conecte el otro extremo del adaptador a un tomacorriente de pared. -
Page 47: Íconos De La Pantalla
íCONOS DE LA PANTALLA INTENSIDAD DE LA SEÑAL BRILLO FUERTE OSCURO CLARO SEÑAL SEÑAL NIVEL DE BATERÍA AHORRO DE ENERGÍA VACíA CARGANDO LLENA ACTIVADO DESACTIVADO CÁMARA TALK TO BABY™ CÁMARA CÁMARA CÁMARA CÁMARA SECUENCIAL CÁMARA MODO SINCRONIZACIÓN SERVICIO VOLUMEN SALIR MUDO ALTO mylevana.com... -
Page 48: Funcionamiento
FUNCIONAMIENTO Encendido del MONITOR Presione y mantenga presionado el botón de ENCENDIDO (POWER) en la parte delantera del monitor. Emparejamiento de las cámaras y el monitor La cámara y el monitor se emparejan (se conectan) de modo automático. Sin embargo, si al abrir el paquete los dispositivos no se conectan automáticamente y comienzan la transmisión, usted puede hacerlo de modo manual. -
Page 49: Ubicación Del Monitor
FUNCIONAMIENTO Ubicación del monitor Puede ubicar el monitor en una mesa. • Puede colocar el monitor en una mesa mediante el soporte retráctil para mesa de la parte posterior del monitor. Cuando no lo utilice,tan solo meta el soporte para mesa en la parte posterior del monitor hasta oír un “clic”. -
Page 50: Montaje Seguro De La Cámara En Una Pared
FUNCIONAMIENTO Montaje seguro de la cámara en una pared: Antes de perforar los agujeros, es importante verificar la recepción y la posición de la cámara en la ubicación deseada en la pared. Asegúrese de colgar la cámara a no menos de tres pies de la cuna del bebé. -
Page 51: Visión Nocturna
FUNCIONAMIENTO Visión nocturna La cámara está equipada con NUEVOS LED invisibles IR INVISIBLES (infrarrojos) que mantienen la habitación oscura. Los LED están ubicados en el frente de la cámara y le permiten ver a una distancia de hasta doce pies en completa oscuridad para que pueda observar a su bebé... -
Page 52: Monitor
MONITOR Volumen – Utilice las flechas de navegación para subir, bajar o llevar a mudo el VOLUMEN. • Presione el botón para SUBIR el volumen en VISUALIZACIÓN EN VIVO; el ícono de VOLUMEN mostrará el nivel de volumen en el ángulo superior izquierdo de la pantalla. -
Page 53: Uso Del Modo De Ahorro De Energía
MONITOR Uso de ahorro de energía Cuando esté en el modo de ahorro de energía, luego de un minuto de inactividad, el monitor ingresa en suspensión/reposo. Cuando se detecta un sonido, la pantalla cambia a visualización en vivo. • Para acceder a la visualización en vivo cuando la pantalla está apagada, presione UNA VEZ el botón ENCENDIDO (POWER). -
Page 54: Configuración Del Brillo
MONITOR Configuración del brillo El Modo Brillo regula el brillo de la pantalla. El Modo Brillotambién extiende la duración de la batería. Para fijar el Modo Brillo, presione el botón MENÚ – . Con las flechas de navegación , del frente del monitor, marque el ícono BRILLO y presione una vez el botón MENÚ... -
Page 55: Solución De Problemas
SOLUCION DE PROBLEMAS PROBLEMA SOLUCIÓN POSIBLE El equipo no funciona • Verifique que la cámara y el monitor estén encendidos • La batería puede estar descargada: cárguela • Los adaptadores de energía pueden estar mal conectados No hay recepción • La cámara y el monitor pueden no estar emparejados como corresponde: siga las instrucciones de EMPAREJAMIENTO... - Page 56 mylevana.com...
Need help?
Do you have a question about the Lila and is the answer not in the manual?
Questions and answers