Blue Seal G91 Installation And Operation Manual
Evolution series gas salamander
Hide thumbs
Also See for G91:
- Service manual (33 pages) ,
- Installation and operation manual (22 pages)
Table of Contents
Advertisement
Quick Links
Download this manual
See also:
Service Manual
Advertisement
Table of Contents

Subscribe to Our Youtube Channel
Related Manuals for Blue Seal G91


Summary of Contents for Blue Seal G91
- Page 1 I N S T A L L A T I O N A N D O P E R A T I O N M A N U A L GAS SALAMANDER G91B For use in GB & IE 234060-7...
- Page 2 800 263 1455 (Toll Free) NEW ZEALAND Moffat Limited Web: www.moffat.co.nz E.Mail: sales@moffat.co.nz Main Office: (tel): 0800 663328 UNITED KINGDOM Blue Seal Web: www.blue-seal.co.uk E.Mail: sales@blue-seal.co.uk Sales: (tel): +44 121 327 5575 (fax): +44 121 327 9711 Spares: (tel): +44 121 322 6640...
-
Page 3: Table Of Contents
Contents GAS SALAMANDER (Branding Plate Optional) G91B GAS SALAMANDER (With Branding Plate) Introduction ....................2 Specifications .................... 3 Model Numbers Covered in this Specification General Gas Supply Requirements Gas Connection Dimensions ....................6 Dimensions Internal Dimensions Cooking Area Weight Installation ....................7 Installation Requirements Unpacking Location... -
Page 4: Introduction
Introduction We are confident that you will be delighted with your Blue Seal Gas Salamander, and it will become a most valued appliance in your commercial kitchen. To ensure you receive the utmost benefit from your new Blue Seal Gas Salamander, there are two important things you can do. -
Page 5: Specifications
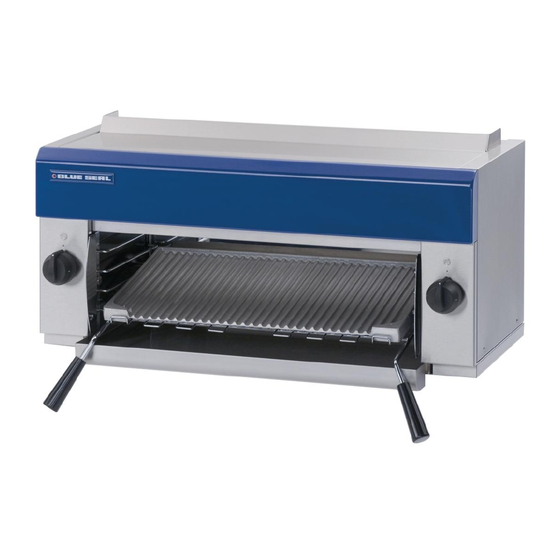
A commercial heavy duty, wall mounted gas fired infra-red grilling Salamander for a wide range of foods. Blue Seal Salamanders feature independently controlled heat zones for left and right side of the cooking area. Two high speed infrared surface combustion burners in the ceiling of cavity are independently operated with left and right hand side controls of appliance. -
Page 6: Gas Supply Requirements
Specifications Gas Supply Requirements - Australia: Natural Gas LP Gas (Propane) Input Rating (N.H.G.C.) 31.5 MJ/hr 31.5 MJ/hr Supply Pressure 1.13 - 3.4 kPa 2.75 - 4.5 kPa Burner Operating Pressure 1.0 kPa (*) 2.55 kPa (*) Gas Connection ½" BSP Male - New Zealand: Natural Gas LP Gas... -
Page 7: Gas Connection
Specifications - All Other Markets: Natural Gas Town Gas Input Rating (N.H.G.C.) 31.5 MJ/hr 40 MJ/hr Supply Pressure 1.13 - 3.40 kPa 0.76 - 1.50 kPa Burner Operating Pressure 1.0 kPa (*) 0.63 kPa (*) Gas Connection ” BSP Male LP Gas (Propane) Butane Input Rating (N.H.G.C.) -
Page 8: Dimensions
Dimensions Dimensions: Internal Dimensions Width 685mm. Height 230mm (at front). Depth 330mm. Cooking Area Rack 610mm x 310mm. Branding Plate 610mm x 310mm. Weight (Nett) 41 kg (without Branding Plate or Racking System). -
Page 9: Installation
NOTE: It is most important that this salamander is installed correctly and that operation is correct before use. Installation shall comply with local gas, health and safety requirements. Blue Seal Salamanders are designed to provide years of satisfactory service, and correct installation is essential to achieve the best performance, efficiency and trouble-free operation. -
Page 10: Clearances
Installation Components having adjustments protected (e.g. paint sealed) by manufacturer are only to be adjusted by an authorised service agent. They are not to be adjusted by the installation person. The unit should be mounted under an extraction hood in compliance with all local regulations. If the unit is not mounted under an extraction hood, the installer must ensure that all regulations are met and that there is an unobstructed minimum distance of 750mm from top surface of unit to ceiling, which must be of non-combustible material. -
Page 11: Wall Mounting (To Non Combustible Wall Only)
Installation Wall Mounting (to Non-Combustible Wall Only) Fix wall mounting bracket to wall with six screws, in such a position that top of bracket is level and at least 945mm (38”) above any surface beneath unit. This will ensure that bottom of Salamander is at least 600mm (24”) above any surface. -
Page 12: Gas Connection
Gas Connection NOTE: ALL GAS FITTING MUST ONLY BE CARRIED OUT BY A QUALIFIED SERVICE PERSON. Blue Seal Salamanders do not require an electrical connection, as they function totally on gas supply only. It is essential that gas supply is correct for Salamander being installed and that adequate supply pressure and volume are available. -
Page 13: Commissioning
Installation Check gas operating pressure is as shown in Specifications section. NOTE: Operating pressure to be measured at manifold test point and with both burners operating at ‘High Flame’ setting. Verify operating pressure remains correct. Check gas supply pressure is as shown in Specifications section, Gas Supply Requirements table. -
Page 14: Operation
/ operator. Blue Seal Salamanders have been designed to provide simplicity of operation and 100% safety protection. Improper operation is almost impossible, however bad operation practices can reduce life of salamander and produce a poor quality product. -
Page 15: Lighting Main Burners
Operation Lighting Main Burners Check gas supply is turned On. Depress gas control knob and rotate anti-clockwise to HIGH position. Manually light Main Burner, holding Gas Control Knob depressed for approx. 10 -15 seconds, then release. If Main Burner does not light, repeat Items 1 to 3 above. Once lit main burner will be burning at full rate. -
Page 16: Cleaning And Maintenance
Cleaning and Maintenance General Caution Always turn ‘Off’ gas supply before cleaning. This appliance is not water proof. Do not use water jet spray to clean interior or exterior of this appliance. To achieve the best results, cleaning must be thorough and all controls and mechanical parts checked and adjusted periodically by a competent serviceman. -
Page 17: Periodic Maintenance
Cleaning and Maintenance Periodic Maintenance NOTE: All maintenance operations should only be carried out by a qualified service person. To achieve the best results cleaning must be regular and thorough and all controls and mechanical parts should be checked and adjusted periodically by a qualified service person. If any small faults occur, have them attended to promptly. -
Page 18: Fault Finding
Fault Finding This section provides an easy reference guide to the more common problems that may occur during operation of your equipment. The fault finding guide in this section is intended to help you correct, or at least accurately diagnose problems with your equipment. Although this section covers the most common problems reported, you may encounter a problem not covered in this section. -
Page 19: Gas Conversion And Specifications
Gas Conversion and Specifications Conversion Procedure Caution Ensure Appliance is isolated from gas supply before commencing servicing. NOTE: These conversions should only be carried out by qualified persons. All connections must be checked for leaks before re-commissioning appliance. For all the following conversion instructions, the side panels have to be removed (Remove two screws at bottom of each side panel). - Page 20 Gas Conversion and Specifications Gas Regulator NOTE, Pin rotated - NAT Gas / LPG / Butane Only. for Natural Gas. NOTE: Gas regulator supplied convertible between Natural Gas NOTE, Pin rotated and LP Gas, but it’s outlet for LPG. pressure is fixed ex-factory and is NOT to be adjusted.
-
Page 21: Gas Specifications
Gas Conversion and Specifications Gas Specifications - Australia: Natural Gas LP Gas (Propane) Main Burner Injectors Ø 1.85mm Ø 1.15mm Size Ø 1.00mm Ø 1.00mm Fire Adjustment 2 turns out (c.c.w.) ½ turn out (c.c.w.) Supply Pressure 1.13 - 3.4 kPa 2.75 - 4.5 kPa Burner Operating Pressure (*) 1.0 kPa... -
Page 22: Gas Specifications
Gas Conversion and Specifications Gas Specifications - All Other Countries: Natural Gas Town Gas (**) Main Burner Injectors Ø 1.85mm Ø 3.50mm Size Ø 1.00mm Ø 1.00mm Low Fire: Adjustment 2 turns out (ccw) 4 turns out (ccw) Supply Pressure 1.13 - 3.40 kPa 0.76 - 1.50 kPa Burner Operating Pressure (*) -
Page 23: Replacement Parts List
Replacement Parts List Replacement Parts List IMPORTANT: Only genuine authorized replacement parts should be used for servicing and repair of this appliance. Instructions supplied with parts should be followed when replacing components. further information servicing instructions, contact your nearest authorized service branch (contact details are as shown on reverse of front cover of this manual).
Need help?
Do you have a question about the G91 and is the answer not in the manual?
Questions and answers