Table of Contents
Advertisement
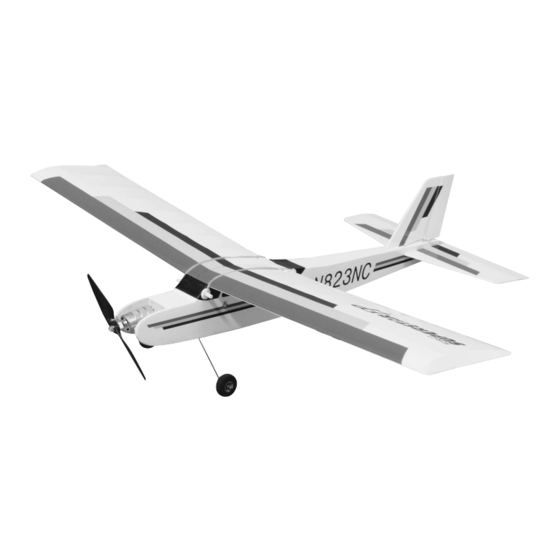
Wingspan: 48.5 in [1232mm]
Wing Area: 400 sq in [26 dm
Weight: 43.5 oz [1230 g]
Wing Loading: 16.1 oz/sq ft [48 g/cm
Length: 36.1 in [917mm]
Radio: 4-Channel with three standard servos (required)
Motor: Included
Electronic Speed Control: Included
Motor Battery: 8.4 volt 1700mAh – 3000mAh
If you, as the original owner of this model, discover defects in parts and workmanship within 90 days of purchase, Hobbico will repair or replace
it – at the option of our authorized U.S. repair facility, Hobby Services – without charge. Our liability does not include the cost of shipping to us.
However, Hobby Services will pay shipping expenses to return your model to you. You must provide proof of purchase, such as your original
purchase invoice or receipt, for your model's warranty to be honored. This warranty does not apply to damage or defects caused by misuse or
improper assembly, service or shipment. Modifications, alterations or repair by anyone other than Hobby Services voids this warranty. We are
sorry, but we cannot be responsible for crash damage and/or resulting loss of kits, motors, accessories, etc.
Your SuperStar EP ARF must be returned directly to Hobby Services for warranty work. The address is: Hobby Services, Attn: Service
Department, 1610 Interstate Drive, Champaign, IL 61822-1067. Phone: (217) 398-0007. Please follow the instructions below when returning
your model. This will help our experienced technicians to repair and return it as quickly as possible.
1. ALWAYS return your entire system, including airplane and radio.
2. Disconnect the receiver battery switch harness and make sure that the transmitter is turned off. Disconnect all batteries.
3. Include a list of all items returned and a THOROUGH, written explanation of the problem and service needed. If you expect the repair to be
covered under warranty, also include your proof of purchase.
4. Include your full return address and a phone number where you can be reached during the day.
If your model is past the 90 day warranty period or is excluded from warranty coverage, you can still receive repair service through Hobby Services
at a nominal cost. Repair charges and postage may be prepaid or billed COD. Additional postage charges will be applied for non-warranty returns.
All repairs shipped outside the United States must be prepaid in U.S. funds only. All pictures, descriptions and specifications found in this
instruction manual and on the product package are subject to change without notice. Hobbico maintains no responsibility for inadvertent errors.
© Copyright 2004
ASSEMBLY INSTRUCTIONS
2
]
2
]
90-DAY LIMITED WARRANTY
TM
W W
I I
T T
H H
A A
I I
L L
W W
I I
T T
H H
A A
I I
L L
E E
R R
O O
N N
S S
E E
R R
O O
N N
S S
HCAA2052 V1.1
Advertisement
Table of Contents

Related Manuals for Hobbico Superstar EP


Summary of Contents for Hobbico Superstar EP
-
Page 1: Assembly Instructions
90-DAY LIMITED WARRANTY If you, as the original owner of this model, discover defects in parts and workmanship within 90 days of purchase, Hobbico will repair or replace it – at the option of our authorized U.S. repair facility, Hobby Services – without charge. Our liability does not include the cost of shipping to us. -
Page 2: Table Of Contents
Kit Contents ............5 An electronic speed control with BEC (Battery Ordering Replacement Parts ......6 Eliminator Circuit) is included with the SuperStar EP . Common Abbreviations ........6 The BEC eliminates the need for a receiver battery. Assemble the Wing..........7 The electronic speed control provides power for the Install the Stabilizer and Fin......9... -
Page 3: Decisions You Must Make
Battery Selection or safety of your completed model. The SuperStar EP was designed to fly on the recommended 7-cell, 8.4 volt, 2100 mAh motor Remember: Take your time and follow the battery pack. If you are new to electric airplanes (or... -
Page 4: Chargers
The bad news is that to produce the Additional Items Required power needed to fly an airplane the size of the SuperStar EP, the motor draws from 15-25 amps. Tools The current consumption reduces the run time to 5- 8 minutes. -
Page 5: Kit Contents
If any parts are missing or are not of acceptable quality, or if you need assistance with assembly, contact Hobbico Product Support. When reporting defective or missing parts, use the part names exactly as they are written in the Kit Contents list on this page. -
Page 6: Ordering Replacement Parts
Ordering Replacement Parts To order replacement parts for the Hobbico SuperStar EP, use the order numbers in the Replacement Parts List that follows. Replacement parts are available only as listed. Not all parts are available separately (a rudder cannot be purchased separately, but is only available with the tail set). Replacement parts are not available from Product Support, but can be purchased from hobby shops or mail order/Internet order firms. -
Page 7: Assemble The Wing
Assemble the Wing ❏ 1. Remove the tape and separate the ailerons from the wing and the elevators from the stab. Use a covering iron with a covering sock on high heat to tighten the covering if necessary. Apply pressure over sheeted areas to thoroughly bond the covering to the wood. - Page 8 ❏ 9. Insert the 7/32" x 6-7/8" [5.5mm x 174.6mm] ❏ 12. Glue the aileron servo tray onto the tabs in steel wing joiner rod in the forward hole in the wing the servo opening. root rib of the left wing half. Insert the 3/32" x 1" [2.3mm x 25.4mm] anti-rotation pin in the aft hole in the wing root rib.
-
Page 9: Install The Stabilizer And Fin
❏ 16. Ensure that the aileron servo is centered. Enlarge the outermost holes in the servo arm with a Hobbico Servo Horn Drill (or a #48 or 5/64" [2mm] drill bit). Center the aileron and align the wire pushrod with the hole in the end of the servo arm. -
Page 10: Install The Landing Gear
Install the Landing Gear ❏ 4. Insert the stabilizer and center it in the stabilizer slot. The side with the red, yellow and blue stripe faces upward. The two holes through ❏ 1. On the bottom of the fuselage, at the aft end, the stabilizer should be aligned with the fin slot in the top of the fuselage. -
Page 11: Install The Battery Hatch Cover
2.5 x 8mm 2.5 x 8mm ❏ 4. Secure the main landing gear wires to the ❏ 2. Use a 2.5mm x 8mm sheet metal screw to fuselage with two nylon landing gear straps and attach the aluminum battery hatch retainer to the four 2.5mm x 8mm sheet metal screws. -
Page 12: Install The Wing Dowels
Install the Wing Dowels Install the Radio ❏ 1. Make a strap, the same way you made the ❏ 1. Trim the covering from over the wing dowel battery strap. Route the strap through the front hole holes on both sides of the fuselage. The holes are in the battery tray and back through the middle located at the front and back of the wing saddle. - Page 13 ❏ 8. Connect the charged motor battery to the electronic speed control. Switch on the transmitter and then the electronic speed control. Center the rudder and elevator trims on your transmitter. IMPORTANT: To avoid accidents, do not install the propeller until after all the control checks have been completed.
- Page 14 4-40 x 1/4" Slotted Head Screw ❏ 13. Locate and pierce the covering from the ❏ 16. With the transmitter and electronic speed rudder pushrod exit hole on the top of the fuselage, control switched on, set the rudder to neutral left of the fin.
-
Page 15: Get The Model Ready To Fly
SuperStar EP flies, you would like to change the centered. Adjust if necessary. With the prop still not throws to suit your taste, that is fine. However,... -
Page 16: Install The Propeller And Motor Battery
Install the Propeller and Motor Battery ❏ 4. Insert the lip on the battery hatch under the sheeting at the aft end of the battery compartment. Lock the battery hatch in position by rotating the ❏ 1. Slide the aluminum prop adapter over the battery hatch retainer over the battery hatch. -
Page 17: Balance The Model (C.g.)
2-11/16" Balance the Model (C.G.) More than any other factor, the C.G. (balance point) can have the greatest effect on how a model flies and may determine whether or not your first flight will be successful. If you value this model and wish to enjoy it for many flights, DO NOT OVERLOOK THIS IMPORTANT PROCEDURE. -
Page 18: Proper Care Of Your Motor
We recommend at least a 10 to 15 minute cool-down period between flights. ❏ 4. The ideal power source for the SuperStar EP is a 7-cell, 8.4 volt 1700 - 3000 mAh battery pack. The use of a higher voltage battery will reduce the motor life and will also require modifications to the battery compartment to allow the extra battery cells to fit. -
Page 19: Ground Check
Ground Check 7. I will not fly my model unless it is identified with my name and address or AMA number, on or in After you break-in the motor on the model, inspect the model. the model closely to make sure all screws 9. -
Page 20: Flying
❏ 8. Use an incidence meter to check the wing for Flight Take it easy with the SuperStar EP for the first few flights, twists and attempt to correct before flying. gradually getting acquainted with it as you gain confidence.
Need help?
Do you have a question about the Superstar EP and is the answer not in the manual?
Questions and answers