Table of Contents
Advertisement
Quick Links
C
OMPLETE R
TF
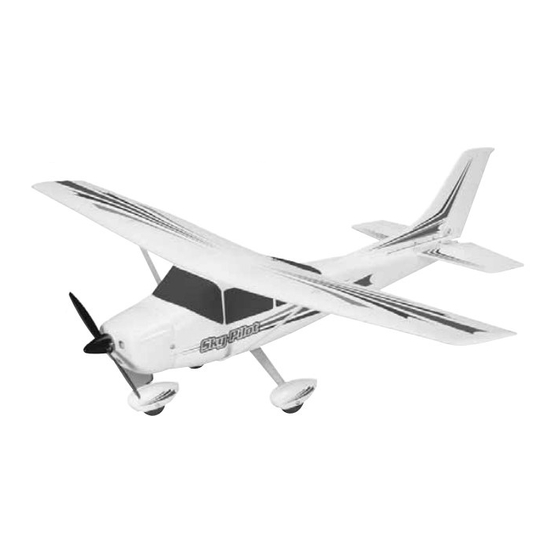
AIRPLANE
C
OMPLETE R
TF
AIRPLANE
™
™
ARF Version Requires
3-Channel Radio
2 Micro Servos
Electronic Speed Control
(Great Planes C-12
GPMM2015 is recommended)
RTF Version Requires
8 (AA) Alkaline Batteries
ASSEMBLE ONLY WITH ADULT SUPERVISION
Please read through this instruction booklet to THOROUGHLY familiarize yourself with the assembly and flight characteristics of this
airplane before beginning to assemble the kit.
Please inspect all parts carefully before starting assembly! If any parts are missing, broken or defective, or if you have any questions
about the assembly or flying of this airplane, please call us at (217) 398-8970 and we'll be glad to help.
WARRANTY
Hobbico
guarantees this kit to be free from defects in both material and workmanship at the date of purchase. This warranty does not
®
cover any component parts damaged by use or modification. In no case shall Hobbico's liability exceed the original cost of the
purchased kit. Further, Hobbico reserves the right to change or modify this warranty without notice.
In that Hobbico has no control over the final assembly, no liability shall be assumed nor accepted for any damage resulting from the use
by the user of the final user-assembled product. By the act of using the user-assembled product, the user accepts all resulting liability.
If the buyers are not prepared to accept the liability associated with the use of this product, they are advised to return this kit
immediately in new and unused condition to the place of purchase.
To make a warranty claim send the defective part or item to Hobby Services at the address below:
Hobby Services
3002 N. Apollo Dr., Suite 1
Champaign IL 61822 USA
Include a letter stating your name, return shipping address, as much contact information as possible (daytime telephone number, fax
number, e-mail address), a detailed description of the problem and a photocopy of the purchase receipt. Upon receipt of the package
the problem will be evaluated as quickly as possible.
Entire Contents © Copyright 2006
Printed in China
HCAZ1175 for HCAA1985 & HCAA1979 V2
Advertisement
Table of Contents

Summary of Contents for Hobbico Sky Pilot
- Page 1 Further, Hobbico reserves the right to change or modify this warranty without notice. In that Hobbico has no control over the final assembly, no liability shall be assumed nor accepted for any damage resulting from the use by the user of the final user-assembled product. By the act of using the user-assembled product, the user accepts all resulting liability.
- Page 2 AND OTHERS; FOLLOW THESE durable and easy to fly. IMPORTANT SAFETY PRECAUTION Your Sky Pilot plane is not a toy, but rather a The R/C model hobby becomes more and more sophisticated, working model that functions very enjoyable as your experience grows. Your chances for much like an actual airplane.
- Page 3 AIRFRAME PARTS AND HARDWARE UNPACKING THE BOX Check the parts against the list below. If any parts are damaged or missing, give us a call at: (217) 398-8970. Part Name Qty. ❏ 1. Fuselage/Stabilizer ........1 ❏ 2. Propeller ............2 ❏ 3. Peak Charger ..........1 ❏...
-
Page 4: Install The Fin
INSTALL THE FIN ❏ 1. The decals for the Sky Pilot are already cut-out on the decal sheet. Peel the decals off of the sheet and apply them to the plane using the box as a guide to their location. -
Page 5: Prepare The Transmitter
Reinstall the battery ❏ 6. Your Sky Pilot requires a minimum 12 amp ESC. hatch on the transmitter case and tighten the screw. Plug the electronic speed control (ESC) into the motor connector. -
Page 6: Battery Charging Precautions
❏ 3. Charging the Sky Pilot battery while your car is running can be dangerous, because it increases the chances of overcharging. For this reason, you should never charge your Sky Pilot battery while your car's engine is running. -
Page 7: Battery Recycling
Check and tighten the screw in the prop adapter before each flight. (If you have the Ready-to-Fly version of the Sky Pilot with the radio system already installed, skip Steps 1 and 4. ❏ 3. Center the rudder (or aileron) and elevator trim. -
Page 8: Check The Control Throws
CHECK THE CONTROL THROWS The throws are measured at the widest part of the elevator and rudder. Adjust the position of the pushrods at the servo arms and the control horns to change the amount of throw. Moving the pushrod out away from the center of the servo arm or in on the control horn will increase the amount the control surface moves. -
Page 9: Install The Wing
❏ 2. Turn the plane over and attach the wing struts to the battery tray and the wing with four small screws. Important: The Sky Pilot must never be flown without the wing struts attached. The wing struts help support the wing. - Page 10 5 mph or less. If the wind is calm or very light, the Sky Pilot will be docile and easy to control. Also, 1. First switch your transmitter power switch “ON.”...
- Page 11 5. With the throttle lever moved fully to the right, airplane will fly straight and level on its own. Having hand launch the Sky Pilot into the wind, at a slight the airplane trimmed properly makes flying much upward angle. Note: For the first couple of flights, we easier and more enjoyable.
-
Page 12: Replacement Parts List
Before starting to build, take an inventory of this kit to make sure it is complete and inspect the parts to 3. To land the Sky Pilot, fly down wind, past the make sure they are of acceptable quality. If you need landing area.


Need help?
Do you have a question about the Sky Pilot and is the answer not in the manual?
Questions and answers