Table of Contents
Advertisement
Available languages
Available languages
Advertisement
Chapters
Table of Contents

Related Manuals for Kenmore 501-80002


Summary of Contents for Kenmore 501-80002
- Page 1 3828EL3006J...
-
Page 2: Table Of Contents
Ultra Big Capacity Drum The Kenmore Dryer has a large capacity. Reduced drying time Drying time is shortened by efficient air flow mechanism and optimized heater. Innovative Noise Reduction Noise is reduced by optimized design of air flow system and vibration reduction technology. -
Page 3: Safety Instructions
afety Instructions IMPORTANT SAFETY INSTRUCTIONS WARNING! To help reduce any risk of electric shock, fire, or other personal injury or property damage when using your dryer, please exercise care and follow basic safety precautions, including the following: 1) Read all instructions before using the appliance. 8) Do not repair or replace any part of the appliance or attempt any servicing unless specifically 2) Do not dry articles that have come into contact with... - Page 4 afety Instructions WARNING WARNING! To reduce the risk of fire or explosion, electric • Keep flammable materials and vapors, such shock, property damage, personal injury, or death as gasoline, away from dryer. when using this appliance, please follow all • Place dryer at least 18 inches above the floor instructions and information, including those in for a garage installation.
-
Page 5: Installation Instructions
nstallation Instructions The following instructions will help guide you through the initial steps of setting up your dryer for use. Please note that every section of this manual provides important information regarding the preparation and use of your dryer, and it is important that you review this entire manual before proceeding with any installation or use. - Page 6 nstallation Instructions Note STEP 2 Connecting the Exhaust During transportation side cap can come out slightly. and Venting System. If that is so, push and fit it to the hole to prevent possible lint leakage. WARNING! • Use a heavy metal vent. •...
- Page 7 nstallation Instructions STEP 3 Electrical Plug Connections WARNING! DO NOT connect exhaust ducts with Following are several warnings and instructions concerning making the electrical connection for metal screws or fasteners that extend electric dryers. into the duct. WARNING! The following instructions apply to any installation of the dryer in a manufactured or mobile home: Do not plug with several other appliances power cord.
- Page 8 Instructions Stacking Kit WARNING! In order to stack this dryer on an Kenmore Incorrect installation can cause serious washing machine(40002), an Kenmore stacking accidents. kit is needed. The weight of the dryer and the height of installation makes the stacking procedure too risky for one person.
-
Page 9: Level The Dryer
nstallation Instructions Level the dryer 1. Leveling the dryer is to prevent undesirable noise and vibration. Place your dryer in a solid and level area where water is not dripping or freezing. 2. If the dryer is not properly level, adjust the levelling legs up and down as necessary. -
Page 10: Exhaust Requirements And Maintenance
xhaust Requirements And Maintenance Following are important instructions and information concerning the exhaust requirements for your dryer. Important Warning: To reduce the risk of fire, combustion, or accumulation of combustible gases, DO NOT exhaust dryer air into an enclosed and unventilated area, such as an attic, wall, ceiling, crawl space, chimney, gas vent, or concealed space of a building. - Page 11 xhaust Requirements And Maintenance Exhaust and Dryer Maintenance Cleaning the Lint Screen 1. Clean the lint filter either before drying each load WARNING! or after drying each load. Always make sure the lint filter is clean before starting a new load, Disconnect the dryer’s electric power because a clogged lint filter may increase drying prior to any cleaning or maintenance.
-
Page 12: Appearance And Design
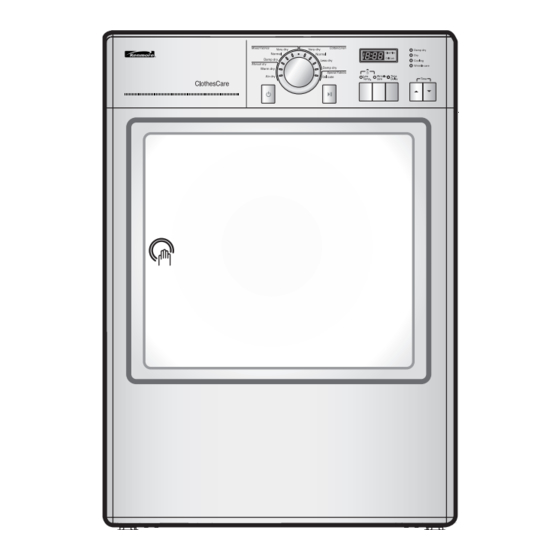
ppearance And Design Control Panel Door Air Ventilation Grill Control Panel LED Display Time Display Indicator lamps Additional Function Buttons Low Temp Wrinkle care Time Delay Time Up( Time Down( Program Selector Start/Pause... -
Page 13: Operating Your Dryer
perating Your Dryer Cycle Selection Table Important Warning: To reduce the risk of fire, electric shock, or injury to person, read this entire manual, including the Important Safety Instructions, before operating this dryer. Standard Electronic Auto Dry Cycles Program Mixed-Fabric cycles (Note) Press the Low Temp. -
Page 14: Open The Door
perating Your Dryer Before first use of the dryer ※ Before you use the dryer for the first time, there are some points that you have to check. After removing the dryer from the package, check the product has no problem and is properly installed. 1. - Page 15 perating Your Dryer Select the 5. Close the Door. desired Before you close the door, make sure fabrics are well cycle. placed inside and that foreign objects are not caught around door. 6. Select the Drying Cycle you want. You can choose a cycle by turning the program control knob until the required program reaches to its indicator.
-
Page 16: Additional Functions
dditional Functions Low Temp. Time Delay Low temp is functioning to decrease dry You can use the Time Delay function to temperature. delay the finishing time of drying cycle. Maximum Time Delay is 19 hours. 1. Turn the dryer on Wrinkle care 2. -
Page 17: Caring For Your Dryer
aring For Your Dryer Care and Cleaning is Clean filter It’s not very difficult to care for your dryer. All you This lamp blinks at the start of each use just to remind have to do is to follow the information below. you to clean the filter. -
Page 18: Reverse The Door
aring For Your Dryer 4. Detach both Reverse the door hinge point The door can be reversed to fit to your own covers. installation conditions. From the factory, the door hinge is located on the right side. Note 1. This work may cause the injury of your hands so you must be careful to handle some sharp devices like torx screwdriver or slotted 5. - Page 19 aring For Your Dryer Change the Bulb WARNING! The bulb itself could be very hot when the dryer just finishes its operation. So before changing the bulb, Power cord must be unplugged before this be sure that the inside of the drum is cool down. work to avoid danger of electric shock.
-
Page 20: Additional Tips For Smart Use
dditional Tips For Smart Use Drying Guide Woven and Knit Materials Below are fabric care labels. Some woven and Knit materials may shrink, Symbols Instructions depending on their quality. Permanent Press and Synthetics Do not overload your dryer. Take out permanent press article as soon as the Tumble dry dryer stops to reduce wrinkles. -
Page 21: Replacement Parts
Kenmore washing 2. Your phone number. machine(40002). 3. Description of trouble. Both the washer and dryer must be the Kenmore 4. The model Nomber and the serial Nomber of brand and designed to work with the stacking kit. your dryer. -
Page 22: Troubleshooting Guide
roubleshooting Guide Troubleshooting Tips Save time and money! Review the charts on the following pages first and you may not need to call for service. 1.Problem:My Dryer Won ’t Start Question What to Do • Is the dryer plugged in? Confirm that the dryer’s plug is securely and completely pushed into the laundry room’s power outlet •... - Page 23 roubleshooting Guide 4.Problem:There is Lint on my Clothes Question What to Do Please refer to the manual section on cleaning the lint filter, and please confirm • Is your lint filter full? that the lint filter is clean. It is important that the lint filter is clean before each new load of laundry.
- Page 24 roubleshooting Guide 7.Problem:It takes too long for my clothes to dry Question What to Do • Did you properly sort your loads of Separate heavy weight items from light weight items when creating loads. laundry? • Are you drying large loads of heavy Heavy fabrics take longer to dry because they tend to retain more moisture.
- Page 25 roubleshooting Guide Error Mode LED displays in case of the door open. Close the door and press START to resume operation. High temperature and high humidity of air continues to remain in the contained dryer by drying object during drying if the dryer suddenly stops due to power failure or other different causes while drying is in progress. Leaving the dryer continuously in such status may reduce durability of the dryer or have a bad effect on major electrical parts.
-
Page 26: Technical Data
echnical Data Type : Electric Dryer Rating : Please refer to the rating label regarding detailed information. Size : 23.5 X 23.6 X 33.5(Inch) Capacity : IEC 4.1cu.ft. Weight : 86 lb(39kg) ❋ The appearance and specifications are subject to change without manufacturer’s notice. Electrical Requirements Ventilation Requirement Alcove or... -
Page 27: Warranty
Kenmore Appliance Warranty - Canada This warranty applies only while this appliance is used in One Year Limited Warranty Canada. When installed, operated and maintained according to all instructions supplied with the product, if this This warranty gives you specific legal rights, and you appliance fails due to a defect in material or may also have other rights which vary from state to state. - Page 31 Tambour ultra-grande capacité La sécheuse Kenmore offre une très grande capacité. Temps de séchage réduit Le temps de séchage est raccourci grâce à un débit d'air optimisé et une technologie de réduction des vibrations. Insonorisation innovatrice Le bruit est réduit grâce à un débit d'air optimisé et une technologie de réduction des vibrations.
-
Page 32: Consignes De Sécurité
onsignes de sécurité INSTRUCTIONS DE SÉCURITÉ IMPORTANTES AVERTISSEMENT Pour réduire le risque d’incendie, de choc électrique ou de blessure au moment d’utiliser la sécheuse, prendre des précautions de base, dont les suivantes : 1. Lire toutes les instructions avant d’utiliser l’appareil. 8. - Page 33 onsignes de sécurité AVERTISSEMENT AVERTISSEMENT Pour réduire le risque d’incendie, d’explosion, de • Éloigner les matériaux ou vapeurs choc électrique, de dommages à la propriété, de inflammables, comme de l’essence, de la blessures ou de mort au moment d’utiliser cet sécheuse.
-
Page 34: Instructions D'installation
nstructions d’installation Les instructions suivantes aident à travers les étapes initiales pour régler la sécheuse. Il est à noter que chaque section de ce guide fournit des informations importantes concernant la préparation et l’utilisation de l’appareil et il est important de revoir tout le guide avant de procéder à l’installation ou à l’utilisation. Des instructions détaillées concernant les connexions électriques, de gaz et les exigences d’échappement sont données dans d’autres sections. - Page 35 nstructions d’installation Remarque Étape 2 Connexion du système Le capuchon peut sortir en cours de transport. Si c'est d’évent et d’échappement le cas, renfoncez-le dans l'orifice pour éviter tout épanchement de charpies. AVERTISSEMENT • Utiliser un évent en métal rigide. •...
- Page 36 nstructions d’installation Étape 6 Instructions additionnelles Étape 3 Connexions électriques pour pour l’installation de la sécheuse électrique seulement sécheuse dans une maison Plusieurs avertissements et instructions préfabriquée ou mobile concernant les connexions électriques suivent. AVERTISSEMENT Ces directives s'appliquent à l'installation d'une Ne branchez pas le cordon d’alimentation sur la même prise sécheuse dans une maison préfabriquée ou mobile : que d'autres électroménagers.
- Page 37 Procédure d'installation 1. Placez le sèche-linge Kenmore sur le lave-linge Kenmore(40002). 2. Enlevez le couvercle arrière qui se trouve dans la partie inférieure en dévissant les 2 vis.
- Page 38 nstructions d’installation Mise au niveau de la sécheuse 1. La mise au niveau de la sécheuse permet d’empêcher les bruits et vibrations indésirables. Placez la sécheuse à un endroit stable et plat, où il n’y a pas d’écoulement d’eau ni risque de gel. 2.
-
Page 39: Exigences D'échappement Et Entretien
xigences d’échappement et entretien Les instructions suivantes s’appliquent aux exigences d’échappement de l’appareil. Avertissement important : Pour réduire le risque d’incendie, de combustion ou d’accumulation de gaz de combustion, NE PAS ventiler la sécheuse dans un endroit fermé et non ventilé comme un grenier, mur, plafond, espace restreint, cheminée, évent de gaz, etc. - Page 40 xigences d’échappement et entretien Échappement et entretien Nettoyage de la crépine à charpie 1. Nettoyer le filtre à charpie avant chaque charge ou AVERTISSEMENT après chaque séchage. Toujours s’assurer que le Débrancher l’alimentation électrique avant filtre à charpie est propre avant de sécher une nouvelle charge, un filtre à...
-
Page 41: Aspect Extérieur Et Conception
spect extérieur et conception Panneau de commande Porte Grille d’aération Panneau de commande Écran d’affichage • Affichage de l’heure • Témoins Boutons de fonctions supplémentaires Délicat Anti-froissage Fin différée Temps (+) Temps ( - ) Sélecteur de Départ/Pause programmes... -
Page 42: Fonctionnement De Votre Sécheuse
onctionnement de votre sécheuse Tableau de sélection de cycles Avertissement important : pour réduire le risque d’incendie, de choc électrique ou de blessures, lire tout le guide, incluant instructions importantes de sécurité avant d’utiliser la sécheuse. Programme Cycles de séchage auto électronique standard Mixed-Fabrics (Textiles mixes) (Note) Appuyez sur le bouton Low Temp. - Page 43 onctionnement de votre sécheuse Avant la première utilisation de la sécheuse ※ Avant d’utiliser la sécheuse pour la première fois, vous devez vérifier un certain nombre de points. Après l’avoir retiré de son emballage, vérifiez que le produit ne présente pas de problème et qu’il est correctement installé. 1.
- Page 44 onctionnement de votre sécheuse 5. Fermez la porte. Sélectionnez le cycle Avant de fermer la porte, assurez-vous que le linge souhaité. est bien placé à l’intérieur et qu’aucun objet étranger, notamment des objets inflammables, n’est bloqué dans la porte. 6. Sélectionnez le cycle de séchage souhaité.
-
Page 45: Fonctions Supplémentaires
onctions supplémentaires Low Temp. (Délicat) Time Delay (Fin différée) Vous pouvez utiliser la fonction Fin différée La fonction « Low Temp. » sert à réduire la pour différer la fin du cycle de séchage. température de séchage. Le retardement maximal est de 19 heures. 1. -
Page 46: Entretien De Votre Sécheuse
ntretien de votre sécheuse Importance de l’entretien et du Nettoyage du filtre nettoyage Ce témoin clignote à chaque mise en marche pour vous L’entretien de votre sécheuse n’est pas très difficile. rappeler de nettoyer le filtre. Tout ce que vous avez à faire est de suivre les informations ci-dessous. - Page 47 ntretien de votre sécheuse Inversement de l’ouverture de la porte 4. Détachez les deux L’ouverture de la porte peut être inversée pour s’adapter couvercles des à vos propres conditions d’installation. La charnière de porte est située sur le côté droit, à l'usine. points de charnière.
- Page 48 ntretien de votre sécheuse Changement de l’ampoule AVERTISSEMENT L’ampoule peut être brûlante lorsque la sécheuse vient de s’arrêter. Par conséquent, avant de changer Le cordon d’alimentation doit être débranché l’ampoule, vérifiez que l’intérieur du tambour a avant cette opération afin d’éviter tout risque refroidi.
-
Page 49: Conseils Supplémentaires Pour Une Utilisation Efficace
onseils supplémentaires pour une utilisation efficace Guide de séchage Signification des étiquettes d’entretien des Textiles tissés et tricots de laine vêtements bouclette Certains textiles tissés et tricots de laine bouclette peuvent Symboles Instructions rétrécir, en fonction de leur qualité. Synthétiques et tissus sans repassage Séchage Ne surchargez pas votre sécheuse Sortez les vêtements en tissus sans repassage dès l’arrêt du... - Page 50 2. Votre numéro de téléphone sécheuse sur la laveuse Kenmore(40002). Les 3. La description du problème deux doivent être de marque Kenmore et conçues 4. Les numéros de modèle et de série de la pour accepter le kit de superposition.
-
Page 51: Guide De Dépannage
épannage Conseils de dépannage Économisez temps et argent ! Passez en revue les tableaux aux pages suivantes avant d’effectuer un appel de service. 1. Problème : sécheuse ne se met pas en marche Question Quoi faire • La sécheuse est-elle branchée ? S’assurer que la sécheuse est bien branchée. - Page 52 épannage 4. Problème : charpie sur les vêtements Question Quoi faire • Le filtre à charpie est-il plein ? Voir la rubrique concernant le nettoyage du filtre à charpie et s’assurer qu’il est propre avant et après chaque charge. • A-t-on bien trié la charge ? Afin de réduire la quantité...
- Page 53 épannage 7. Problème : trop long à sécher Question Quoi faire A-t-on bien trié la charge? Séparer les articles lourds des articles légers.. . Sèche-t-on de grandes charges Les tissus lourds sont plus longs à sécher et gardent plus d’humidité. Pour aider à d’articles lourds ? réduire les temps de séchage, séparer les articles en charges plus petites.
- Page 54 épannage Mode Erreur • L’écran affiche ‘ ’ si la porte est ouverte. La porte doit être fermée et le bouton Départ enfoncé pour que la sécheuse redémarre. Si la sécheuse s'arrête soudainement à cause d'une panne d'électricité ou pour d'autres raisons alors que le séchage est en cours, l'air à...
-
Page 55: Informations Techniques
nformations techniques : Sécheuse électrique Alimentation : Consulter la plaque signalétique concernant l’information détaillée Dimensions : 23,5 X 23,6 X 33,5(Inch) Capacité : IEC 4,1 pi cu Poids : 86 lbs(39kg) ❋ Les données techniques sont sujettes à des changements par le fabricant. Exigences électriques Besoins en ventilation Watts... -
Page 56: Garantie
arantie...
Need help?
Do you have a question about the 501-80002 and is the answer not in the manual?
Questions and answers
How replace the eating element 501-80002?