Panasonic CF-M34 series Reference Manual
Hide thumbs
Also See for CF-M34 series:
- Reference manual (69 pages) ,
- Operating instructions manual (33 pages) ,
- Supplementary instructions (4 pages)
Table of Contents
Advertisement
Quick Links
Download this manual
See also:
Reference Manual
2000
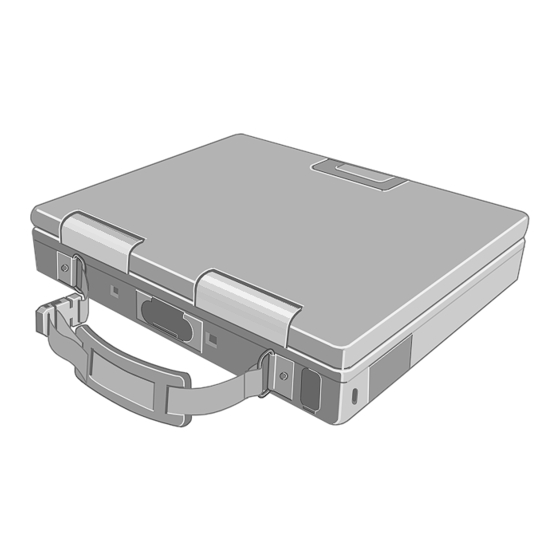
In this manual, descriptions are given us-
ing illustrations not featuring the hand
strap for convenience of explanation.
Illustrations in this Reference Manual
NOTE:
CAUTION:
WARNING:
[Start]-[Shut Down]:
Enter :
Fn + F5 :
page:
:
We recommend that this Reference Manual be printed.
NOTE provides a useful fact or helpful information.
CAUTION indicates a condition that may result in minor or moderate injury.
WARNING indicates a hazard that may result in moderate or serious injury.
This illustration means to click [Start], then to click [Shut Down].
(For some applications, you may need to double-click.)
This illustration means to press the [Enter] key.
This illustration means to press and hold the [Fn] key, then press the [F5] key.
When the cursor is moved to an item under [Contents] or to
shape of the cursor will change to
click is made), the corresponding page in the Reference Manual will be displayed.
This illustration means to refer to the Operating Instructions.
Reference Manual
Contents
Read Me First ...................................................... 2
Key Combinations .............................................. 4
LED Indicators .................................................... 5
Touchscreen ..................................................... 10
Suspend/Hibernation Functions .....................12
Security Measures ............................................15
Computing On The Road ..................................19
Battery Power ...................................................20
PC Cards ........................................................... 24
RAM Module ......................................................25
USB Devices ..................................................... 26
External Display ...............................................27
Modem ............................................................... 28
Port Replicator .................................................. 29
Floppy Disk Drive .............................................30
Accessories ......................................................31
Hard Disk Drive ................................................. 32
Setup Utility ......................................................34
Technical Information ......................................40
DMI Viewer ........................................................ 41
Creating Backup Disks .................................... 42
List of Error Codes ........................................... 44
. Under this condition, if characters are tapped (or a
Personal Computer
CF-M34
.......................................... 6
(Advanced) ........................
page (green display), the
®
Series
46
Advertisement
Table of Contents

Related Manuals for Panasonic CF-M34 series


Summary of Contents for Panasonic CF-M34 series
-
Page 1: Table Of Contents
® Personal Computer Reference Manual CF-M34 Series Contents Read Me First ............2 Key Combinations ..........4 LED Indicators ............ 5 Touch Pad .......... 6 2000 (Advanced) Touchscreen ............. 10 Suspend/Hibernation Functions .....12 Security Measures ..........15 Computing On The Road ........19 Battery Power ...........20 PC Cards ............ -
Page 2: Read Me First
Read Me First Saving Data on the Hard Disk Do not expose your computer to shock. Use care when handling your computer, shock may damage your hard disk or make your software applications and data unusable. Do not power off your computer while software applications are running or HDD indicator ( ) is on. Properly shut Windows* down to avoid problems ([Start] - [Shut Down] ). - Page 3 Read Me First Usage Environment Environment Place the computer on a flat stable surface. In use: Temperature: 5 °C to 35 °C {41 °F to 95 °F} Humidity: 30% to 80% RH (No condensation) Not in use: Temperature: -20 °C to 60 °C {-4 °F to 140 °F} Humidity: 30% to 90% RH (No condensation) Places not to use your computer...
-
Page 4: Key Combinations
Key Combinations CAUTION Do not press the following key combinations repeatedly in (quick) succession. Do not press the following key combinations while using the touch pad (mouse) or other keys. Functions Popup Window Pressing this key combination adjusts the brightness Is displayed when LCD brightness con- Fn + F1... -
Page 5: Led Indicators
LED Indicators Caps Lock This indicator lights green when Caps Lock is pressed. Subsequent non-shifted input is capitalized. NumLk These indicators light green when NumLk is pressed. This causes a (Numeric key) portion of the keyboard to function as a numeric keypad. The [Enter] key functions differently depending on the application. -
Page 6: Touch Pad (Advanced)
Touch Pad (Advanced) Using the Touch Pad Use the touch pad to move the cursor on the display and perform normal computer operations. Work Surface For instructions on how to handle the touch pad, refer to page The touch pad has the following two modes of operation. Microsoft ®... - Page 7 Touch Pad (Advanced) ® Indicates an operation applicable to the Microsoft IntelliMouse Wheel mode. Wheel Indicates an operation applicable to the original mode. Original Basic Operation Function Touch Pad Operation Moving the Cursor Wheel Original Move the tip of your finger lightly over the surface.
- Page 8 Touch Pad (Advanced) Function Touch Pad Operation Pan* Wheel Scroll in various directions of a document (move the mouse slightly while Operate while holding down the two buttons. holding down the wheel) Zoom* Wheel Magnify/reduce the display of Ctrl + Magnify a document.
- Page 9 Touch Pad (Advanced) CAUTION When [PS/2 Compatible Mouse] is displayed in [Mice and other pointing devices]: Double-click [PS/2 Compatible Mouse]. Select [Driver] - [Update Driver] and then press [Next]. Select [Display a list of the known drivers..] and then press [Next]. At the [Update Device Driver Wizard], select [touchpad] and then press [Next].
-
Page 10: Touchscreen
Touchscreen Your computer is equipped with a touchscreen display allowing you to perform the same operations as the touch pad or mouse by touching the surface of the display with your finger. (The following explanation gives one example (for the default settings). The operation settings can be changed in [Start] - [Programs] - [Updd] - [Settings].) Clicking Moving the cursor... -
Page 11: Configuring The Touchscreen
Touchscreen Configuring the Touchscreen When needed, the touchscreen can be configured using the following steps. Select from the taskbar or select [Settings] from [Start] - [Programs] - [Updd] The following screen will appear. Calibration Define the calibration setup. Windows Use when the cursor can not be pointed correctly with Set the “double-click”... -
Page 12: Suspend/Hibernation Functions
Suspend/Hibernation Functions Starting Up Your Computer Quickly If you want to immediately start up and continue an application after shutting down your computer, you can do so by using the suspend or hibernation function. NOTE With Windows 2000, the "Suspend" is called "Standby". Differences between the suspend and hibernation functions Function Suspend function... -
Page 13: Resuming Operation
Suspend/Hibernation Functions NOTE With the method below, you can shut down the computer by using the suspend function. Fn + F7 page In [Start] - [Shut Down], select [Stand by]. With the method below, you can shut down the computer by using the hibernation function. - Page 14 Suspend/Hibernation Functions Precautions for Using the Suspend or Hibernation Function Save all data before powering off your computer. When restarting from or shutting down to the suspend or hibernation mode, do not touch the touch pad or touchscreen (or move the mouse (serial or PS/2 type) if one is connected).
-
Page 15: Security Measures
Security Measures To prevent unauthorized access of your computer, the various security measures are provided below. Situation Function to use Reference You do not want your computer to be used without permission Supervisor Password below User Password You do not want the data on the hard disk to be read, or data to Hard Disk Lock page 18 be written to the hard disk, in cases including theft. - Page 16 Use only the upper horizontal row of numeric keys to input your user password. Do not forget your password. If a password is forgotten you will be un- able to use your computer. Contact Panasonic Technical Support. When running the Setup Utility, do not leave your computer even for a short time.
- Page 17 Use only the upper horizontal row of numeric keys to input your user password. Do not forget your password. If a password is forgotten, you will be unable to use your computer. Contact Panasonic Technical Support. When running the Setup Utility, do not leave your computer even for a short time.
- Page 18 Set the Supervisor Password if you have not done so. ( page Using , select [Hard Disk Lock], then press Enter NOTE If [Hard Disk Lock] is not displayed, contact Panasonic Technical Support. To enable the Hard Disk Lock Select [Enable], then press Enter At the [Caution], press Enter .
-
Page 19: Computing On The Road
Computing On The Road Conserving Power One of the main features of notebook-type computers is that you have the power of computing away from your home or office. In the following, information is provided on how to maximize use of the battery pack which is necessary for such computing. Four Important Points POINT Be sure to charge your battery before and after use. -
Page 20: Battery Power
Battery pack or charger may not be working properly. Quickly remove the battery pack and disconnect the AC adapter, then connect them again. If the problem persists, contact Panasonic Technical Support. Blinking orange* Unable to recharge due to violation of temperature limits. - Page 21 Battery Power When the Remaining Battery Charge Becomes Low Save your data and power off your computer Following that: Plug in the AC adapter, and fully charge your battery. Use a spare battery if you have one. If you have neither the AC adapter nor an extra battery, power the computer off. Power settings, e.g., warning* for a low battery level, can be made in [Control Panel] - [Power Options].
- Page 22 Battery Power Replacing the Battery Pack When the charge provided by your battery pack is supplied for only a short period of time, even after fully charging according to the instructions, it may be time to replace your battery pack. The battery pack is a consumable item and therefore will require replacement (CF-VZSU15).
- Page 23 Battery Power Put the battery pack Use the blue tab to lower the battery pack into place. Slide the battery pack inward until it is firmly in place. CAUTION Be sure the battery pack is properly connected to the connector. Put the cover back into place The cover is closed by inserting the hook at the right end (see illus- tration) into the groove.
-
Page 24: Pc Cards
PC Cards Your computer has one PC Card slot. This slot conforms to the PC Card Standard; therefore, communications and SCSI devices may be utilized. The slot allows you to use one Type I or Type II card. CAUTION Check the PC Cards’ specifications. Be sure the total operating current does not exceed the specified limit. -
Page 25: Ram Module
RAM Module Use a RAM module meeting the RAM module specifications below. If a module is used that does not meet the specifications, there are cases in which data may become unus- able or the computer may not operate properly. RAM module specifications 144 pins, SO-DIMM, 3.3 V, SDRAM, PC100 Compliant Only a RAM card designed for PC100 can be added... -
Page 26: Usb Devices
USB Devices Installing a USB devices Power off your computer.( "Starting Up/Shutting Down") Do not shut down using the suspend or hibernation mode. Connect the USB device to your computer. NOTE Even a USB device connected during Windows 2000 start up may not operate. -
Page 27: External Display
External Display Power off your computer "Starting Up/Shutting Down") Do not shut down using the suspend or hibernation mode. Port Replicator Connect your computer to the optional port replicator The operation manual of the port replicator, page Connect the external display to the port replicator NOTE For more detailed information, refer to the operation manual of the external display. -
Page 28: Modem
Modem Connecting to a telephone line and settings Connecting a telephone line to the internal modem It is not possible to connect the internal modem to any of the following lines. Internal home phones Intercoms CAUTION Do not use the PBX internal phone lines installed in company offices. Doing so may lead to a fire or electric shock. -
Page 29: Port Replicator
Port Replicator A port replicator is available as an option (CF-VEB341/CF-VEB342). This device elimi- nates the hassles of having you connect/disconnect the various cables when carrying your computer around and allows a variety of peripherals to be connected including a headphone or microphone, etc. -
Page 30: Floppy Disk Drive
USB connector of the computer should be used. CAUTION If a USB floppy disk drive other than the Panasonic CF-VFDU03 USB floppy disk drive is used, operations such as reinstallation cannot be performed because the FDD will be unable to be used as a boot drive. -
Page 31: Accessories
Accessories Hand Strap and Shoulder Strap A hand strap and shoulder strap are available as an option (CF-VSS341). The hand strap is convenient for computing while standing. Adjust the length of the belt so that the computer does not fall by mistake, and firmly hold the computer when using it. -
Page 32: Hard Disk Drive
Hard Disk Drive To change your hard disk drive, contact Panasonic Technical Support CAUTION To customers: To change your hard disk, contact Panasonic Technical Support. Be sure to back up all important data before the change. If [Hard Disk Lock] is set to [Enable] in the Setup Utility, change this to [Disable] before the change. - Page 33 Hard Disk Drive Remove the hard disk Unlock the connector lock. Remove the cable. Gently lift the hard disk. Cable Connector Lock Remove the hard disk cover. Disconnect the hard disk connector. Installing the hard disk Perform the steps in the reverse order of the procedure to remove the hard disk.
-
Page 34: Setup Utility
Setup Utility Running the Setup Utility To run the Setup Utility, you Upon seeing press Press <F2> to enter SETUP need to restart your computer. this message NOTE Press F2 while [Press <F2> to enter SETUP] is displayed. The Setup Utility will not run if F2 is not pressed soon after the computer starts. In this case, you need to restart your computer. - Page 35 Setup Utility Main Menu BIOS Version: Vx.xxLxx System Time: [xx:xx:xx] System Date: [xx/xx/2000] System Memory: xx MB Hard Disk: xx GB NumLock: [Off] Touch Pad: [Enable] Speaker: [Enable] Display: [External Monitor] Expansion: [Disable] Parameters : Default) NumLock Touch Pad Disable Enable Speaker Disable...
- Page 36 Setup Utility Advanced Menu Plug & Play: [Enable] Serial Port A: [3F8/IRQ4] Serial Port B: [2F8/IRQ3] Touch Screen: [2E8/IRQ7] Parallel Port: [378] Mode: [Bi-directional] Modem: [Enable] Legacy USB Support: [Disable] Floppy Drive Type: [CF-VFDU01] Parameters : Default) Plug & Play Disable Enable Serial Port A*...
- Page 37 Setup Utility Security Menu Password on boot: [Enable] Set Supervisor Password: [Enter] Hard Disk Lock: [Disable] User Password Protection: [No Protection] Set User Password: [Enter] Boot Up Drive: [A:/C:] Processor Serial Number: [Disable] CAUTION The User Password can only be set when the Supervisor Password has been set and [User Password Protection] has been set to [No Protection].
- Page 38 Setup Utility Power Menu When Windows 2000 is starting up, the individual timeout functions of the Setup Utility will not work. Power Switch: [Suspend] Panel Switch: [LCD Off] Fn+F7/Fn+F10 key: [Enable] Battery Operation AC Adapter Operation Parameters : Default) Power Switch* Suspend* Hibernation* Power Off...
- Page 39 Setup Utility Exit Menu Save Values & Exit NOTE Exit Without Saving Changes Get Default Values If the Supervisor Password and Load Previous Values User Password has been set, the Save Current Values password must be entered before Windows can start. Parameters Save Values &...
-
Page 40: Technical Information
Technical Information Network The network connection may be severed under the condition the power of the dis- play is OFF (for energy conservation purposes) and suspend* (hibernation) mode. When network or communication software is to be used, set [System standby] and [System hibernates], [Turn off monitor] and [Turn off hard disks](in [Start] - [Settings] - [Control Panel] - [Power Options]) to [Never]. -
Page 41: Dmi Viewer
CPU and memory. Running DMI Viewer Select [DMI Viewer] from [Start] - [Programs] - [Panasonic] The screen shown below is displayed. When you click on an item, detailed information on that item will be displayed. -
Page 42: Creating Backup Disks
Turn on your computer Set a floppy disk and make sure it is not in the write-protected state Select [Start] - [Programs] - [Panasonic] - [Create Backup Disk] Follow the on-screen instructions. Place a label identifying the contents on each disk. - Page 43 Creating Backup Disks Make a copy of the CD-ROM driver When using a CD-ROM drive other than the Panasonic KXL-RW10A CD-ROM drive Copy the necessary drivers, from the floppy disk included with your CD-ROM drive, to the FIRSTAID FD with the method below. It will be necessary to edit the CONFIG.SYS file and AUTOEXEC.BAT file on the FIRSTAID FD.
-
Page 44: List Of Error Codes
If your system displays one of except the messages marked below with an asterisk (*), write down the message and contact Panasonic Technical Support. If your system fails after you make changes in the Setup menus, reset the computer, enter Setup and install Setup defaults or correct the error. - Page 45 List of Error Codes 02F5 DMA Test Failed Cannot write to extended DMA (Direct Memory Access) registers. 02F6 Software NMI Failed Cannot generate software NMI (Non-Maskable Interrupt). 02F7 Fail - Safe Timer NMI Failed Fail-Safe Timer takes too long. device address Conflict Address conflict for specified device.
-
Page 46: Dealing With Problems
Dealing With Problems (Advanced) When a problem occurs, refer to this page. If you still cannot troubleshoot the problem, contact Panasonic Technical Support. Starting Up Check the cable connection for the AC adapter. The power indicator or Check to see if a fully charged battery is properly installed. - Page 47 Dealing With Problems (Advanced) Display No display after powering At the time of purchase, the display setting is preset for an external display. If you connect an external display, the screen is displayed on the external display. When there is no display to an external display, •...
-
Page 48: Character Input
Check to see if the hard disk is full. If it is full, delete unnecessary files. Your hard disk content may be corrupted. Contact Panasonic Technical Support. Check the settings of Setup Utility and Device Manager. When the previous item Try testing another drive or media. - Page 49 F9 does not work Restart the Setup Utility with the Supervisor Password. [Hard Disk Lock] is not The internal battery maintaining the clock may need to be replaced. Contact Panasonic displayed Technical Support. Application Software Computer hangs Press Ctrl + Alt + Del , select [Shut Down], and then press [OK].
- Page 50 Use the RAM module that support the recommended specifications. USB floppy disk drives Only the Panasonic CF-VFD03U USB floppy disk drive can be used. do not work as a boot Do not connect the floppy disk drive to the USB connector of the port replicator for drive this computer.
- Page 51 Pentium is a registered trademark of Intel Corporation. ® ® Adobe and Acrobat are either registered trademarks or trademarks of Adobe Systems Incorporated in the United States and/or other countries. Panasonic is a registered trademark of Matsushita Electric Industrial Co., Ltd. PCE0027B_2K...
Need help?
Do you have a question about the CF-M34 series and is the answer not in the manual?
Questions and answers