
Related Manuals for Nuvico EasyView CD-S21N


Summary of Contents for Nuvico EasyView CD-S21N
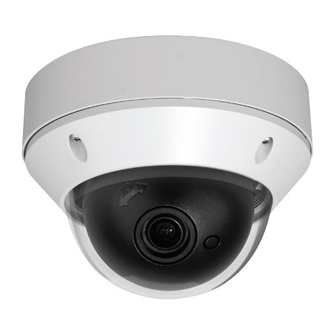
- Page 1 ™ Dome Cameras Flush Housing w/ Surface Mount Plate SD Series w/ 36 LEDs Outdoor Wall Mount Indoor Wall Mount Pedestal Mount Junction Box INSTALLATION MANUAL...
-
Page 2: Table Of Contents
Table of Contents About This Manual Before installing and using the camera, please read this manual carefully. Be sure to About This Manual keep it handy for later use. This installation manual covers the following models listed Available Models below. Any difference in features for these models are indicated where necessary. Note: Installation of this product should be made b y a qualified technician and should How to Open the Gimbal Cover conform to all local codes. -
Page 3: How To Open The Gimbal Cover
How to Open the Gimbal Cover 3-Axis Gimbal Adjustments The Gimbal mechanism yields maximum rotation and placement as shown below. EasyView Dome Cameras have vari-focal lens integrated inside the Gimbal. If you require to make focal/focus adjustments, the Gimbal cover needs to be removed temporarily. -
Page 4: Assembly & Mounting Accessories
Assembly & Mounting Accessories Dimensions (UNIT: mm) • Torx Wrench - For Vandalproof Domes Flush Mount Model #: T20 Length: 2 1/2" Thickness: " • Assembly Screws - For Vandalproof Domes These screws are used to affix dome cover to flush housing. Model #: Philips M4x10 Qty: 3 Length: 10mm... -
Page 5: Parts Name And Descriptions
Parts Name and Descriptions Base Installations 1. Remove dome cover by loosening 3 screws. For indoor domes, use standard Philips 1. Lens screw driver. For vandalproof domes, use Torx wrench provided with the package. 2. Power Input Connector 2. Surface Mount: 12VDC/24VAC Dual Voltage Using four ST4x30 screws, mount surface plate to a sturdy surface Using three ST4x12(Indoor) screws or M4x10(Vandalproof) screws, affix flush mount base to... -
Page 6: Mounting Housings To Electrical Junction Boxes
Mounting Housings to Electrical Junction Boxes ™ Either flush mount or surface mount application, pre-drilled mounting holes on EasyView Dome Cameras Domes accommodate various electrical junction boxes, making installation easy and less time consuming. S Series Indoor Dome Cameras CD-S21N / CD-S21P Vandalproof Dome Cameras CV-S21N / CV-S21P SD Series... -
Page 7: Connections
Replace the Gimbal cover back to the Gimbal base. this feature along with a service monitor, second monitor cable/connector (Part# CA-SMC30) is required. Contact your distributor or NUVICO Sales Department Please refer to Page 14 of this manual for further instructions. -
Page 8: Camera Control & Setup
OSD Menu Instructions Camera Control & Setup Menu & Setting Details Main Menu • DC BRIGHTNESS 1-70 (25) LENS • MANUAL • NONE SHUTTER • FLK • ESC BRIGHTNESS 1-70 (25) • MANUAL SHUTTER 1/60 -1/120,000 WHITE BALANCE • ATW MODE •... -
Page 9: Osd Menu Instructions
OSD Menu Instructions OSD Menu Instructions OSD Menu Control Menu & Setting Details CENTER KEY - Used to access menu mode, Also used to confirm the setting Main Menu UP / DOWN KEY - Used to choose the desired menu selection. •... -
Page 10: Main Menu
OSD Menu Instructions OSD Menu Instructions Main Menu D. BACKLIGHT This function is used when there is strong light in the background. A. LENS • OFF: Backlight Compensation is off. • LOW: Select if there is little light in the background. This function is used to adjust the brightness of the screen. - Page 11 OSD Menu Instructions OSD Menu Instructions SYNC H. SPECIAL This function is used when synchronization with the legacy system is needed. • INT: Internal Synchronization. CAMERA ID • LL: External Synchronization.(Optional) • ON: CAMERA ID is displayed on the monitor. If the CAMERA ID has not been set, please follow these directions: MOTION DETECTION 1.
-
Page 12: Fan & Heater Installations & Specifications / Cv-Fh
OSD Menu Instructions Fan & Heater Installations & Specifications / CV-FH MIRROR Features • OFF: Cancels the inversion. Assembly Screws Fan & Heater for EasyView™ Vandalproof Domes Philips M2.6x14 (1x) • ON: Sets a horizontal image inversion. Assembly Screws Philips M3x6 (1x) SHARPNESS Assembly Accessories •... -
Page 13: Wall Mount Installations / Cv-Wm
Wall Mount Installations / CV-WM Specifications S Serie Contents 550 TV Lines S Series Wall Pipe 3/4 Inch Indoor Dome Cameras Wall Mount CD-S21N / CD-S21P - Qty: 1 Teflon tape Vandalproof Dome Cameras Mounting Template CV-S21N / CV-S21P - Qty: 1 Wall Mount Item S Series... -
Page 14: Sd Series
™ Specifications SD Series Dome Cameras SD Series 550 TV Lines • Day/Night • IR LEDs Indoor Dome Cameras CD-SD21N / CD-SD21P | CD-SD21N-L / CD-SD21P- L Vandalproof Dome Cameras CV-SD21N / CV-SD21P | CV-SD21N-L / CV-SD21P- L Item SD Series Video Formats NTSC Image Sensor... - Page 15 ™ Dome Cameras NUVICO Tel: +7 495 234-3212 Fax: +7 495 234-3212 E-mail: techsupport@nuvico.ru www .nuvico.ru NUVICO EasyView and the NUVICO logos are registered trademarks of NUVICO. © Copyright 2008, NUVICO. All rights reserved...
Need help?
Do you have a question about the EasyView CD-S21N and is the answer not in the manual?
Questions and answers