Table of Contents
Advertisement
Quick Links
Advertisement
Table of Contents

Summary of Contents for Nuvico CF-S1N/P
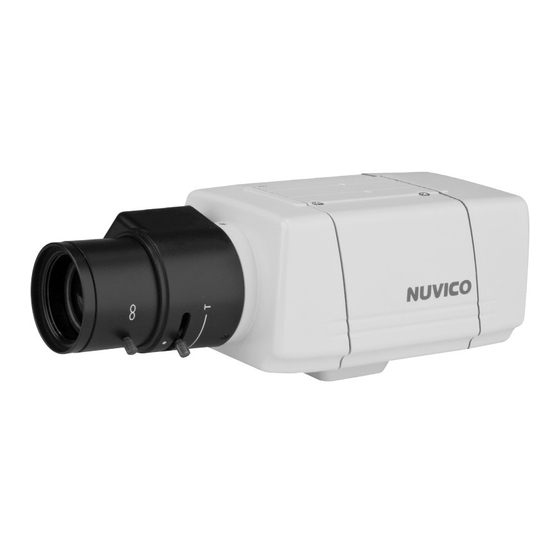
- Page 1 FIXED CAMERA CF-S1N/P | CF-W1N/P (Lens not included) INSTALLATION MANUAL...
-
Page 2: Table Of Contents
Note: Installation of this product should be made by a qualified technician and should conform to all local codes. Dimensions Parts Name & Descriptions Contents Verification Installation Contents of CF-S1N/P OSD Menu Instructions Contents of CF-W1N/P OSD Menu Instructions Specifications CF-S1N/P CF-W1N/P •... -
Page 3: Dimensions
Dimensions Parts Name & Descriptions (UNIT: mm) Front Bottom 1. Sensor Protective Cap Be sure to cap the lens mount when the lens is not mounted. Pull out the cap to mount the lens. 2. CS-Mount Lens Adaptor Used to mount a CS-mount lens. 3. -
Page 4: Installation
Parts Name & Descriptions Installation Installing DC/Video Auto Iris Lens Back Using auto Iris lens, connect Iris lens plug to the camera as below. 1. Set the lens type, DC/Video. 2. If necessary, strip Approx. 8mm for outer shield and Approx. 2mm for inner shield of lens cable for soldering. - Page 5 Installation FIXED CAMERA Power Requirement CF-S1N/P - 12VDC/24VAC 500mA regulated power supply. - The camera is reverse - polarity protected. (Lens not included) Note: Do not use power sources other than above specified. Key Features • 1/3” CCD Sensor • 550 TVL •...
-
Page 6: Osd Menu Instructions
OSD Menu Instructions OSD Menu Instructions OSD Menu Control Menu & Setting Details • SETUP key: Access to the menu mode or to confirm the setting. • UP/DOWN key: Choose the desired menu. • LEFT/RIGHT: Set up the value of the selected menu. OSD Menu ENTER/EXIT •... -
Page 7: Main Menu
OSD Menu Instructions OSD Menu Instructions Main Menu A. LENS This function is used to adjust the brightness of the screen. • DC: The brightness can be adjusted in DC mode. The brightness can be adjusted within the range of 1 to 70. B. - Page 8 OSD Menu Instructions OSD Menu Instructions D. BACKLIGHT (Backlight compensation) H. SPECIAL This function is used when there is strong light in the background. CAMERA ID • OFF: Backlight Compensation is off. • LOW: Select if there is little light in the background. •...
-
Page 9: Cf-W1N/P
OSD Menu Instructions FIXED CAMERA MOTION DETECTION CF-W1N/P This function allows you to observe movement of object in 4 different areas on the screen. • OFF: MOTION DETECTION mode is canceled. • ON: Any motion in the selected area is observed. PRIVACY This function allows you to restrict some areas to be observed. - Page 10 OSD Menu Instructions OSD Menu Instructions OSD Menu Control Special Menu 1 Table • SETUP key: Access to the menu mode or to confirm the setting. • UP/DOWN key: Choose the desired menu. • LEFT/RIGHT: Set up the value of the selected menu. OSD Menu ENTER/EXIT and SWITCH •...
-
Page 11: Main Menu Setup
OSD Menu Instructions OSD Menu Instructions Main Menu Setup Resolution Select the resolution between NORMAL(480 TVL) or HIGH(540 TVL). Lens & Video Setup This function is used to adjust lens type, brightness, chrome gain, and video standard. (NTSC/PAL) • LENS: Select the mounted lens type “DC”, “VIDEO” or “MANUAL” by using LEFT/RIGHT key. - Page 12 OSD Menu Instructions OSD Menu Instructions WB(White Balance) Control WDR(Wide Dynamic Range) Compensate different colors of light being emitted from different light sources. By accumulate the scope of contrast between the brightest and darkest value of the picture, the camera displays the adapted image automatically. The desired level “LOW”, “NORMAL”, “HIGH”...
- Page 13 OSD Menu Instructions OSD Menu Instructions DNR(Digital Noise Reduction) Preset Camera Compensate different colors of light being emitted from different light sources. Select a preset setting of the camera according to lighting conditions. • ON: Reduces noise level of the image under the low light condition.
- Page 14 OSD Menu Instructions OSD Menu Instructions EXIT Special Menu 1 Setup Camera ID Enter the camera ID(Identification). Select up to 8 letters for your camera ID. • EXIT W/SAVE • EXIT NO CHANGE • FACTORY RESET • Select “ON” and press SETUP key to edit camera ID. •...
- Page 15 OSD Menu Instructions OSD Menu Instructions Day/Night SYNC Select either INT(Internal) or LINELOCK. • INT: Used for cameras with DC power or when LINELOCK is not required. • LINELOCK: Used for cameras with AC power and requiring LINELOCK. Adjust the “V PHASE(Vertical Sync)”...
- Page 16 OSD Menu Instructions OSD Menu Instructions • ENABLE ZONES: Select the desired zone No. to enable back light compensation. AE(Auto Exposure) Preference • ADJUST ZONE1, 2, 3, 4: Select desired ADJUST ZONE No. from 1 to 4 to edit its size Proper Iris Adjustment.
- Page 17 OSD Menu Instructions Specifications CF-S1N/P Special Menu 2 Setup Item CF-S1N/P Video Format NTSC / PAL Image Sensor 1/3” CCD Sync System Internal Effective Pixels 768(H) x 494(V)(N) / 625(H) x 582(V)(P) Scanning system 525 Lines. 2:1 Interlaced(N), 625 Lines. 2:1 Interlaced(P) Electronic Shutter 1/60 ~ 1/120,000 sec.(N), 1/50 ~ 1/120,000 sec.(P)
- Page 18 Specifications CF-W1N/P Item CF-W1N/P Video Format NTSC & PAL Selectable Image Sensor 1/3” CMOS Sync System Internal Effective Pixels 720(H) x 540(V) Scanning system 525 Lines. 2:1 Interlaced(N), 625 Lines. 2:1 Interlaced(P) Main Video Output 1.0 Vp-p Composite, 75 ohm Service Monitor Output 1.0 Vp-p Composite, 75 ohm Horizontal Resolution...
- Page 19 NUVICO Tel: +7 495 234-3212 Fax: +7 495 234-3212 E-mail: techsupport@nuvico.ru www .nuvico.ru...


Need help?
Do you have a question about the CF-S1N/P and is the answer not in the manual?
Questions and answers