Table of Contents
Advertisement
Quick Links
Download this manual
See also:
User Manual
Advertisement
Table of Contents

Subscribe to Our Youtube Channel
Related Manuals for Audionet SAM G2


Summary of Contents for Audionet SAM G2
- Page 1 SAM G2 Stereo Amplifier User's Manual...
-
Page 3: Table Of Contents
Usage ............... 14 Powering up ................14 Switching on and off ..............14 Mains phase detection .............. 15 Using Audionet Link ..............15 Control elements on the front panel ........16 Volume control................16 Display ..................17 Input selection ................17 Muting .................. - Page 4 Edit Channel Name ..............22 Set Channel for By-Pass Mode ............22 Overview factory defaults ............25 Audionet Metal Remote Control ......26 Key assignment SAM G2 ............27 Changing the batteries ............. 27 Settings for Audionet preamplifier ......... 28 Protection system ..........30 Technical information ..........
-
Page 5: Preface
Bochum works by our experienced and passionate work- force. But before you start listening to your new Audionet SAM G2, please read this manual carefully so you are able to use and enjoy all functions of this... -
Page 6: Included
Always use the provided cloth bag to prevent scratches on the casing. · Please allow the SAM G2 to adapt to the climatic conditions in your listening room before you switch on the unit for the first time after transport. -
Page 7: Overview Front Panel
Overview front panel... -
Page 8: Overview Back Panel
Overview back panel... -
Page 9: Installation And Power Supply
Do not place the SAM G2 in close range to heat sources like radiators. · Do not place the SAM G2 on top of other units, especially not on top of power amplifiers, pre amplifiers or similar that produce heat. Both units could suffer damage from thermal overload. -
Page 10: Orientation Of Mains Plug
· The SAM G2 is a Class I unit and must be earthed. Please ensure a stable earth connection. Phase ('hot' pin) is marked on the back panel ('phase') 11 . · If you connect the mains cord please make sure that mains switch 10 at the back panel is switched off. -
Page 11: Inputs And Outputs
5.1 Inputs The SAM G2 is equipped with five RCA inputs 2 to 6 and one bal- anced (XLR) input 1 for connecting signal sources at line level. Please connect the left and right input of the same number printed on the back panel of the SAM G2 to the corresponding output of the source you would like to connect to the SAM G2. -
Page 12: Preamplifier Output
REC OUT 15 of the SAM G2. For playback please con- nect your recording device only to input no. 5 IN 5 5 of the SAM G2, if it is also connected to the output REC OUT 15 of your SAM G2. If you select input no. -
Page 13: Headphones Socket
5.6 Headphones socket A 6.3 mm headphones socket is located at the rear of your SAM G2. The signal at this socket can be switched on and off to allow the headphones to be plugged in permanently. Switching is easily done on the front panel, please refer to section 'Set Output Mode' on page 20. -
Page 14: Usage
6.1 Powering up First of all, please make sure your SAM G2 is connected correctly to your signal sources and mains (see section 'Installation and power supply' on page 8 and 'Inputs and outputs' on page 11). -
Page 15: Mains Phase Detection
CD player or tuner) connected via Audionet Link (also see section 'Audionet Link' on page 13). If the rest of your Audionet system is connected to your SAM G2 via Audionet Link, all linked units will be automatically switched on/off as... -
Page 16: Control Elements On The Front Panel
The volume control of the SAM G2 runs in a range from –80 dB to +0 dB relatively to the level of the input signal. Note ·... -
Page 17: Display
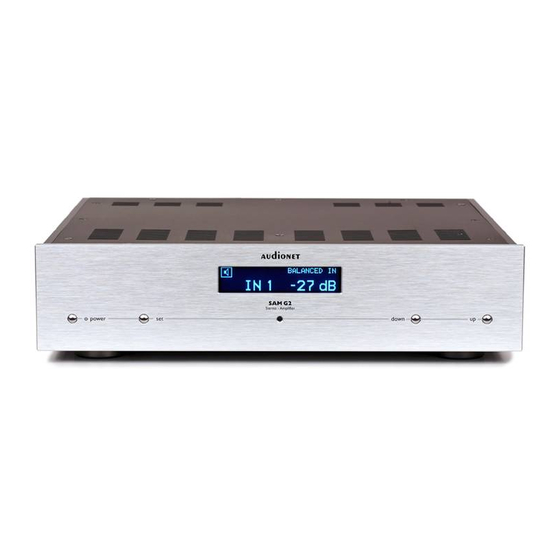
Display The display provides in the normal operating mode the following infor- mation: INPUT TWO IN 2 -32 dB Status of the loudspeaker output mode (see section 'Set Output Mode' on page 20). Status of the headphones output mode (see section 'Set Output Mode' on page 20). -
Page 18: Muting
Audionet Metal Remote Control RC 1 or RC 2 to mute or un-mute your SAM G2. The SAM G2 uses 'soft' muting, i.e. volume is stepped down gently to -80 dB. The display informs the user of a muted unit with the text MUTE. -
Page 19: Setup Menu
After the last menu item you will leave the setup menu automatically. Of course, you may leave the setup menu from each menu item by holding the set key down for longer than two seconds. The SAM G2 will return to the normal operating mode. -
Page 20: Set Output Mode
PRE OUT 7 will be automatically disabled. 7.2 Set Display Brightness To adjust the brightness of the display on the front panel of the SAM G2 push and hold the set key longer than 2 seconds to enter the setup menu. -
Page 21: Set Pre Output Mode
It switches off automatically several seconds af- ter the last user entry. · The SAM G2 activates the 'display saver' automatically after 10 min- utes without any user entry. · During active 'display saver', the display shows only the number of the selected input channel and current volume level in the form of In 4 -47dB. -
Page 22: Edit Channel Name
The Autostart function is active. As soon as you connect active the SAM G2 to mains (i.e. use the mains switch 10 on the back panel) the unit starts up automatically to normal operating mode. Use this setting for timer controlled op- erations. - Page 23 Set Channel for By-Pass Mode. The signal at the input channel selected for By-Pass Mode operations is passed through to the amplifiers and outputs of your SAM G2 at level of 0 dB (i.e. no change in volume level).
- Page 24 PRE key on the Audionet Metal Remote Control RC 1 or RC 2, this mode will be saved, i.e. if you switch on the SAM G2, the unit will switch to the last saved input channel selection and thus...
-
Page 25: Overview Factory Defaults
7.7 Overview factory defaults Option Setting Select Input INPUT TWO -> IN 2 Set Output Mode Speakers only Set Display Brightness Set Pre Output Mode disabled Set AutoStart disabled Channel name 1: BALANCED IN 2: INPUT TWO 3: INPUT THREE 4: INPUT FOUR 5: TAPE INPUT 6: PHONO INPUT... -
Page 26: Audionet Metal Remote Control
Audionet Metal Remote Control The Audionet Metal Remote Control RC 1 (included) or RC 2 controls all the important function of everyday use of your SAM G2. The following explains all these commands in detail. POWER < ä < •... -
Page 27: Key Assignment Sam G2
8.1 Key assignment SAM G2 Power key PRE use the key PRE to switch on / off your SAM G2. This key has the function as key power on the front panel. If the SAM G2 is in stand- by mode, press key PRE to switch on this unit. If the SAM G2 is al- ready switched on, then pressing PRE powers the unit down to stand- by mode. -
Page 28: Settings For Audionet Preamplifier
Settings for Audionet preamplifier The Audionet Metal Remote Control RC 1 or RC 2 has 6 keys to control an Audionet (pre-) amplifier like the SAM G2. The previous section 'Key assignment SAM G2' explains the function of these keys. - Page 29 For Audionet Metal Remote Control RC 2 the DIP switch for selecting the system address is located here: DIP switch for system address on RC 2 (the upper slider is for configuring a preamplifier) Put the DIP switch labelled 'SYS ADDRESS' in position '19' or '16' ac-...
-
Page 30: Protection System
Power Failure (temporary) breakdown of mains Even after powering down the SAM G2, the error message will still be in the display. Press the power key on the front panel to indicating the stand-by mode. -
Page 31: Technical Information
A by-pass mode is available for smart integration of the new SAM G2 into a home cinema system. The inputs are freely nameable and the controller even verifies that the mains connection is phase correct. Moreover, the controller monitors all operating states and deactivates the device as soon as a critical state has been identified. -
Page 32: Security Advice
· During connecting or removing the SAM G2 to/from sources and/or power/pre amplifiers all units have to be switched off to prevent damage of the SAM G2 or any of the other connected units. · Use dry cloth for cleaning! We would like to wish you many exciting listening experiences with your new Audionet product. -
Page 33: Technical Data
2 pair Furutech 4mm-jacks, Rhodium Outputs 1 pair RCA, gold-plated, Teflon insulated (Pre Out) 1 pair RCA , gold-plated, Teflon insulated (Rec Out) 1 Audionet Link, optical (TosLink) 1 6,3 mm socket for headphones (switchable) Mains 220 V…240 V, 50…60 Hz Power consumption <... - Page 34 DC coupling, no capacitors in the signal path By-Pass function (e.g. for integration into home cin- ema systems) Audionet Link output for remote control of other Audionet components Switchable headphones output MC/MM phono pre amplifier module Options Errors and omissions excepted.
Need help?
Do you have a question about the SAM G2 and is the answer not in the manual?
Questions and answers