Table of Contents
Advertisement
Quick Links
Download this manual
See also:
User Manual
Advertisement
Table of Contents

Related Manuals for Audionet PAM G2


Summary of Contents for Audionet PAM G2
- Page 1 PAM G2 Phono Preamplifier for MC / MM User’s Manual...
-
Page 3: Table Of Contents
Contents Preface ..................5 Included ..................6 Transport..................6 Overview front panel ..............7 Overview back panel ..............8 Installation and power supply ........... 9 Placement ..................9 Mains connection ................ 10 External power supply EPS ............10 Inputs and outputs ..............12 Inputs .................. - Page 4 Circuitry ..................19 Security advice ................20 Technical data ................21...
-
Page 5: Preface
Berlin, Germany by our experienced and passionate workforce. But before you start listening to your new Audionet PAM G2, please read this manual carefully so you are able to use and enjoy all functions of this... -
Page 6: Included
· Always use the provided bag to prevent scratches on the casing. · Please allow the PAM G2 to adapt to the climatic conditions in your listening room before you switch on the unit for the first time after transport. -
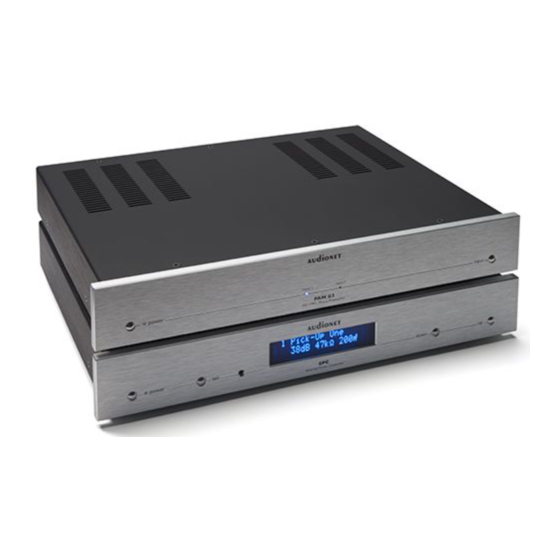
Page 7: Overview Front Panel
Overview front panel... -
Page 8: Overview Back Panel
Overview back panel... -
Page 9: Installation And Power Supply
Important · During connecting and removing of turntables or preamplifiers to the PAM G2 all units of your audio system have to be switched off to prevent damage of the PAM G2 or any of the other connected units. ·... -
Page 10: Mains Connection
The electrical specifications of your home country must meet the electrical specifications printed onto the back panel. · The PAM G2 is a Class I unit and must be earthed. Please ensure a stable earth connection. Phase ('hot' pin) is marked on the back panel ("PHASE") 10 ·... - Page 11 Use the power key on the front panel to switch on the PAM G2. The PAM G2 is now ready to use and gets its power from the external power supply EPS. To switch off the PAM G2 into stand-by mode, use the power key...
-
Page 12: Inputs And Outputs
Important · During connecting and removing of turntables or preamplifiers to the PAM G2 all units of your audio system have to be switched off to prevent damage of the PAM G2 or any of the other connected units. ·... -
Page 13: Usage
Usage 6.1 Powering up First of all, please make sure your PAM G2 is connected correctly to your turntable, preamplifier and mains (see section "Installation and power supply" on page 9 and section "Inputs and outputs" on page 12). The PAM G2 is a stand-by unit. As soon as the amplifier is con-... -
Page 14: Mains Phase Detection
LED on the front panel is activated. Important · If your PAM G2 is equipped with only one channel, the input key is disabled and channel switching is not possible. In this case, only In- put 1 is available. -
Page 15: Settings
Settings Matching the pick-up's electrical characteristic At the back of the PAM G2 (see section: "Overview back panel" on page 8) are six rotary switches for the basic configuration of both input chan- nels. The lower row is for the configuration of input 1, the upper row is for the configuration of input 2. -
Page 16: Mm Systems
MC Systems MC pick-up systems cover a great range of different output levels. To achieve an output matching the level of your other sources, the PAM G2 offers 4 gain settings: For pick-ups with a 'normal' output level (approx. 1...2 mV output volt- age) set the Gain (dB) 6 to 58 dB. -
Page 17: Typical Setups
· For optimum adjustment to your pick-up follow the recommen- dations of the manufacturer! If necessary ask your dealer. 7.2 Factory defaults Upon delivery of the PAM G2 following settings are configured by de- fault: Gain 38 dB Input resistance... -
Page 18: Resistance Reduction
Example: If a capacity of C = 500 pF is needed, select the base capacity of = 420 pF with the rotary switch on the back panel. Then add an addi- = 82 pF to the input C/R ext. 15 or 16 to get tional capacitor of C EXT. -
Page 19: Technical Information
Technical information 8.1 Design The construction is optimized magnetically and capacitatively. The signal paths have absolute minimum lengths with no harmful components like coupling capacitors, coils or relays. Input and output circuits are immune to negative influences of connected devices. Consequently, SMD minia- ture technology ensures optimized high frequency properties. -
Page 20: Security Advice
Important · Use only EPS G2 devices (with serial number 12.21.10 or higher) if your PAM G2 is powered by the optional external power supply. Noncompliance may cause damage to both units. · Avoid packaging material, especially plastic bags, coming into chil- dren's hands! ·... -
Page 21: Technical Data
10 Technical data Function Phono preamplifier 40 – 30.000 Hz (+/- 0.2 dB) Frequency response 18 – 80.000 Hz (+/- 1.0 dB) order high pass fg = 8 Hz Subsonic filter Gain 38 dB, 48 dB, 58 dB, 68 dB (@ 1 kHz) <... - Page 22 DC-free outputs FET inputs, no bias current Errors and omissions excepted. Specifications and design are subject to changes without prior notice. audionet is a trademark of Idektron GmbH & Co KG Engineered and produced by: Idektron GmbH & Co. KG, Alboinstraße 36 - 42, 12103 Berlin, Germany www.audionet.de...
Need help?
Do you have a question about the PAM G2 and is the answer not in the manual?
Questions and answers