
Related Manuals for Uniden UWG200


Summary of Contents for Uniden UWG200
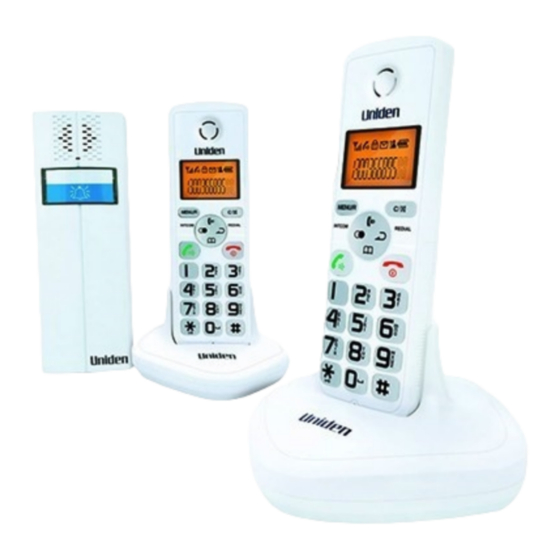
- Page 1 UWG200 DECT CORDLESS PHONE with DOORBELL For more exciting new products please visit our website: Australia: www.uniden.com.au New Zealand: www.uniden.co.nz...
-
Page 2: Important Safety Instructions
IMPORTANT SAFETY INSTRUCTIONS When using your telephone equipment, basic safety precautions should always be fol- lowed to reduce the risk of fire, electric shock and injury to persons, including the fol- lowing: • This unit is NOT waterproof. DO NOT expose this unit to moisture. •... - Page 3 Important Notice Under power failure conditions this appliance may not operate. Please ensure that a separate telephone, not dependent on local power, is available for emergency use. General Notices for New Zealand Model: • The grant of a NZ Telepermit for any item of terminal equipment indicates only that Telecom has accepted that the item complies with minimum conditions for connec- tion to its network.
-
Page 4: Table Of Contents
CONTENTS IMPORTANT SAFETY INSTRUCTIONS Menu Map Phone Book FEATURES OF ThE UWG 200 BS (Base) Settings Terminate HS WhAT’S IN ThE BOx? Flash Time GETTING TO KNOW YOUR PhONE Modify PIN BS Reset INSTALLING YOUR PhONE Insert 0 (NZ Only) hS (handset) Settings CORDLESS PhONE Setting Alarm... -
Page 5: Features Of The Uwg 200
FEATURES OF ThE UWG 200 Phone • 1.8GHz DECT technology with GAP • Real time clock (set time) • Up to 5 handsets optional for one base • Keypad lock • Up to 4 bases optional for one handset • 13 languages selectable •... -
Page 6: What's In The Box
• Owner’s Manual Base Handset (2) Doorbell x If any items are missing or damaged, contact your place of purchase immediately. Never use damaged products! x Need help? Get answers at our website: www.uniden.com.au for Australian model www.uniden.co.nz for New Zealand model. -
Page 7: Getting To Know Your Phone
GETTING TO KNOW YOUR PhONE Phone Layout and Keys Function Earpiece Display Speaker MENU/ CANCEL/MUTE SELECT CID/UP PHONEBOOK/DOWN DIAL/SPEAKER Battery compartment cover 12-key dial pad Charging Contacts Microphone... - Page 8 Phone Layout PHONE (BASE) REAR AND BOTTOM VIEW Phone Line Jack Power Jack Charge Pins Page button CHARGER...
- Page 9 Doorbell/Intercom Call Button 1. 12V DC POSITIVE INPUT 2. 12V DC NEGATIVE INPUT 3. UNLOCK CONTROL POSITIVE TERMINAL 4. UNLOCK CONTROL NEGATIVE TERMINAL 5. SILICA GEL PLUG...
- Page 10 Keys Description Key Icon What it does Dial/Speaker key Make/Answer a call. Activates the speakerphone, if pressed during a call. End/Power key End a call. Press and hold to activate On/Off, as described in page 17. Navigation Key Up/CID key Scroll up through lists and menu options Increase the earpiece/speakerphone volume during a call.
- Page 11 INT key Set up internal call to another handset. Transfer an incoming call to another handset. Set up a conference call with an external line and an internal handset. Redial Key Redial a number, as described in page 21. Insert a pause when pre-dialing a number. Menu (Select)/R key MENU/R Enter the menu functions in standby mode.
- Page 12 LCD Icons Description New Call: Indicates you have missed one or more calls. Off hook: Indicates the line is engaged. hands-free: Indicates the handsfree function is enabled. Battery Icon: Indicates battery charge level. Signal Icon: Indicates whether the current signal exists or not. If the handset is too far from the base, this icon will blink on the LCD.
-
Page 13: Installing Your Phone
INSTALLING YOUR PhONE Phone Charge the Battery Install the rechargeable batteries Press in on the notch and slide the battery before using your phone. cover down and off. Insert the new batteries, matching correct polarity (+, -). Replace the battery cover, by sliding it into place. - Page 14 Installation Instruction Connect the modular ends of the AC power adaptors to the power jack of the base and charger, then plug the AC adaptors into standard AC wall outlets. Connect one end of the phone line cord to the phone line jack of the base, and the other end to a standard phone wall outlet.
- Page 15 Doorbell/Intercom Charge the Battery Press in on the notch and slide the battery cover down and off. Insert two C size alkaline batteries batteries, matching correct polarity (+, -). Replace the battery cover, by sliding it into place. Reversing the orientation of the batteries may damage the unit. When replacing the batteries, always use good quality C size alkaline batteries.
- Page 16 Installation Instruction Choose a proper location for the doorbell. Be sure to consider the average height of the visitors. Place the iron mounting bracket on the wall and fix it by drilling the screws. Slide down the doorbell and finish the installation. If you do not install two batteries, you should connect the 12 V DC Positive input and negative input.
- Page 17 Turning the handset On/Off If the handset is in power off mode, when you place the handset on the base, it auto- matically turns on. To turn the handset on or off in standby mode, follow these steps: To turn on the handset when it’s off, press and hold the key until you switch the display on.
-
Page 18: Cordless Phone
CORDLESS PhONE All descriptions in this manual assume that the handset is in the standby mode. Set the telephone to the standby mode by pressing the Basic Functions Making a Call Pick up the handset and press key. icon appears on the LCD. Dial a telephone number. -
Page 19: Receiving A Call
Receiving a Call When a new call is received, the call information will appear on the LCD. If the caller can be identified, the caller’s phone number is displayed. To answer a call, press the key. If you have activated the Auto Answer func- tion, when the handset is on the base, simply lift up to answer. -
Page 20: Muting The Microphone
Muting the Microphone During a conversation, you can temporarily switch off your phone’s microphone, so that the other party cannot hear you. • Press the key, during a conversation. The “Call Muted” appears on the LCD. • To unmute, press the key again. -
Page 21: Last Number Redial
Press key to choose Melody or Volume, then press the key. MENU/R Press the key to confirm. MENU/R You can select the ring tone from Melody 1 to 10 or adjust the volume from Vol- ume 1 to 5 or off. When you adjust the ring tone or volume, the phone plays the selected melody at the selected volume level. - Page 22 If no numbers are found, “Empty” is displayed. When the Redial Memory is full, each time you dial a new number, the oldest num- ber stored in the redial memory is automatically erased. Use Redial Memory Options Using the redial memory options, you can add a number to the phone book or delete a number in the redial memory.
-
Page 23: Cid Book
CID Book When you receive a call, if the caller’s information is transmitted from the network on which the call was made (and the caller doesn’t hide it), the caller’s phone number is displayed. Moreover, if you missed one or more calls, the icon will appear on the LCD. - Page 24 Add CID Number to Phone Book Press key. MENU/R Press the key again to choose the CID book, and if available the numbers are MENU/R displayed. Use the key to view the numbers. When the desired number displays on the LCD, press the key to enter Add to PB menu.
-
Page 25: Key Lock
To delete all the numbers, follow the first two steps and then press key and MENU/R use the key, to choose the Delete All menu, then press key. The dis- MENU/R play shows “confirm?”, press key to confirm. MENU/R Key Lock If you turn on this feature, all keys will be locked. -
Page 26: Hs Name
Use to key choose LANGUAGE , then press the key. MENU/R The languages will be displayed. Use to scroll through the options. Each language will be displayed in its own native translation. Press the key to select the language required and you will hear a confirma- MENU/R tion beep. -
Page 27: Auto Answer
Auto Answer With this feature, you can answer a call by just picking up the handset from the base without pressing any key. Press key. MENU/R Press key repeatedly to choose HS Settings, press the key. MENU/R key to choose Auto Answer, then press key. -
Page 28: Dial Mode
Dial Mode The default dial mode for Australia and New Zealand is Tone dial. Press key. MENU/R Press key repeatedly to choose BS Settings, press the key. MENU/R Press key to choose DIAL MODE, then press the key. MENU/R Press key to select the required dial mode options (Tone/Pulse) and press key. -
Page 29: Flash Signal (Call Waiting Service)
Flash Signal (Call Waiting Service) Call Waiting, a service available from your telephone provider, lets you receive calls while you are on another call. Caller ID on Call Waiting (CIDCW) service displays Caller ID information for a waiting call. If you get a Call Waiting call, the phone sounds a tone and displays any CID informa- tion received from the waiting call. -
Page 30: Advanced Functions
Advanced Functions Menu Navigation To access a menu option To display menu items, press key. MENU/R To scroll through menu options, press the key. To select a menu, press key when the desired menu appears on the LCD. MENU/R Repeat, if necessary. To return to standby mode: •... -
Page 31: Menu Map
Menu Map 1. CID BOOK (Page 23) AUDIO SETUP (Page 41) RING SETUP (Page 20) TONE SETUP (Page 42) 2. PhONEBOOK LANGUAGE (Page 25) NEW (Page 33) HS NAME (Page 26) EDIT (Page 35) AUTO ANSWER (Page 27) DELETE (Page 36) DATE &... -
Page 32: Phone Book
Phone Book The phonebook built in your cordless phone allows you to store frequently used numbers so that you can easily make a call without having to enter the phone num- ber. Character Map To enter a specific alphanumeric character, press the relevant key once or more, for the required character according to the following table;... - Page 33 Adding the Phone book Entries Press the key. MENU/R Press the key, to choose Phonebook, then press the key. MENU/R Press the key to choose Add Entry. MENU/R The display shows “Name?”. Enter the name you want to use, then press the MENU/R key to confirm.
- Page 34 Using a Pause A pause is useful when you access an interactive voice response system, such as an automated banking system. A pause provides a delay of 3 seconds. If you want to in- sert a pause when you dial a number in standby mode or store a number in memory, press the key.
- Page 35 Editing the Phonebook entries Press the key. MENU/R Press the key to choose Phonebook, then press the key. MENU/R Press the key to choose Change Entry menu. Press key. MENU/R Press the key repeatedly until the entry you want to edit displays, then press the key.
- Page 36 Deleting the Phonebook entries Press the key. MENU/R Press the key to choose Phonebook, then press the key. MENU/R Press the key to choose Delete Entry. Press the key. MENU/R Press the key repeatedly until the name you want to delete displays, then press the key to confirm.
-
Page 37: Bs (Base) Settings
BS (Base) Settings Terminate hS This function allows you to delete a handset registration from the base. Press the key. MENU/R Press key repeatedly to choose BS Settings menu, then press key. MENU/R key, to choose the Terminate HS. The display shows “PIN?” to prompt Press the MENU/R you to enter the PIN code (The default PIN code is 0000). -
Page 38: Modify Pin
Modify PIN This function allows you to change the PIN number of the currently active Base. The default PIN is 0000. Press the key. MENU/R key to choose BS Settings menu, then press the Press MENU/R key. key to choose Modify PIN menu, then press the key. -
Page 39: Bs Reset
BS Reset This function allows you to reset the Base setting to the factory default. Press key. MENU/R Press key to choose BS Settings menu then press the key. MENU/R Press key to choose BS Default, then press the key. You will be MENU/R prompted to enter the PIN code. -
Page 40: Hs (Handset) Settings
hS (handset) Settings Setting Alarm You are able to set the alarm on the handset and adjust the alarm settings. Press key. MENU/R Press key to choose HS Settings menu then press the key. MENU/R key again to choose the Alarm. Press MENU/R The display shows the current set. -
Page 41: Audio Setup
Audio Setup You can also use the menu to adjust the audio volume. Press key. MENU/R Press key to choose HS Settings, then press the key. MENU/R Press the key to choose Audio Setup, then press the key. MENU/R key to choose Speaker Vol or Earpiece Vol, then press Use the key. -
Page 42: Key Tone
Key Tone Every time you press a key, your handset acknowledges it with a key tone. You can disable the key tones for a silent use. However at times, when an incorrect key is pressed, a warning tone will sound. Press key. -
Page 43: Setting Date & Time
Setting Date & Time Date & Time Format Press key. MENU/R Press key to choose HS Settings menu, then press the key. MENU/R Press the key to choose Date&Time, then press key. MENU/R Press the key to choose Date Form. MENU/R You can use key to choose the Date Format (DD-MM/MM-DD) or the Time... -
Page 44: Selecting A Base
Selecting a Base This function allows you to select a base from those already registered to the handset. You can access the options by scrolling the menu. Press key. MENU/R key to choose HS Settings menu, then press the Press key. -
Page 45: Registration
After restting, the handest will return to the standby mode. Registration The supplied handsets are already registered with the number 1 and 2. You can reg- ister up to 5 handsets (include an outdoor station) to the same base in order to share the same line with other people. -
Page 46: Calling With More Than One Handset
Calling with more than one handset If you have more than one handset registered to the same base, you can make inter- nal calls and transfer an external call between the registered handsets. Making an Internal Call Press the key, the LCD displays as follows, then input the number of the handset you want to call. -
Page 47: Call Transfer Between Handsets
Call Transfer between handsets You can transfer an external call between the handsets that are registered to the same base. During an external call, press the key then key in the number of the hand- set you want to transfer the call to. If the called party can answer your call, he/she can press the key to talk with you. -
Page 48: Setting Up A 3-Way Conference Call
Setting up a 3-way Conference Call When you have both an external call and an intercom call in progress, you can set up a three way conference call, as follows: During an external call, press the key and then input the number of the handset you want to join the 3-way call. -
Page 49: Caller Id On Call Waiting
Caller ID on Call Waiting When you subscribe to Call Waiting service from your local telephone company, the telephone will display the name and number of the second caller while you are hav- ing a conversation. Caller ID info is displayed Caller two’s information is displayed Caller 1 Caller 1... -
Page 50: Wireless Doorbell
WIRELESS DOORBELL Call Button Register Button (Pin hole type) The wireless doorbell comes pre-registered to the base unit. If you need to register, first hold on the bottom of the base for 5 seconds or longer then release it. Sec- ond, press the Call button of the outdoor bell then press and hold the Register key on the back of the doorbell unit for 5 seconds or longer then release. - Page 51 To Call When the visitor presses the Call button on the doorbell, the internal ring will sound to indicate to the host, that there is someone at the door. If the called handset is on an external line, the handset user will hear prompt tones, which allows him/her to hang up and wait for the ring tone to sound again.
-
Page 52: Troubleshooting
TROUBLEShOOTING Problem Possible Solution No operation Ensure that the power adaptor is properly connected. Ensure that the telephone line cord is properly connected. Ensure that the handset batteries is charged fully. Ensure that the handset batteries are installed properly. No dial tone Ensure that the telephone line cord is properly connected. - Page 53 If you subscribe to a DSL service Please attach a noise filter (contact your DSL provider) to the telephone line between the base unit and the telephone line jack in the event of the following: • Noise is heard during conversations. •...
-
Page 54: One-Year Warranty
Australia or New Zealand and will expire one (1) year from the date of the original retail sale. If a warranty claim is made, this warranty will not apply if the Product is found by Uniden to be: A. - Page 55 Product, together with satisfactory evidence of your original purchase (such as a legible copy of the sales docket) to Uniden at the addresses shown below. You should con- tact Uniden regarding any compensation that may be payable for your expenses incurred in making a warranty claim.
- Page 56 © 2012 Uniden Australia Pty. Limited. Uniden New Zealand Limited. Printed in PRC.
Need help?
Do you have a question about the UWG200 and is the answer not in the manual?
Questions and answers