Table of Contents
Advertisement
Advertisement
Table of Contents

Related Manuals for Tunturi Pure ROW 8.1


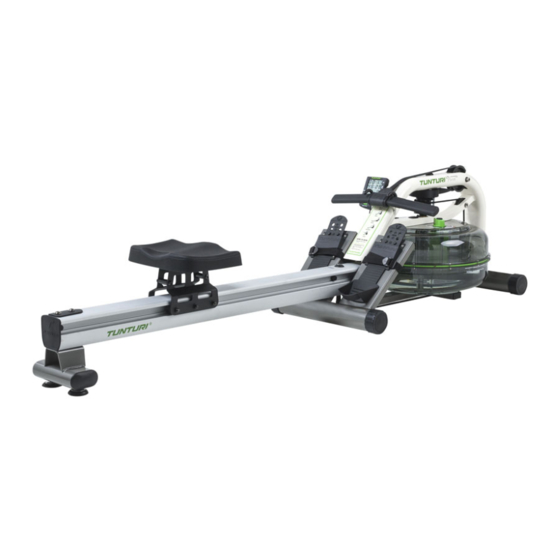
Summary of Contents for Tunturi Pure ROW 8.1
-
Page 1: Owners Manual
Owners Manual ROW 8.1 English... -
Page 2: Table Of Contents
Table of contents Introduction Safety warnings Workouts Heart rate measument (chest belt) Maximum heart rate (during training) Box contents Installation part 1 - Mounting instructions rear end Installation part 2 - Marriage front and rear end Installation part 3 - Fine tuning front and rear end Setting the rowing resistance - Adjustable water level Getting started Filling the tank with water... -
Page 3: Introduction
Introduction Welcome to the world of Tunturi Fitness! Thank you for purchasing this piece of Tunturi equipment. Tunturi offers a wide range of professional fitness equipment, including crosstrainers, treadmills, exercise bikes, rowers and vibration plates. The Tunturi equipment is suitable for the entire family, no matter what fitness level. - Page 4 The equipment is suitable for indoor use only. The equipment is not suitable for out- • door use. Only use the equipment in environments with adequate ventilation. Do not use the • equipment in draughty environments in order not to catch a cold. Only use the equipment in environments with ambient temperatures between 10 °C •...
-
Page 5: Workouts
Workouts The workout must be suitably light, but of long duration. Aerobic exercise is based on im- proving the body’s maximum oxygen uptake, which in turn improves endurance and fit- ness. You should perspire, but you should not get out of breath during the workout. To reach and maintain a basic fitness level, exercise at least three times a week, 30 minutes at a time. - Page 6 Heart rate measurement (heart rate chest belt) The most accurate heart rate measurement is achieved with a heart rate chest belt. The heart rate is measured by a heart rate receiver in combination with a heart rate transmitter belt. Accurate heart measurement requires that the electrodes on the trans- mitter belt are slight moist and constantly touching the skin.
-
Page 7: Maximum Heart Rate (During Training)
Maximum heart rate (during training) The maximum heart rate is the highest heart rate a person can safely achieve through exercise stress. The following formula is used to calculate the average maximum heart rate: 220 - AGE. The maximum heart rate varies from person to person. WARNING WARNING WARNING... -
Page 8: Box Contents
Box contents ROW 8.1... - Page 9 Box contents Item Description Item Description Item Item Description Description Item Item Description Description Item Item Description Description Main frame Seat rail bracket Seat rail (boxed seperately) Rear leg bolts - dome (M10x120mm) Rower seat AA Batteries (x2) Horizontal seat rail bolt Multi tool (M10x120mm) Washer (M10)
-
Page 10: Installation Part 1 - Mounting Instructions Rear End
Installation part 1 - Mounting instructions rear end CAUTION CAUTION CAUTION CAUTION Assemble the equipment in the given order. ⇒ Install the rower seat (3) rower seat (3) rower seat (3) rower seat (3) onto the seat rail seat rail seat rail seat rail (2) as shown. - Page 11 Insert the internal seat rail backet (22) internal seat rail backet (22) internal seat rail backet (22) internal seat rail backet (22) into the rear end of the rail and align the internal seat rail bracket hole with the seat rail front bolt hole.
-
Page 12: Installation Part 2 - Marriage Front And Rear End
Installation part 2 - Marriage front and rear end For the next assembly step, you will need: seat rail assembly seat rail assembly seat rail assembly seat rail assembly (previously assem- • bled) main frame (1) main frame (1) main frame (1) main frame (1) •... -
Page 13: Installation Part 3 - Fine Tuning Front And Rear End
Installation part 3 - Fine tuning front and rear end Install the vertical seat rail bolt (7) vertical seat rail bolt (7) vertical seat rail bolt (7) vertical seat rail bolt (7) with plastic dome cap (8) plastic dome cap (8) through the plastic dome cap (8) plastic dome cap (8) seat rail assy. -
Page 14: Setting The Rowing Resistance - Adjustable Water Level
Row hard at a steady pace (20 to 25 Strokes Per Minute [SPM]) and put some effort into the stroke, ensuring that good form is maintained. You can make adjustments to the resistance level while you row. Your Tunturi rower will adapt almost instantly to increases in resistance but will take up to 10 strokes to reduce the effort required, as the inner storage tank fills up. -
Page 15: Filling The Tank With Water
Filling the tank with water Remove the rubber tank plug rubber tank plug from the top of the tank. rubber tank plug rubber tank plug Place a large bucket of water next to the rower and position the siphon with the rigid rigid rigid rigid... -
Page 16: Changing / Removing Water From The Tank
Changing / removing water from the tank Set the resistance adjuster handle to MIN MIN. Row at least ten strokes to fill the inner storage reservoir as much as possible with water. Remove the tank plug tank plug. tank plug tank plug Insert the siphon rigid hose rigid hose... -
Page 17: Water Treatment
Add a water treatment tablet whenever the water appears dirty or cloudy over time. WARNING WARNING WARNING WARNING Only use the Tunturi supplied water treatment tablets. ⇒ Slider footplate The slider footplate is designed to fit a wide range of foot sizes. Adjusting the footplate Lift the top of the sliding portion of the footplate and slide up or down. -
Page 18: How Often
How to row? Catch - - - - Drive Catch Drive Catch Catch Drive Drive Begin the stroke comfortably in forward position and push strongly back with your legs while keeping your arms and back straight. Finish Finish Finish Finish Begin to pull your arms back as they pass over your knees and continue the stroke through to completion rocking slightly back over your pelvis. -
Page 19: Rowing Console
Rowing console Auto Start: Commence rowing to activate. Reset all values: Hold DISTANCE button down for 3 second to RESET. Distance: Add 1000m distance each button push to accumulate required distance then begin rowing to initiate count-back. Auto-Pause: A temporary halt in exercise will result in the following: For over 5 seconds and under 5 minutes: SPM / 500M TIME / WATT return to zero. - Page 20 LEVEL UP / DOWN LEVEL UP / DOWN LEVEL UP / DOWN LEVEL UP / DOWN LEVEL LEVEL LEVEL LEVEL Use the yellow LEVEL UP / DOWN buttons on the console in conjunction with the tank resistance adjuster handle for accurate 500M TIME / DISTANCE / CAL HOUR / WATT. ROW 8.1...
-
Page 21: Detaching The Rowing Belt
Detaching the rowing belt Untie the bungee cord bungee cord bungee cord bungee cord or cut the plastic tiewrap plastic tiewrap holding the bungee at plastic tiewrap plastic tiewrap the bungee attachment point attachment point attachment point. The attachment point bungee attachment point bungee attachment point is located bungee attachment point... -
Page 22: Re-Attaching The Rowing Belt
Re-attaching the rowing belt Begin re-attaching by guiding the ro- wer belt wer belt around the rower belt pulley. wer belt wer belt rower belt pulley. rower belt pulley. rower belt pulley. The velcro side should be facing up- ward as illustrated. Next, guide the belt around the idle idle idle... - Page 23 8. Bungee cord route (red line) 8. Bungee cord route (red line) 8. Bungee cord route (red line) 8. Bungee cord route (red line) NOTE NOTE NOTE NOTE If bungee cord previous tension seemed correct (a good way to judge is if ⇒...
-
Page 24: Troubleshooting
Troubleshooting Fault Possible cause Solution Water changes color or be- Rower is in direct sunlight or Change rower location to comes cloudy. has not had water treatment. reduce direct exposure to sunlight. Add water treatment or change tank water as di- rected in the water treatment section of this manual. -
Page 25: Warranty
Damages caused by material or manufacturing faults are covered by the warranty and will repaired or replaced at no cost. Declaration of the manufacturer Tunturi Fitness BV declares that the product is in conformity with the following standards and directives: EN 957 (SC), 89/336/EEC. The product therefore carries the CE label. - Page 26 NOTES NOTES NOTES NOTES ROW 8.1...
- Page 27 ROW 8.1...
- Page 28 Tunturi Fitness BV Tunturi Fitness BV Tunturi Fitness BV Tunturi Fitness BV PO Box 60001 1320AA Almere The Netherlands E-mail: info@tunturi-fitness.com For contact information and manuals in other languages, check our website: WWW.TUNTURI.COM...
Need help?
Do you have a question about the Pure ROW 8.1 and is the answer not in the manual?
Questions and answers