
Subscribe to Our Youtube Channel
Related Manuals for Acrosser Technology AR-B1892


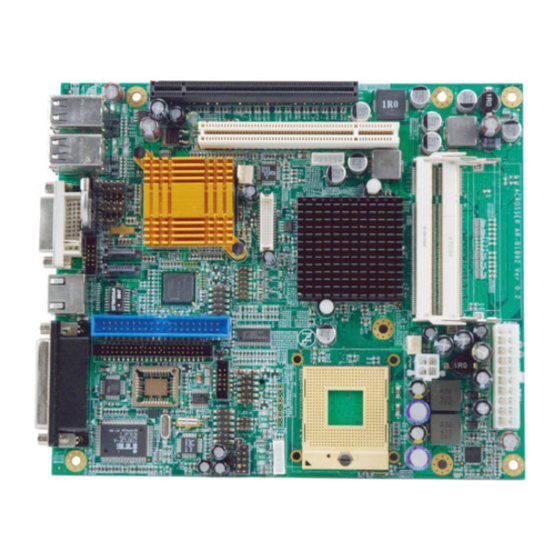
Summary of Contents for Acrosser Technology AR-B1892
- Page 1 AR-B1892 v1.0 Multimedia Embedded System Intel Core Duo Gaming Borad User’ s Guide Edition: 1.03 Book Number: AR-B1892-08.0521...
-
Page 2: Table Of Contents
Table of Contents 0. PREFACE..................................3 0.1 COPYRIGHT NOTICE AND DISCLAIMER .............................3 0.2 WELCOME TO THE AR-B1892 CPU BOARD..........................3 0.3 BEFORE YOU USE THIS GUIDE ..............................3 0.4 RETURNING YOUR BOARD FOR SERVICE..........................3 0.5 TECHNICAL SUPPORT AND USER COMMENTS ........................4 0.6 STATIC ELECTRICITY PRECAUTIONS ............................4 1. -
Page 3: Preface
This guide introduces the Acrosser AR-B1892 CPU Board. Use information provided in this manual describes this card’s functions and features. It also helps you start, set up and operate your AR-B1892. General system information can also be found in this publication. -
Page 4: Technical Support And User Comments
You may, of course, continue to use the information you provide. If you have any suggestions for improving particular sections or if you find any errors on it, please send your comments to Acrosser Technology Co., Ltd. or your local sales representative and indicate the manual title and book number. -
Page 5: Introduction
IDE channel and two Serial-ATA disk interface. Other I/O features include six USB ports connector and two USB port using pin headers. Expansion slots composed of one PCI slot and one PCI Express 16X slot. AR-B1892 uses a 20-pin ATX power. 1.1 PACKING LIST... -
Page 6: Specifications
1.2 SPECIFICATIONS Model Name AR-B1892 CPU Type Intel Core Duo & Solo Processors FSB 667MHz (ULV Type:FSB 533MHz) CPU Voltage 0.0125V ~ 1.5V CPU Frequency 1GHz ~ 2.16GHz Chipset GMCH : Intel 945GM, 1466-Micro-FCBGA ICH7M : Intel 82801GBM, 652-mBGA BIOS... -
Page 7: Block Diagram
1.3 BLOCK DIAGRAM... -
Page 8: Installation
2. INSTALLATION This chapter describes how to install the AR-B1892. At first, the layout of AR-B1892 is shown, and the unpacking information that you should be careful is described. The jumpers and switches setting for the AR-B1892’s configuration are as below. - Page 9 2.2 AR-B1892'S BOARD DIMENSIONS(BOTTOM)
-
Page 10: Cpu Installation
2.2 CPU INSTALLATION ® The AR-B1892 embedded board supports a mPGA478MT processor socket for Intel Core Duo or Core solo processors. The processor socket comes with a screw to secure the processor. As shown in the left picture below, loosen the screw first before inserting the processor. Place the processor into the socket by making sure the notch on the corner of the CPU corresponds with the notch on the inside of the socket. -
Page 11: Connection
3. CONNECTION The connectors on AR-B1892 allows you to connect external devices such as USB devices, serial port drives, hard disk devices, display connector ,etc. The following table lists the connectors on AR-B1892 and their respective functions. 3.1 VGA DISPLAY PIN HEADER ( VGA1)... -
Page 12: Lvds Pin Header(Lcd1
3.4 LVDS PIN HEADER (LCD1) 18-bits single channel and 2x18-bits dual channel LVDS pin header SIGNAL SIGNAL VCC_LVDS RXEC- RXEC+ RXE2- RXE2+ RXE1- RXE1+ N.C. N.C. RXE0+ RXE0- RXOC+ RXOC- RXO2+ RXO2- DDCLK RXO1+ RXO1- DDDATA RXO0+ RXO0- N.C. N.C. VCC_LVDS VCC_LVDS 3.5 POWER PIN HEADER FOR LCD BACKLIGHT INVERTER CONTROL (LCDPW1)... -
Page 13: Dvi-D Connector(Cn1
3.6 DVI-D CONNECTOR(CN1) Monitor can be connected to DVI-D port. SIGNAL Signal Signal TDC2- TDC1- TDC0- TDC2+ TDC1+ TDC0+ N.C. N.C. N.C. N.C. N.C. N.C. DDCLK DDCDATA TDCLK+ VSYNC TDCLK- BLUE GREEN HSYNC 3.7 AUDIO LINE OUT⁄LINE IN⁄MIC HEADER(AUDIO1) Include Line out, Line in, and MIC. Devices like CD-ROM, walkman etc. can be connected to line in. Connect the speaker, earphone to line out. - Page 14 SIGNAL SIGNAL IDERST PDATA7 PDATA8 PDATA6 PDATA9 PDATA5 PDATA10 PDATA4 PDATA11 PDATA3 PDATA12 PDATA2 PDATA13 PDATA1 PDATA14 PDATA0 PDATA15 N.C. PDDREQ PDDIOW PDDIOR PIORDY PDDACK IDEIRQ N.C. PDA1 P66DET PDA0 PDA2 PDCS1 PDCS3 HDDLED IDE2 : IDE Channel Box Header SIGNAL SIGNAL IDERST...
-
Page 15: Compact Flash Connector(Cf1
3.9 COMPACT FLASH CONNECTOR(CF1) SIGNAL SIGNAL PDATA3 PDATA4 PDATA5 PDATA6 PDATA7 PDCS1 PDA2 PDA1 PDA0 PDATA0 PDATA1 PDATA2 PDATA11 PDATA12 PDATA13 PDATA14 PDATA15 PDCS3 PDDIOR PDDIOW IRQ15 M/S SELECT N.C. IDERST PIORDY N.C. HDDLED P66DET PDATA8 PDATA9 PDATA10 ※ Compact Flash (CF1) and IDE 1&2 share the same channel. Since a Compact Flash card is installed in the socket, please set the jumper J8 to select CF device as Master/Slave and the other as Slave/Master. -
Page 16: Ps2 Keyboard & Mouse Connector(Km1
3.11 PS2 KEYBOARD & MOUSE CONNECTOR(KM1) To install a PS/2 port keyboard and mouse, plug the mouse to the upper port(green)and the keyboard to the lower port(purple). SIGNAL MSDAT KBDAT 5V_DUAL MSCLK KBCLK 3.12 KEYBOARD LOCK JUMPER (J5) To install a PS/2 port keyboard and mouse, plug the mouse to the upper port(green)and the keyboard to the lower port(purple). -
Page 17: Rs485/Rs422 Signal Pin Header(J6
3.15 RS485/RS422 SIGNAL PIN HEADER(J6) SIGNAL 3.16 IrDA (IR1) SIGNAL N.C. 3.17 EXTERNAL SERIAL PORT CONNECTOR(COM2~COM6) The following table describes the pin out assignments of this connector. SIGNAL Signal Signal /DCD2 /DTR2 /CTS2 /DSR2 /RI2 /RTS2 /DCD3 /DTR3 /CTS3 /DSR3 /RI3 /RTS3 /DCD4... -
Page 18: Internal Usb Header(Usb1
3.18 INTERNAL USB HEADER(USB1) The following table shows the pin outs of the USB pin headers connectors. Overall, the one pin headers support two USB ports. Signal Signal USBD6- USBD7+ USBD6+ USBD7- 3.19 USB CONNECTOR(USB2,USB3) Before you connect your device into USB connectors, please make sure your devices such as USB keyboard, mouse, scanner, zip, speaker …etc. -
Page 19: System Pwm Control Fan Connector(Fan1
3.21 SYSTEM PWM CONTROL FAN CONNECTOR(FAN1) Signal PWM FAN Control SENSE 3.22 CPU FAN CONNECTOR(FAN2) Signal +12V SENSE 3.23 DDRII SDRAM SO-DIMM SOCKET(DIMM1, DIMM2) The board has two DDRII small outline dual inline memory module(SO-DIMM)sockets. 3.24 PCI SLOT(PCI1) The board has one PCI slot. 3.25 PCI-E SLOT(PCIE1)... -
Page 20: Panel Header(J4
3.27 PANEL HEADER(J4) Please connect the power LED, IDE Hard disk active LED, buzzer, reset switch and power switch etc. FUNCTION POWER LED (1+) HDD LED (3+) PCBEEP (5+) RESET BTN 9-10 POWER BTN 3.28 GENERAL PURPOSE INPUT OUTPUT(GPIO1) Signal Signal DIO0 DIO1... -
Page 21: Watchdog Timer Configuration
4. WATCHDOG TIMER CONFIGURATION The WDT (Watch Dog Timer) is used to generate a variety of output signals after a user programmable count. The WDT is suitable for use in the prevention of system lock-up, such as when software becomes trapped in a deadlock. -
Page 22: Bios Console
5. BIOS CONSOLE This chapter describes the AR-B1892 BIOS menu displays and explains how to perform common tasks needed to get up and running, and presents detailed explanations of the elements found in each of the BIOS menus. The following topics are covered:... -
Page 23: Advanced Chipset Setup
Time Setup The time format is: Hour:1 to 24 Minute:00 to 59 Second:00 to 59 To set the time, highlight the “Time” field and use the 【PageUp】/【PageDown】or 【+】/【-】keys to set the current time. IDE Channel Master/Slave The onboard single IDE channel provide IDE connectors for connecting up to two IDE hard disks or other devices. - Page 24 Hyper-Threading Technology Hyper-Threading allows a single physical processor to execute two heavyweight threads (processes) at the same time, dynamically sharing processor resources. the field is set to enabled Quick Power On Self Test When enabled, this field speeds up the Power On Self Test(POST)after the system is turned on. If it is set to Enable, BIOS will skip some items.
-
Page 25: Power Setup
5.3 POWER SETUP Use this main to specify your setting for power management. Power Setup ACPI Function Enable this function to support ACPI(Advance Configuration and Power Interface). ACPI Suspend Type ( ) ( ) ( ) The options for this field are S1 and S3 . -
Page 26: Pnp/Pci Setup
5.5 PNP/PCI SETUP The option configures the PCI bus system. All PCI bus system on the system use INT#, thus all installed PCI cards must be set to this value. PnP / PCI Setup Reset Configuration Data This field allow you to determine whether to reset the configuration data or not. The default value is Disabled. -
Page 27: Peripherals Setup
5.4 PERIPHERALS SETUP This option controls the configuration of the board’s chipset. Control keys for this screen are the same as for the previous screen. Peripherals Setup Onboard Serial Port 1 Onboard Serial Port 2 Onboard Serial Port 3 Onboard Serial Port 4 Onboard Serial Port 5 Onboard Serial Port 6 These fields allow you to select the on board serial ports and their addresses. -
Page 28: Pc Health Setup
5.6 PC HEALTH SETUP This section shows the parameters in determining the PC Health Status. These parameters include temperatures, fan speeds, voltages. PC Health Status Temperature / Voltage These fields are parameters of the hardware monitoring function feature of the motherboard. The values are read-only values as monitored by the system and show the PC health status. -
Page 29: Boot Setup
5.7 BOOT SETUP This section is used to exit the BIOS main menu. After making your changes, you can either save them or exit the BIOS menu and without saving the new values PCI / Plug And Play First / Second / Third Boot Device These fields determine the device that the system searches first for an operating system. -
Page 30: Exit Setup
5.8 EXIT SETUP This section is used to configure exit mode. Exit Setup Save & Exit Setup This option allow you determine whether or not to accept the modifications. If you type “Y”, You will quit the setup utility and save all changes into the CMOS memory. If you type “N”, you will return to setup utility. -
Page 31: Bios Update
The chips can be electronically reprogrammed, allowing you to upgrade your BIOS firmware without removing and installing chips. The AR-B1892 provides the FLASH BIOS update function for you to easily to update to a newer BIOS version. Please follow these operating steps to update to new BIOS:... -
Page 32: Trusted Platform Module(Tpm1.2)
6. TRUSTED PLATFORM MODULE(TPM1.2) The basis of Trusted Computing is the Trusted Platform Module,or TPM.The TPM is a small piece of silicon affixed in a device. It securely stores digital keys,certificates and passwords and is more difficult to attack virtually or physically. INFINEON’S TPM Security Solution provides a comprehensive hardware and software solution for safer computing targeted for today’s notebook and desktop architectures.The Infineon TPM Management software enables the easy use of the most important trusted computing functions such as... -
Page 33: Appendix B. Interrupt Request (Irq)
APPENDIX B. INTERRUPT REQUEST (IRQ) Peripheral devices use interrupt request lines to notify CPU for the services required. The following table shows the IRQ used by the devices on board. Level HARDWARE USING THE SETTING System timer Standard 101/102-Key or Microsoft Natural Keyboard Programmable interrupt controller (COM2) Communication Port...
Need help?
Do you have a question about the AR-B1892 and is the answer not in the manual?
Questions and answers