Pantech Burst User Manual
Hide thumbs
Also See for Burst:
- Manual (97 pages) ,
- User manual (93 pages) ,
- Quick start manual (2 pages)
Table of Contents
Advertisement
Quick Links
Thank you for choosing the Pantech Burst, our latest smartphone. The
Pantech Burst has many features designed to enhance your mobile
experience. With its unique and stylish design, you will enjoy the entire
Burst experience.
This User Guide contains important and useful information that will
maximize your familiarity with all that Pantech Burst has to offer.
Advertisement
Table of Contents

Related Manuals for Pantech Burst


Summary of Contents for Pantech Burst
- Page 1 Thank you for choosing the Pantech Burst, our latest smartphone. The Pantech Burst has many features designed to enhance your mobile experience. With its unique and stylish design, you will enjoy the entire Burst experience. This User Guide contains important and useful information that will...
- Page 2 Service provided by AT&T Mobility. Portions © 2011 AT&T Intellectual Property. All rights reserved. AT&T, the AT&T logo and all other AT&T marks contained herein are trademarks of AT&T Intellectual Property and/or AT&T affiliated companies. All other marks contained herein are the property of their respective owners. Copyright © 2011. Pantech. All Rights Reserved.
-
Page 3: Safety Information
Important Safety Information Safety information Safety precautions The following list shows how to maintain your mobile phone The following list shows precautions to keep your device as and precautions to take as you use the device. you use it. Keep your mobile phone and its accessories out of the Using a mobile phone while driving is prohibited. -
Page 4: About Battery Usage
Important Safety Information Switch off in dangerous areas Do not use an unauthorized charger or battery. Use the battery only for the device for which it is specified. Always switch your phone off in areas where explosive or dangerous materials (e.g. fuels or chemical products) are Use the battery with a charging device that has been located and obey relevant instructions or signs. -
Page 5: Basic Instructions
Important Safety Information Basic instructions The symbol “>” refers to the next action. For example, “Tap Settings > Language & keyboard” means that you should tap Settings first and Language & keyboard next. Useful tips The term, ‘Applications menu’ refers to the screen where all To understand information contained in this user guide, please applications of the phone appear. -
Page 6: Using At&T Applications
AT&T Applications Overview Using AT&T applications Enjoy applications provided by AT&T. AT&T FamilyMap: Allows you to locate your Movies: Allows you to subscribe for various movies family members on the map. without downloading files or plugging your handset into PC. AT&T Navigator: Helps find your way to the Live TV: Allows you to enjoy the live and destination and locate restaurants and more. -
Page 7: Table Of Contents
Table of contents Safety information ..................3 Connecting to a PC ..................25 Safety precautions ..................3 3. Call & Message ..........27 About battery usage ...................4 Basic instructions ..................5 Calling ......................27 Using AT&T applications ................6 Messaging ....................29 Managing contacts ...................33 1. - Page 8 Table of contents News & Weather ..................57 Accounts & sync ..................80 RSS Reader ....................59 Privacy ......................80 SD card & phone storage ................ 80 6. Tools ............60 Language & keyboard ................81 Using the calendar ................... 60 Voice input & output .................82 Creating a memo ..................
-
Page 9: Getting Started
1. Getting Started Follow the outlined steps that should be taken first before Installing the SIM/USIM card and battery using the Burst. 1. Remove the battery cover from the unit. - To remove the battery cover, place Inside the package your finger nail in the groove at the bottom of the unit, and then lift it up. -
Page 10: Charging The Battery
Getting Started Correct method of inserting the battery About the Internal memory The internal memory is divided into two areas: internal system storage and internal media storage. Downloaded and preload applications are saved in the Internal system storage. Pictures and video files taken with the built-in camera, downloaded music files or attachments downloaded from MMS, Emails or web browser are saved in the Internall media storage. -
Page 11: Turning The Phone On/Off
Getting Started It is recommended that you format the microSD™ card before Turning the phone on/off using the phone. To turn on Viewing available memory 1. Press and hold the LOCK/PWR key for a few seconds. 1. Tap Settings from the applications menu. To turn off 2. -
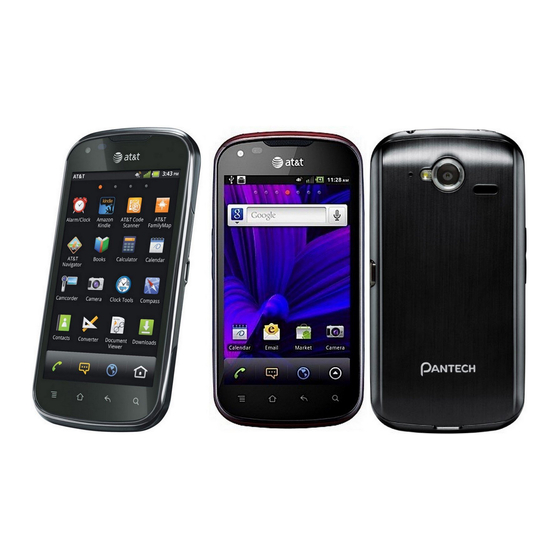
Page 12: Product Overview
Getting Started Product overview Touch mode Front view Rear view LOCK/PWR Proximity Speaker Sensor Ear jack Front-side camera Microphone Rear camera Camera flash MENU Internal SEARCH antenna area BACK HOME Microphone Function Function MENU Displays options available; rearranges the SEARCH Searches through the Internet;... - Page 13 Getting Started Side view Rear camera Volume keys connector Internal antenna area Hard keys from the touch mode Using 3.5 PI Stereo Earphones You can control your stereo earphone by inserting the stereo Function earphone’s plug into Ear jack on the phone. VOLUME Adjusts all sound volumes;...
-
Page 14: Using The Touch Screen
Getting Started Using the touch screen Understanding the home screen Run an application or perform functions using the touch The Home screen is where you’ll find all your applications. You screen. The following finger actions help you easily understand can have up to 7 Home screens and browse them with a flick. how to use the touch screen and the phone. -
Page 15: Navigating The Home Screen
Getting Started Navigating the home screen Using the blind mode for home screen The phone provides seven different screens where you can By hiding the icons and widgets, you can enjoy the wallpaper in place items according to your preference. a full view. - Page 16 Getting Started Screen indicators Icon Description Icon Description Signal strength: The longer the bar, the stronger the signal. Connected to a Wi-Fi network Airplane mode is active. Connected to the LTE 4G network There is no signal. An alarm has been set. A call is under way.
-
Page 17: Customizing The Home Screen
Otherwise, the application continues to 2. Tap Widgets. run and will take memory and consume battery. 3. Tap either Android Widgets or Pantech Widgets. 4. Select and tap a widget among those in the list. Customizing the home screen - You will find the widget on the home screen. - Page 18 Getting Started Creating a wallpaper from the Gallery Changing the theme of the home screen 1. Press and hold an empty space on the home screen and tap 1. Press in idle mode and tap Themes. The User theme Wallpapers or press in idle mode and tap Wallpaper.
-
Page 19: Viewing Applications
Getting Started Checking Easy Settings and Notifications Viewing Applications Easy Settings help manage a few important functions easily 1. Tap to view the applications on the home screen. and check ongoing events. 2. Press and tap the desired menu option to arrange the 1. -
Page 20: Gripping The Phone
Getting Started Gripping the phone Connect to Wi-Fi network > Next in step 2. Follow the necessary steps to connect to the Wi-Fi network. For more Hold the phone in the right position for a call as shown in the information, refer to page 22. -
Page 21: Creating A Google Account
Getting Started Creating a Google account 16. Tap Finish setup. Note Steps for connecting to Wi-Fi network and Google location After finishing learning how to use the phone: service might not appear if you have already done with them. 1. Tap 2. -
Page 22: Connectivity
2. Connectivity This chapter introduces useful tips on how to connect to the About network notifications network available that enables applications of the phone to run. You are informed by default when a Wi-Fi network is available around you. The message in the status bar indicates a Using a Wi-Fi network network is available. -
Page 23: Connecting To A Mobile Network
Connectivity Adding a Wi-Fi network Using Bluetooth 1. Tap Settings from the applications menu. Bluetooth function enables wireless connections between electronic devices. Using this function, you can send images, 2. Tap Wireless & networks > Wi-Fi settings. text, and business cards. 3. -
Page 24: Making The Phone A Modem
Connectivity Using the Easy Setting Making the phone a modem 1. Tap on the top of the home screen and drag it down, or The phone provides other devices with an Internet connection. press in idle mode and tap Notifications. Activating the USB Tethering 2. -
Page 25: Connecting To A Pc
Connectivity 5. Tap WPA2(AES) for security and select the related items Connecting to a PC if you want to allow limited devices to access the Internet You can synchronize files and exchange data with a computer through the phone, and tap Save. using the PC data cable. -
Page 26: Using The Phone As Mass Storage
Connectivity Using the phone as Mass Storage Transferring files through Media Transfer You can copy files between your computer and the MTP stands for Media Transfer Protocol and it is a microSD™ card in the phone. In the mass storage mode, a few communication method specifically optimized for the transfer applications—Handy Memo, Voice Memo, Sketch Pad, Music of audio and video file types. -
Page 27: Call & Message
3. Call & Message Calling Adjusting the volume 1. Press the upper volume key to increase the volume during a Making a call call. 2. Press the lower volume key to decrease the volume during a 1. Tap call. 2. Enter the area code and the phone Note Press the volume key in idle mode if you want to adjust the number. -
Page 28: Making A Conference Call
Call & Message Making a conference call Checking missed calls 1. Tap 1. Tap 2. Enter the area code and the phone 2. Tap Call log and check missed calls. number. 3. Select and tap a number to call back. 3. -
Page 29: Messaging
Call & Message Talking through the Bluetooth Using the Local Search 1. Tap Bluetooth during a call. A white bar appears under 1. Tap Bluetooth when the function is on. 2. Tap and Local Search. 2. Tap Bluetooth if you want to stop using the function. 3. - Page 30 Call & Message Entering a message using voice Entering a message using the keyboard Use different keyboard settings for different characters. 1. Tap Messaging from the applications menu. 1. Tap Messaging from the applications menu. 2. Tap New message and tap in the body of the text. 2.
-
Page 31: Deleting Messages
Call & Message Note The following Swype options are also available in the Swype Adding a Quick Text settings menu: Audio feedback / Vibrate on keypress / Auto-spacing / Auto- 1. Tap Messaging from the applications menu. capitalization / Show complete trace / Speed vs. accuracy 2. -
Page 32: Searching Messages
Call & Message (Drawing). Setting a signature 7. Select and tap a picture to attach. 1. Tap Messaging from the applications menu. 8. Tap Send. 2. Press and tap Settings. Attaching locations 3. Tap Edit signature. 4. Enter a signature and tap Save. 1. -
Page 33: Replying To A Received Message
Call & Message Replying to a received message 3. Adjust the following setting options. - Notifications: Displays a notification in the status bar 1. Tap Messaging from the applications menu. when a message is delivered. The check box is selected by 2. -
Page 34: Deleting Contacts
Call & Message Deleting contacts Setting display options 1. Tap Contacts from the applications menu. 1. Tap Contacts from the applications menu. 2. Tap a contact. 2. Press and tap Display options. 3. Press and then tap Delete. 3. Tap Only contacts with phones if you want to see only contacts with phone numbers. - Page 35 Call & Message Managing accounts and sync 1. Tap Contacts from the applications menu. 2. Press and tap More > Accounts. 3. Tap Background data to allow applications to retrieve data at any time. 4. Tap Auto-sync to sync data automatically. 5.
-
Page 36: Communication
4. Communication Receiving and sending emails 5. Click Exchange. 6. Enter your Domain\Username, password, and Exchange server address. Setting up an email account 7. Check Use Secure Connection(SSL) and Accept all SSL 1. Tap Email from the applications menu. Certificates and click Next. 2. -
Page 37: Using Gmail
Communication Adding attachments to an email 4. Tap an item to set in the way you want. You can set General settings, Signature, Notification settings, Server 1. Press in the composed message and tap Attach. settings, or Remove account. 2. Tap an item you want to attach among Pictures, Videos, Audio, vCard, vCalendar, Documents, and Location. -
Page 38: Using Twitter
Communication Sending an email through Gmail Using Twitter 1. Tap Gmail from the applications menu. Joining in Twitter 2. Press and tap Compose. 1. Tap Twitter from the applications menu. 3. Enter the recipient’s email address, the subject and the message. -
Page 39: Using Facebook
Communication Using Facebook Searching Tweets or people 1. Tap Twitter from the applications menu. Accessing Facebook 2. Tap 1. Tap Facebook from the applications menu or the home 3. Type the keyword in the box and tap screen. Adjusting General settings 2. Enter your email address and password. 3. Tap Login. If you don’t have the account, tap Sign up and 1. Tap Twitter from the applications menu. follow the necessary steps. 2. Press n and tap Settings. 4. Select and tap an option for syncing and tap Finish to 3. Adjust the following setting options. complete the process. - S ound effects: Sets to activate or deactivate sound Posting messages effects on Twitter. -
Page 40: Using The Social Snapshot Widget
7. Enter a message in the empty space and tap Done. Using the Social Snapshot Widget 8. Tap Send. 1. Press and hold an empty space on the home screen. Editing a group 2. Tap Widgets. 1. Tap S-Board from the applications menu. 3. Tap Pantech Widgets > Social Snapshot. -
Page 41: Google Talk
Communication 2. Press and tap Edit group. Sharing media 3. Tap Photo, select and tap a picture from the Gallery. 1. Tap S-Board from the applications menu. 4. Change the name of the group. 2. Tap Contents on the top left of the screen. 5. - Page 42 Communication 6. Tap if you want to insert a photo. the rear camera, and vice versa. Note Then user may be charged for this service. 7. Select and tap a picture from your gallery, adjust the size of the picture and tap Save. Managing your friends list 8.
-
Page 43: Entertainment
5. Entertainment The phone offers a variety of tools for entertainment purposes. Changes settings: Resolution, Flash, Shutter sound, Focus Setting Using Camera mode, Store location, Save picture to You can take pictures with the built-in camera. They can be Changes to the camcorder saved and sent via multimedia messages. -
Page 44: Adjusting Brightness
Entertainment Adjusting brightness Viewing pictures 1. Tap on the screen or press while in the camera mode. 1. Tap Gallery from the applications menu. 2. Tap 2. Select and tap a picture to view. 3. Drag to the left to decrease brightness, or to the right to 3. -
Page 45: Cropping A Picture
Entertainment Cropping a picture 3. Tap Delete > Confirm Delete. 1. Tap on the screen and tap while in the camera mode or Using Camcorder tap Gallery from the applications menu. 2. Select and tap a picture to crop. 3. Tap Menu > More > Crop. 4. -
Page 46: Recording Videos
Entertainment Adjusting brightness Icon Name Description 1. Tap on the screen while in the camcorder mode. Sets to use the front camera for Self shot mode 2. Tap the self shot mode. Front 3. Drag to the left to decrease brightness, or to the right to increase brightness. -
Page 47: Viewing Videos
Entertainment Viewing videos Sharing videos 1. Tap Gallery or Video Player from the applications menu. 1. Tap on the screen and tap while in the camcorder mode, or tap Galleryfrom the applications menu. 2. Tap a video to view. An item with is a video. -
Page 48: Video Player Settings
Entertainment Video Player settings Icon Description Moves to the next/previous file 1. Tap Video Player from the applications menu. Fast-forwards or rewinds the file by pressing and 2. Press while a video is being played. holding 3. Tap Settings. Shuffles files (blue); shuffle is off (white) 4. -
Page 49: Adding Songs To A Playlist
Entertainment Adding songs to a playlist - Sound effect: Tap Sound effect according to your preferences. 1. Tap Music Player from the applications menu. Viewing information 2. Tap Playlists. 3. Press and hold the playlist you would like to add songs to 1. -
Page 50: Enjoying Youtube
Entertainment Enjoying YouTube Sharing videos 1. Tap YouTube from the applications menu. Watching videos 2. Select and tap a video to share. 1. Tap YouTube from the applications menu. 3. Tap on the top of the screen. 2. Select and tap a video to watch. 4. -
Page 51: Accessing The Internet
Entertainment YouTube Settings Changing the home page 1. Tap YouTube from the applications menu. 1. Tap Web from the applications menu. 2. Press and tap Settings. 2. Press and tap More. 3. Adjust the following setting options. 3. Tap Settings > Set home page. - High quality on mobile: Sets videos display to high- 4. -
Page 52: Adding Bookmarks
Entertainment Managing many windows Viewing browser history 1. Tap Web from the applications 1. Tap Web from the applications menu. menu. 2. Press and tap Bookmarks. 2. Press and tap Windows. 3. Tap Most visited if you want to see web pages that you visit 3. -
Page 53: Shopping In The Android Market
Entertainment Shopping in the Android Market Searching for applications You can download useful applications from the Android Market 1. Tap Market from the applications menu. and use them for your purposes. For downloaded applications, 2. Tap and enter the name or the keyword of the you can move it to Internal media storage through the Setting application that you want to install and tap menu. -
Page 54: Using Google Maps
Entertainment Using Google Maps Zooming in and out of the map Google Maps offers useful information based on your region. 1. Tap to zoom in the map. Make sure to connect the phone to a Wi-Fi or 3G network. If 2. -
Page 55: Using Places
Entertainment Using Places Using Latitude You can share your location with your friends or check those Finding places of your friends. Make sure to have a Google account to use Latitude. 1. Tap Places from the applications menu. 2. Tap and enter a key word in the search box and tap Joining Latitude Or tap Restaurants, Coffee, Bars, or Attractions, ATMs, Gas... - Page 56 Entertainment Adding friends from email addresses Adjusting privacy settings 1. Tap Latitude from the applications menu. 1. Tap Latitude from the applications menu. 2. Press and tap Add friends. 2. Press and tap Latitude settings. Or tap 3. Adjust the following setting options. 3.
-
Page 57: Searching With Google
Entertainment Searching with Google Selecting items that can be searched 1. Tap Google Search from the applications menu. Searching for information with Google 2. Press and tap Search settings. 1. Tap Google Search, or tap the Google search box in idle 3. - Page 58 Entertainment Selecting weather settings Customizing news topics 1. Tap News & Weather from the applications menu. 1. Tap News & Weather from the applications menu. 2. Press and tap Settings. 2. Press and tap Settings. 3. Tap Weather settings. 3. Tap News settings > Select news topics. 4.
-
Page 59: Rss Reader
Entertainment RSS Reader Viewing new feeds RSS Reader helps get updated news from various sources. 1. Tap RSS Reader. 2. Tap New feeds. Creating channels 3. Press and tap Update. 1. Tap RSS Reader from the applications menu. 4. Select and tap updated new feeds to read. 2. -
Page 60: Tools
6. Tools The phone offers a variety of tools that help you live a convenient life. Using the calendar You can manage your schedule with the calendar. Make sure to have a Google account. For details on Google account, refer to page 21. -
Page 61: Setting Reminders
Tools Setting reminders Drawing a handy memo 1. Tap Handy Memo from the 1. Tap Calendar from the applications menu. applications menu. 2. Press and tap More > Settings. 2. Tap Create New > Hand drawing 3. Adjust the following setting options. memo. -
Page 62: Deleting A Memo
Tools Listening to recorded voices Twitter. Channels might vary depending on the memo type. 1. Tap Voice Memo from the applications menu. 2. Tap List. Deleting a memo 3. Select and tap a memo to listen. 1. Tap Handy Memo from the applications menu. 4. -
Page 63: Clock Tools
Tools Clock Tools Deleting a city Clock Tools offers the current time in major cities and time 1. Tap Clock Tools from the applications menu. zones around the world. World time is displayed first by default. 2. Press and tap Delete. 3. -
Page 64: Alarm/Clock
Tools 4. Tap Lap > Split on the top of the screen and tap Start. This function is used when you want to measure the accumulated time. 5. Tap Reset to restart the stopwatch. Desk Clock Adding an alarm Changing an alarm 1. -
Page 65: Calculator
Tools Setting an alarm Saving a calculation 1. Tap Alarm/Clock from the applications menu. 1. Tap Calculator from the applications menu. 2. Press and tap Settings. 2. Press during a calculation. 3. Adjust the following setting options. 3. Tap Save and enter the file name. The date of the day appears on the screen by default. -
Page 66: Sketch Pad
Tools 3. Tap on the box below the unit type, enter value, and tap 4. Select the size and color of the brush and the size of the Done or eraser. 4. Select the original unit by dragging the wheel in the middle 5. -
Page 67: Voice Dialer
Tools Editing a drawing Voice Dialer 1. Tap Sketch Pad from the applications menu. You can perform functions by speaking into the phone. 2. Press and hold the drawing to edit, and tap Edit. Searching for a contact 3. Edit the drawing and tap Save. 1. -
Page 68: Compass
Tools Compass Compass helps you find your location using the speed and the Way point distance of your moving. Turn on the GPS function to use. Compass Moving speed Setting the way point Moving distance Moving time 1. Tap Compass from the applications menu. Direction Remaining N/S:Latitude... -
Page 69: Navigation
Tools Deleting I’mark Finding directions using Google Maps 1. Tap Compass from the applications menu. 1. Tap Maps from the applications menu. 2. Press and tap I’mark list. 2. Press and tap Directions. 3. Press and tap Delete. 3. Enter the name of the end point. 4. -
Page 70: Weather
Tools Checking the traffic conditions 4. Tap Update to view updated information. 1. Press and tap Route Info while Navigation is running. 2. Flick the screen along the suggested route to the destination. Depending on the traffic conditions, the road appears in green (good), yellow (congested) or red ( jammed). -
Page 71: Viewing Documents
Tools 3. Select and tap the trash icon next to the city to delete. Searching for words in a document 4. Tap Done. 1. Tap Document Viewer from the applications menu. Viewing documents 2. Open a document. You can read Microsoft Office documents that are stored in 3. - Page 72 Tools Deleting documents 1. Tap Document Viewer from the applications menu. 2. Select and tap a folder where you have stored documents. 3. Press and hold a document to delete, and tap Delete > Yes. Renaming documents 1. Tap Document Viewer from the applications menu. 2.
-
Page 73: Setting
7. Settings This chapter explains how to change the settings of the phone. Wireless & networks Access the settings from Applications or simply do it on the home screen by pressing and tapping Settings. Setting Airplane mode 1. Tap Settings > Wireless & networks > Airplane mode. Personalize If you turn on Airplane mode, Wi-Fi, Bluetooth and GPS functions are turned off at once. -
Page 74: Call Settings
Settings Setting VPN settings Setting your voicemail 1. Tap Settings > Wireless & networks > VPN settings > Add 1. Tap Settings > Call settings > Voicemail settings > VPN. Voicemail number. 2. Tap Add PPTP VPN, Add L2TP VPN, Add L2TP/IPSec PSK 2. -
Page 75: Sound
Settings Setting DTMF Tones Sound DTMF (Dual Tone Multi Frequency), better known as touch- Setting silent mode tone, is a system of signal tones used in telecommunications. With DTMF, each key you press on your phone generates two 1. Tap Settings > Sound > Silent mode. All other functions tones of specific frequencies. -
Page 76: Display
Settings Setting notification ringtone Setting auto-rotate screen 1. Tap Settings > Sound > Notification ringtone. 1. Tap Settings > Display > Auto-rotate screen if you want to make the screen rotate automatically when you move the 2. Select and tap a ringtone for notifications. phone horizontally or vertically. - Page 77 Settings 3. Watch how to set up the pattern and tap Next. 2. Enter the email address or user name that you use to sign in to your Google account and click Submit. Note Steps 2–3 appear only when you set up the pattern lock for the 3.
- Page 78 Settings Note Tap Settings > Location & security > Change screen lock if you do not want to set up an additional process to unlock the screen. Setting SIM card lock 1. Tap Settings > Location & security > Set up SIM card lock. 2.
-
Page 79: Applications
Settings Applications Note See Adjust power use for information on how to reduce the battery use for application. Debugging USB Managing applications The Debug mode disables drivers and allows the user to fix 1. Tap Settings > Applications > Manage applications > minor or major problems caused by the firmware. -
Page 80: Accounts & Sync
Settings Accounts & sync 2. Tap Factory data reset if you want to erase all data from the phone. 3. Tap Reset phone. Managing background data 4. Tap Erase everything. 1. Tap Settings > Accounts & sync. Note To erase all the data on the phone’s SD card, such as music 2. -
Page 81: Language & Keyboard
Settings Language & keyboard 5. Tap Touch to correct words to turn off the feature that underlines a word in a text field with suggestions for other words to use. Selecting a language 6. Tap Auto-capitalization to have the onscreen keyboard 1. -
Page 82: Voice Input & Output
Settings Managing the user dictionary 5. Tap Always use my settings when you want to make your settings the default settings for the phone. 1. Tap Settings > Language & keyboard > User dictionary. 6. Tap Speech rate, select and tap an option, and tap OK. 2. -
Page 83: Software Update
Settings Setting the time zone 2. Tap Status if you want to check the current status of the phone, including battery status, battery level and your 1. Tap Settings > Date & time > Select time zone. phone number. 2. Select and tap a time zone in the list. Checking battery use Setting time 1. -
Page 84: Appendix
Appendix To update software PC Suite features: You can update your software without visiting the nearest Application Management dealer. Data Backup&Restore 1. Tap Settings > AT&T software update. File Management 2. Tap Check for updates to check whether you need to Multimedia Management update the software. -
Page 85: Specifications
Appendix When you are unable to receive a call Photo album and video album Your phone may be set to “Call forwarding”. Cancel the “Call Dimensions & Weight forwarding” function. Weight: 4.48 oz (with battery cell) When you are unable to charge the battery Dimensions: 124.8 x 63.9 x 10.99 mm This may be the result of one of the following three cases: Power Management (Performance) - Page 86 Appendix are more immune than others to this interference noise, and In the above example, if a hearing aid meets the M2 level rating phones also vary in the amount of interference they generate. and the wireless phone meets the M3 level rating, the sum of the two values equals M5.
-
Page 87: Fcc Regulatory Compliance
Appendix FCC Regulatory Compliance turning the equipment off and on, the user is encouraged to try to correct the interference by one or more of the following measures: FCC Regulatory Compliance Reorient or relocate the receiving antenna. This device complies with Part 15 of the FCC Rules. Operation Increase the separation between the equipment and receiver. -
Page 88: Warranty
U.S. Territories; this filing is applicable only for better than the Pantech product. Be careful. Some of these 850 MHz GSM and 1900 MHz PCS operations. products may not be compatible to use with your Pantech FCC Hearing-Aid Compatibility Regulations for product and may damage the unit or cause it to malfunction. -
Page 89: Other Warranty Program
Appendix The antenna, keypad, display, rechargeable battery and To locate Pantech Authorized Service Center, call: (800) 962- battery charger, if included, are similarly warranted for twelve 8622 or email HandsetHelp@Pantech.com. Please have the (12) months from date of purchase. This Warranty extends only... -
Page 90: Legal Notice
For technical support in the U.S. & Canada, call (800) 962- 8622. Or email us to HandsetHelp@Pantech.com. Or visit the web site at www.pantechusa.com. For all other inquiries, write to: PANTECH WIRELESS, INC.5607 Glenridge Dr.
Need help?
Do you have a question about the Burst and is the answer not in the manual?
Questions and answers