Table of Contents
Advertisement
Quick Links
User Guide
Thank you for choosing the Pantech Breeze II P2000, our
latest mobile phone.
The Pantech Breeze II P2000 has many features designed
to enhance your mobile experience. From its EZ to read
menus, to its sleek, stylish design, we know you will enjoy
the entire Breeze II P2000 experience.
This User Guide contains important and useful information
that will maximize your familiarity with all that the
Pantech Breeze II P2000 has to offer.
Advertisement
Table of Contents

Related Manuals for Pantech Breeze II


Summary of Contents for Pantech Breeze II
-
Page 1: User Guide
User Guide Thank you for choosing the Pantech Breeze II P2000, our latest mobile phone. The Pantech Breeze II P2000 has many features designed to enhance your mobile experience. From its EZ to read menus, to its sleek, stylish design, we know you will enjoy the entire Breeze II P2000 experience. -
Page 2: Specifications
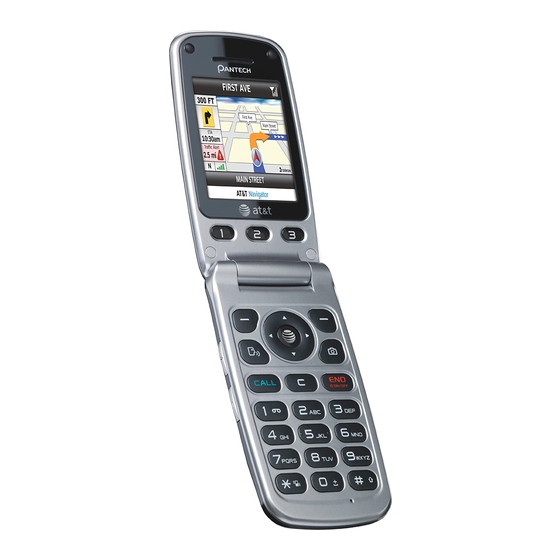
Specifications Melodies MIDI, i-Melody, MP3, AMR, WAV, AAC, Design AAC+, WMA Clamshell phone with internal and external Camera display Integrated 1.3M CMOS Camera Displays • Resolution up to 1280 x 1024 (1.3M pixels) • 260K Colors TFT LCD with 2.2” internal • Mpeg4 Video recording/playing up to display 15f/s (QCIF size) • 260K Colors TFT LCD with 1.38” external • Self-timer function (5 seconds or 10 display seconds) • 7 lines for text in basic mode with 16 • Photo album and video album point font Dimensions & Weight • Two soft keys and four-way scroll and selection O keys Weight: 101 g (with standard battery) Dimensions: 99 mm x 50 mm x 18.65 mm Power Management (Performance) Battery Standby Talk Capacity Type Time Time Standard... -
Page 3: Table Of Contents
Breeze Mode Specifications ...2 Phone overview ...8 1. Calls and address book Using Shortcuts ... 10 Making, receiving and ending a call ...34 Menu overview ... 11 Using video share ...36 Quick & Easy ... 14 Options during a call ...38 SIM card and battery ... 17 Checking all calls ...40 Turning the phone on/off ... 20 Speed dialing ...42 Essential display indications ... - Page 4 Service and fixed dialing number ...98 Audio ...122 Caller identification ...99 Music player ...123 Music player settings ...128 2. Messaging Media player ...129 Receiving messages ...102 Other files ...132 Creating and sending text messages ...103 Managing memory ...132 Creating multimedia messages ...104 Playing games ...132 Message templates ...109 Message settings...110 4. Useful Features Managing messaging memory ...112 Calendar ...134 Email ...113 Alarm clock ...134 Using instant messenger ...113 Calculator ...135 Tip calculator ...136...
-
Page 5: Phone Overview
Phone overview Earpiece Internal display EZ Quick Call Keys Left/Right Soft key Perform the functions shown at the bottom line of the display Navigation key OK key or access Scroll through the menu Press to enter menu system options Voice Command Camera key Send key Power on &... -
Page 6: Using Shortcuts
Using Shortcuts note: The steps may vary by mode and this manual provides instructions for both Breeze Numbered menu items, such as menus, Mode and Advanced Mode respectively. sub-menus, and options can be quickly accessed by using their shortcut numbers. In Menu mode, Main Menus can be accessed by pressing the number keys (1 to 0) corresponding to their location on the screen. Example: Accessing the Phone Mode menu. - Page 7 Advanced mode menu Address Messaging Mobile Book Email Conversations All Contacts Create Message Favorites Mobile Email Groups My Settings Outbox Drafts Voice Mail Settings Templates Used Space YPmobile Mobile AppCenter AT&T GPS AT&T Navigator Where AllSport GPS AT&T FamilyMap SIM dependent My Stuff AT&T Music Online Settings Locker Phone Mode...
-
Page 8: Quick & Easy
Quick & Easy Keys Functions Perform the functions shown at the bottom line of the display by using < > these soft keys. Scroll through the menu options in Menu mode. In standby mode, Left Scroll: Access Mobile Email menu Right Scroll: Access menu Up Scroll: Access Create Message menu Down Scroll: Access Address Book menu Select a menu function or store user-input information, such as names. Also use this key for confirmation as the O key. -
Page 9: Sim Card And Battery
Keys Functions Change various text input modes if pressed at the text-editing screen. Adjust the earpiece volume while making a call. Control the Ringtone volume, vibrate mode and silent all mode in standby. Mute the ringtone of an incoming call. Reject the incoming call if pressed and held when you receive an incoming call. Turn camera capture mode on. Work as a camera shutter in capture mode. Turn the Voice Commands on. SIM card and battery About your battery Your phone uses a Li-Ion battery. Make sure About your SIM card to use an authorized battery and charger When you subscribe to your network only. For more details, please inquire at operator, you receive a SIM (Subscriber your nearest dealer. -
Page 10: Installing/Removing Sim Card And Battery
Installing/removing SIM card and Put the contacts of the battery into the hole battery located at the bottom of 1. Remove the battery the unit and then insert cover from the unit. To and press the upper side of the battery fit the battery cover, put until you hear the “ click”. Make sure you it on the guide rail and align the gold contacts at the battery push up. -
Page 11: Turning The Phone On/Off
Turning the phone on/off To turn on 1. Press and hold E. To turn off 1. Press and hold E. Essential display indications Signal strength. The greater the number of bars, the stronger the signal. When network is in searching mode displayed. Flight mode is active. A call is being made. When you are in no service area is displayed. Call forwarding is active. -
Page 12: Setting The Phone Mode
In the Breeze mode, you can view an Available, Away, Invisible Status of AIM abbreviated menu: Address Messaging, Camera, Online, Away, Busy, Offline Status of and Settings. The access to all menu items. Available, Busy, Invisible Status of YAHOO Breeze Mode You have received one or more IM messages Network dependent Setting the phone mode Your phone has two customized modes, Breeze and Advanced. The default is set To change the phone mode to Breeze mode which provides EZ access 1. Press to the functions used most frequently. -
Page 13: Number Mode
1. Press # to change the mode as English French Spanish multi-tap. . , - ? ! / ' @ : 2. Press 2 to 9 to input text ç à ä á ã ç repeatedly. To write the letter “ C”, press é è é 2 3 times. To write number 2 press í... -
Page 14: Pc Suite
To send a message using one touch key • I nterface devices such as USB or Bluetooth 1. Press x. for the connection with the phone Options Send Message. 2. Press > PC Suite features • PC Suite launcher PC Suite • Connection Manager PC suite is a Windows-based PC program • Contact Manager that allows you to easily manage personal • PC Sync data and multimedia files by connecting • Message Manager... -
Page 15: Updating Software
> Delete. to computer from your phone. Advanced To copy a file to the memory card of the features of Breeze II including the 1. Select the file > Options > Copy to features provided by Breeze External Memory. To move the file from the card to the 2. -
Page 16: Appcenter
To view the version of software 2. Press Answer Tones 1. Press Menu > Settings > Phone Information. Shopping Games Software Version. 2. Scroll down to 1. Press Shop AppCenter Shopping Wallpapers AppCenter 1. Press 1. Press Menu > AppCenter. Shop Shopping Applications Shopping Videos... -
Page 17: Making, Receiving And Ending A Call
Making, receiving and ending Making a call using the call list Your phone logs up to 30 dialed, received a call and missed call numbers. Making a call 1. Press S to display the 1. Enter the area code and phone number. list. 2. Press S. 2. Select Answering a call Calls, pressing the L/R key. -
Page 18: Using Video Share
Using video share Making video share call 1. Enter the area code and phone number You can share live or recorded video while > S. on a call. You can send or receive video. 2. Press note: Video Share is not available in all 3. Select markets. Both parties must be in a 3G service area–a 3G icon must appear by the signal bars note: To use video share in the Recent Calls, prior to a call being placed, and both parties press Options must remain in the 3G coverage area for the... -
Page 19: Options During A Call
2. Press Options > Full Screen Putting a call on hold and returning landscape the screen. Putting a call on hold 1. Press Options during a call Returning to a held call Microphone off and on 1. Press Switching your phone’ s microphone again. -
Page 20: Viewing The Details Of Highlighted Entry In Address Book
Finding a name manually in address Mobile Web book 1. Press 1. Press the U/D key. Viewing the calendar during a call Viewing the details of highlighted 1. Press entry in address book Making a note during a call 1. Press Select. 1. -
Page 21: Viewing Data Transmitted Information
3. Press Reset > Yes. Kilobytes. note: The default password is ‘ 1234’ . • T otal Received, Viewing data transmitted transmitted data in Kilobytes. information • C lear 1. Press Shortcuts in standby mode. ‘1234’ . Recent Calls Packet Counter. 2. Press > • C urrent Info: You can view Speed dialing transmitted data in the current... -
Page 22: Making Groups
Viewing the contact list 2. Select a contact to call. 3. Press S. 1. Press D or press Menu > Address Book > Contacts. Sending a contact 1. Press D or press Searching for a phone number 1. Press D or press Book Menu >... -
Page 23: Service And Fixed Dialing Number
the service provider. for this device. It is an optional item. Not all headset will have a button. 1. Press D or press Book. While in standby mode 2. Press 1. Press the button once to list recent calls. 3. Select a number > press S. 2. Press the button twice to redial the last call. -
Page 24: Messaging
Memo Messaging Receiving messages Creating and sending text messages Creating multimedia messages Managing messaging memory Email... -
Page 25: Receiving Messages
Receiving messages Saving the object in a received multimedia message Viewing a new message 1. Open a multimedia message. or press O. 1. Press View 2. Select an object. Reading a message from the inbox 3. Press 1. Press Menu > Messaging > Inbox. It will be saved in one of the categories in 2. Select a received message >... - Page 26 > Preview > Current Whole > Preview Message. Message. To go back to text editor 6. To edit the text message, press U/D page, press Stop. to select the text box and edit your 6. To edit the text message, press U/D message. to select the text box and edit your 7. Press Send to and select a contact to message.
- Page 27 message. 5. To preview the message, press Options > Preview 8. Press Send to and select a contact to Message. send the message and press Select. 6. Press Pause to stop listening the voice 9. Press Send. memo or press For details on recording a video, see page 61. editor page. Adding a recorded voice memo to the 7. To edit the text message, press U/D message to select the text box and edit your...
-
Page 28: Managing Messaging Memory
5. To preview the message, press Options message box is full, the messages full icon > Preview > Current Whole will appear. All messages share memory. Message. To go back to text editor Icon page, press Stop. 6. To edit the text message, press U/D to select the text box and edit your Deleting a message in the inbox message. -
Page 29: Multimedia
Memo Multimedia Camera My Picture My Video... -
Page 30: Camera
Camera You can take pictures and record movies using the built-in camera. The photos and video clips can be saved and sent via multimedia messages and Bluetooth. Camera mode Picture remaining White Balance White Balance Effect Size Self Timer Self Timer Brightness Setting camera settings 1. Press Q in standby mode or press Menu 2. Press Video mode to taking a picture. Camera options Icon Name Zoom Effect Size Brightness Breeze Mode - Multimedia... -
Page 31: After Taking Pictures
Increasing or decreasing the Icon Name Descriptions brightness Normal ( ), Sepia ( ), Effect 1. Press L/R. It ranges from -2 to +2. Negative ( ), B&W ( ) Off ( ), 5 secs ( ), Taking a picture Self Timer 10 secs ( 1. Press Q in standby mode or press 176x144(MMS) ( ), Menu Size... -
Page 32: My Pictures
2. Focus on the object > O or press Viewing the recorded video clip Options > Record. 1. Press 3. Press Stop to stop recording. Video. 4. Press Options > Play to play the video 2. Press clip. 3. Select the video clip > Play. 5. Press C to go back to preview mode. After recording video clips Changing to camera mode 1. -
Page 33: My Videos
2. Select a picture. Deleting multiple pictures 3. Press Options > Set as > Wallpaper. 1. Press 2. Press Setting as caller identification 3. Press 1. Press Menu > Camera > Pictures. picture. 2. Select a picture. 4. Press Deselect 3. Press Options >... -
Page 34: Useful Features
Sending a video clip via Bluetooth 1. Press Menu > Camera > Videos. 2. Select a video clip. 3. Press Options > Send > Bluetooth. Deleting multiple video clips 1. Press Menu > Camera > Videos. 2. Press Options > Multiple Select. 3. Press Select to select more than one picture. -
Page 35: Alarm Clock
Calendar In the monthly view Calendar helps you manage your schedule including Move to another your time for calls or special days. You can set a reminder Move to another on any given date with this function. Viewing calendar Creating a new event 1. Press Menu > Tools > Calendar. 1. Select a day and press note: You can also access Calendar by pressing Event. -
Page 36: Tip Calculator
Tip calculator Stop watch Menu Tools 1. Press > > 1. Press Calculator. Stop 2. Enter the values for all the 2. Press variable fields (Bill($), 3. Press Tip(%), Split) and then 4. Press Continue the corresponding calculation fields or press (Tip($), Total($), Pay) are updated 5. To change to lap time, press automatically. -
Page 37: Connectivity
Send Message <Name or #>: Display the Create Message screen with the contact you have spoken. Contact <Name>: Retrieve and display the contact information stored in the address book. Go To <Menu>: Open an application on your phone. Check <Item>: Check the status information of your phone (Status, Voicemail, Messages, Missed Calls, Time, Signal strength, Battery, My Phone Number, and Volume). Connectivity Bluetooth Using Mobile Web... -
Page 38: Bluetooth
Bluetooth Bluetooth Icon Bluetooth technology enables free wireless Icon connections between electronic devices within a maximum range of 33 feet (10 meters). Bluetooth connections can be used to send images, text, business cards, calendar events, or to connect to computers using Bluetooth technology. Your mobile phone supports: • Connect to PC to access internet. note: Advance Audio Distribution Profile • Connect to Hands-Free. (A2DP) is a Bluetooth profile (mode) which • Connect to electronic devices. is designed to transfer a uni-directional 2-channel stereo audio stream to a headset or car audio. -
Page 39: Using Mobile Web
sender, it will be saved in your phone’ s 3. Enter the new name and press Save. memory. note: The device name is what identifies your phone to Bluetooth network. 1. After pairing with the target device, press Options > Take Files. Using Mobile Web 2. The available files will be displayed. Accessing Mobile Web 3. Select a file and press Options > Copy. 1. Press O in standby mode or press Setting the visibility Menu 1. -
Page 40: Phone Status
Phone status 3. Press 4. Select an option for each field and press This menu allows you to view My Phone Save. To reset to factory defaults, press Number, Signal Strength Battery Reset. Remaining. note: You can specify the options only when 1. Press Menu > Settings > Phone Normal Status. highlighted. Sounds & alerts Display settings Sounds &... -
Page 41: Calls And Address Book
Calls and address book with Advanced Mode Making, receiving and ending a call Using video share Options during a call Call settings Settings for video share Checking all calls Speed dialing Using address book Caller identifi cation Using your headset Service and fi xed dialing number... -
Page 42: Making, Receiving And Ending A Call
Advanced Mode offers additional features Once the call is completed, a call summary and functionality associated with making is displayed. calls and using address book. Rejecting a call Press E or Ignore. Making, receiving and ending Making a call using the call list a call Your phone logs up to 30 dialed, received Making a call and missed call numbers. 1. -
Page 43: Using Video Share
duration of the Video Share. Answering a second call <Call mode> 1. Press S. The first call is automatically put on hold. 2. Press E to end the second call. The call on hold is automatically reconnected. Using video share Making video share call You can share live or recorded video while 1. -
Page 44: Options During A Call
Receiving video share Switching your phone’ s microphone back on 1. After receiving video share, it will ask you whether to accept or reject the 1. Press video share > to accept and Talking on speaker reject. 1. Press Options Full Screen 2. Press > Putting a call on hold and returning landscape the screen. -
Page 45: Call Settings
Searching for a name or group in Reading a message during a call address book 1. Press 2. Select a message > Open. Enter the first letters of the name for Name Search. The entries are displayed starting Sending a message during a call with the first entry matching your input. -
Page 46: Setting For Profile
Setting recording location Share. 2. Press Service. 1. Press 3. Select > Select. Share. 2. Press Setting for profile 3. Select 1. Press Menu > Settings > Call > Video Memory Share. 2. Press Profile. Checking all calls 3. Select AT&T IMS Mobile Web >... -
Page 47: Speed Dialing
Viewing data transmitted information • C lear ‘1234’ . 1. Press Menu > My Stuff > Tools. 2. Press Recent Calls > Packet Counter. Speed dialing C urrent Info: You can view • You can dial quickly using speed dialing. Up transmitted data in the current to 8 phone numbers can be programmed Received session, in Kilobytes. Sent, using numbers 2 to 9. Total information are also 1 : Voice mail... -
Page 48: Using Your Headset
Searching for a phone number Sending a contact 1. Press D or press 1. Press D or press Menu > Address Book > Contacts. Book 2. Input the first letter or two of the 2. Select a contact > person’ s name and scroll with U/D. Contact. -
Page 49: Service And Fixed Dialing Number
1. Press D or press While in standby mode Book. 1. Press the button once to list recent calls. 2. Press 2. Press the button twice to redial the last 3. Select a number > press S. call. Viewing fixed dialing number list While the phone is closed Fixed dialing number is a service that 1. -
Page 50: Message Templates
Memo Messaging P2000 with Advanced Mode Receiving messages Creating and sending text messages Creating multimedia messages Message templates Message settings Managing messaging memory Using instant messenger... -
Page 51: Creating And Sending Text Messages
When your phone is set to Advanced 2. Press Mode, you can use additional features and 3. Select functionality associated with messaging. Contact. Saving the object in a received Receiving messages multimedia message Viewing a new message 1. Open a multimedia message. or press O. 1. Press View 2. Select an object. Reading a message from the inbox 3. -
Page 52: Creating Multimedia Messages
Messaging > Conversations. Adding a saved picture to the message 1. Press U or press note: All successfully sent messages will be saved in Conversations while the messages Create failed to be sent will be saved in Outbox. 2. Enter a message. Finding all sent messages 3. Press Camera. 1. Press Menu >... - Page 53 page, press Stop. 5. To stop and save the recording, press Stop. 6. To edit the text message, press U/D to select the text box and edit your 6. To preview the message, press Options message. > Message. To go back to text editor 7. Press Send to and select a contact to page, press Stop. send the message and press Select. 8. Press Send.
-
Page 54: Message Templates
Stop. Adding other files to the message 1. Press U or press 6. To preview the message, press Options > Preview > Current Whole Create Message. 2. Enter a message. 7. Press Pause to stop listening the voice 3. Press memo or press Stop to go back to text Files. editor page. 4. Select a file and press Select. 8. To edit the text message, press U/D 5. To preview the message, press Options to select the text box and edit your... - Page 55 2. Press Text Massage. 3. Select a profile and press Select. 3. Enter new Center Address. Setting sending options for 4. Select Message Type, Delivery Report multimedia message Validity Period and press Select. 1. Press 5. Select a desired option and press Save. 2.
-
Page 56: Managing Messaging Memory
Managing messaging memory Deleting a message in the inbox 1. Select a message > Up to 200 messages can be stored in the > Yes. phone memory, additional messages will be saved to the SIM card. When the Deleting multiple messages in the message box is full, the messages full icon inbox will appear. -
Page 57: Multimedia
Multimedia with Advanced Mode Camera Picture Video Audio Music player Music player settings Media player Other fi les Managing memory Playing games... -
Page 58: Camera
In Advanced Mode, you can use the full features of multimedia that Breeze II offers. Camera You can take pictures and record movies using the built-in camera. The photos and video clips can be saved and sent via multimedia messages and Bluetooth. Camera mode Picture remaining White Balance White Balance Effect Size Self Timer Self Timer Brightness Setting camera settings 1. Press Q in standby mode or press Menu 2. Press to taking a picture. Video mode Taking a picture 1. Press Q in standby mode or press Menu 2. -
Page 59: Picture
Recording a video 3. Press For details on taking a picture, see page 115. 1. Press Menu > My Stuff > Tools > Video Camera. Viewing the recorded video clip 2. Focus on the object > O or press 1. Press Options >... -
Page 60: Video
For details on creating multimedia 2. Select a picture. messages, see page 102. 3. Press Deleting multiple pictures Video 1. Press Menu > My Stuff > Picture > The Video menu allows you to shop video Camera. clips using the WAP browser. You can 2. Press Options > Multiple Select. download desired video clips and play with Select 3. Press to select more than one the built-in video player. You can also send, picture. -
Page 61: Audio
4. Press Deselect to cancel your selection. 2. Select a recorded sound. 5. Press Options > Delete. 3. Press Play. Using audio player controls Audio Audio menu allows you to shop tones and answer tones using the WAP browser. You can download desired audio files and play with the built-in audio player. You can Fast forward Hold R also send, save and delete audio files. The Control volume Side key up or down or U/D... - Page 62 note: Windows Media Player™ 10, 11 and Icon Descriptions Windows XP version is required. Music is paused. Playing music Music is stopped. 1. Press note: microSD card must be inserted to Player. transfer music to your phone. 2. Select a category Adding music from Windows Media Albums, Artists, Genres) and press Player™ Select. 1. Connect the USB cable to the device and 3. Select the computer. Music Player >...
-
Page 63: Listening Music With Bluetooth Headset
2. Select a playlist to add music and press Listening music with Bluetooth Options > Tracks. headset 3. Select Music, Albums, Artists 1. While music is playing in the standby Genres. mode, press 4. Select a music file(s) and press Select > Music Done. 2. Press 5. To remove tracks from the playlist, Transfer to B/T press Options > Remove Tracks >... -
Page 64: Music Player Settings
Using music identification Launching to community 1. Press Menu > AT&T Music. 1. Press 2. Press Shazam. 2. Press Community. 3. Hold the phone close to music. Your Launching more applications phone will analyze the music and 1. Press display the artist, title and album. 2. Press note: For the cost plan, contact your nearest service provider. - Page 65 Video illegal to copy such sound / video tracks for the image purpose of selling or distribution. Pantech does not in any way support the unauthorized use of Volume content on your phone media player. controls <Audio player> Background skin Icon Playing time Duration Volume Player controls controls <Video player>...
-
Page 66: Other Files
Other files Playing games You can manage unsupported file formats You can download games to play with. It that are saved on your phone. It also lists is easy to download and you can preview files received via Bluetooth from other them beforehand. You will only be able devices. to view games that are available on your mobile. Viewing the list of the files Shop games 1. Press Menu >... -
Page 67: Calendar
In Advanced Mode, you can utilize all useful Creating a new event features that Breeze II provides. 1. Select a day and press Event. Calendar 2. Select Schedule, Calendar helps you manage 3. Input the event and press Save. your schedule including your note: You can create events for dates from time for calls or special days. 01/01/2000 to 12/31/2099. You can set a reminder on any Alarm clock given date with this function. -
Page 68: Tip Calculator
Tip calculator Stop watch Menu My Stuff 1. Press > > 1. Press Tools Calculator. Tools > 2. Enter the values for all the 2. Press variable fields (Bill($), 3. Press Tip(%), Split) and then 4. Press Continue the corresponding calculation fields or press (Tip($), Total($), Pay) are updated 5. To change to lap time, press automatically. -
Page 69: World Time
World time Listening the recorded sound 1. Press Menu > Stuff. 1. Press Audio My Voice or press Tools 2. Press > Tools Voice Memo. > 2. Select a city and press 3. Select a recorded memo and press Play. Select. - Page 70 1. In standby mode, simply press N Send Message <Name or to access Say a Command. Or press Create Message screen with the contact Menu > My Stuff > Tools > Say a you have spoken. Command. Contact 2. At the voice prompt, say a command the contact information stored in the and simply follow the voice prompts. address book. The following list shows available voice Go To commands.
-
Page 71: Connectivity Bluetooth
When your phone is set to Advanced Devices. Mode, you can use functionality associated 2. Select with connectivity and set the connection Search. profiles. 3. The available device will be displayed. 4. Select a device and press Select. Bluetooth 5. Enter password and press O. Activating Bluetooth note: The target device must be in discoverable mode. 1. Press Menu > Settings > Connectivity > Bluetooth > Sending files Activation. 1. After pairing with the target device, 2. Select or Off. press 2. -
Page 72: Using Mobile Web
Using Mobile Web > Adding bookmarks Accessing Mobile Web 1. Press O in standby mode or press 1. Press Menu > Mobile Web. > 2. Press New. note: It will access the Mobile Web homepage. 3. Enter a name for new bookmark in Title Using the web browser field and web address in URL field. -
Page 73: Setting Profiles
Download Manager. Editing profiles 1. Press Setting profiles Applications You can view a current connection profile Profiles. or create new profiles by customizing 2. Select a profile and press Profile Name, Home URL, Connection Edit. Type, Proxy Address Proxy Port. 3. Edit the parameters and press Save. Adding profiles note: The default profile is not editable. -
Page 74: Memo
Memo Settings with Advanced Mode Language Time and date Voice command settings Profi les Display settings Security Reset... -
Page 75: Language
In Advanced Mode, you can change and 2. Select customize sounds settings, call handling, Format, display settings, security settings, and Select. other settings associated with your phone. 3. Select an option and press Select. Language Voice command settings 1. Press Menu > Settings > Phone > 1. -
Page 76: Security
Setting the menu type Setting the font size 1. Press Menu > Settings > Display > 1. Press Menu Type. Font Grid List and press Save. 2. Select Small, 2. Select 3. Press Select. Setting the color theme Setting the brightness 1. -
Page 77: Reset
Setting fixed dialing number the SIM cards (either depends on the SIM card or determined by the SIM card). 1. Press Menu > Settings > Security > FDN. Reset and press Select. 2. Select 3. Enter PIN2 code and press O. Resetting the phone 1. Press For details on fixed dialing, see page 96. 2. -
Page 78: Appendix
Memo Appendix Alert message Troubleshooting checklist Safety information Safety precautions About the battery usage FCC Hearing-Aid Compatibility (HAC) regulations for wireless devices FCC regulatory compliance Warranty... -
Page 79: Troubleshooting Checklist
Alert message When the “Phone and SIM messages is full. Delete Messages” message appears: If you experience any problem while using your The received or saved messages are full in your mobile phone, please refer to the following phone and SIM card memory. You need to checklist. If the problem still persists, contact delete the message. your dealer or nearest carrier. -
Page 80: Safety Information
When you are unable to select a certain Number (FDN)” mode. Cancel the “ FDN” mode. function: When you are unable to charge the battery: You may not have subscribed to that function, This may be the result of one of the following or your network service provider may be in an three cases. area where such service cannot be provided. 1. Y our charger may be out of order. Contact Contact your local service provider. your nearest dealer. 2. -
Page 81: About The Battery Usage
Mode You should use your phone in an emergency, either use a hands free device built into your car Profiles or pull over in a safe place first. Breeze Mode Press Shortcuts Switch off in restricted areas of the Always switch your phone off in areas where Profiles. Press mobile phone use is restricted. Flight Switch off in explosive or dangerous The electromagnetic waves emitted by your areas phone may affect the electronic navigation... -
Page 82: Fcc Hearing-Aid Compatibility (Hac) Regulations For Wireless Devices
dispose of batteries by burning; they may battery may present a risk of fire, explosion, explode. leakage or other hazard. – Do not use an unauthorized charger. Only – Promptly dispose of used batteries in use the battery for the device for which it is accordance with local regulations. specified. – Battery usage by children should be – Only use the battery with a charging device supervised. - Page 83 hearing device is the best way to evaluate it for humming, or whining noise. Some hearing devices are more immune than others to this your personal needs. interference noise, and phones also vary in the • M-Ratings: Phones rated M3 or M4 meet FCC amount of interference they generate. requirements and are likely to generate less interference to hearing devices than phones The wireless telephone industry has developed that are not labeled. M4 is the better/higher a rating system for wireless phones, to assist of the two ratings. hearing device users find phones that may be • T-Ratings: Phones rated T3 or T4 meet FCC compatible with their hearing devices. Not all phones have been rated. Phones that are rated requirements and are likely to generate less have the rating on their box or a label located interference to hearing devices than phones on the box.
-
Page 84: Fcc Regulatory Compliance
FCC Regulatory Compliance Those guidelines are consistent with safety standards previously set by both U.S. and FCC Regulatory Compliance international standards bodies: American This device complies with Part 15 of the FCC National Standard Institute (ANSI), National Rules. Operation is subject to the following Council of Radiation Protection and two conditions: (1) this device may not cause Measurements (NCRP), and International harmful interference, and (2) this device must Commission on Non-Ionizing Radiation accept any interference received, including Protection (ICNRP). Those standards were interference that may cause undesired based on comprehensive and periodic operation. evaluations of the relevant scientific literature. Your mobile device is a low power radio The design of your phone complies with the transmitter and receiver. When it is ON, it FCC guidelines and applicable. -
Page 85: Health And Safety Information Fcc
Pantech Wireless, Inc. (the Company) warrants Pantech product. Be careful. Some of these to the original retail purchaser of this Pantech products may not be compatible to use with handheld portable cellular telephone, that your Pantech product and may damage the should this product or any part thereof during unit or cause it to malfunction. - Page 86 This Warranty does not apply to: such as fire, flooding, dirt, sand, weather (a) Product subjected to abnormal use or conditions, battery leakage, blown fuse, conditions, accident, mishandling, neglect, theft or improper usage of any electrical To locate Pantech Authorized Service Center, source. call: (800) 962-8622 or email HandsetHelp@ Pantech.com. The Company disclaims liability for removal or Please have the following information...
- Page 87 ANY WARRANTY MUST BE BROUGHT WITHIN limitations on how long an implied warranty A PERIOD OF 18 MONTHS FROM DATE OF lasts or the exclusion or limitation of incidental ORIGINAL PURCHASE. IN NO CASE SHALL or consequential damage so the above limitation or exclusions may not apply to you. This Warranty gives you specific legal rights, and you may also have other rights which vary from state to state or province to province. For technical support in the U.S. & Canada, call (800) 962-8622. Or email: HandsetHelp@Pantech.com. Or visit the web site: www.pantechusa.com For all other inquiry, write to: PANTECH WIRELESS, INC. 5607 Glenridge Dr. Suite 500 Atlanta, GA 30342 Appendix...
Need help?
Do you have a question about the Breeze II and is the answer not in the manual?
Questions and answers