Pantech Burst User Manual
English - manual
Hide thumbs
Also See for Burst:
- Manual (97 pages) ,
- Quick start manual (2 pages) ,
- User manual (90 pages)
Table of Contents
Advertisement
Quick Links
Download this manual
See also:
Manual
Thank you for choosing the Pantech Burst, our latest smartphone. The
Pantech Burst has many features designed to enhance your mobile
experience. With its unique and stylish design, you will enjoy the entire
Burst experience.
This User Guide contains important and useful information that will
maximize your familiarity with all that the Pantech Burst has to offer.
Advertisement
Table of Contents

Related Manuals for Pantech Burst


Summary of Contents for Pantech Burst
- Page 1 Pantech Burst has many features designed to enhance your mobile experience. With its unique and stylish design, you will enjoy the entire Burst experience. This User Guide contains important and useful information that will maximize your familiarity with all that the Pantech Burst has to offer.
- Page 2 Service provided by AT&T Mobility. Portions © 2012 AT&T Intellectual Property. All rights reserved. AT&T, the AT&T logo and all other AT&T marks contained herein are trademarks of AT&T Intellectual Property and/or AT&T affiliated companies. All other marks contained herein are the property of their respective owners. Copyright © 2012. Pantech. All Rights Reserved.
-
Page 3: Safety Information
Important Safety Information Safety information Safety precautions The following shows how to maintain your mobile phone, The following list shows precautions to keep your device as together with necessary precautions. you use it. Keep your mobile phone and its accessories out of the Using a mobile phone while driving is prohibited. -
Page 4: About Battery Usage
Important Safety Information Turn off in dangerous areas Dispose of and recycle used batteries in accordance with local regulations. Do not dispose of batteries by burning; Always turn your phone off in areas where explosive or they may explode. dangerous materials (e.g. fuels or chemical products) are Do not use an unauthorized charger or battery. -
Page 5: Basic Instructions
Important Safety Information To prevent injury or burns, ensure that no metal objects Words in all capital letters refer to hard keys. For example, come into contact with the + and – terminals of the battery. LOCK/PWR indicates the lock/power key on the top left of the handset that locks the screen or turns on/off power. -
Page 6: Table Of Contents
Table of contents Safety information ..................3 2. Connectivity ..........25 Safety precautions ..................3 Using a Wi-Fi network ................25 About battery usage ...................4 Connecting to a mobile network ............26 Basic instructions ..................5 Using Bluetooth ..................26 Using the phone as modem ..............27 1. - Page 7 Table of contents Enjoying YouTube ..................52 AT&T Locker ....................73 Accessing the Internet ................53 AT&T Navigator ..................74 Installing or uninstalling applications ...........55 AT&T Smart Wi-Fi ..................74 Using Google Maps ..................56 Live TV ......................74 Using Local ....................57 Device Help ....................75 Using Latitude ....................57 YPmobile .....................75 Searching with Google ................59 myAT&T ......................75...
- Page 8 Table of contents Software update ..................86 About phone ....................86 Resetting the phone ................86 Appendix ............87 PC Suite .......................87 Troubleshooting checklist ...............87 Specifications ................... 88 FCC Hearing-Aid Compatibility Regulations for Wireless Devices..................88 FCC Regulatory Compliance ..............89 Warranty .....................
-
Page 9: Getting Started
1. Getting Started Follow the outlined steps that should be taken first before Installing the SIM/USIM card and battery using Burst. 1. Remove the battery cover from the unit. To remove the battery cover, place Inside the package your fingernail in the groove at the The package should contain the following items: bottom of the unit, and then lift it up. -
Page 10: Charging The Battery
Getting Started Correct method of inserting the battery About the internal memory The internal memory is divided into two areas: internal system storage and internal media storage. Downloaded and preloaded applications are saved in the internal system storage. Pictures and video files taken with the built-in camera, downloaded music files or attachments downloaded from MMS, emails or web browser are saved in the internal media storage. -
Page 11: Turning The Phone On/Off
Getting Started It is recommended that you format the microSD™ card before To turn off using the phone. 1. Press and hold the LOCK/PWR key. Viewing available memory 2. Tap Power off. 3. Tap OK. 1. Tap Settings from the applications menu. 2. -
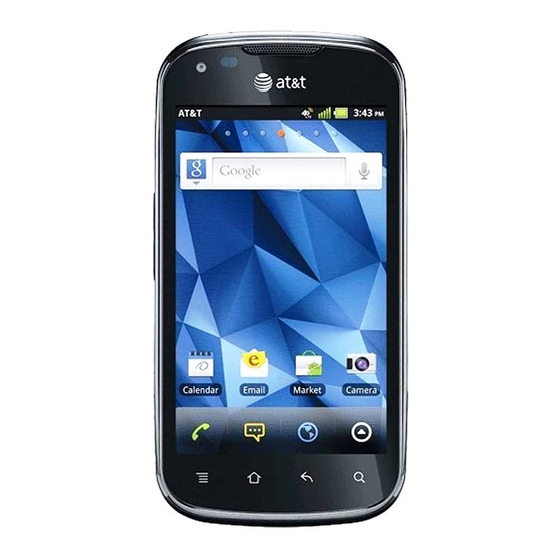
Page 12: Product Overview
Getting Started Product overview Front view Rear view LOCK/PWR Proximity Speaker sensor Earphone jack Front-side camera Microphone Rear camera Camera flash Rear speaker MENU Internal SEARCH antenna area BACK HOME Microphone Function Function MENU Displays options available; rearranges the SEARCH Searches through the Internet;... - Page 13 Getting Started Side view Rear camera Volume keys USB port Internal antenna area Hard keys from the touch mode Using 3.5pi stereo earphone You can control your stereo earphone by inserting the stereo Function earphone’s plug into earphone jack on the phone. VOLUME Adjusts all sound volumes.
-
Page 14: Screen Indicators
Getting Started Screen indicators Icon Description Icon Description Firmware upgrade is available. A call is in progress. Power saver mode is on. Missed call An alarm has been set. Call on hold Timer has been set. A call is in progress using a Bluetooth device. Music is playing. -
Page 15: Using The Touch Screen
Getting Started Using the touch screen Icon Description Run an application or perform functions using the touch Portable Wi-Fi hotspot is active. screen. The following finger actions help you easily understand how to use the touch screen and the phone. USB tethering is active. -
Page 16: Understanding The Home Screen
Getting Started Understanding the home screen Navigating the home screen The phone provides five different screens where you can place The home screen is where you’ll find all your applications. You items according to your preference. can have up to 5 home screens and browse them with a flick. 1. -
Page 17: Customizing The Home Screen
Getting Started Using the blind mode for the home screen Customizing the home screen By hiding the icons and widgets, you can enjoy the wallpaper in Rearranging or deleting a panel a full view. 1. Spread two fingers apart on the home screen to hide icons 1. - Page 18 Getting Started Adding a folder Rearranging or deleting icons, widgets, or folders You can add a folder that contains shortcuts or application icons to the background screen. You can rearrange or delete icons, widgets, or folders on the background screen or the basic launcher bar. 1.
-
Page 19: Using The Main Home Menu Options
Getting Started Using the main home menu options Setting the home screen wallpapaer 1. Tap Wallpaper on the main home 1. Tap and hold the background screen. menu. Or press 2. Tap a tab from among Live 2. Tap a desired menu icon. Wallpapers, Wallpapers, Gallery, and Download Wallpapers. -
Page 20: Viewing Tips For The Home Screen
Getting Started Viewing tips for the home screen Using the Quick Settings screen 1. Tap Tips on the main home menu. 2. Check each tip and tap Back to move to the previous tip or tap Next to move to the next tip. Description Turns on or off Vibrate mode, Wi-Fi, Airplane Tip page 1... -
Page 21: Using The Applications Menu
Getting Started Using the applications menu Description Main applications menu to open the applications menu. Tap an icon to run the application. Flick the screen to the left or right to move to the previous or next page. Tap and hold an icon to create a shortcut on the home screen. -
Page 22: Closing Running Applications
Getting Started Viewing tips for applications menu Closing running applications 1. Press and tap Tips. If you start an application and do not close it with the Task Manager, the application remains active even when you switch 2. Check each tip and tap Back to move to the previous tip or to the home screen or start another application. -
Page 23: Activating The Phone
Getting Started Activating the phone Creating a Google account Go through the following steps when you turn on the phone 1. Tap Settings from the applications menu. for the first time. If you want to set up the phone as your choice 2. -
Page 24: Gripping The Phone
Getting Started Gripping the phone Hold the phone in the right position for a call as shown in the image below. Correct Incorrect Make sure not to block the internal antenna embedded in the phone. Check the location of the antenna on the illustration on page 12. -
Page 25: Connectivity
2. Connectivity This chapter explains how to connect to wireless networks using Connecting to a Wi-Fi network your phone. 1. Tap Settings from the applications menu. 2. Tap Wi-Fi. Using a Wi-Fi network 3. Tap OFF to On to activate the function. 4. -
Page 26: Connecting To A Mobile Network
Connectivity Disconnecting a Wi-Fi network Pairing with devices 1. Tap the network that is connected to the phone. 1. Tap Settings from the applications menu. 2. Tap Forget to disconnect the network. 2. Tap Bluetooth. Note You can also disconnect the Wi-Fi network by pressing and 3. -
Page 27: Using The Phone As Modem
Connectivity Managing the Bluetooth settings Using the phone as modem 1. Tap Settings from the applications menu. The phone provides other devices with an Internet connection. 2. Tap Bluetooth. Activating the USB tethering 3. Press 1. Connect the phone with an electronic device using a USB 4. -
Page 28: Connecting To A Pc
Connectivity Setting options for portable Wi-Fi hotspot Connecting to a PC 1. Tap Settings from the applications menu. You can synchronize files and exchange data with a computer using a PC data cable. 2. Tap More... > Tethering & portable hotspot. 3. -
Page 29: Transferring Files Through Media Transfer
Connectivity Using the phone as mass storage device Transferring files through Media Transfer You can copy files between your computer and the microSD™ Media Transfer Protocol (MTP) is a communication method card in the phone. The applications which need microSD™ specifically optimized for the transfer of audio and video card, such as Handy Memo, Voice Recorder, Sketch Pad, Music file formats. -
Page 30: Call & Message
3. Call & Message Calling Adjusting the volume 1. Press the upper volume key to increase the volume during a Making a call call. 1. Tap Phone from the launcher. 2. Press the lower volume key to decrease the volume during a call. -
Page 31: Checking Your Voice Mail
Call & Message Checking your voice mail Saving a dialed number as a new contact 1. Tap Phone from the launcher. 1. Tap Phone from the launcher. 2. Tap and hold 1 on the keypad. 2. Enter a telephone number. 3. -
Page 32: Messaging
Call & Message Muting a call About Swype Swype is a fast and easy way to enter 1. Tap during a call. a message. For example, drag your 2. Tap if you want to turn off the function. finger on the screen keyboard as shown and input “Quick”. -
Page 33: Forwarding Messages
Call & Message Forwarding messages 1. Tap Messages from the launcher. 2. Select and tap a message that you want to deliver. 3. Tap and hold the desired message, and tap Forward. 4. Enter a recipient’s number or email address. 5. - Page 34 Call & Message Adding a template Attaching locations 1. Tap Messages from the launcher. 1. Tap Messages from the launcher. 2. Press and tap Templates. 2. Tap 3. Press and tap Add new. 3. Enter a recipient’s number. 4. Enter a recipient’s number and a message. 4.
- Page 35 Call & Message Setting a signature Replying to a received message 1. Tap Messages from the launcher. 1. Tap Messages from the launcher. 2. Press and tap Settings. 2. Select a message to reply to. 3. Tap Edit signature. 3. Press and tap Reply.
-
Page 36: Managing Contacts
Call & Message Setting notifications Description Registers a photo. 1. Tap Messages from the launcher. Enters a name, phone number, or email address; 2. Press and tap Settings. set a ringtone; or select a group. 3. Adjust the following setting options. Notifications: Displays a notification in the status bar Editing contacts when a message is delivered. -
Page 37: Sharing Contacts
Call & Message Export to SIM card(Copy): Copies contacts from the Setting contact groups phone to the SIM or USIM card. Manage multiple contacts in groups. If you have registered Export to SIM card(Move): Moves contacts from the more than two Google accounts, you must select an account phone to the SIM or USIM card. - Page 38 Call & Message To delete a group 1. Press in the group list. 2. Tap Delete group. 3. Select and tap desired groups. 4 Tap > OK. Managing accounts and sync 1. Tap Contacts from the launcher. 2. Press and tap Accounts. 3.
-
Page 39: Communication
4. Communication Receiving and sending emails Sending an email Setting up an email account 1. Tap Email from the applications menu. 2. Select an email account. 3. Enter your email address and password for the first use. 4. Tap either MANUAL SETUP or NEXT. If you tap MANUAL SETUP, tap POP3 or IMAP, set the necessary options, and tap Set the account setting options and tap... -
Page 40: Using Gmail
Communication Marking emails as read Using Gmail 1. Tap Email from the applications menu. 2. Tap and hold a desired email. 3. Tap Mark as read. The title of the mail is displayed in regular type. Deleting an email account 1. -
Page 41: Using Twitter
Communication Reading incoming messages Sending an email from Gmail 1. Tap Gmail from the applications menu. 2. Tap 3. Enter a recipient’s email address, the subject and the message. 4. Tap Setting Gmail options 1. Tap Gmail from the applications menu. 2. -
Page 42: Using Facebook
Communication Searching tweets or people Using S-Board 1. Tap Twitter from the applications menu. Form a group with your friends through S-Board and share contents and logs that you have created using the phone. You 2. Tap can use S-Board in the landscape mode only. 3. -
Page 43: Adding Members To A Group
Communication Adding members to a group Sharing media 1. Tap S-Board from the applications menu. 1. Tap S-Board from the applications menu. 2. Press and tap Add members. 2. Tap Contents on the top left of the screen. 3. Enter the name or phone number of a member to add to 3. -
Page 44: Using Google Talk
Communication Using Google Talk Setting your status 1. Tap Talk from the applications menu. 2. Tap on the top of the screen where your Gmail address is displayed. 3. Tap the status bar on the top of the screen. 4. Tap Available, Busy, or Invisible. Note The status message will not be displayed if your status is Invisible. -
Page 45: Entertainment
5. Entertainment The phone offers a variety of tools for entertainment purposes. Changing camera option settings Using Camera You can take pictures with the built-in camera. You can send and share the photos via multimedia messages. Taking pictures Selecting options Menu Setting (when you use the rear camera) Exposure, Timer, Flash, Resolution,... -
Page 46: Using Gallery
Entertainment Zooming in or out Viewing pictures in a slideshow 1. Tap Gallery from the applications menu. 2. Select and tap the pictures that you want to view in a slideshow. 3. Press and tap Slideshow. 4. Tap on the screen if you want to stop the slideshow. Sharing pictures Zooming in or out 1. -
Page 47: Using Camcorder
Entertainment Cropping a picture Deleting pictures 1. Tap on the album icon while in the camera mode or tap 1. Tap the album icon while in the camera mode or tap Gallery Gallery from the applications menu. from the applications menu. 2. -
Page 48: Using Video Player
Entertainment Zooming in or out 1. Tap The screen changes to landscape mode by default. 2. Tap on the screen and select options if necessary. 3. Focus on the object and press . Press if you want to cancel recording. 4. -
Page 49: Deleting Videos
Entertainment Video Player icons Note You can also search for similar videos on YouTube, Web, and music applications, or view the video properties after pressing and Icon Name Description holding the video. Play Plays a video. Deleting videos Pause Pauses a video. Deleting one video file Fast- Fast-forwards a video. -
Page 50: Using Movies
Entertainment Using Movies Icon Description Shuffles songs (white); shuffle is off (black). Movies allows you to rent movies that can be played on your phone. Repeats the current song (white). 1. Tap Movies from the applications menu. Repeats all songs (white). You must allow installation of non-Market applications by tapping Settings >... -
Page 51: Music Player Settings
Entertainment 5. Tap Description Music Player settings Music sorting tab (Songs, Albums, Artists, Genres, Folders, Playlists, Rating, Most played) 1. Tap Music Player from the applications menu. Plays or pauses the currently playing song on and tap Settings. 2. Press the list. -
Page 52: Enjoying Youtube
Entertainment Deleting songs Watching videos 1. Tap YouTube from the applications menu. 1. Tap Music Player from the applications menu. 2. Select and tap a video to watch. 2. Press and tap Delete. 3. Rotate the phone to landscape mode to switch to full 3. -
Page 53: Accessing The Internet
Entertainment YouTube Settings Accessing the Internet 1. Tap YouTube from the applications menu. Searches for information on the Internet and bookmarks your favorite websites. 2. Press and tap Settings. 3. Tap General and adjust the following setting options. High quality on mobile: Sets videos display to high- quality. -
Page 54: Adding Bookmarks
Entertainment Managing tabs Share link: Shares the link of a bookmark with Bluetooth, Facebook, Gmail, Google+, Message, or 1. Tap Web from the launcher. Twitter. The sharing application may vary depending on the availability of the application. 2. Press and tap Tab management. Copy link URL: Copies the URL of a bookmark. -
Page 55: Installing Or Uninstalling Applications
Entertainment Installing or uninstalling applications Deleting applications from Play Store You can download useful applications from Play Store and use 1. Tap Play Store from the applications menu or on the home them for your purposes. For downloaded applications, you can screen. -
Page 56: Using Google Maps
Entertainment Using Google Maps Finding places Google Maps offers useful information based on your region. 1. Tap Maps. You can see your current location on the map. Make sure to connect the phone to a Wi-Fi or mobile network. Note Make sure to connect to wireless networks or GPS satellites by If you turn on the GPS function, you can obtain more accurate tapping Settings >... -
Page 57: Using Local
Entertainment Using Local Adding a category for places 1. Tap Local from the applications menu. Finding places 2. Press and tap Add a search. 1. Tap Local from the applications 3. Enter a category to add. The category appears on the menu. - Page 58 Entertainment Adding friends from contacts Managing friends 1. Tap Latitude from the applications menu. 1. Tap Latitude from the applications menu. 2. Tap 2. Tap one of the friends on the screen. 3. Tap Select from Contacts. 3. Tap Ping for check in, and select and tap the time interval for refreshing locations.
-
Page 59: Searching With Google
Entertainment Searching with Google Selecting items that can be searched 1. Tap Search from the applications menu. Searching for information with Google 2. Press and tap Settings. 1. Tap Search, or tap the Google 3. Tap Searchable items. search box in idle mode. 4. -
Page 60: Setting Options
Entertainment Viewing new feeds 1. Tap RSS Reader from the applications menu. 2. Press and tap Refresh. 3. Select and tap updated new feeds to read. 4. Tap Done. Viewing new feeds Setting options 1. Tap RSS Reader. 2. Press and tap Settings. -
Page 61: Tools
6. Tools The phone offers a variety of tools that help you live a Creating an event convenient life. 1. Tap Calendar from the applications menu. 2. Tap Existing to log in with your Google account. Calendar Tap New to create a Google account. You can manage your schedule with the calendar. -
Page 62: Handy Memo
Tools Managing Calendar Handy Memo 1. Tap Calendar from applications menu. You can create a memo with your finger, the keypad or your voice. 2. Press and tap Calendars to display. 3. Select and tap an account, and tap Calendar to sync. Creating a text memo 4. -
Page 63: Voice Recorder
Tools Handy Memo icons Voice Recorder Icon Description Record a memo using the phone. Sets the size of the brush. Sets the size of the eraser. Undoes the previous drawing. Redoes the previous drawing. Editing a memo 1. Tap Handy Memo from the applications menu. 2. -
Page 64: Alarm/Clock
Tools Recording Voice Memo Alarm/Clock 1. Tap Voice Recorder from the applications menu. Alarm/Clock helps set the alarm and activates clock tools including World Time, Timer, or Stopwatch. Alarm/Clock is 2. Tap to start recording your voice. provided by default. 3. -
Page 65: Deleting An Alarm
Tools Deleting an alarm Viewing the world time 1. Tap Alarm/Clock from the applications menu. 1. Tap Alarm/Clock from the applications menu. 2. Tap and hold the alarm to delete, and tap Delete alarm. 2. Tap World Time > Add new city and Setting an alarm enter the name of a city. -
Page 66: Calculator
Tools Using the timer Calculator 1. Tap Alarm/Clock from the You can perform basic mathematical calculations with the calculator in the phone. applications menu. 2. Tap Timer. Doing calculations 3. Tap the timer indicated on the screen, and then Set for setting the 1. -
Page 67: Converter
Tools Deleting a calculation Sketch Pad 1. Tap Calculator from the applications menu. You can sketch a drawing and share it with your friends. 2. Press and tap List. Creating a drawing 3. Tap and hold the calculation to delete, and tap Delete. 1. -
Page 68: Voice Dialer
Tools Voice Dialer Icon Description You can perform functions by speaking into the phone. Sets the size of the eraser. Searching for a contact Undoes the previous drawing. 1. Tap Voice Dialer from the Redoes the previous drawing. applications menu. 2. - Page 69 Tools Moving toward a way point Reviewing the moving track 1. Tap Start after you set a way point and start moving. The 1. Tap Compass from the applications moving track begins to be recorded. menu. 2. Tap Pause if you stop recording temporarily. Tap Resume if 2.
-
Page 70: Navigation
Tools Navigation Weather Searching for destination by voice Adding a new city 1. Tap Navigation from the 1. Tap Weather from the applications applications menu. menu. 2. Tap Speak destination and speak 2. Tap your destination into the phone. 3. Enter the name of the city you want, 3. -
Page 71: Document Viewer
Tools Changing temperature unit Document Viewer 1. Tap Weather from the applications menu. You can read Microsoft Office documents that are stored in a variety of formats in the phone. Following file formats are and tap Settings. 2. Press supported: .doc, .docx, .xls, .xlsx, .ppt, and .pptx, .txt, .pdf. 3. - Page 72 Tools Reading documents Moving to a page in a document 1. Tap Document Viewer from the applications menu. 1. Tap Document Viewer from the applications menu. 2. Select and tap a document to read. 2. Open a document. 4. Tap anywhere on the screen while a document is open. 3.
-
Page 73: At&T Services
7. AT&T SERVICES Make your phone do more for you with useful applications from AT&T Family Map AT&T. View the location of your family members at any time for a monthly fee. Amazon Kindle 1. Tap Apps from the launcher. Read books on your smartphone. -
Page 74: At&T Navigator
AT&T SERVICES AT&T Navigator Option Description AT&T Navigator takes you to your destination with turn-by turn Only enables and connects to Wi-Fi near voice and on-screen driving directions. My Spots AT&T Wi-Fi Hot Spots and saved networks. 1. Tap Apps from the launcher. Only enables Wi-Fi near My Spots and Popular 2. -
Page 75: Device Help
AT&T SERVICES Device Help myAT&T View videos and tutorials about how to use the features of your myAT&T is an online account management application. phone. 1. Tap Apps from the launcher. 1. Tap Apps from the launcher. 2. Tap myAT&T. 2. -
Page 76: Setting
8. Settings This chapter explains how to change the settings of the phone. Setting Bluetooth tethering Access the settings from the applications menu or simply do it 1. Tap Settings from the applications menu. on the home screen by pressing and tapping Settings. - Page 77 Settings Setting your voicemail Setting Call forwarding 1. Tap Settings > Call settings > Voicemail settings > 1. Tap Settings > Call settings > Call forwarding. Voicemail number. 2. Tap Always forward, Forward when busy, Forward when 2. Enter a voicemail number or tap and select a contact to unanswered, or Forward when unreachable.
-
Page 78: Sound
Settings Sound Setting Sound effect 1. Tap Settings > Sound > NASH Sound effect. Setting silent mode 2. Select and tap an effect from 3D sounds and equalizers. 1. Tap Settings > Sound > Silent mode. All sounds, except You can choose a user set. media and alarm, are silenced if you select this option. -
Page 79: Storage
Settings Setting screen timeout USB connection settings 1. Tap Settings > Display > Sleep. Manage settings for connecting the phone to a computer via a USB cable. 2. Select and tap the time interval to turn off the screen. 1. Tap Settings > USB connection settings. Note Longer screen timeout intervals may adversely impact battery life. -
Page 80: Apps
Settings Apps Location services View and manage applications installed on the phone. Setting my location 1. Tap Settings > Apps. 1. Tap Settings > Location services. 2. Tap an application and tap Force stop if you want to force 2. Adjust the following setting options. the selected application to stop. - Page 81 Settings Setting screen lock with a pattern key Setting screen lock with a PIN 1. Tap Settings > Security > Screen lock > Pattern. 1. Tap Settings > Security > Screen lock > PIN. 2. Read the “Securing your phone” guide and tap Next. 2.
- Page 82 Settings Encrypting phone Setting device administration Encrypts your accounts, settings, downloaded apps and their 1. Tap Settings > Security > Device administrators to view or data, media, and other files. deactivate device administrators. 1. Tap Settings > Security > Encrypt phone. 2.
-
Page 83: Language & Input
Settings Language & input The setting items - Select input languages and Block offensive words - are under the Google voice typing setting. Setting language Swype: Sets to use the Swype keyboard. 1. Tap Settings > Language & input > Language. Select input languages: Sets the voice input language. -
Page 84: Backup & Reset
Settings Backup & reset Date & time Backing up data Setting date, time, or timezone automatically 1. Tap Settings > Backup & reset. 1. Tap Settings > Date & time. 2. Tap Back up my data to back up your data. 2. -
Page 85: Accessibility
Settings Selecting date format Developer option 1. Tap Settings > Date & time > Select date format. 1. Tap Settings > Developer options. 2. Select a preferred date format. 2. Select an option. USB debugging: Sets to activate the debug mode when Accessibility the phone is connected to a computer via a USB cable. -
Page 86: Software Update
Settings Software update Resetting the phone You can solve repeated problems by resetting the phone. Checking for software updates Make sure to turn off the phone first to protect information and software in the phone. 1. Tap Settings > AT&T software update. 1. -
Page 87: Appendix
Appendix PC Suite When you are unable to make a call Your phone may be set to “fixed dial.” Cancel the “fixed dial” PC suite is a Windows-based program that allows you to easily function. manage personal data and multimedia files by connecting When you are unable to receive a call your phone to a PC. -
Page 88: Specifications
Appendix Specifications Operating Frequency GSM/GPRS/EDGE 850/900/1800/1900MHz, UMTS/ Design HSPA+ 850/1900/2100MHz, LTE 700MHz(Band Capacitive Touch Bar 17)/1700MHz(Band 4) networks in North America, South America, Europe, Africa, and Asia-Pacific where these Displays networks are supported. 4.0” Super AMOLED (480 x 800 Pixels) Automatic band switching Melodies MP3, AAC, AAC+, WMA, eAAC+, AMR-NB, AMR-WB, AMR-WB+,... -
Page 89: Fcc Regulatory Compliance
Appendix M-Ratings: Phones rated M3 or M4 meet FCC requirements To ensure that the Hearing Aid Compatibility rating for and are likely to generate less interference to hearing your phone is maintained, secondary transmitters such as devices than phones that are not labeled. M4 is the better/ Bluetooth and WLAN components must be disabled during a higher of the two ratings. - Page 90 Appendix on comprehensive and periodic evaluations of the relevant RF exposure FCC scientific literature. The design of your phone complies with For body worn operation, to maintain compliance with FCC the FCC guidelines and applicable. RF exposure guidelines, use only accessories that contain no metallic components and provide a separation distance of 10 mm Statement according to FCC part 15.105 (0.39 inches) to the body.
-
Page 91: Warranty
Pantech product. Be careful. Some of these (c) Damage from exposure to moisture, humidity, excessive products may not be compatible to use with your Pantech temperatures or extreme environmental conditions;... -
Page 92: Other Warranty Program
THE PRODUCT IS BEING REPAIRED OR REPLACED. To locate Pantech Authorized Service Center, call: (800) 962- No person or representative is authorized to assume for 8622 or email HandsetHelp@Pantech.com. Please have the... -
Page 93: Legal Notice
Appendix Legal notice Bluetooth is a trademark of Bluetooth SIG, Inc. Wi-Fi is a trademark of the Wi-Fi Alliance. Google, YouTube, Picasa, Gmail, Google Maps and Android Market are trademarks of Google, Inc.
Need help?
Do you have a question about the Burst and is the answer not in the manual?
Questions and answers