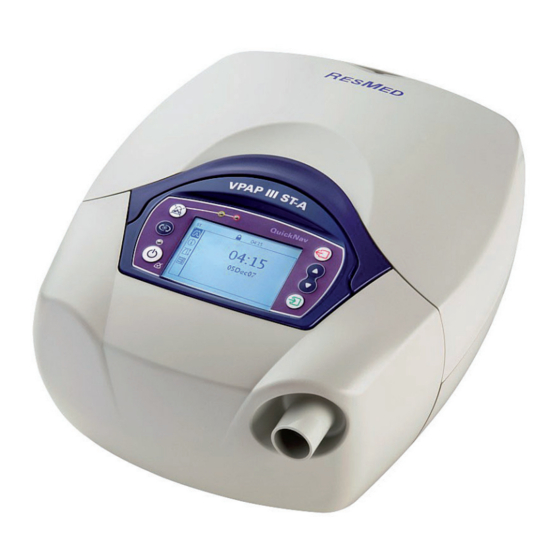
ResMed VPAP III ST-A User Manual
Hide thumbs
Also See for VPAP III ST-A:
- User manual (72 pages) ,
- Service manual (71 pages) ,
- User manual (57 pages)
Table of Contents
Advertisement
Quick Links
Advertisement
Table of Contents
Troubleshooting

Related Manuals for ResMed VPAP III ST-A


Summary of Contents for ResMed VPAP III ST-A
- Page 1 VPAP ™ III ST-A User Manual English...
- Page 2 248182/1 06 05 VPAP III ST-A USER USA ENG Global leaders in sleep and respiratory medicine www.myresmed.com...
- Page 3 248182 illos.qxp 16/05/2006 11:47 AM Page 1 HUMIDIFIERS HUMIDAIRE 2i AND VPAP III ST-A SETTING UP THE VPAP III ST-A VPAP ™ III ST-A Illustrations Component of 248182/1 SYSTEM COMPONENTS Docking ™ ™ HumidAire 2i HumidAire 2iC station Handle Water...
- Page 4 248182 illos.qxp 16/05/2006 11:47 AM Page 2 USING A HUMIDAIRE HUMIDIFIER USING A PASSOVER HUMIDIFIER REPLACING THE AIR FILTER (21”) (21”) (6’6”/9’10”) (6’6”/9’10”)
- Page 5 VPAP III ST-A ™ User Manual English...
- Page 6 VPAP , Activa, HumidAire, HumidAire 2i, IPAP Max, IPAP Min, Kidsta, Mirage, ResControl, ResLink, SmartStart, Smart Data, Swift, TiControl, Ultra Mirage, Vista and Vsync are trademarks of ResMed Ltd, and VPAP , Activa, HumidAire, HumidAire 2i, IPAP Max, Kidsta, Mirage, SmartStart, Ultra Mirage and Vista are registered in U.S. Patent and Trademark Office.
-
Page 7: Table Of Contents
Testing the Alarm Replacing the Air Filter Servicing How to Use the VPAP III ST-A Menus ..... . 19 Ramp Screen... - Page 8 Limited Warranty ......... 45 Index .
-
Page 9: Introduction
This user manual contains the information you need for the correct use of your VPAP III ST-A. When used with ResMed’s Mirage Kidsta™ Nasal Mask, the VPAP III ST-A is intended to provide non-invasive ventilation for pediatric patients aged 7 years or older (>40 lb) with respiratory insufficiency or obstructive sleep apnea (OSA). -
Page 10: Contraindications
Contraindications The VPAP III ST-A should not be used if you have an insufficient respiratory drive to endure brief interruptions in non-invasive ventilation therapy. The VPAP III ST-A is not a life support ventilator and may stop operating with power failure or in the unlikely event of certain fault conditions. -
Page 11: Cautions
The VPAP III ST-A can be set to deliver pressures up to 30 cm H O. In the • unlikely event of certain fault conditions, pressures up to 40 cm H O are possible. The VPAP III ST-A is not suitable for use in the vicinity of flammable •... - Page 12 The above are general warnings and cautions. Further specific warnings, cautions, and notes appear next to the relevant instructions in the manual.
-
Page 13: The Vpap Iii St-A System
Locally approved modems may also be connected in the clinical environment. In the clinical environment any PC that is used with the VPAP III ST-A • system must be at least 5’ away from, or at least 8’ above the patient. It must also comply with IEC 60950 or equivalent. -
Page 14: Humidifiers
Please refer to the illustrations in section B of the illustration sheet. A humidifier may be required if you are experiencing dryness of the nose, throat or mouth. The VPAP III ST-A is compatible for use with the following humidifiers: HumidAire 2i™ heated humidifier (B-1) •... -
Page 15: Setting Up The Vpap Iii St-A System
Setting up the VPAP III ST-A Place the VPAP III ST-A on a flat surface near the head of your bed. If the device is placed on the floor, ensure that the area is free from dust and clear of bedding, clothes or any other objects that could block the air inlet. -
Page 16: Attaching A Humidifier
• spillage onto the device. Ensure that the air filter and air filter cover are fitted at all times. Connect one end of the air tubing firmly onto the air outlet of the VPAP III ST-A (D-2). WARNING Only ResMed air tubing should be used with your flow generator. A different type of air tubing may alter the pressure you actually receive and reduce the effectiveness of your treatment. - Page 17 G-4. 6. Plug the HumidAire power cord into a power outlet. 7. If the VPAP III ST-A is not already plugged in, see Step 2 on page 7. WARNING Make sure that the power cord and plug are in good condition and the equipment is not damaged.
-
Page 18: Using The Lcd Screen And Keypad
Make sure that the power cord and plug are in good condition and the equipment is not damaged. 7 . Navigate to the humidifier setting (if available) in the VPAP III ST-A menu and select "PASSOVER". See “How to Use the Detailed Menu (if enabled by your clinician)”... - Page 19 • Clinical menu function key. Clinical use only. Keypad and LCD Backlight To assist you in adjusting the VPAP III ST-A, the keypad and LCD are equipped with a backlight. The LCD backlight comes on when the unit is turned on or when you press a key, and turns off after two minutes.
-
Page 21: Starting Treatment
Starting Treatment The VPAP III ST-A should be assembled beside your bed with the air tubing and mask system connected. See “Setting up the VPAP III ST-A” on page 7. Turn the main power switch at the back of the device to on (I). -
Page 22: Stopping Treatment
Using the HumidAire 2i Warm-up Feature If using a HumidAire 2i with the VPAP III ST-A, you can use the Warm-up feature to pre-heat the water in the humidifier prior to starting treatment. After stopping treatment, the VPAP III ST-A will continue to blow air gently to assist cooling of the heater plate. - Page 23 If you press the Start/Stop key for less than three seconds, the • VPAP III ST-A will return to standby mode (the VPAP or Ramp screen is displayed). Table 1: Definitions of Mask-Fit Star Rating...
-
Page 25: Cleaning And Maintenance
Periodic Cleaning 1. Clean the exterior of the VPAP III ST-A with a damp cloth and mild liquid soap. 2. Inspect the air filter to check if it is blocked by dirt or contains holes. See “Replacing the Air Filter”... -
Page 26: Testing The Alarm
Inspect the air filter every month to check if it is blocked by dirt or contains holes. With normal use of a VPAP III ST-A, the air filter needs to be replaced every six months (or more often if your device is in a dusty environment). To replace the air filter: 1. -
Page 27: How To Use The Vpap Iii St-A Menus
The Used (time) screen displays the total number of hours for which the device has been used. It also displays the number of days the VPAP III ST-A was used out of the total number of days available for use. -
Page 28: How To Use The Detailed Menu (If Enabled By Your Clinician)
Settings Summary Screens The settings summary screens enable your clinician to quickly review your VPAP III ST-A settings. These screens are displayed in both the standard and detailed patient menus. How to Use the Detailed Menu (if enabled by your... - Page 29 VMLP -3 HP30LV 2 (View only) change exit Setting options—bold text SW: SX3650201 2m, 3m indicates default setting View only exit Figure 2: VPAP III ST-A Detailed Menu Series (if enabled by your clinician) How to Use the VPAP III ST-A Menus...
-
Page 30: Menu Functions (Detailed Menu Only)
Right key for at least three seconds. Menu Functions (Detailed Menu only) The VPAP III ST-A menu functions are summarized in Tables 2–6 below with a brief description of what each function does and the available setting options. To access these functions, see “How to Use the Detailed Menu (if enabled by your clinician)”... - Page 31 SmartStart™ The VPAP III ST-A has a function called SmartStart which can be enabled by your clinician. If SmartStart is enabled, VPAP III ST-A will start automatically when you breathe into the mask and will stop automatically when you take your mask off.
- Page 32 OFF , Smart Data is displayed in the Results menu only. Language English Selects the language the English, German, VPAP III ST-A uses for all its French, Italian, display text. English is the Spanish, default language. Portuguese, Swedish, Dutch...
-
Page 33: Treatment Screens
Cycle indicator (TiMn / C / TiMx) Trigger indicator Set IPAP Max S ∗ ∗ C TiMx 2.0 Measured Ti 1.5s 1:2.5 Measured I:E ratio inspiration time Figure 5: Treatment screen 3 How to Use the VPAP III ST-A Menus... - Page 34 Treatment mode: Mode of treatment set by your clinician. Options include: CPAP, Spontaneous, Spontaneous/Timed and Timed. Ramping indicator: Appears if the VPAP III ST-A is in ramp mode. This disappears once the ramp time has elapsed. Set pressure(s): In CPAP mode, this displays the set treatment pressure (units: centimeters of water).
-
Page 35: Non-Vented Mask Alarm Screen
If the non-vented mask alarm has been disabled by your clinician, the following screen is displayed after starting therapy. To exit this screen, press any key to display the treatment screens, or stop treatment. NON–VENTED MASK DISABLED exit How to Use the VPAP III ST-A Menus... -
Page 37: The Alarms
The Alarms The VPAP III ST-A unit is fitted with alarms to alert you to changes that will affect your treatment. Alarm Mute Key You can mute an alarm by pressing the Alarm Mute key once. If the problem is still present, the alarm will sound again after two minutes. - Page 38 LCD: CHECK TUBE • Hardware failure. the flow generator. LED: Yellow flashing 3. Turn the VPAP III ST-A off and on Alarm: System fault again at the power switch. If the alarm persists, return the unit to ResMed for servicing.
- Page 39 LCD: LOW PRES ALARM below the alarm connected properly. LED: Yellow flashing setting level. 3. Turn the VPAP III ST-A off and on Alarm: Low mask • Mask is removed again at the power switch. If the pressure while SmartStop alarm persists, return the unit to has been disabled.
- Page 40 Warning Signal Cause Action Sound: Single • Minute ventilation 1. Reposition your mask and check it for a source of leaks. intermittent tone level has dropped 2. If the alarm persists, contact your LCD: LOW MV ALARM below the alarm clinician.
-
Page 41: Helpful Hints
Travelling with the VPAP III ST-A International Use Your VPAP III ST-A flow generator has an internal power adapter that enables it to operate in other countries. It will operate on power supplies of 100–240V and 50–60Hz. No special adjustment is necessary, but you will require an approved power cord for that country. - Page 42 ResMed DC-24/30 Converter ResMed supplies the DC-24/30 Converter (product code: 22015) which is compatible with the DC input of the VPAP III ST-A. This is an accessory that may be purchased separately through your ResMed distributor. The DC-24/30 Converter can be connected to a 12V or 24V battery, or a cigarette lighter socket (in a vehicle).
-
Page 43: Troubleshooting
Troubleshooting If there is a problem, try the following suggestions. If the problem cannot be solved, contact your equipment supplier or ResMed. Do not attempt to open the VPAP III ST-A. Problem Possible Cause Solution No display. Power not connected or Ensure the power cable is switch at back is not on. - Page 44 There is a large impedance Press the Start/Stop key. (eg, antibacterial filter, oxygen connector) in the air circuit. VPAP III ST-A does not SmartStart/Stop is disabled. Enable SmartStart/Stop. stop when you remove your mask. Use of a full face mask.
-
Page 45: System Specifications
System Specifications Dynamic pressure characteristics IPAP: 3 to 30 cm H O (measured at the end of standard 6’6” air tubing) EPAP: 3 to 25 cm H O (measured at the end of standard 6’6” air tubing) CPAP: 4 to 20 cm H O (measured at the end of standard 6’6”... - Page 46 Electromagnetic Compatibility Product complies with all applicable electromagnetic compatibility requirements (EMC) according to IEC60601-1-2, for residential, commercial and light industry environments. For further details, see “Guidance and Manufacturer’s Declaration - Electromagnetic Emissions and Immunity” on page 40. Air Filter: Two-layered, powder-bonded, polyester non-woven fiber Air Tubing: Flexible plastic, 6’6”...
- Page 47 Symbols which may Appear on the Product Attention, consult accompanying documents Class II equipment Type CF equipment Drip proof Start/Stop Mask-Fit Alarm LEDs Alarm Mute QuickView AC switch only System Specifications...
- Page 48 Guidance and manufacturer’s declaration – electromagnetic emissions The VPAP III ST-A is intended for use in the electromagnetic environment specified below. The customer or the user of the VPAP III ST-A should assure that it is used in such an environment. Electromagnetic environment -...
- Page 49 Guidance and manufacturer’s declaration – electromagnetic immunity The VPAP III ST-A is intended for use in the electromagnetic environment specified below. The customer or the user of the VPAP III ST-A should assure that it is used in such an environment. Electromagnetic...
- Page 50 If the measured field strength in the location in which the VPAP III ST-A is used exceeds the applicable RF compliance level above, the VPAP III ST-A should be observed to verify normal operation. If abnormal performance is observed, additional measures may be necessary, such as reorienting or relocating the VPAP III ST-A.
- Page 51 VPAP III ST-A The VPAP III ST-A is intended for use in an environment in which radiated RF disturbances are controlled. The customer or the user of the VPAP III ST-A can help prevent electromagnetic interference by maintaining...
- Page 53 ResMed shall not be responsible for any incidental or consequential damages claimed to have occurred as a result of the sale, installation or use of any ResMed product. Some regions or states do not allow the exclusion or limitation of incidental or consequential damages, so the above limitation may not apply to you.
- Page 55 Index HumidAire 8 HumidAire 2i 8 AC locking clip 7 HumidAire 2iC 8 Accessories 6 Humidifier 6 Air filter 18, 38 cleaning 17 Air tubing 38 Humidifier Use 8 cleaning 17 IEC 60601-1 Classifications 38 Backlight, LCD and Keypad 10, 11 International Use 33 battery power 33 Inverter 34...
- Page 56 Periodic cleaning 17 Power cord AC 7 connection 7 DC 7 locking clip 7 Power Supply 37 Ramp Screen 19 Ramp time 19 Replacing the Air Filter 18 Responsibility, user/owner 1 Results Menu 24 Right Key 11 Runny or Blocked Nose 33 Servicing 18 Servicing Menu 25 Setting up 7...
Need help?
Do you have a question about the VPAP III ST-A and is the answer not in the manual?
Questions and answers