Table of Contents
Advertisement
Advertisement
Table of Contents

Related Manuals for MasterCraft 54-4892-4


Summary of Contents for MasterCraft 54-4892-4
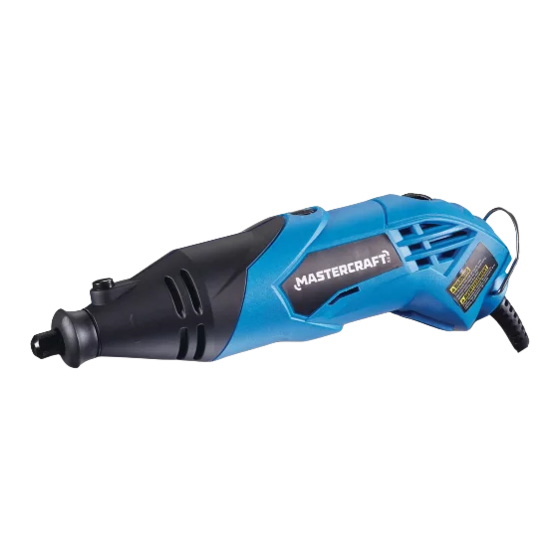
- Page 1 INSTRUCTION MANUAL DELUXE CORDED ROTARY TOOL KIT 054-4892-4...
- Page 2 If any parts are missing or TECHNICAL SPECIFICATIONS damaged, or if you have SAFETY GUIDELINES 5–12 KEY PARTS DIAGRAM any questions, please call ACCESSORIES 14–16 our toll-free helpline at ACCESSORY USE 17–18 1-800-689-9928. OPERATING INSTRUCTIONS 19–23 MAINTENANCE 24–25 EXPLODED VIEW PARTS LIST WARRANTY 28–29...
-
Page 3: General Safety Warnings
General safety warnings Rating 120 V, 60 Hz, AC Amperes 1.5 A WARNING: Before using this tool or any of its accessories, read this manual and Chuck speed 5,000–35,000 RPM (no load) follow all Safety Rules and Operating Instructions. The important precautions, safeguards and Collets 1/16", 3/32"... -
Page 4: Electrical Safety
Keep children and bystanders away while operating a power tool. Distractions can cause you to lose WARNING: Dust that is created by power sanding, sawing, grinding, drilling, and control. other construction activities may contain chemicals that are known to cause cancer, birth defects, or other genetic abnormalities. - Page 5 Remove any adjusting key or wrench before turning the power tool on. A wrench or a key left Hold power tools by insulated gripping surfaces when performing an operation where cutting tool may contact hidden wiring or its own cord. Contact with a “live” wire will make exposed metal parts attached to a rotating part of the power tool may result in personal injury.
-
Page 6: Extension Cord Safety
Extension cord safety Always wear safety goggles and a dust mask. Use only in well-ventilated areas. Using personal safety devices and working in a safe environment reduces risk of injury. WARNING: After changing the bits and accessories or making adjustments, make sure the collet nut and any other Keep the extension cord clear of the working area. - Page 7 Symbols WARNING: Some of the following symbols may appear on the rotary tool. Study these symbols and learn their meaning. Proper interpretation of these symbols will allow for more efficient and safer operation of this tool. V ….... Volts Direct current A ………...
- Page 8 Illustration Description Shape Illustration Description Shape Brass brush 1/2” Axial Aluminium oxide 3/8" Cylinder grinding stone Felt polishing 1/2" Aluminium oxide 5/8" Radial wheel grinding stone Felt polishing 1" Aluminium oxide Parabolic 3/8" wheel grinding stone Felt polishing tip 3/8" Pointed tip Aluminium oxide 3/4"...
- Page 9 Illustration Description Shape NOTE: Not all accessories listed below are included with this tool. Please refer to Pages 14, 15 & 16 for a listing of those Diamond point 5/64" Ball accessories included with this tool. Diamond point 5/32" Ball Accessory Description Accessory Use Diamond point...
-
Page 10: Changing The Collet
ON/OFF & Speed control switch Accessory Description Accessory Use Dressing stone Cleans grinding wheels and stones. Shapes or reshapes stones for Both the ON/OFF and speed control functions are fig. 1 desired applications. controlled by one switch (1) located on the top of Silicon carbide (green) Designed to work well on stone, glass, ceramics, porcelain and non- the tool (fig. -
Page 11: Installing Accessories
Installing the right angle Insert the replacement collet into the fig. 4 spindle and replace the collet nut by turning attachment it clockwise while holding the spindle lock button down. Remove the nose nut (1) from the tool by NOTE: Do not tighten the collet nut without turning it counter-clockwise (fig. -
Page 12: Selecting Proper Speeds
When the drive shaft is fully engaged into fig. 6 the right angle attachment, lock the right WARNING angle attachment to the adaptor by turning the adaptor collar clockwise. NOTE: Only tighten by hand. DO NOT use Have you read “GENERAL SAFETY WARNINGS”, pliers or wrench. - Page 13 Replacing carbon motor WARNING: WARNING: brushes When servicing, Always wear use only identical replacement parts. Use of any safety goggles or safety glasses with side shields The carbon motor brushes will wear down and other part may create a hazard or cause product during all operations.
- Page 14 WARNING: When servicing, use only Mastercraft™ replacement parts. The use of any other parts may create a safety hazard or cause damage to the rotary tool. Any attempt to repair or replace electrical parts on this rotary tool may create a safety hazard unless repairs are performed by a qualified technician.
-
Page 15: Additional Limitations
Mastercraft is a superior line of products selected for their workmanship and materials. These products These warranties are subject to the following conditions and are designed to meet rigorous quality and performance standards, and are approved by our Quality limitations: Assurance laboratory.
Need help?
Do you have a question about the 54-4892-4 and is the answer not in the manual?
Questions and answers
How do you use the Housing Cap
@Jerry J Vink
To use the housing cap for MasterCraft part number 54-4892-4:
1. Use a 3/16" (5 mm) slot screwdriver to turn the brush cap counterclockwise and remove it from the motor housing.
2. Pull out the spring and brush assembly from the brush holder.
3. Insert a new spring and brush assembly into the motor housing.
4. Compress the spring into the brush holder and thread the brush cap back into the motor housing.
5. Ensure the brush cap is not cross-threaded and do not overtighten.
6. Repeat the steps for the other brush cap if needed.
This answer is automatically generated
I NEED A REPLACEMENT ON/OFF ROCKER SWITCH FOR MY ROTARY TOOL