
Related Manuals for DeWalt D28106-XE


Summary of Contents for DeWalt D28106-XE
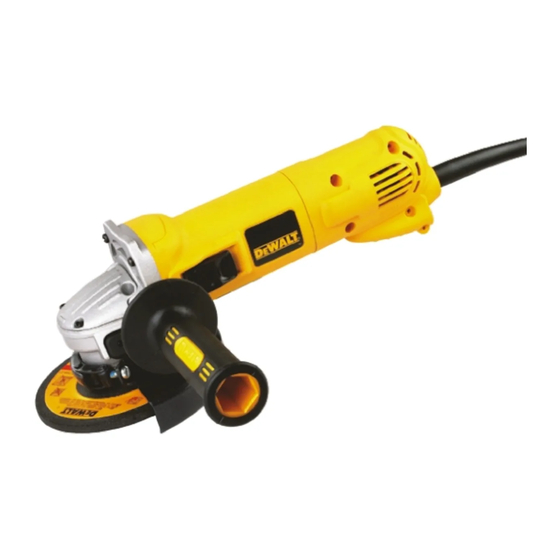
- Page 1 INSTRUCTION MANUAL D28106-XE, D28113-XE, D28130-XE, D28132-XE, D28135-XE, D28139-XE, D28402-XE, D28402N-XE HEAVY-DUTY SMALL ANGLE GRINDERS...
-
Page 3: Definitions: Safety Guidelines
1) WORK AREA SAFETY Definitions: Safety Guidelines a) Keep work area clean and well lit. Cluttered or dark areas invite accidents. b) Do not operate power tools in explosive atmospheres, such as in the The definitions below describe the level of severity for each signal presence of flammable liquids, gases or dust. -
Page 4: Electrical Safety
d) Remove any adjusting key or wrench before turning the power tool on. A performed. Use of the power tool for operations different from those intended wrench or a key left attached to a rotating part of the power tool may result in could result in a hazardous situation.. -
Page 5: Additional Specific Safety Rules
Additional Specific Safety Rules • Avoid bouncing the wheel or giving it rough treatment. If this occurs, stop the tool and inspect the wheel for cracks or flaws. • Check that the grinding wheel backing flange has a yellow rubber ring (S) •... -
Page 6: Components (Fig. 1)
complete stop. Never attempt to remove the unit from the work or pull the unit WARNING: ALWAYS wear proper personal hearing protection that conforms to backward while the wheel is in motion or kickback may occur. Investigate and ANSI S12.6 (S3.19) during use. Under some conditions and duration of use, noise take corrective actions to eliminate the cause of wheel binding. -
Page 7: Assembly And Adjustments
WARNING: Turn off and unplug the tool before making any adjustments or removing or installing attachments or accessories. Before reconnecting the tool, depress and D28106-XE release the paddle switch to ensure that the tool is off. D28113-XE 1. Remove guard and flanges from tool. -
Page 8: Operation
have been designed for a circular saw and should not be used. Use only the 5. To remove the guard, open the guard latch, rotate the guard so that the arrows accessories shown on pages 7–8 of this manual. Accessory ratings must be above are aligned and pull up on the guard. -
Page 9: Grinding Wheels
Grinding Wheels Wire Wheels Type 27 guard Type 27 guard Type 27 guard Type 27 guard backing flange 75 mm (3") 100 mm (4") Type 27 hubbed wheel wire cup brush wire wheel SLIDER SWITCH Type 27 depressed WARNING: Before connecting the tool to a power supply, be sure the switch is in center wheel the off position by pressing the rear part of the switch and releasing. -
Page 10: Cutting Wheels
Cutting Wheels Sanding Discs Sanding Flap Discs Type 1 guard Type 1 guard Type 27 guard Type 27 guard rubber backing pad backing flange backing flange backing flange hubbed sanding sanding disc flap disc non-hubbed abrasive cutting wheel diamond cutting wheel sanding flap disc threaded clamp nut clamp nut... - Page 11 3. Depress the spindle lock button and use a wrench to tighten the hub of the wheel. 4. While depressing the spindle lock button, tighten the clamp nut with a wrench. 4. Reverse the above procedure to remove the wheel. 5.
- Page 12 3. Position yourself so that the open-underside of the wheel is facing away from WARNING: Proper guard must be reinstalled for grinding wheel, sanding flap disc, you. wire brush or wire wheel applications after sanding applications are complete. 4. Once a cut is begun and a notch is established in the workpiece, do not change 1.
- Page 13 Mounting and Using Wire Brushes and Wire Wheels work surface without moving, or moving the tool in a circular motion causes burning and swirling marks Wire cup brushes or wire wheels screw directly on the grinder spindle without the use on the work surface.
- Page 14 4. Close the guard latch to secure the guard on the gear case cover. You should 1. Allow tool to reach full speed before touching tool to work surface. be unable to rotate the guard by hand when the latch is in closed position. If 2.
- Page 15 Repairs In addition to the warranty, D WALT tools are covered by our: FREE ONE YEAR SERVICE CONTRACT To assure product SAFETY and RELIABILITY, repairs, maintenance and adjustment (including brush inspection and replacement) should be performed by certified WALT will also maintain the tool for free at any time during the first year of service centers or other qualified service organizations, always using identical purchase.
- Page 16 20 Fletcher Road, Mooroolbark, VIC 3138 Australia (03 8720 5100) • 5 Te Apunga Place, Mt Wellington, New Zealand (0800 339258) (JAN10) Part No. N067895 D28106-XE, D28113-XE, D28130-XE, D28132-XE, D28135-XE, D28139-XE, D28402-XE, D28402N-XE Copyright © 2006, 2008, 2010 D WALT The following are trademarks for one or more D WALT power tools: the yellow and black color scheme;...
Need help?
Do you have a question about the D28106-XE and is the answer not in the manual?
Questions and answers