Table of Contents
Advertisement
Quick Links
DENSITÉ series
FIO-1901-RR
3G/HD/SD Fiber Optic to Electrical Converter
Guide to Installation and Operation
M927-0100-100
14 Apr 2011
Miranda
Technologies Inc.
3499 Douglas-B.-Floreani
St-Laurent, Québec, Canada H4S 2C6
Tel. 514-333-1772
Fax. 514-333-9828
www.miranda.com
© 2011 Miranda Technologies Inc..
Advertisement
Table of Contents

Subscribe to Our Youtube Channel
Related Manuals for Miranda FIO-1901-RR


Summary of Contents for Miranda FIO-1901-RR
- Page 1 DENSITÉ series FIO-1901-RR 3G/HD/SD Fiber Optic to Electrical Converter Guide to Installation and Operation M927-0100-100 14 Apr 2011 Miranda Technologies Inc. 3499 Douglas-B.-Floreani St-Laurent, Québec, Canada H4S 2C6 Tel. 514-333-1772 Fax. 514-333-9828 www.miranda.com © 2011 Miranda Technologies Inc..
-
Page 2: Electromagnetic Compatibility
• EN 61000-4-5 Surge immunity • EN 61000-4-11 Voltage dips, short interruptions and voltage variations immunity How to contact us: For technical assistance, please contact the Miranda Technical support centre nearest you: Americas Asia Europe, Middle East, Africa, UK Telephone:... -
Page 3: Table Of Contents
The Factory/Presets panel ....................14 3.3.7 The Alarm Config panel ....................... 14 3.3.8 The Info panel ........................17 Specifications ........................... 19 ANNEX 1 – FIO-1901-RR User Interface (local menu structure) ..........20 ANNEX 2 – Installing the Optical Interface .................. 21 FIO-1901-RR... - Page 4 GUIDE TO INSTALLATION AND OPERATION FIO-1901-RR...
-
Page 5: Fio-1901-Rr 3G/Hd/Sd Fiber Optic To Electrical Converter
The FIO-1901 can be installed in the same chassis as a series of interface modules, providing a wide variety of video, audio and data conversion and multiplexing functions. The FIO-1901-RR version incorporates dual optical receivers, and is also available in a WDM version for use with a single optical fiber. -
Page 6: Block Diagram
GUIDE TO INSTALLATION AND OPERATION Block Diagram The following block diagrams show the functionality of the FIO-1901-RR. Both versions of the card (Dual Rx, and Dual Rx with WDM) are illustrated. Figure 1.1 Functional block diagram of the FIO-1901-RR 1.4 Front Card-edge Interface The front card-edge of the FIO-1901-RR incorporates two elements: •... -
Page 7: Installation
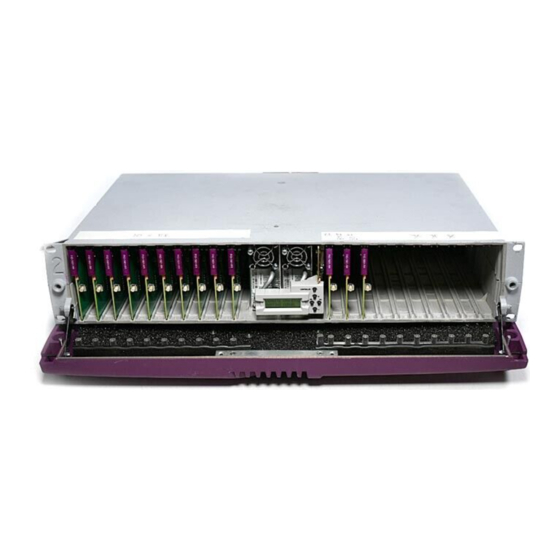
Miranda Densité-series cards are each associated with a rear connector panel, which must be installed in the Densité frame before the card can be inserted. The FIO-1901-RR card is sized to fit into Miranda’s Densité-2 frame. One rear connector panel is available to fit the Densité 2 frame: •... -
Page 8: Installation In A Densité-3 Frame
Once a matching rear connector panel has been installed, install the FIO-1901-RR card as follows: 1. Open the front panel of the frame. 2. Slide the FIO-1901-RR card into the slot with the swivel handle at the top, and push gently on the handle to seat the connectors. - Page 9 GUIDE TO INSTALLATION AND OPERATION Rear adapter: The FIO-1901-RR-SRP rear panel requires the following adapter for use in a Densité-3 frame: DENSITE SRP-3RU Installing the adapter and connector panel Install the adapter and the rear panel as follows: 1. Position the adapter at the top of the empty slot on the rear of the frame.
-
Page 10: Rear Connector Panel
GUIDE TO INSTALLATION AND OPERATION 2.3 Rear Connector Panel The FIO-1901-RR-SRP single-slot rear panel, mounted in a Densité 2 or Densité 3 frame, incorporates these connectors: • One socket for inserting a fiber receiver SFP module – see the list of supported modules below. -
Page 11: Operation
3.1 Card-Edge Status LED The status monitor LED is located on the front card-edge of the FIO-1901-RR, and is visible through the front access door of the DENSITÉ frame. This multi-color LED indicates the status of the FIO-1901-RR by color, and by flashing/steady illumination. -
Page 12: Menu For Local Control
Menu for local control The FIO-1901-RR has operating parameters which may be adjusted locally at the controller card interface. • Press the SELECT button on the FIO-1901-RR front card edge to assign the Densité frame’s local control panel to the FIO-1901-RR •... -
Page 13: Fail Over
3.2.3.1 Fail Over When Fail Over mode is activated, the FIO-1901-RR is configured with Optical In A as the source for both outputs, and Optical In B as the backup. If Optical In A fails, the outputs will be switched over to Optical In B (if it is valid), after a defined delay. -
Page 14: Remote Control Using Icontrol
3.3.1 The iControl graphic interface window The basic window structure for the FIO-1901-RR is shown in figure 5.1. The window identification line gives the card type and the slot number where the card is installed in its Densité frame. There are three main sections in the window itself, identified in figure 3.2: Figure 3.2 FIO-1901-RR iControl graphic interface window... - Page 15 Section 3. The main panel contains all the parameters specific to the group selected. Each of the panels associated with the groups accessed from the buttons in Section 2, and shown in Section 3, is described individually in the following sections. FIO-1901-RR | 11...
-
Page 16: The Status Panel
GUIDE TO INSTALLATION AND OPERATION 3.3.2 The Status panel This panel reports the status of this FIO-1901-RR card, its rear panel, its SFP module, and the signas arriving at the rear panel on fiber. Optical RX A and OPTICAL RX B •... -
Page 17: The Output & Optical Panel
Figure 3.6 Output & Optical panel 3.3.5 The Fail Over panel When Failover mode is activated, the FIO-1901-RR is configured with Optical In A as the source for both outputs, and Optical In B as the backup. If Optical In A fails, the outputs will be switched over to Optical In B (if it is valid), after a defined delay. -
Page 18: The Factory/Presets Panel
Annex to this document, beginning on page 20. User Presets The FIO-1901-RR has memory registers which can hold up to 5 user-defined parameter settings. Select any one of the five presets using the pull-down list. The name of the currently-selected User Preset is shown on the name bar. - Page 19 Card LED This column allows configuration of the contribution of each individual alarm to the status reported by the Status LED on the front edge of the FIO-1901-RR card, visible through the front door of the Densité frame. Overall Alarm This column allows configuration of the contribution of each individual alarm to the Overall Alarm associated with this card.
- Page 20 Copy to other cards Click this button to open a panel that allows the alarm configuration set for this card to be copied into another FIO-1901-RR card. • Select one or more destination cards from the list in the window by clicking in the...
-
Page 21: The Info Panel
Cancel closes the window without applying any changes, and leaves the previous settings intact. 3.3.8 The Info panel When the FIO-1901-RR is included in an iControl environment, certain information about the card should be available to the iControl system. The user can enter labels and comments that will make this card easy to identify in a complex setup. - Page 22 • Remote System Administration – opens the Joining Locators window, which lists remote lookup services to which this FIO-1901-RR is registered. Add: Force the iControl service for this FIO-1901-RR to register itself on a user-specified Jini lookup service, using the following syntax in the data box: jini://<ip_address>...
-
Page 23: Specifications
Rx2 - Rejection between 1260 and 1360 nm: >30 dB Sensitivity between 1480 and 1580 nm: 270 Mbps: -20 dBm 1.5 Gbps: -20 dBm 3 Gbps: -18 dBm PROCESSING PERFORMANCE Signal path: 10 bits Latency: < 6 ns Power: < 5W FIO-1901-RR | 19... -
Page 24: Annex 1 - Fio-1901-Rr User Interface (Local Menu Structure)
GUIDE TO INSTALLATION AND OPERATION ANNEX 1 – FIO-1901-RR User Interface (local menu structure) STATUS NO REAR, FIO-1901-RR-SRP, FIO-1901-TT-SRP, FIO-1901-RT-SRP, FIO-1901-R-SFP, FIO-1901-T-SRP REAR MISMATCH This item does not appear if the rear is matched to the card type OPT.RxA NO LOCK, NOSIGNAL, 270 Mbps, 1.5 Gbps, 3 Gbps OPT.RxB... -
Page 25: Annex 2 - Installing The Optical Interface
ANNEX 2 – Installing the Optical Interface Installing and removing the Fiber I/O interface cartridge requires special care. This annex describes the process. The FIO-1901-RR-SRP rear panel incorporates a fiber optic interface. The interface consists of two parts: • A socket on the rear panel into which an SFP interface module is plugged •... - Page 26 For best results, it should be possible for the user to perform a visual inspection of the fiber ends to verify cleanliness. Miranda strongly urges all users to select a cleaning method that meets their needs, and to use it rigorously and consistently.
- Page 27 • You may find that you need to wiggle the module, or perhaps push it into the slot a bit, before it will release and slide out. 3. Insert a dust plug into the SFP module. FIO-1901-RR | 23...
Need help?
Do you have a question about the FIO-1901-RR and is the answer not in the manual?
Questions and answers