Advertisement
Table of Contents
- 1 Table of Contents
- 2 Safety Tips
- 3 Unpacking Your Fan
- 4 Installation Preparation
- 5 Hanging Bracket Installation
- 6 Tools and Material Required
- 7 Electrical Outlet Box
- 8 Bulb Installation
- 9 Fan Assembly
- 10 Wiring
- 11 Canopy Assembly
- 12 Blade Assembly
- 13 Light Kit Assembly
- 14 Testing Your Fan
- 15 Trouble Shooting
- 16 Maintenance
- Download this manual
Installation Guide
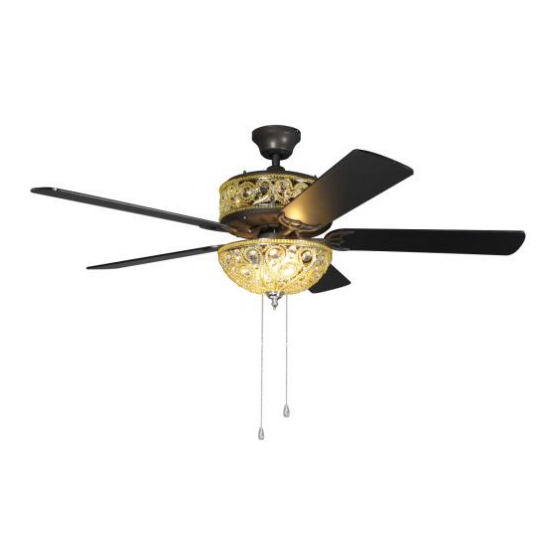
MODEL NO.:
RSS52
Professional Installation Recommended
Note: Approximate time of assembly is 30 min to 1
MODEL NO.:RSS52
Table of Contents:
Safety tips Pg.2
Unpacking your fan. Pg.3
Bulb installation Pg.6
Fan Assembly Pg.7-8
Wiring Pg.8
Canopy Assembly Pg.9
Blade Assembly Pg.9
Light Kit Assembly Pg.10
Testing Your Fan Pg.10
Trouble Shooting Pg.11-12
Maintenance Pg.12
Page
1
READ AND SAVE THESE
INSTRUCTIONS
hour
PRINTED IN CHINA
Advertisement
Table of Contents

Subscribe to Our Youtube Channel
Related Manuals for Intertek RSS52


Summary of Contents for Intertek RSS52
-
Page 1: Table Of Contents
MODEL NO.:RSS52 READ AND SAVE THESE INSTRUCTIONS Installation Guide MODEL NO.: RSS52 Table of Contents: Safety tips Pg.2 Unpacking your fan. Pg.3 Installation Preparation.Pg.4 Hanging Bracket Installation Pg.4 Tools and material required Pg.5 Electrical Outlet Box Pg.5 Bulb installation Pg.6 Fan Assembly Pg.7-8... -
Page 2: Safety Tips
MODEL NO.:RSS52 SAFETY TIPS. WARNING: To reduce the risk of electrical shock, turn off the electricity to the fan at the main fuse box or circuit panel before you begin the fan installation or before servicing the fan or installing accessories. -
Page 3: Unpacking Your Fan
MODEL NO.:RSS52 1. Unpacking Your Fan. Carefully open the packaging. Remove items from styrofoam inserts. Remove motor housing and place on carpet or styrofoam to avoid damage to finish. Do not discard fan carton or styrofoam inserts should this fan need to be returned for repairs. -
Page 4: Installation Preparation
MODEL NO.:RSS52 3. Installation Preparation. To prevent personal injury and damage, ensure that the hanging location allows the blade a clearance of 7ft.(2.13m) from the floor and 30in.(76cm) from any wall or obstruction. The fan is suitable for room sizes up to 400 square feet (37.2square meters). -
Page 5: Tools And Material Required
MODEL NO.:RSS52 TOOLS AND MATERIALS REQUIRED Phillip screw driver Blade screw driver Adjustable pliers or wrench Step Ladder Wire cutter Electrical tape ELECTRICAL OUTLET 1. If there is an existing outlet box, ensure it is clearly marked” Suitable For Fan Support”. -
Page 6: Bulb Installation
MODEL NO.:RSS52 BULB INSTALLATION Installing bulbs in the motor housing, locate the four access plates on the motor housing top. Remove two screws per access plate to reach each socket, use phillips screwdriver. Install each candelabra base Type C, 7W bulbs (Not Included). -
Page 7: Fan Assembly
MODEL NO.:RSS52 Fan Assembly with Down Rod - Choose the 4” or 21” Down Rod - Remove pin and clip from down rod (if you have not already done so). Slide down rod through canopy, and down rod cover. Thread electrical wires through downrod and Pull extra wire slack from the upper end of the downrod. -
Page 8: Wiring
MODEL NO.:RSS52 Fan Assembly with down rod. (cont.) With the hanging bracket secured to the outlet box and able to support the fan, you are now ready to hang your fan. Grab the fan firmly with two hands. Slide down rod through opening in hanging bracket and let hanging ball rest on the hanging bracket. -
Page 9: Canopy Assembly
MODEL NO.:RSS52 . Canopy Assembly. If necessary, partially loosen the 2 screws on the bottom of the hanging bracket. Lift canopy to hanging bracket, aligning rounded part of holes in canopy with loosened screws in hanging bracket, and push up. Twist canopy to lock. -
Page 10: Light Kit Assembly
MODEL NO.:RSS52 11. Light Kit Assembly. Remove 3 screws from light kit fitter. Plug the connector from light kit fitter to the connector from switch housing. Please note the correct wiring is white to white blue to black Gently push connector into switch housing and align holes in light kit fitter with holes in switch housing. -
Page 11: Trouble Shooting
MODEL NO.:RSS52 TROUBLE SHOOTING FAN DOES NOT START 1. Check all fuses or circuit breakers. Replace if MISSING. 2. Turn off electrical power and check all wire connections to fan and in switch housing. 3. Make sure pull chain switch is on, and reverse slide switch is up or down, not in the middle. -
Page 12: Maintenance
MODEL NO.:RSS52 If the above does not eliminate the wobble, clip a balancing kit on any one of blade about the middle of blade edge. Let fan run. If it is still wobbling, stop the fan, and change the location. Repeating this procedure on the remaining blades until the wobble is removed.
Need help?
Do you have a question about the RSS52 and is the answer not in the manual?
Questions and answers