Table of Contents
Advertisement
Quick Links
Advertisement
Table of Contents

Related Manuals for Advantech TPC-1582H


Summary of Contents for Advantech TPC-1582H
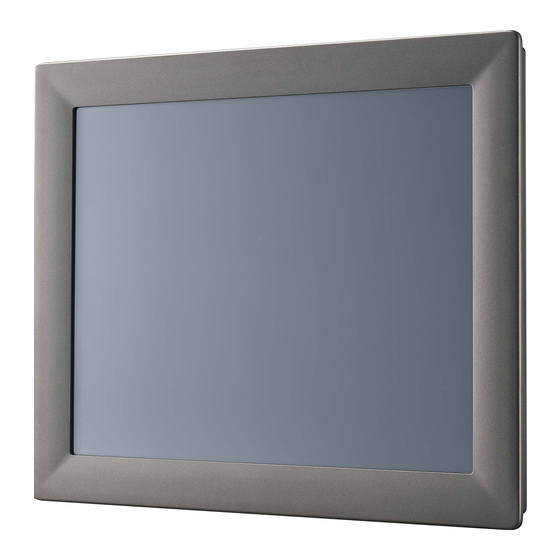
- Page 1 User Manual TPC-1582H/TPC-1782H Intel 4 Generation Core i Computer...
- Page 2 No part of this manual may be reproduced, copied, translated or transmitted in any form or by any means without the prior written permission of Advantech Co., Ltd. Information provided in this manual is intended to be accurate and reliable. How- ever, Advantech Co., Ltd.
- Page 3 Because of Advantech’s high quality-control standards and rigorous testing, most of our customers never need to use our repair service. If an Advantech product is defec- tive, it will be repaired or replaced at no charge during the warranty period. For out- of-warranty repairs, you will be billed according to the cost of replacement materials, service time and freight.
-
Page 4: Declaration Of Conformity
This product has passed the CE test for environmental specifications when shielded cables are used for external wiring. We recommend the use of shielded cables. This kind of cable is available from Advantech. Please contact your local supplier for ordering information. -
Page 5: Safety Instructions
The sound pressure level at the operator's position according to IEC 704-1:1982 is no more than 70 dB (A). DISCLAIMER: This set of instructions is given according to IEC 704-1. Advantech disclaims all responsibility for the accuracy of any statements contained herein. - Page 6 Attention! Danger d'explosion si la pile est remplacée de façon incorrecte. Rem- placez seulement avec le même type ou équivalent recommandé par le fabricant. Dispose des piles usagées selon les instructions du fabricant. TPC-1582H/TPC-1782H User Manual...
-
Page 7: Table Of Contents
1.3.3 LCD Display .................. 4 1.3.4 Touchscreen ................. 4 1.3.5 Environment.................. 4 Interface ....................5 Figure 1.1 TPC-1582H/1782H - I/O Port Arrangement....5 Dimensions and Cutout................6 1.5.1 TPC-1582H ................... 6 Figure 1.2 TPC-1582H Dimensions..........6 1.5.2 TPC-1782H ................... 7 Figure 1.3 TPC-1782H Dimensions.......... - Page 8 Appendix A Main Board Connector and Switch Settings43 Serial Port Settings ................. 44 TPC-1582H/TPC-1782H User Manual viii...
-
Page 9: Chapter 1 Overview
Chapter Overview... -
Page 10: Introduction
Generation Core i3 1.7GHz processor and 4GB DDR3 SDRAM provides the high computing performance in a compact fanless system. To enhance its durability, the TPC-1582H/1782H are designed with IP65 compliant front protec- tion, die-cast Al Alloy front bezel and 5-wire resistive touch. It also includes PCIe slot and Mini-pcie slots to extend the functionality and meet a variety of automation appli- cations needs. -
Page 11: Specifications
Certification: BSMI, CCC, CE, FCC Class A, UL Cooling System: Fanless design Dimensions TPC-1582H: 383 x 307 x 78.5 mm (15.08" x 12.09" x 3.09") TPC-1782H: 414 x 347.5 x 84 mm (16.3" x 13.68" x 3.31") Enclosure Front bezel: Die-cast Aluminum alloy Back housing: PC/ABS Resin ... -
Page 12: Lcd Display
Ingress Protection: Front panel: IP65 compliant design Operating Temperature: 0 ~ 55°C (32 ~ 131°F) Storage Temperature: -20 ~ 60°C (-4 ~ 140°F) Vibration Protection: With HDD: 1 Grms (5 ~ 500 Hz) (Operating, random vibration) TPC-1582H/TPC-1782H User Manual... -
Page 13: Interface
Interface The arrangement of the I/O ports is shown in Figure 1.1. Figure 1.1 TPC-1582H/1782H - I/O Port Arrangement TPC-1582H/TPC-1782H User Manual... -
Page 14: Dimensions And Cutout
Weight: 5.5kg Dimensions (W x H x D): – 383.0±0.7 x 307.0±0.7 x 78.5±1.5 mm (15.08" x 12.09" x 3.09") Cutout: 374.5 ±0.7x 298.5±0.7 mm Note! Antenna not included in the pack. Figure 1.2 TPC-1582H Dimensions TPC-1582H/TPC-1782H User Manual... -
Page 15: Tpc-1782H
Weight: 6kg Dimensions (W x H x D): – 414±1 x 347.5±1 x 84±1.5 (16.3" x 13.68" x 3.31") Cutout: 400.8±1 x 334.3 ±1 Note! Antenna not included in the pack. Figure 1.3 TPC-1782H Dimensions TPC-1582H/TPC-1782H User Manual... - Page 16 TPC-1582H/TPC-1782H User Manual...
-
Page 17: Chapter 2 Installation
Chapter Installation... -
Page 18: Transport And Unpacking
12 hours must be allowed to make sure the TPC is completely dry before the TPC is switched on. Panel Mounting Position the TPC against the panel. Insert the holding clip into the side of the TPC. TPC-1582H/TPC-1782H User Manual... -
Page 19: Cabinet Installation And Earth Grounding Setup
TPC-1x82H’s ground, cabinet’s ground and earth ground should all be connected together. Embed TPC-1x82H series into the cabinet. Step A: Connect the cabinet to earth ground. Step B: Embed null TPC-1x82H series into the cabinet without any I/O cable and power. TPC-1582H/TPC-1782H User Manual... - Page 20 If you install a USB device or Mini PCIe card on the TPC-1x82H, please double check the voltage between V- and earth ground, if the voltage is not almost equal with each other, we suggest to short V- and earth ground with wiring. TPC-1582H/TPC-1782H User Manual...
-
Page 21: Switching The Panel Pc On And Off
It is suggested to turn OFF system power as you plug in or pull out the memory card, even though the CompactFlash memory is hot swappable. Connect the power connector to the 24 VDC power lines. The power lines can either be of some power adapter or in-house power source. TPC-1582H/TPC-1782H User Manual... - Page 22 TPC-1582H/TPC-1782H User Manual...
-
Page 23: Chapter 3 Operation
Chapter Operation... -
Page 24: Installing The Drivers
A support DVD for TPC-1x82H series is available and along with the product and there are related utilities and drivers for starting up the system. Note! You can download the latest driver on the Advantech support portal of Advan- tech’s website if there is any updated. 3.1.1... - Page 25 Click “Install” Click “Finish” to finish the installation After installing Touch Screen driver, a “PenMount Monitor” icon will show on your notification area. TPC-1582H/TPC-1782H User Manual...
-
Page 26: Installation Of Watchdog Driver
3.1.2 Installation of Watchdog driver Enter into Watchdog folder, double click AdvWDT icon, and then click “Next” under InstallShield Wizard window Select “Advantech [EC] WDT” and click “Next” TPC-1582H/TPC-1782H User Manual... - Page 27 Click “Install” Click “Finish” to finish the installation Select “Yes, I want to restart my computer now” and click “OK” TPC-1582H/TPC-1782H User Manual...
- Page 28 After installing Watchdog driver, a “Watchdog Service Configuration” icon will show in control panel Double click the “Watchdog Service Configuration” icon, and you can configure the Watchdog timer function. TPC-1582H/TPC-1782H User Manual...
-
Page 29: Touch Screen Configuration
Setting Beep function for each device. Right Button When you select this function, a mouse icon appears in the right-bottom of the screen. Click this icon to switch between Right and Left Button functions. Exit Exits the PenMount Monitor function. TPC-1582H/TPC-1782H User Manual... -
Page 30: Device
Device You will see the icon of PenMount 6000 USB under Device tab. In Device tab, you can see the devices detected on your system. Select a device and press the Config- ure button to configure it. TPC-1582H/TPC-1782H User Manual... - Page 31 About of the device you selected. 3.2.1.1 Calibrate This function offers two ways to calibrate your touchscreen. 'Standard Calibration' adjusts most touchscreens while 'Advanced Calibration' adjusts aging touchscreens. You can select either or both method to calibrate your touchscreens. TPC-1582H/TPC-1782H User Manual...
- Page 32 PenMount's application program as the result of user's execution of Advance Calibration. Turn off EEPROM storage: This function disables the write-in of calibration data in the controller. This function is enabled by default. TPC-1582H/TPC-1782H User Manual...
- Page 33 Kind of Sound: TPC-1x82H series only support Buzzer beep. Cursor Stabilizer: Enable the function support to prevent cursor shake. Use press and hold as right click: You can set the time out and area for you need TPC-1582H/TPC-1782H User Manual...
- Page 34 Edge compensation is used to optimize the cursor accuracy on the edge, which is for advanced calibration. You can adjust the settings from 0 to 30 for accommodating the difference of each touch panel. 3.2.1.4 About This tab shows the information about the PenMount controller and driver version TPC-1582H/TPC-1782H User Manual...
-
Page 35: Multiple Monitors
TPC-1x82H series. 3.2.2.1 Tools In Tools tab, there are Draw, Right Button Icon, functions. They will be introduced in this section. 3.2.2.2 Draw Draw function is used to test or demonstrate the PenMount touchscreen operation. TPC-1582H/TPC-1782H User Manual... - Page 36 When you select this function, a mouse icon appears in the right-bottom of the screen. Click this icon to switch between Right and Left Button functions. TPC-1582H/TPC-1782H User Manual...
-
Page 37: Watchdog Configuration
In the General tab, there are four static labels: Service Name: display the name of the Advantech Watchdog service in the Ser- vice Control Manager (SCM) database. Watchdog Type: display the Watchdog chipset type. Such as EC. - Page 38 Watchdog is disabled. If the Watchdog is enabled and you click this “Reboot” button then all the three buttons: “Enable/Disable”, “Strobe” and “Reboot” becomes grayed, no operations can cancel the rebooting machine operation but stop the Advantech Watchdog service. TPC-1582H/TPC-1782H User Manual...
-
Page 39: Wake Up From Suspend Mode
In the About tab, there shows some copyright information of the Advantech Watchdog ser- vice. Wake up from Suspend Mode TPC-1x82H series has three wake-up modes which can let you do versatile setting such as remote control. You can wake up the system on USB, LAN and touch screen. The following table shows each wake-up mode in detail. -
Page 40: Wake-On-Lan
Also, you need to enable the Wake-on-LAN function on TPC-1x82H series. Please follow the following steps. Enter Network Connections setting, right-click on the Local Area Connection icon, and select “Properties.” In the Networking tab, select “Configure” button. TPC-1582H/TPC-1782H User Manual... - Page 41 In Power Management tab, check “Wake on LAN items” to enable the Wake-on- LAN function. TPC-1582H/TPC-1782H User Manual...
-
Page 42: Wake-On-Touch Screen
If you need wake-on-touch screen function, you need to enable the function in Device Manager under Windows. Touch screen can wake up the system from S3. Enter into Device Manager, then you can find touch device is belong to "Micro- soft Input Configuration Device" or “Mice and other pointing devices”. TPC-1582H/TPC-1782H User Manual... -
Page 43: Wake-On-Usb
3.4.2 to select USB device in Mice and other pointing devices then enable USB wake up function.. USB can wake up the system from S3. Note! The setting depends on what kind of device is plugged into the USB interface. TPC-1582H/TPC-1782H User Manual... - Page 44 TPC-1582H/TPC-1782H User Manual...
-
Page 45: Chapter 4 Technical Specifications
Chapter Technical Specifications... -
Page 46: Technical Specifications
PenMount PM6200D Combo 5-wire Control Board Touch controller Touch screen analog resistive Touch force with test pen; 2 mm diameter: 5 N Backlighting (MTBF) Half brightness life time, min. 50000 h at 50 °C, 50% brightness typical TPC-1582H/TPC-1782H User Manual... -
Page 47: Interfaces
Intel I210 Gigabit Ethernet supports 10/100/1000 bps and teaing func- LAN interface B, RJ45 tion and jumbo frame. Connection via USB interface Keyboard, mouse For unique labeling, the LAN interfaces are numbered on the housing. The number- ing by the operating system can differ. TPC-1582H/TPC-1782H User Manual... -
Page 48: Com Port Pin Definition
Temperature gradient in operation Max. 10 °C/h, no condensation Maximum ambient temperature in operation 0~+55°C Permissible relative humidity to 95%, no condensation 5 … 85% at 30 °C, no condensation Operation Storage/transport 5 … 95% at 25 °C, no condensation TPC-1582H/TPC-1782H User Manual... -
Page 49: Mechanical Ambient Conditions
Hibernate 0.045 1.08 0.05625 1.35 Shutdown 0.04 0.96 0.05 Note! Inrush current The inrush current of the device at an input voltage of 24 V amounts to at least 8 A for a period of 30 ms. TPC-1582H/TPC-1782H User Manual... -
Page 50: Power/Digital Ground And Earth Ground
In real cases, many customers may break the level 1 isolation by 3rd party Device or cable design, in this situation, we need to consider making all the GND short (Power GND/Digital GND/Earth GND), and ensure customers have good Earth GND connec- tion. TPC-1582H/TPC-1782H User Manual... - Page 51 Appendix Main Board Connector and Switch Settings...
- Page 52 To setup COM2 as RS422/485, enter the BIOS menu during boot up by pressing the DEL key, in the Advanced submenu, change COM2 Uart mode setting to RS422/485 as in the following picture. Caution! Don't change any settings unless you understand the consequences. TPC-1582H/TPC-1782H User Manual...
- Page 53 In TPC-1582H, you will need to boot into OS to install COM driver and configure COM setting manually to COM1 and COM2 as following picture. TPC-1582H/TPC-1782H User Manual...
- Page 54 TPC-1582H/TPC-1782H User Manual...
- Page 55 TPC-1582H/TPC-1782H User Manual...
- Page 56 No part of this publication may be reproduced in any form or by any means, electronic, photocopying, recording or otherwise, without prior written permis- sion of the publisher. All brand and product names are trademarks or registered trademarks of their respective companies. © Advantech Co., Ltd. 2014...
Need help?
Do you have a question about the TPC-1582H and is the answer not in the manual?
Questions and answers