
Related Manuals for Advantech TPC-1881WP Series


Summary of Contents for Advantech TPC-1881WP Series
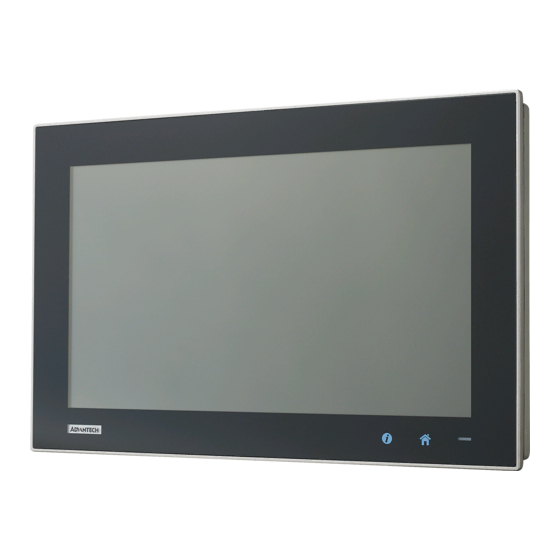
- Page 1 User Manual TPC-1881WP TPC-1881WPH Multi-Touch Panel Computer with Intel 4 Generation Core i Processor...
- Page 2 No part of this manual may be reproduced, copied, translated or transmitted in any form or by any means without the prior written permission of Advantech Co., Ltd. Information provided in this manual is intended to be accurate and reliable. How- ever, Advantech Co., Ltd.
- Page 3 Because of Advantech’s high quality-control standards and rigorous testing, most of our customers never need to use our repair service. If an Advantech product is defec- tive, it will be repaired or replaced at no charge during the warranty period. For out- of-warranty repairs, you will be billed according to the cost of replacement materials, service time and freight.
- Page 4 This product has passed the CE test for environmental specifications when shielded cables are used for external wiring. We recommend the use of shielded cables. This kind of cable is available from Advantech. Please contact your local supplier for ordering information.
- Page 5 Safety Instructions Read these safety instructions carefully. Keep this User Manual for later reference. Disconnect this equipment from any AC outlet before cleaning. Use a damp cloth. Do not use liquid or spray detergents for cleaning. For plug-in equipment, the power outlet socket must be located near the equip- ment and must be easily accessible.
- Page 6 The sound pressure level at the operator's position according to IEC 704-1:1982 is no more than 70 dB (A). DISCLAIMER: This set of instructions is given according to IEC 704-1. Advantech disclaims all responsibility for the accuracy of any statements contained herein.
-
Page 7: Table Of Contents
Contents Chapter General Information ......1 Introduction ....................2 Packing List ....................2 Specifications .................... 3 1.3.1 General ..................3 1.3.2 System Hardware ................3 LCD Specifications ..................4 Touchscreen Specifications ..............4 Power......................4 I/O Ports Arrangement ................5 Figure 1.1 I/O Port Arrangement .......... - Page 8 Table C.2: Button code definition ..........36 Appendix D Notice ..........37 Notice ....................... 38 Appendix E Com Port pin definition ....39 COM1: RS-232 ..................40 COM2: RS-232/422/485 ................40 RS-422/ 485 mode setting by BIOS ............41 TPC-XX81WP User Manual viii...
-
Page 9: Chapter 1 General Information
Chapter General Information... -
Page 10: Introduction
To enhance reliability and durability, it comes with an integrated 7H hardness anti-scratch surface on a high resolution 18.5" WXGA display with multi-touch in 16:9 format. Using the Mini-PCIe slot, Advantech’s iDoor technology can provide more I/O connectors, such as: Isolated Digital IO, the Fieldbus Protocol, 3G/GPS/ GPRS/WiFi Communication and MRAM. -
Page 11: Specifications
Specifications 1.3.1 General BIOS: AMI UEFI Certification: BSMI, CCC, CE, FCC Class A, UL Cooling System: Fanless design Dimensions (W x H x D): 488 x 309.1 x 56.7 mm (19.2" x 12.2" 2.2") Enclosure: Front bezel: Die-cast Aluminum alloy Back housing: PC/ABS Resin ... -
Page 12: Lcd Specifications
LCD Specifications Display Type: WXGA TFT LED LCD Display Size: 18.5 Max. Resolution: 1366 x 768 Max. Colors: 16.7M Luminance cd/m2: 300 Viewing Angle (H/V°): 170/160 Backlight Life: 50,000 hrs Contrast Ratio: 500:1 Note! There might be several bright or dark pixels on the LCD. -
Page 13: I/O Ports Arrangement
I/O Ports Arrangement The arrangement of the I/O ports is shown in Figure 1.1 Figure 1.1 I/O Port Arrangement Panel Mounting There is an adhesive waterproof gasket on the Mg front bezel. Make sure the waterproof gasket is in position before installing TPC into the panel opening. Install the TPC into the panel opening. -
Page 14: Dimensions And Cutout
Dimensions and Cutout TPC-XX81WP User Manual... - Page 15 Chapter 1 General Information...
- Page 16 TPC-XX81WP User Manual...
-
Page 17: Chapter 2 System Setup
Chapter System Setup... -
Page 18: System Setup
System Setup You can easily get TPC started by following the below steps. Unpack the TPC package. Check the packing list at the beginning of this manual to make sure all items have been included. Open side cover and then Install a CFast card containing Embedded Windows 7 or another operating system. -
Page 19: Installing The Drivers
Windows 7 and Windows 8 has the built-in multi-touch driver to support. 2.2.2 Installation of Watchdog driver Enter into Watchdog folder, double click AdvWDT icon, and then click "Next" under InstallShield Wizard window. Select "Advantech [EC] WDT” and click “Next” Click “Install” TPC-XX81WP User Manual... - Page 20 Click "Finish" to finish the installation Select “Yes, I want to restart my computer now” and click “OK” After installing Watchdog driver, a "Watchdog Service Configuration" icon will show in control panel. Double click the "Watchdog Service Configuration" icon, and you can configure the Watchdog timer function.
-
Page 21: Installation Of Graphic Driver
2.2.3 Installation of graphic driver Insert the driver CD into your system’s CD-ROM drive. You can see the driver folders items. Select to the "Graphics" folder then navigate to your directory for your OS.. 2.2.4 Installation of LAN driver Enter into TS folder, enter into “LAN folder then choose your OS type” Driver folder and double click setup icon, and then click “Next”... - Page 22 Click ”Install” Click “Finish” to finish the installation TPC-XX81WP User Manual...
-
Page 23: Cabinet Installation Guide
Cabinet Installation Guide Follow the steps below to complete the installation. The earth ground to TPC is strongly sug- gested for the system reliability like EMC, surge, etc. Embed the TPC into the cabinet. Connect the cabinet to earth ground. Step A: Embed the TPC into the cabinet without any I/O cable and power. - Page 24 TPC-XX81WP User Manual...
-
Page 25: Chapter 3 Features In Windows Embedded
Chapter Features in Windows Embedded... -
Page 26: Features In Windows Embedded
Applying changes to an image applies all changes made to the operat- ing system during a specific period of time. Advantech provide utility to operate EWF. Refer below steps if you want to enable Click Start Menu->All Programs->Advantech->AdvWF and click EWF Utility... -
Page 27: File-Based Write Filter (Fbwf)
Writes to folders with write-through exceptions will be persisted when the device restarts. Advantech provide utility to operate FBWF. Refer below steps if you want to enable Click Start Menu->All Programs->Advantech->AdvWF and click... -
Page 28: Horm
Move volume you want to protect from “Available Volume” to “Protected Vol- ume” and choose “Write-Through Files and Folders” Click “Apply”, and the system is rebooted automatically. Then FBWF enable. HORM HORM stands for Hibernate Once Resume Many. In HORM environment, a single hibernation file is used to boot the system repeatedly. - Page 29 Run OSLock, and then system reboot automatically. Open the software that customers want to directly use after the system resumes from hibernation. Hibernate via Advantech HORM utility: Click Start Menu->All Programs->Advantech->AdvWF Select “Enable Hibernation” in “Power Options”. Open AdvWF and enable EWF After the system is rebooted automatically, open AdvWF and click EWF Utility.
- Page 30 TPC-XX81WP User Manual...
-
Page 31: Appendix A Easy Installation
Appendix Easy Installation... -
Page 32: Easy Installation
Easy Installation With easy installation, a person can complete panel mount process by himself, just follow following steps: Step 1: Release the 2 screws in the top of TPC and the snap hook will arise. Step 2: And then release the 2 screws in the bottom of TPC TPC-XX81WP User Manual... - Page 33 Step 3: Set TPC cross the cut-out hole and push it into the wall, the snap hook will hold the machine on the wall. Step 4: Panel-mount installation complete Note! While using easy installation, the suggested mounting panel thickness is less than 2 mm (0.079").
- Page 34 TPC-XX81WP User Manual...
-
Page 35: Hdd Assembly Instructions And Msata Expansion27
Appendix HDD assembly instructions and mSATA expansion... -
Page 36: Hdd Assembly Instructions
HDD Assembly Instructions Step 1: Fix 2.5" HDD/SSD on the bracket, shown as follows: Step 2: Install the dampers in the bracket and fix by four screws. Step 3: Install HDD module into system and then cover back the side cover to finish. TPC-XX81WP User Manual... -
Page 37: Msata Expansion
mSATA expansion Step1: Insert mSATA module to mini-PCIE slot as following picture shows: Step2: Power up the system then you can find your mSATA storage after entering TPC-XX81WP User Manual... - Page 38 TPC-XX81WP User Manual...
-
Page 39: Appendix Cui Operating Process
Appendix UI Operating Process... -
Page 40: Ui Operating Process
UI Operating Process This section is to introduce how to operate HMI utility(GL_Utility), you can download the utility from Advantech's product support portal of the TPC at http://support.advantech.com. See the process below: As you can find 2 function buttons in the lower right corner of front panel, represents “intelligent”... - Page 41 One press Home Key Home – Back to desktop (default setting) Home - Execute Home-key App (Set up in setting page) Long press Home Key-> Home - Long press to disable / enable touch function TPC-XX81WP User Manual...
- Page 42 One press Intelligent Key-> Intelligent - Advantech Intelligent Utility A. Quick start-> – Press “+” to add shortcut – Long press the icon to perform “right click” until an “X” mark appears in upper right corner to “delete” TPC-XX81WP User Manual...
- Page 43 B. Setting -> – Password confirmation for authority confirmation when first log in, default password is “1234” without input order to active. – Setting - Home-key: Select an execute file to set up as "Home-key" App, in default path is to show “desktop” –...
- Page 44 C. System management-> – System information: – Self Diagnosis: Note!* TPC-1581WP/1881WP also provides open button code as following def- inition for customer's configuration to their Apps/SW applications. The codes are defined from general keyboard input. Table C.2: Button code definition One press Long press I key(icon)
-
Page 45: Notice
Appendix Notice... -
Page 46: Notice
Notice RS-422/485 terminal impedance calculation: In order to improve transmission speed for big data and provide steady signal in long distance transmission of RS422/485, we'll add a terminal impedance that matches transmission line's impedance. Another key for correct signal transmission is that the Vfsb of receptor must be +/-0.2V. -
Page 47: Com Port Pin Definition
Appendix Com Port pin definition... -
Page 48: Com1: Rs-232
COM1: RS-232 Pin Definition COM1 Signal NDCD NDTR NDSR NRTS NCTS COM2: RS-232/422/485 The serial port COM4 on the TPC-1581WP series are adjustable by BIOS. It can be set to RS-422 or RS-485 mode. This port is designed with auto data flow control capability.In other words, the TPC-1581WP series can automatically detect the data flow direction at this port when the two wired RS-485 communication is activated. -
Page 49: Rs-422/ 485 Mode Setting By Bios
RS-422/ 485 mode setting by BIOS Enter into BIOS setup utility Enter into Advanced tab and select COM2 Configuration. The default setting is RS-422 mode, you can change it to RS-422/485 mode. TPC-XX81WP User Manual... - Page 50 No part of this publication may be reproduced in any form or by any means, electronic, photocopying, recording or otherwise, without prior written permis- sion of the publisher. All brand and product names are trademarks or registered trademarks of their respective companies. © Advantech Co., Ltd. 2014...
Need help?
Do you have a question about the TPC-1881WP Series and is the answer not in the manual?
Questions and answers