Table of Contents
Advertisement
Quick Links
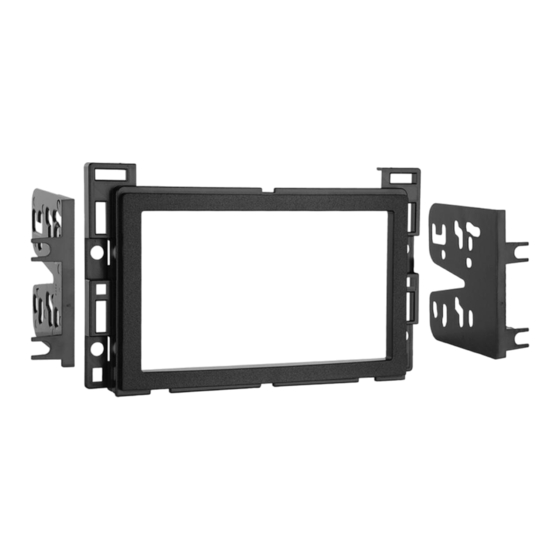
INSTALLATION INSTRUCTIONS FOR PART 95-3302
95-3302
KIT FEATURES
• Double DIN Mount Radio Provision
• Stacked ISO Mount Radio Provision
• Painted To Match Factory Dash
KIT COMPONENTS
A) Double DIN Housing • B) Double DIN Brackets
A
1-800-221-0932
© COPYRIGHT 2004-2009 METRA ELECTRONICS CORPORATION
APPLICATIONS
GM
MULTI KIT
(
see models list inside)
WIRING AND ANTENNA CONNECTIONS (Sold Separately)
Wiring Harness:
• See www.metraonline.com for specific interface applications
Antenna Adapter:
• 40-GM10 - GM antenna adapter 1988-up
• 40-CR10 - Chrysler antenna adapter 2002-up
TOOLS REQUIRED:
Small Flat Blade Screwdriver/ Panel Removal Tool
• Phillips Screwdriver • Socket Set • Cutting Tool
B
www.metraonline.com
Advertisement
Table of Contents

Summary of Contents for Metra Electronics 95-3302
- Page 1 INSTALLATION INSTRUCTIONS FOR PART 95-3302 see models list inside) 95-3302 KIT FEATURES • Double DIN Mount Radio Provision • Stacked ISO Mount Radio Provision • Painted To Match Factory Dash KIT COMPONENTS A) Double DIN Housing • B) Double DIN Brackets Small Flat Blade Screwdriver/ Panel Removal Tool •...
-
Page 2: Table Of Contents
The 99-3303 does not allow for Double DIN installations. • Refer also to the instructions included with the aftermarket radio. 95-3302 Saturn - Aura 2007-2009 ....9 - Ion 2006-2007 . -
Page 3: Cobalt 2005-2010
Unclip and remove small trim panel to right of ignition switch. (Figure C) Unclip and remove trim panel sur- rounding radio and climate controls. (Figure D) Remove (4) 9/32 screws securing radio. Unplug and remove the radio. (Figure E) Continue to kit assembly. 95-3302 DASH DISASSEMBLY... -
Page 4: Equinox 2005-2006
(Figure A) Unsnap and remove entire panel sur- rounding radio and shifter. (Figure B) Remove (4) 9/32 screws securing radio. Unplug and remove the radio. (Figure C) Continue to kit assembly. 95-3302 DASH DISASSEMBLY... -
Page 5: Hhr 2006-2010
Unclip and remove entire panel sur- rounding radio and a/c controls including the a/c vents. (Figure A) Remove (8) 9/32” screws securing radio and a/c control to remove radio. (Figure B) Continue to kit assembly. 95-3302 DASH DISASSEMBLY... -
Page 6: Malibu 2004-2007
Remove (2) 7 MM screws from bot- tom edge of panel below steering wheel, unclip panel and let hang. It is not necessary to completely remove panel. (Figure C) Unclip and remove wood grain/painted trim piece from above glove box. (Figure D) 95-3302 DASH DISASSEMBLY... -
Page 7: Malibu 2004-2007
Unclip and remove trim panel sur- rounding radio and climate controls. (Figure G) Remove (4) 7 MM screws securing the radio and (2) 7 MM screws secur- ing the climate control. Unplug and remove the radio. (Figure H) Continue to kit assembly. 95-3302 DASH DISASSEMBLY... -
Page 8: Malibu 2008-2010
Unsnap and remove the climate/radio panel and upper vent trim panel together. (They can be separated after removel) (Figure B,C) Remove (6) 8 mm screws from radio and climate controls. Continue to kit assembly. 95-3302 DASH DISASSEMBLY... -
Page 9: G6 2005-2009
Unclip and remove panel. (Figure B) Unclip and remove center panel sur- rounding radio and A/C controls. (Figure C) Remove (4) screws securing the radio. Unplug and remove the radio. (Figure D) Continue to kit assembly. 95-3302 DASH DISASSEMBLY... -
Page 10: Solstice 2006-2009
(Figure D) Remove (2) bolts securing the pas- senger assist handle and remove handle. (Figure D) Unclip and remove dash trim panel. Remove (4) screws securing the radio. Unplug and remove the radio. Continue to kit assembly. 95-3302 DASH DISASSEMBLY... -
Page 11: Aura 2007-2009
Unclip and remove the key switch trim ring, then unclip and remove dash trim panel. (Figure C) Remove (2) screws securing the cli- mate controls. Remove (4) screws securing the radio. Unplug and remove the radio. Continue to kit assembly. 95-3302 DASH DISASSEMBLY... -
Page 12: Ion 2006-2007
Unclip radio trim panel. (Figure A) Unplug connectors from trim panel and remove panel. (Figure B) Remove (4) screws securing the radio. Unplug and remove the radio. Continue to kit assembly. 95-3302 DASH DISASSEMBLY... -
Page 13: Sky 2006-2009
(Figure D) Remove (1) screw from lower left corner of radio trim panel and unplug connectors to remove panel. (Figure D) Remove (4) screws securing the radio. Unplug and remove the radio. Continue to kit assembly. 95-3302 DASH DISASSEMBLY... -
Page 14: Vue 2006-2007
Remove (4) screws securing storage pocket and remove pocket. (Figure C) Unclip and remove center dash trim panel. (Figure D) Remove (4) screws securing the radio. Unplug and remove the radio. Continue to kit assembly. 95-3302 DASH DISASSEMBLY BOTTOM VIEW... -
Page 15: Double Din Mount Radio Provision
(Figure B) Aura, Cobalt, G5, HHR, Sky and Vue only: Cut and remove top mounting tabs on each side of the Radio Housing. (Figure C) Continue to final assembly. 95-3302 KIT ASSEMBLY... -
Page 16: Stacked Iso Mount Radio Provision
(Figure B) Aura, Cobalt, G5, HHR, Sky and Vue only: Cut and remove top mounting tabs on each side of the Radio Housing. Continue to final assembly. 95-3302 KIT ASSEMBLY... -
Page 17: Final Assembly
Dimmer ....Orange / White *NOTE: When a Black wire is not present, ground radio to vehicle chassis. All colors may not be present on all leads due to manufacturer’s specifications. 95-3302 FINAL ASSEMBLY (A) Strip wire ends back 1/2" B) Twist ends together... - Page 18 95-3302 NOTES...
- Page 19 95-3302 NOTES...
- Page 20 95-3302 INSTRUCTIONS www.metraonline.com 1-800-221-0932 REV. 05/03/10 © COPYRIGHT 2001-2010 METRA ELECTRONICS CORPORATION INST95-3302...


Need help?
Do you have a question about the 95-3302 and is the answer not in the manual?
Questions and answers