Table of Contents
Advertisement
Quick Links
Broan-NuTone LLC. 926 West State Street, Hartford, WI 53027
NuTone, Inc., 4820 Red Bank Road, Cincinnati, OH 45227
Broan-NuTone Canada, INC.1140 Tristar Drive, Mississauga, Ontario, L5T 1H9
61000 Series
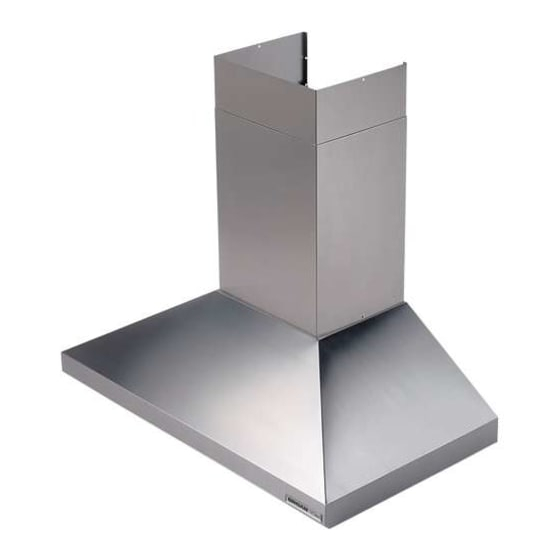
48" versions
ENGLISH......................................2
FRANÇAIS..................................12
ESPAÑOL...................................22
Advertisement
Table of Contents

Subscribe to Our Youtube Channel
Related Manuals for Rangemaster 61000 Series


Summary of Contents for Rangemaster 61000 Series
- Page 1 61000 Series 48” versions ENGLISH........2 FRANÇAIS........12 ESPAÑOL........22 Broan-NuTone LLC. 926 West State Street, Hartford, WI 53027 NuTone, Inc., 4820 Red Bank Road, Cincinnati, OH 45227 Broan-NuTone Canada, INC.1140 Tristar Drive, Mississauga, Ontario, L5T 1H9...
- Page 2 READ AND SAVE THESE INSTRUCTIONS INTENDED FOR DOMESTIC COOKING ONLY WARNING TO REDUCE THE RISK OF FIRE, ELECTRIC SHOCK, OR INJURY TO PERSONS, OBSERVE THE FOLLOWING: 1. Use this unit only in the manner intended by the manufacturer. If you have questions, contact the manufacturer at the address or telephone number listed in the warranty.
- Page 3 CAUTION 1. To reduce risk of fire and to properly exhaust air, be sure to duct air outside. Do not vent exhaust air into spaces within walls or ceilings or into attics, crawl spaces, or garages. 2. Take care when using cleaning agents or detergents. 3.
-
Page 4: Prepare The Hood
PREPARE THE HOOD Unpack hood and check contents. You should receive: 1 - Hood 1 - Decorative Flue Assembly 1 - Flue Mounting Bracket 1 - Parts Bag (B08081196) containing: 2 - Mounting Brackets 10 - Mounting Screws (4,8 x 38mm Pan Head) 4 - Mounting Screws (3,9 x 9,5mm Pan Head) 4 - Mounting Screws (3,9 x 9,5mm Pan Head Black) 10 - Drywall Anchors... -
Page 5: Install The Ductwork
INSTALL THE DUCTWORK ROOF CAP NOTE: To reduce the risk of fire, use only ROUND metal ductwork. DUCT 1. Decide where the ductwork will run between the hood and the outside. 2. A straight, short duct run will allow the hood to perform most efficiently. -
Page 6: Install The Hood
INSTALL THE HOOD RECTANGULAR MOUNTING SCREWS CUTOUTS (4,8x38mm) 1. Hang the hood from the brackets through the rectangular cut-outs on the back of MOUNTING the hood. Cut-outs are larger than the BRACKETS brackets to allow for horizontal adjustment. The bottom of the hood should be 24" to 30"... - Page 7 WIRING Note: This range hood must be properly grounded. The unit should be installed by a qualified electrician in accordance with all 33-7/16” applicable national and local electrical codes. (85cm) max GROUNDING INSTRUCTIONS This appliance must be grounded. In the event of an electrical short circuit, grounding reduces the risk of electric shock by providing an escape wire for the electric current.
-
Page 8: Connect Ductwork
CONNECT DUCTWORK FIXING TO THE WALL 1. Use (2) screws (4,8x38mm) and drywall anchors to secure flue mounting bracket to the ceiling or wall as shown. 2. Use 8" round metal duct to connect the discharge collar on the hood to the ductwork above. -
Page 9: Maintenance
MAINTENANCE Proper maintenance of the Range Hood will assure proper performance of the unit. Grease Filters The grease filters should be cleaned fre- quently. Use a warm detergent solution. Grease filters are dishwasher safe. Remove filter by pushing filter towards the back of hood and rotating filter downward. -
Page 10: Operation
OPERATION BLOWER LIGHT ON / OFF SWITCH BLOWER Controls SWITCH SPEED The hood is operated using the slide controls CONTROL under the front edge of the hood. The light switch turns the halogen lights on and off. The blower on / off switch turns the blower on to the running speed set by the blower speed PILOT LAMP... -
Page 11: Fuse Replacement
FUSE REPLACEMENT FUSE SWITCH OFF THE ELECTRICITY SUPPLY. ELECTRICAL Remove the grease filters. SUPPORT Remove the electrical box support and open the fuse box. Replace with the same type of fuse (5x20mm, 4A, 125V). FUSE WARRANTY BROAN-NUTONE LLC ONE YEAR LIMITED WARRANTY Broan-NuTone LLC warrants to the original consumer purchaser of its products that such products will be free from defects in materials or workmanship for a period of one year from the date of original purchase. -
Page 12: Service Parts
SERVICE PARTS MODEL 61000 (48” versions) - Parts for stainless steel models shown. For service parts for black, white, polished brass, or brushed copper models, call Broan Customer Service. KEY NO. PART NO. DESCRIPTION B08087136 Grease Filter (n. 4) B02300233 Motor Capacitor BE3345326 Electrical Box Support... - Page 13 SERVICE PARTS - LISTE PIECES DE RECHANGE - LISTA DE PIEZAS DE RECAMBIO MODEL 61000 (48” VERSIONS) - 35 -...
Need help?
Do you have a question about the 61000 Series and is the answer not in the manual?
Questions and answers