Table of Contents
Advertisement
Quick Links
Advertisement
Table of Contents

Related Manuals for EUROCOM Monster 4


Summary of Contents for EUROCOM Monster 4
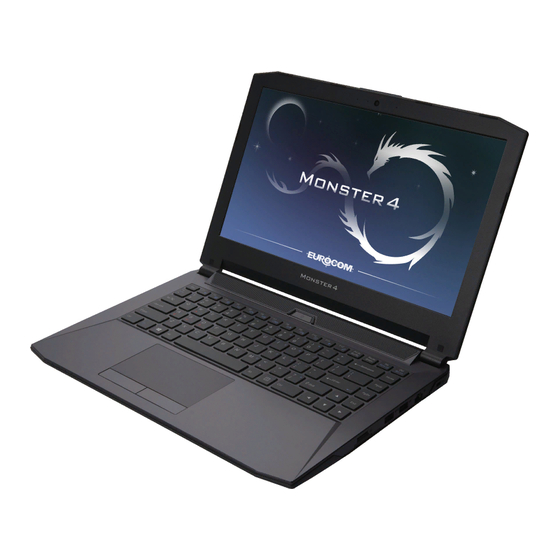
- Page 1 EUROCOM Monster 4...
-
Page 2: Regulatory And Safety Information
About this Concise User Guide This quick guide is a brief introduction to getting your system started. This is a supplement, and not a substitute for the expanded English language User’s Manual in Adobe Acrobat format on the Device Drivers & Utilities + User’s Manual disc supplied with your computer. -
Page 3: Instructions For Care And Operation
Instructions for Care and Opera- • The AC/DC adapter may have either a 2-prong or a 3-prong grounded plug. The third prong is an important safety feature; do tion not defeat its purpose. If you do not have access to a compatible outlet, have a qualified electrician install one. -
Page 4: Polymer Battery Precautions
Polymer Battery Precautions Cleaning Note the following information which is specific to poly- • Use a soft clean cloth to clean the computer, but do not apply cleaner directly to the computer. mer batteries only, and where applicable, this overrides •... -
Page 5: System Start-Up
System Startup 1. Remove all packing materials. 2. Place the computer on a stable surface. 3. Securely attach any peripherals you want to use with the computer (e.g. keyboard and mouse) to their ports. 4. Attach the AC/DC adapter to the DC-In jack at the rear of the computer, then plug the AC power cord into an outlet, and connect the AC power cord to the AC/DC adapter (make sure you use the adapter when first setting up the computer, as to... -
Page 6: System Map: Front View With Lcd Panel Open
System Map: Front View with LCD Panel Open Figure 2 Front View with LCD Panel Open 1. PC Camera Wireless Device 2. *PC Camera LED Operation Aboard *When the PC camera is in Aircraft use, the LED will be illuminated in red. -
Page 7: Led Indicators
LED Indicators The LED indicators on the computer display helpful infor- *The powered USB 3.0 port (see page 15) may be toggled mation about the current status of the computer. on /off by means of the Fn + Power Button key combina- tion. -
Page 8: Keyboard & Function Keys
Keyboard & Function Keys The keyboard includes a numeric keypad for easy numer- ic data input. Pressing Fn + NumLk turns on/off the nu- ScrLk & Function Keys meric keypad. It also features function keys to allow you NumLk Numeric to change operational features instantly. -
Page 9: Power Modes
Control Center Power Modes You can set a Power Mode by clicking the appropriate Press the Fn + Esc key combination, or double-click the icon at the top of the Control Center. Each power mode icon in the notification area of the taskbar to toggle will affect the Power Conservation Mode, Airplane Mode, the Control Center on/off. - Page 10 Power Status Fan Speed The Power Status icon will show whether you are cur- You can set the fan speed to Maximum (full power), Au- rently powered by the battery, or by the AC/DC adapter tomatic, Custom or Overclock from this menu item. The plugged in to a working power outlet.
- Page 11 Time Zone Flexikey® Click the button to access the Flexikey® appli- Clicking the Time Zone button will access the Date and cation. Time Windows control panel. Desktop Background Clicking the Desktop Background button will allow you to change the desktop background picture. Touchpad/PC Camera Click either of these buttons to toggle the Touchpad or camera module’s power status.
-
Page 12: Flexikey® Application
Flexikey® Application Profiles The menus on the left side of the application relate to Pro- The Flexikey® application is a quick hotkey configura- files. You can Add or Delete profiles (you can maintain tion application, which allows you to assign a single key 12 active Profiles), Export and Import profiles from the to launch multiple key combinations, or to launch pro- menus. -
Page 13: Keyboard Settings
Keyboard Settings by clicking in the Name box, and click in Tool Tips to type in a note to remind you of the action’s function. The keyboard settings allow you to configure actions for any single key (or a combination of keys). Click the key and then select the Action Type (Express Key, Launch App, Express Text or Disable) from the menu at the bot- tom of the page. -
Page 14: Keyboard Settings - Express Key
Keyboard Settings - Express Key If you want to clear all the settings click Restore to return to the default key setting. To configure a single key to send multiple key combina- 10. Any assigned Express Keys will appear in orange. tions, or to create more useful shortcut keys, use Express Key. -
Page 15: Keyboard Settings - Express Text
Keyboard Settings - Express Text Keyboard Settings - Disable A single key can be set to send a string of text within any You can use the program to disable any keys not required. application using Express Text. Enable and select the keyboard under your chosen profile, click to select a key to disable, and then click to select Disable in 1. -
Page 16: System Map: Front, Left & Right Views
System Map: Front, Left & Right Views Front USIM Card Ejection Simply press on the USIM card to eject it, Left however do not do this while a connec- tion is in progress. If you do eject the card while a 3G/4G con- nection is ongoing, Right... -
Page 17: System Map: Bottom & Rear Views
System Map: Bottom & Rear Views Overheating To prevent your computer from overheating make sure nothing blocks any vent while the computer is in use. Bottom Cover Removal Warning Do not remove any cov- er(s) and/or screw(s) for the purposes of device up- grade as this may violate the terms of your warranty. -
Page 18: Windows 10 Start Menu, Context Menu, Taskbar, Control Panel And Settings
Windows 10 Start Menu, Context Menu, Taskbar, Control Panel and Settings Most of the apps, control panels, utilities and programs within Windows 10 can be accessed from the Start Menu by clicking the icon in the taskbar in the lower left corner of the screen (or by pressing the Windows Logo Key on the key- board). -
Page 19: Video Features
Video Features To access the Display control panel in Windows: Go to the Control Panel. The system features both an Intel’s Integrated GPU (for Click Display (icon) - in the Appearances and power-saving) and an NVIDIA’s discrete GPU (for per- Personalization category. -
Page 20: Display Devices
Display Devices Note that you can use external displays connected to the HDMI-Out port and/or Mini DisplayPort. See your display device manual to see which formats are supported. In Windows it is possible to quickly configure external displays from the Project menu (press the Windows Logo Key and the P key). -
Page 21: Cpu Overclocking Support
CPU Overclocking Support 8. You will need to agree to the usage conditions before continuing. You may tune the system using the set of controls provided on You can enable overclocking support for systems with the left side menus e.g. System Information etc. Intel®... -
Page 22: Audio Features
Audio Features Setup for 5.1 Surround Sound To setup your system for 5.1 surround sound you will You can configure the audio options on your computer need to connect the audio cables to the Headphone-Out, from the Sound control panel in Windows, or from the Microphone-In and S/PDIF-Out jacks. -
Page 23: Sound Blaster Audio
Sound Blaster Audio 6. As you plug in each cable a dialog box will pop up. 7. Click to put a tick in the appropriate box according to the Sound Blaster Install the application to allow you to speaker plugged-in (e.g. Rear Speaker Out), and then click OK configure the audio settings to your requirements for the to save the setting. -
Page 24: Camera App
PC Camera Power Options Use the Fn + F10 key combination to toggle power to the The Power Options (Hardware and Sound menu) con- PC Camera module. When the PC Camera is in use the PC trol panel icon in Windows allows you to configure power Camera LED will be illuminated (see page management features for your computer. -
Page 25: Driver Installation
Driver Installation Driver Page# The Device Drivers & Utilities + User’s Manual disc con- Chipset page 25 tains the drivers and utilities necessary for the proper op- eration of the computer. Insert the disc and click Install Video (VGA) page 25 Drivers (button), or Option Drivers (button) to access NVIDIA Video (NVIDIA VGA) page 25... - Page 26 Chipset CardReader 1. Click Install Drivers (button). 1. Click 5.Install Cardreader Driver 1. Click 9.Install MEI Driver > Yes. > Yes. 2. Click 1.Install Chipset Driver > 2. Click Next. Yes. 2. Click Finish. 3. Click the tickbox to accept the 3.
-
Page 27: Wireless Lan Module (Option)
Wireless LAN Module (Option) WLAN Configuration in Windows Make sure the Wireless LAN module is turned on (and not Make sure the Wireless LAN module is turned on (and not in Airplane Mode) before configuration begins. in Airplane Mode). Click the icon in the notification area of the taskbar. -
Page 28: Wireless Display Configuration
Wireless Display Wireless Display Configuration Note that no driver or application is required for wireless display Wireless Display (Miracast) uses your Wireless LAN in Windows 10. module/WLAN/Bluetooth Combo module (you need to Press the + P (or Fn + F7) key combination. make sure that your video adapter/display device is com- An on-screen menu will pop up. -
Page 29: Bluetooth Module (Option)
Bluetooth Module (Option) Bluetooth Configuration in Windows Make sure the Bluetooth module is turned on (and not in Make sure the Bluetooth module is turned on (and not in Airplane Mode) before configuration begins. Airplane Mode). Click the Settings item in the Start Menu and then click Bluetooth Driver Installation Devices. -
Page 30: Activating Tpm
(Option) The TPM Management window allows you to configure the TPM within Windows. As TPM is usually administered within Before setting up the TPM (Trusted Platform Module) large enterprises and organizations, your system administrator will need to assist you in managing the information here. functions you must initialize the security platform. -
Page 31: Troubleshooting
Troubleshooting Problem Possible Cause - Solution The Wireless LAN/Bluetooth The modules are off as the computer is in Airplane Mode. Check the LED indicator to see if it modules cannot be detected. is in Airplane Mode (see Table 1 on page 6). -
Page 32: Specifications
Specifications Processor Options Storage i7-6820HK (2.70GHz) One changeable 2.5" (6cm) 7.0mm (h) SATA (Serial) Hard Disk Drive/Solid State 8MB Smart Cache, 14nm, DDR4-2133MHz, Drive (SSD) TDP 45W (Factory Option) One M.2 SATA/PCIe Latest Specification Information Support Intel® XTU over-clocking technol- Gen3 x4 Solid State Drive (SSD) ogy on i7-6820HK The specifications listed in this sec-... - Page 33 Video Adapter Interface M.2 Slots Intel® Integrated GPU and NVIDIA® Four USB 3.0 Ports (Including one AC/DC Slot 1 for Combo WLAN and Bluetooth Module Discrete GPU Powered USB port) One HDMI-Out Port Slot 2 for SATA or PCIe Gen3 x4 SSD Supports Microsoft Hybrid Graphics (Factory Option) Slot 3 for 3G/4G Module Two Mini DisplayPorts 1.2...
Need help?
Do you have a question about the Monster 4 and is the answer not in the manual?
Questions and answers