Table of Contents
Advertisement
Quick Links
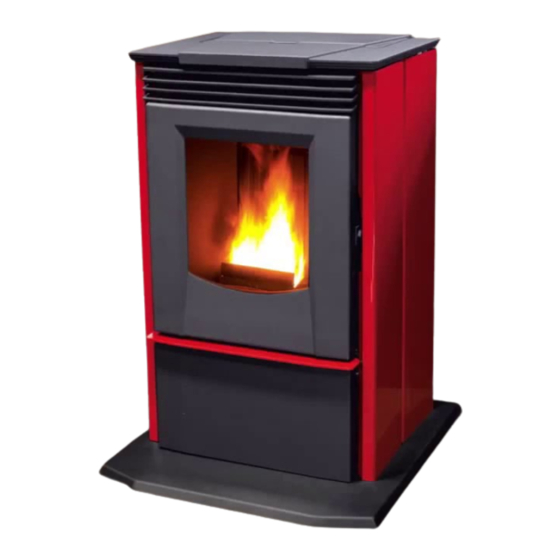
F R E E - S T A N D I N G P E L L E T S T O V E
OWNER'S MANUAL
Version Française: www.enviro.com/fr.html
P4
PLEASE READ THIS ENTIRE MANUAL BEFORE INSTALLATION AND USE
OF THIS PELLET BURNING ROOM HEATER. FAILURE TO FOLLOW THESE
INSTRUCTIONS COULD RESULT IN PROPERTY DAMAGE, BODILY INJURY
OR EVEN DEATH
CONTACT YOUR BUILDING OR FIRE OFFICIALS ABOUT RESTRICTIONS
AND INSTALLATION INSPECTION REQUIREMENTS IN YOUR AREA.
:
INSTALLER
LEAVE THIS MANUAL WITH THE WOOD STOVE.
CONSUMER
: RETAIN THIS MANUAL FOR FUTURE REFERENCE
50-3136
Advertisement
Table of Contents

Subscribe to Our Youtube Channel
Related Manuals for Enviro P4


Summary of Contents for Enviro P4
- Page 1 INSTRUCTIONS COULD RESULT IN PROPERTY DAMAGE, BODILY INJURY OR EVEN DEATH CONTACT YOUR BUILDING OR FIRE OFFICIALS ABOUT RESTRICTIONS AND INSTALLATION INSPECTION REQUIREMENTS IN YOUR AREA. INSTALLER LEAVE THIS MANUAL WITH THE WOOD STOVE. 50-3136 CONSUMER : RETAIN THIS MANUAL FOR FUTURE REFERENCE Version Française: www.enviro.com/fr.html...
-
Page 2: Table Of Contents
Table of Contents Introduction........................3 Important Safety Data......................3 Emissions and Efficiencies....................4 Safety Warnings And Recommendations................5 Rating Label Location......................7 Pellet Quality........................7 Installation........................8 Deciding Where to Locate the Appliance................8 Unpacking and Removing Pellet Stove From Pallet..............8 Clearances to Combustibles....................10 Alcove Clearances......................10 Vent Termination Requirements..................11 Outside Fresh Air Connection...................12 Exhaust and Intake Locations...................12 Mobile Home Installation....................13... -
Page 3: Introduction
To prevent the possibility of a fire, ensure that the appliance is properly installed by adhering to the installation instructions. An ENVIRO dealer will be happy to assist you in obtaining information with regards to your local building codes and installation restrictions. -
Page 4: Emissions And Efficiencies
Rates: This manual describes the installation and operation of the Enviro P4 Pellet heater. This heater meets the 2015 U.S. Environmental Protection Agency’s pellet emission limits for pellet emission limits sold after May 15, 2015. Under specific test conditions this heater has been shown to deliver heat at rates ranging from 8,200-23,000 Btu/hr. -
Page 5: Safety Warnings And Recommendations
To prevent the possibility of a fire, ensure that the appliance is properly installed by adhering to the installation instructions. An ENVIRO dealer will be happy to assist you in obtaining information with regards to your local building codes and installation restrictions. - Page 6 If this power cord should become damaged, a replacement power cord must be purchased from the manufacturer or a qualified ENVIRO dealer. Be careful that the electrical cord is not trapped under the appliance and that it is clear of any hot surfaces or sharp edges.
-
Page 7: Rating Label Location
Pellet quality is important, please read the following: Your Enviro pellet stove has been designed to burn wood pellets only. Do not use any other type of fuel, as this will void any warranties stated in this manual. The performance of your pellet stove is greatly affected by the type and quality of wood pellets being burned. -
Page 8: Installation
Installation ecIDIng here to ocate your ellet pplIance 1. Check the “Clearances to Combustibles” section for proper spacing. Do not obtain combustion air from an attic, garage or any unventilated space. Combustion air may be obtained from a ventilated crawlspace. 3. - Page 9 Tabs are installed by screwing one #8-32 T-20 screw throught the Hearth Pad and into each Mounting Tab (there are three total). See Figure 4a. You may have SA-900760 P4 HEARTH PAD to unscrew feet to raise unit up. Tilt the unit so it ITEM NO.
-
Page 10: Clearances To Combustibles
Hearth Pad with a minimum R Value of at least 0.84 must be placed underneath the unit and extend 7.25 inches in front of the unit measured from the glass. If the P4 is installed on carpet the use of a solid non combustible Hearth Pad must be used under leveling legs. -
Page 11: Vent Termination Requirements
Installation ermInatIon eQuIrementS IT IS RECOMMENDED THAT YOUR PELLET STOVE BE INSTALLED BY AN AUTHORIZED DEALER/INSTALLER. Table 1: Use in conjunction with Figure 6 for allowable exterior vent termination locations. Letter Minimum Clearance Description 24 in (61 cm) Above grass, top of plants, wood, or any other combustible materials. 48 in (122 cm) Beside/below any door or window that may be opened. -
Page 12: Outside Fresh Air Connection
(7.21 cm) three screws must be used at each joint. If vented horizontally, joints shall be made gas tight with aluminum foil duct tape. 4.144in (10.53 cm) 13.044in (33.13cm) 11.045in (28.05 cm) Figure 11: P4 Inlet and Outlet Location. -
Page 13: Mobile Home Installation
CAUTION: THE STRUCTURAL INTEGRITY OF THE MANUFACTURED HOME FLOOR, WALL AND CEILING/ROOF MUST BE MAINTAINED. ENVIRO P4 Hearth Pad Flooring Steel Frame ” Lag Bolts Ground Wire Directly to Metal Chassis Securely Fastened Figure 12: Mobile home installation. -
Page 14: Horizontal Exhaust Through Wall Installation
Installation orIzontal xhauSt hrough nStallatIon Vent installation: install vent at clearances specified by the vent manufacturer. A chimney connector shall not pass through an attic or roof space, closet or similar concealed spaces, or a floor, or ceiling. Where passage through a wall or partition of combustible construction is desired, the installation shall conform to CAN/CSA-B365 Installation Code for Solid-Fuel-Burning Appliances and Equipment. -
Page 15: Through Wall Vertical Rise Horizontal Termination - Freestanding
Installation 10. Install a vertical pipe, or if all requirements for direct venting are met, install vent termination. The stainless steel cap termination manufactured by the vent manufacturer is recommended. However, when the vent terminates several feet above ground level and there are no trees, plants, etc. within several feet, a 45° elbow can be used as termination. -
Page 16: Inside Vertical Installations
Installation nSIDe ertIcal nStallatIonS 1. Choose a stove location that is ideal. See the Rain Cap (ensure cap is section “D at least 3ft above the eciDing here to ocate your eLLet 2 ft roof at the lowest point) .” PPLiance (600 mm) 2. -
Page 17: Hearth Mount Installation
Steel Plate or Flashing Installation Flexible or Rigid 6" Stainless Steel Liner earth ount nStallatIon Refer to Figures 20 and 21. Damper Removed 1. Install the hearth pad. or Fastened Open 2. Lock the fireplace damper in the open 10" (25.4 cm) Mantel position. -
Page 18: Thermostat Installation
STOVE: REVISION: SHEET: P4 PROTO R01 1 of 2 the thermostat wires to the thermostat connection THIS DRAWING IS THE PROPERTY OF SHERWOOD INDUSTRIES LTD. AND MAY NOT BE COPIED, REPRODUCED, OR OTHERWISE DISCLOSED WITHOUT THE PRIOR APPROVAL OF SHERWOOD INDUSTRIES LTD. -
Page 19: Specifications
INTERNAL ASSEMBLY MANUAL SHEET: STOVE: REVISION: 1 of 1 THIS DRAWING IS THE PROPERTY OF SHERWOOD INDUSTRIES LTD. AND MAY NOT BE COPIED, REPRODUCED, OR OTHERWISE DISCLOSED WITHOUT THE PRIOR APPROVAL OF SHERWOOD INDUSTRIES LTD. Figure 25: Dimensions of P4. -
Page 20: Operating Instructions
Operating Instructions ontrol oarD unctIonS 1. POWER BUTTON: This is the green button with the power symbol, it is used to turn the unit on and off. When the power is on and the blue LED beside the button will be illuminated. -
Page 21: Operating Your Pellet Stove
Operating Instructions peratIon ellet tove PRE-BURN INSTRUCTIONS: The burn pot liner holes must be clear and the liner installed properly against the ignitor tube for proper operation. Check the hopper for enough pellets to start the unit. DO NOT OPERATE THE UNIT WITH THE DOOR OR ASH PAN OPEN. TO START: Press the Power button. -
Page 22: Guidelines For Fine-Tuning For Fuel Quality
Operating Instructions For less experienced installers or owners a magnehelic gauge can be used to determine the proper Damper setting. A magnehelic gauge will accurately measure the pressure in your firebox. There is a small hole on underneath the ash lip on the right side of the firebox front, see figure 29. You want a reading of .10-.13 WC (25-32 Pa) depending on pellet quality. -
Page 23: Routine Cleaning And Maintenance
Cloth, Vacuum with fine filter bag Burn Pot Figure 30: P4 Burn pot and Liner BURNER POT AND LINER (2-3 days) Every two to three days (when the unit is cold), remove the burn-pot liner from the stove. Using a metal scraper, remove material that has accumulated or is clogging the liner’s holes. - Page 24 Compartment the hole at the top back of the compartment. Replace the ash pan ,close the latch, and close Figure 31: P4 Open pedestal door. DO NOT PLACE UNBURNED OR RAW PELLET FUEL IN ASH PAN. AIR INTAKE (semi-annually) Inspect periodically to be sure that it is not clogged with any foreign materials.
- Page 25 32 in order to remove any fly ash that may have collected on the heat exchanger tubes. This will allow for optimal heat transfer to convection air. Figure 32: P4 Heat Exchanger Tubes removal of fIrebox panelS Remove • Open the door, remove the door, burn pot and burn pot liner.
- Page 26 DOOR GLASS REPLACEMENT Never run a stove with broken glass, new glass must be purchased and installed by a Enviro dealer. The door glass is made of high temperature “PYROCERAM” ceramic glass. The proper glass size is 13” x 9.5” x 0.2”...
-
Page 27: Troubleshooting
Troubleshooting DO NOT: ● Service the stove with wet hands. The stove is an electrical appliance, which may pose a shock hazard if handled improperly. Only qualified technicians should deal with possible internal electrical failures. ● Do not remove any screws from the firebox without penetrating oil lubrication. WHAT TO DO IF: 1. - Page 28 If there is no smoke the Hopper Lid switch may not be engaged or there has been a component failure. The components will need to be tested, contact an Enviro dealer. The High limit switch is a manual reset switch and a small red button on the back of the switch will need to be manually pressed in order for the unit be started again.
- Page 29 Troubleshooting 6. Auger is not Feeding Pellets. • If this is the first time starting the unit or during the previous burn the unit ran out of pellets the Auger will need to be primed. You may get an E3 while auger is filling with pellets, just press the power button again. Once the Auger is full of pellets it will start dropping them into the burn pot.
-
Page 30: Wiring Diagram
Wiring Diagram Supplied Armor Cable Grey Optional Exterior Vacuum Exhaust Blower Grey Switch Black White Ribbon Cable Combustion White Blower Blue Brown Thermostat Exhaust Connection Temperature Power Switch Cord Brown Chassis Ground 115V 115V White Black White 2A 2A 2A 2A 5A Ignitor Black (Hot) White (Common) -
Page 31: Parts List
Auger Stop Plate 50-3118 P4 Hearth Pad with Mounting Hardware 50-3119 P4 Cabinet Sides and Ash Shelf (Painted) 50-3120 P4 Cabinet Sides and Ash Shelf (Racing Red) 50-3121 P4 Cabinet Sides and Ash Shelf (Modern Grey) 50-3122 P4 Cast Top 50-3123... - Page 32 Daughterboard Mount Box 50-3134 Heat Exchanger Scraper Rod 50-2966 Machined Door Latch Nut 50-2967 P4 Door Gasket 54” with Jont Tape 50-3135 Aluminum Hose Barb (Vacuum Line) EF-019 Auger Brass Bushings (Set of 2) 50-1806 Circuit Board 2 Amp Fuse - 115V (Single)
-
Page 33: Parts Diagram
Parts Diagram P4 Steel Parts... - Page 34 Parts Diagram P4 - COMPONENTS...
-
Page 35: Rating Label
Rating Label... -
Page 37: Installation Data Sheet
Installation Data Sheet The following information must be recorded by the installer for warranty purposes and future reference. NAME OF OWNER: NAME OF DEALER: _________________________________________ _________________________________________ ADDRESS: ADDRESS: _________________________________________ _________________________________________ _________________________________________ _________________________________________ _________________________________________ _________________________________________ PHONE:___________________________________ PHONE:___________________________________ NAME OF INSTALLER: MODEL:___________________________________ SERIAL NUMBER:___________________________ _________________________________________ DATE OF PURCHASE: _____________... -
Page 38: Notes
Notes... - Page 39 Notes...
- Page 40 Notes MANUFACTURED BY: SHERWOOD INDUSTRIES LTD. 6782 OLDFIELD RD. SAANICHTON, BC, CANADA V8M 2A3 www.enviro.com July 28, 2015 C-14675...
Need help?
Do you have a question about the P4 and is the answer not in the manual?
Questions and answers