
Related Manuals for DAPAudio Stageamp 2.2


Summary of Contents for DAPAudio Stageamp 2.2
- Page 1 Stage-Amp Stage-Amp 2.2 ORDERCODE D4502 Stage-Amp 2.6 ORDERCODE D4503 Stage-Amp 4.0 ORDERCODE D4504 Stage-Amp 4.4 ORDERCODE D4505...
- Page 2 Congratulations! You have bought a great, innovative product from DAP Audio. The DAP Audio Stage Amp series bring excitement to any venue. Whether you want simple plug-&-play action or a sophisticated show, this product provides the effect you need. You can rely on DAP Audio, for more excellent audio products. We design and manufacture professional audio equipment for the entertainment industry.
-
Page 3: Table Of Contents
DAP Audio DAP Audio Stage Amp 2.2, Stage Amp 2.6, Stage Amp 4.0, Stage Amp 4.4 Product Guide Warning.................…...……………..…………………………….…………. Safety-instructions………………………………………………………………………………………………………. Operating Determinations.…………………………………………………………………………………………… Return Procedure……………………………………………………………………………........Claims……………………………………………………………………………............Description................…...………………………………………….………… Features and Overview ………………………………...….……………….………….……………………….…….. Overview Front panel............................Overview Back panel............................Set Up and Operation..............……..……………………………………………. Mode selection............................... -
Page 4: Warning
FOR YOUR OWN SAFETY, PLEASE READ THIS USER MANUAL CAREFULLY BEFORE YOUR INITIAL START-UP! Unpacking Instructions Immediately upon receiving this product, carefully unpack the carton and check the contents to ensure that all parts are present, and have been received in good condition. Notify the dealer immediately and retain packing material for inspection if any parts appear damaged from shipping or the carton itself shows signs of mishandling. - Page 5 Never remove warning or informative labels from the unit. Never use anything to cover the ground contact. Do not insert objects into air vents. Do not connect this system to a dimmerpack. Do not switch the system on and off in short intervals, as this would reduce the system’s life. Do not open the device and do not modify the device.
-
Page 6: Operating Determinations
The user is responsible for correct positioning and operating of this device. The manufacturer will not accept liability for damages caused by the misuse or incorrect installation of this device. Repairs, servicing and electric connection must be carried out by a qualified technician. WARRANTY: Till one year after date of purchase. -
Page 7: Description
Description of the device Features The Stage Amp 2.2, Stage Amp 2.6, Stage Amp 4.0, Stage Amp 4.4 are professional high-end amplifiers : • Power rating 2Ω 4Ω 8Ω RMS 2 X 1350W RMS 2 X 1050W RMS 2 X 650W Stage Amp 2.2 RMS 2 X 2300W RMS 2 X 1400W... -
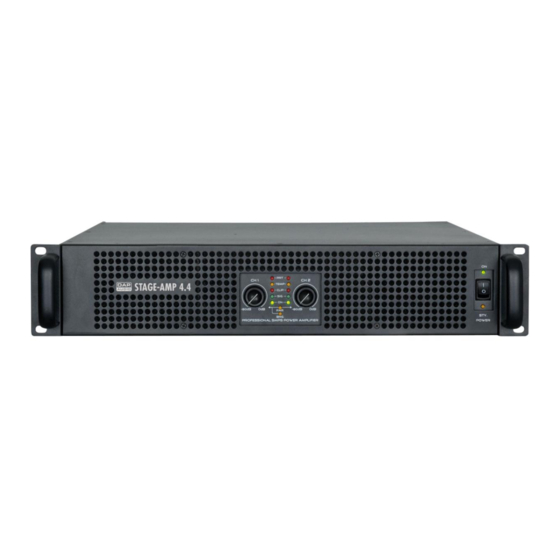
Page 8: Overview Front Panel
Frontpanel Fig. 2 1. CH1 volume control In bridge mode, this attenuator controls the volume of two channels. CH2 attenuator has no function. In stereo or parallel mode, this attenuator just controls CH1 volume. Gain control range: -8 ~, continuous control. Gain control range: -8 ~ 0dB, 40 steps control, effective rotation angle is 280 degrees. -
Page 9: Overview Back Panel
Backpanel Fig. 3 14. Power Fuse (18AL / 250V) Replace the fuse only by a fuse of the same type. 15. Air cooling Make sure these outlets remain clear to allow unrestricted air flow. 16. lnput sensitivity selector The switch has three exchange modes: 1) Whole equipment signal gain is 26dB 2) Whole equipment signal gain is 32dB 3) Whole equipment signal gain is 38dB... - Page 10 Operation Mode (#3 and #4) Soft-clipping (#1 and #2) 22. Operation mode selector (Dipswitch #3 and #4) The switch has three exchange modes: 1) Stereo mode: In this mode both channels operate independently of each other, with their input attenuates controlling their respective levels.
-
Page 11: Set Up And Operation
Set Up and Operation Installation Remove all packing materials from the Stage Amp. Check that all foam and plastic padding is removed. Secure the equipment into a 19" rack. Connect all cables. Connecting Power / Circuit Size Requirements. The actual current draw, the amplifier demands from the AC mains, depends on many factors (its load, output level or the crest factor of its program material). -
Page 12: Mode Selection
Mode Selection The three-position, recessed Mode Select switch (located on the rear panel) configures the amplifier for Stereo, Parallel or Bridged Mono Mode. Amplifiers are factory set to Stereo Mode. Stereo Mode In Stereo Mode, both channels operate independently, with their input attenuators controlling their respective levels. -
Page 13: Bridged Mono Mode
Bridged Mono Mode Bridged Mono Mode straps both amplifier channels together to make a very powerful, single-channel monaural amplifier. One channel "pushes" and the other "pulls" equally, doubling the power over that of channel alone. Signal is applied to the Channel A input only. Both attenuators are used to control signal level;... -
Page 14: Reliability Protection Function
Reliability protection function 1. Clip/Limit This feature has two protection functions: 1) Limit on the input signal range, to prevent input signal overload beyond the amplifiers rated range and cause square wave output to damage the speaker. 2) When the signal waveform is distorted, it can automatically adjust gain and limit distortion signal output. -
Page 15: Connection Cables
Connection Cables Take care of the connector cables, always holding them by the connectors and avoiding knots and twists when coiling them: This gives the advantage of increasing their life and reliability, which is always to your advantage. Periodically check that your cables are in good condition, that they are correctly wired and that all their contacts are in good condition: a great number of problems (faulty contacts, ground hum, discharges, etc.) are caused entirely by using unsuitable or faulty cables. -
Page 16: Maintenance
Maintenance DAP Audio STAGE AMP requires almost no maintenance. However, you should keep the unit clean. Disconnect the mains power supply, and then wipe the cover with a damp cloth. Do not immerse in liquid. Do not use alcohol or solvents. Keep connections clean. -
Page 17: Product Specifications
Product Specifications Model Stage Amp 2.2 Stage Amp 2.6 Stage Amp 4.0 Stage Amp 4.4 Stereo, 8 Ω (per ch.)* 650Wx2 850Wx2 1200Wx2 1500Wx2 Stereo, 4 Ω (per ch.)* 1050Wx2 1400Wx2 2000Wx2 2500Wx2 Stereo, 2 Ω (per 1350Wx2 2300Wx2 3000Wx2 3700Wx2 ch.)** Bridge, 8 Ω... -
Page 18: Appendix 1: Stage Amp Block Diagram
STAGE AMP Block Diagram... -
Page 19: Appendix 2: Wire Gauge Charts
Wire Gauge Chart (Metric) Stranded Cable Wire Gauge Power Loss % Power Loss % Power Loss % Length (m) (8 ohm load) (4 ohm load) (2 ohm load) 10,8 1,74 0,75 1,16 0,58 1,16 0,35 0,70 1,39 0,22 0,44 0,87 15,5 0,75 10,8... - Page 20 Wire Gauge Chart (AWG : American Wire Gauge Stranded Cable Wire Gauge Power Loss % Power Loss % Power Loss % Length(ft) (AWG) (8 ohm load) (4 ohm load) (2 ohm load) 0.81 1.61 0.51 1.02 0.32 0.64 1.28 0.128 0.25 0.51 1.61...
- Page 21 2009 Dap Audio.
Need help?
Do you have a question about the Stageamp 2.2 and is the answer not in the manual?
Questions and answers