
Related Manuals for DAPAudio Vision 1600 ORDERCODE D4151


Summary of Contents for DAPAudio Vision 1600 ORDERCODE D4151
- Page 1 Vision mkII Vision 1600 ORDERCODE D4151 Vision 2400 ORDERCODE D4152 Vision 3500 ORDERCODE D4153...
- Page 2 Congratulations! You have bought a great, innovative product from DAP Audio. The DAP Audio Vision series brings excitement to any venue. Whether you want simple plug-&-play action or a sophisticated show, this product provides the effect you need. You can rely on DAP Audio, for more excellent audio products. We design and manufacture professional audio equipment for the entertainment industry.
-
Page 3: Table Of Contents
DAP Audio Dap Audio Vision 1600, 2400, 3500 Product Guide Warning.................…...……………..…………………………….………..….. Safety-instructions………………………………………………………………………………………………………… Operating Determinations.……………………………………………………………………………………………… Description................…...………………………………………….………..…. Features................................. Overview Front panel............................Overview Back panel............................Operation................................... Connection Cables......…........………..………….…….………….………………. Maintenance...................………..………….…….………………………..Replacing the Fuse..............…………………….……………………………… Troubleshooting................………………….………………….………………... Product Specifications..............……………….…….………………………………... -
Page 4: Warning
WARNING CAUTION! Keep this system away from rain and moisture! FOR YOUR OWN SAFETY, PLEASE READ THIS USER MANUAL CAREFULLY BEFORE YOUR INITIAL START-UP! SAFETY INSTRUCTIONS Every person involved with the installation, operation and maintenance of this system have to: be qualified follow the instructions of this manual CAUTION! Be careful with your operations. -
Page 5: Operating Determinations
Please read this manual carefully and keep it for future reference. Remember that the amplifier has a better value on the market, if you save the carton and all packing materials. Always operate the unit with the AC ground wire connected to the electrical system ground. Connecting amplifier outputs to oscilloscopes or other test equipment, while the amplifier is in bridged mode, may damage both the amplifier and test equipment. -
Page 6: Description
Description of the device Features The Vision 1600, 2400 and 3500 are professional high-end amplifiers : Vision 1600 • 2x Channel in and Link out • 2x Speakon out • Built-in Clip Limiter • Switch-able entrance sensitivity: 0.775V, 1V and 1.4V •... -
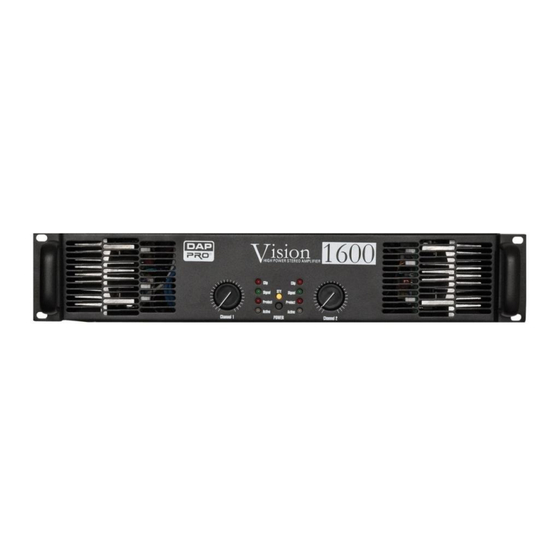
Page 7: Overview Front Panel
Frontpanel Fig. 1 1. "CLIP" Indicator Any illumination of the clip LED indicates distortion. In this case, check the output signal of your mixer and turn down the input gain control. Please keep in mind that the power amplifier cannot correct any distortion. -
Page 8: Overview Back Panel
7. Power Switch Use this switch to switch your power amplifier on. 8. "PROTECTION" Indicator When this indicator lights, the power amplifier is in protection mode. Switch off the device and find out what the problem is. The power amplifier is protected against overheat, overload, short circuit, DC, soft-start. - Page 9 15. Operation Mode Selector This switch is used to select the operating mode of the power amplifier: Stereo Mode: 2 inputs (channel 1 and 2) and 2 outputs are used. Parallel Mode: 1 input (channel 1) and 2 outputs are used. Bridge Mode: 1 input (channel 1) and 1 output is used.
-
Page 10: Operation
Operation Installation Remove all packing materials from the Vision. Check that all foam and plastic padding is removed. Screw the equipment into a 19" rack. Connect all cables. Always disconnect from electric mains power supply before cleaning or servicing. Damages caused by non-observance are not subject to warranty. Set Up and Operation Before plugging the unit in, always make sure that the power supply matches the product specification voltage. - Page 11 Stereo mode using Binding posts (Vision 2400 & 3600 only) : Fig. 4 In this mode, connect the 2 inputs CH1 and CH2 to your mixer's outputs. Put the selector to in stereo position. Output volume can be adjusted by means of the two potentiometers. Connect the 2 speakers to the binding- posts.
- Page 12 Parallel mode using binding- posts (Vision 2400 and 3600 only) : Fig. 6 In this mode, connect the input CH1 to your mixer's outputs. Put the selector in parallel position. Output volume can be adjusted by means of the two potentiometers. Connect the 2 speakers to the binding- posts.
- Page 13 Bridge mode using binding- posts (Vision 2400 and 3600 only): Fig. 8 In this mode, connect the input CH1 to your mixer's outputs. Put the selector on the bridge position. Output volume can be adjusted with channel 1 potentiometer. Connect the speaker to the red binding- posts.
-
Page 14: Connection Cables
Connection Cables Take care of the connector cables, always holding them by the connectors and avoiding knots and twists when coiling them: This gives the advantage of increasing their life and reliability, which is always to your advantage. Periodically check that your cables are in good condition, that they are correctly wired and that all their contacts are in good condition: a great number of problems (faulty contacts, ground hum, discharges, etc.) are caused entirely by using unsuitable or faulty cables. - Page 15 Compensation of interference with balanced connections...
-
Page 16: Maintenance
Maintenance The Vision requires almost no maintenance. However, you should keep the unit clean. Disconnect the mains power supply, and then wipe the cover with a damp cloth. Do not immerse in liquid. Keep connections clean. Disconnect electric power, and then wipe the audio connections with a damp cloth. -
Page 17: Product Specifications
Product Specifications MODE VISION 1600 VISION 2400 VISION 3500 Stereo Mode 8Ω 2x 620Wrms 2x840Wrms 2x1200Wrms 4Ω 2x 1050Wrms 2x1360Wrms 2x1920Wrms 2Ω 2x 1500Wrms 2x1920Wrms 2x2850Wrms Bridge Mode 8Ω 2100Wrms 2720Wrms 3840Wrms 4Ω 3000Wrms 3840Wrms 5700Wrms Frequency response 8Hz-50kHz(-1dB) 15Hz-35kHz(-1dB) THD+N <0.03% <0.03%... - Page 18 2008 Dap Audio.
Need help?
Do you have a question about the Vision 1600 ORDERCODE D4151 and is the answer not in the manual?
Questions and answers