Table of Contents
Advertisement
Quick Links
Advertisement
Table of Contents

Summary of Contents for DAPAudio TAS-1100
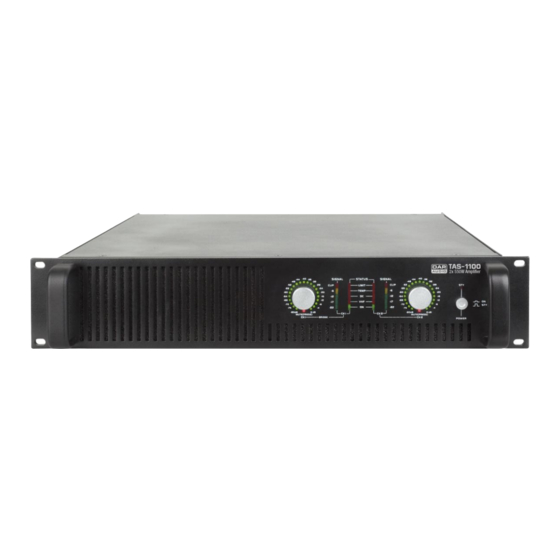
- Page 1 TAS-1100 ORDERCODE D4190...
- Page 2 Congratulations! You have bought a great, innovative product from DAP Audio. The DAP Audio TAS series bring excitement to any venue. Whether you want simple plug-&-play action or a sophisticated show, this product provides the effect you need. You can rely on DAP Audio, for more excellent audio products. We design and manufacture professional audio equipment for the entertainment industry.
-
Page 3: Table Of Contents
DAP Audio DAP Audio TAS-1100, TAS-1500, TAS-1900, TAS-2400, TAS4000 Product Guide Warning ................................. Safety-instructions............................Operating Determinations..........................Description................................Features................................Overview Front panel............................Overview Back panel............................Operation................................Mode selection..............................Connection Cables............................... Maintenance................................Troubleshooting..............................Product Specifications............................Appendix 1: TAS block diagram......................... Appendix 2: Wire Gauge Charts.......................... -
Page 4: Warning
WARNING CAUTION! Keep this system away from rain and moisture! FOR YOUR OWN SAFETY, PLEASE READ THIS USER MANUAL CAREFULLY BEFORE YOUR INITIAL START-UP! SAFETY INSTRUCTIONS Every person involved with the installation, operation and maintenance of this system have to: be qualified follow the instructions of this manual CAUTION! Be careful with your operations. -
Page 5: Operating Determinations
Make sure that the power-cord is never crimped or damaged. Check the system and the power- cord from time to time. Make sure that the amplifier is turned down, before turning the power on or off. So you can avoid supersonic frequencies, which could damage your speakers. -
Page 6: Description
Description of the device Features The TAS-1100, TAS-1500, TAS-1900, TAS-2400, TAS4000 are professional high-end amplifiers : • Power rating 2Ω 4Ω 8Ω Not allowed RMS 2 X 550W RMS 2 X 300W TAS-1100 RMS 2 X 1200W RMS 2 X 750W... -
Page 7: Overview Front Panel
Frontpanel Fig. 2 1. Channel 1 Input Attenuator. Use to attenuate the input signal of channel 1. Pressing the control for 2 seconds mutes Channel 1. 2. Channel 1 volume scale indicator. This indicator displays the volume attenuation of Channel 1. 3. -
Page 8: Overview Back Panel
Backpanel Fig. 3 19. Power Fuse. Replace the fuse only by a fuse of the same type. 20. Mode Selection Switch. This recessed, three-position switch configures the amplifier for Stereo, Parallel or Bridged Mono Mode operation. Amplifiers are factory configured for Stereo Mode. See the section on Mode Selection for more information. -
Page 9: Operation
Operation Installation Remove all packing materials from the DSA. Check that all foam and plastic padding is removed. Secure the equipment into a 19" rack. Connect all cables. Connecting Power / Circuit Size Requirements. The actual current draw, the amplifier demands from the AC mains, depends on many factors (its load, output level or the crest factor of its program material). -
Page 10: Mode Selection
Mode Selection The three-position, recessed Mode Select switch (located on the rear panel) configures the amplifier for either Stereo. Parallel or Bridged Mono Mode. Amplifiers are factory-configured for Stereo Mode. Stereo Mode In Stereo Mode, both channels operate independently, with their input attenuators controlling their respective levels. - Page 11 Bridged Mono Mode Bridged Mono Mode straps both amplifier channels together to make a very powerful, single-channel monaural amplifier. One channel "pushes" and the other "pulls" equally, doubling the power over that of channel alone. Signal is applied to the Channel A input only. Both attenuators are used to control signal level;...
-
Page 12: Connection Cables
Connection Cables Take care of the connector cables, always holding them by the connectors and avoiding knots and twists when coiling them: This gives the advantage of increasing their life and reliability, which is always to your advantage. Periodically check that your cables are in good condition, that they are correctly wired and that all their contacts are in good condition: a great number of problems (faulty contacts, ground hum, discharges, etc.) are caused entirely by using unsuitable or faulty cables. -
Page 13: Maintenance
Maintenance DAP Audio TAS requires almost no maintenance. However, you should keep the unit clean. Disconnect the mains power supply, and then wipe the cover with a damp cloth. Do not immerse in liquid. Do not use alcohol or solvents. Keep connections clean. -
Page 14: Product Specifications
Product Specifications Power TAS-1100 TAS-1500 TAS-1900 TAS-2400 TAS-4000 Stereo, 2 ohms (per ch.) 1200Wrms 1500Wrms 1800Wrms Stereo, 4 ohms (per ch.) 550Wrms 750Wrms 950Wrms 1200Wrms 2000Wrms Stereo, 8 oms (per ch.) 300Wrms 450Wrms 580Wrms 700Wrms 1200Wrms Bridge mono, 8 ohms... -
Page 15: Appendix 1: Tas Block Diagram
TAS Block Diagram... -
Page 16: Appendix 2: Wire Gauge Charts
Wire Gauge Chart (Metric) Stranded Cable Wire Gauge Power Loss % Power Loss % Power Loss % Length (m) (8 ohm load) (4 ohm load) (2 ohm load) 10,8 1,74 0,75 1,16 0,58 1,16 0,35 1,39 0,22 0,44 0,87 15,5 0,75 10,8 1,45... - Page 17 Wire Gauge Chart (AWG : American Wire Gauge Stranded Cable Wire Gauge Power Loss % Power Loss % Power Loss % Length(ft) (AWG) (8 ohm load) (4 ohm load) (2 ohm load) 0.81 1.61 0.51 1.02 0.32 0.64 1.28 0.128 0.25 0.51 1.61...


Need help?
Do you have a question about the TAS-1100 and is the answer not in the manual?
Questions and answers