Subscribe to Our Youtube Channel
Summary of Contents for DAPAudio ZA-240VTU
- Page 1 ZA-240VTU ORDERCODE D6143 Highlite International B.V. Vestastraat 2 6468 EX Kerkrade The Netherlands...
- Page 2 Congratulations! You have bought a great, innovative product from DAP Audio. DAP Audio ZA-240VTU brings excitement to any venue. Whether you want simple plug-&-play action or a sophisticated show, this product provides the effect you need. You can rely on DAP Audio, for more excellent audio products.
-
Page 3: Table Of Contents
DAP Audio DAP Audio ZA-240VTU Product Guide ™ Warning ................................... 3 Unpacking Instructions ............................. 3 Safety Instructions ..............................3 Operating Determinations ............................4 Return Procedure ..............................5 Description of the device ............................. 6 Frontpanel .................................. 6 Tuner/media player ..............................8 Backpanel .................................. -
Page 4: Warning
Save the carton and all packing materials. In the event that a device must be returned to the factory, it is important that the device is returned in the original factory box and packing. Your shipment includes: • DAP ZA-240VTU • FM Antenna • AM Antenna •... -
Page 5: Operating Determinations
Never use anything to cover the ground contact. Never leave any cables lying around. Do not insert objects into air vents. Do not connect this system to a dimmerpack. Do not switch the system on and off in short intervals, as this would reduce the system’s life. ... -
Page 6: Return Procedure
Connection with the mains Connect the device to the mains with the power-plug. Always pay attention, that the right color cable is connected to the right place. International EU (including UK) North America From April 2004 Brown Black Phase Blue White Neutral Green/Yellow... -
Page 7: Description Of The Device
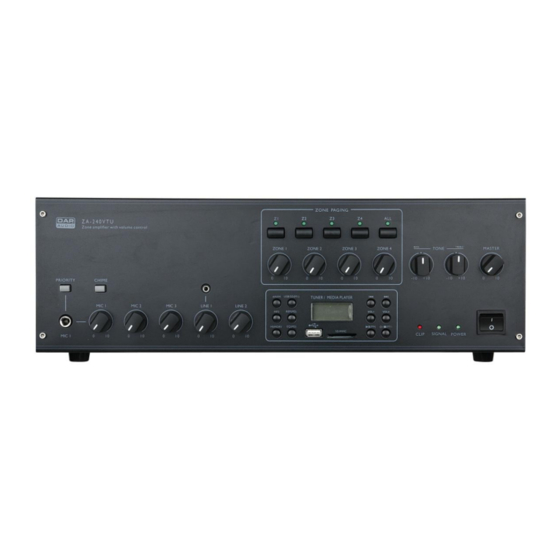
Description of the device Features The ZA-240VTU is a professional 100V 240W Zoneamp with built in tuner, USB/SD player and volume control. • 4 Zones, total power 240W • Inputs: 3 x Mic/Line, 2 x Line input • Front line input: 3,5mm Jack •... - Page 8 5. Zone volume controls Allows you to adjust the volume for the corresponding zones. Pos.0: mute Pos.1: -20 dB Pos.2: -14 dB Pos.3: -11 dB Pos.4: -8 dB Pos.5: -3 dB Pos.6: 0 dB 6. Bass control Use to adjust the Bass frequencies to your preference. 7.
-
Page 9: Tuner/Media Player
Tuner/media player Fig. 3 20. AM/FM radio selection button MP3 mode: Pushing this button allows you to enter tuner mode. Tuner mode: Pushing this button allows you to select either the AM band or the FM band. 21. USB/SD (M1) button MP3 mode: Pushing this button lets you select between USB or SD player mode. -
Page 10: Backpanel
Backpanel Fig. 2 35. AC-selector Before connecting your ZA-240VTU to the mains, make sure the AC-selector is set to the proper voltage used in your country. If you’re not sure, consult a skilled technician. AC Inlet with integrated fuse holder This connector is meant for the connection of the supplied main cord. - Page 11 39. Zone output terminals Each zone has it’s own output terminal. Each zone can be activated or deactivated by pushing the corresponding zone (4) buttons. Connect this terminal to the + terminal of your your high impedance (100V) speaker. The total power rating of the high impedance speakers connected to all zones summed together, should never exceed 240W.
-
Page 12: Operation
Operation Installation Remove all packing materials from the ZA-240VTU. Check that all foam and plastic padding is removed. Secure the equipment into a 19" rack if preferred. Connect all cables. Set Up and Operation Before plugging the unit in, always make sure that the power supply matches the product specification voltage. -
Page 13: Operating The Usb/Sd Player
Operating the USB/SD Player Switching between radio and MP3 playback Insert a USB stick or a SD stick and push the MP3 (27) button. Now the display will search for an inserted USB stick or SD card. The display will briefly show USB if a USB stick is inserted and then proceed in playback mode. During playback the display will show the current track as shown below. - Page 14 Repeat/ Random play Push the rep (22) button once to repeat the current track. Push the rep (22) button again to repeat the whole disc. Push the rep (22) button again to start random play. Push the rep (22) button a fourth time, to exit the Repeat/ Random Mode. Switching between USB and SD playback Make sure that an USB stick as well as a SD-card are inserted.
-
Page 15: Connecting Outputs
Connecting Outputs. Speakers are connected using terminal connectors. See the examples below and following page. Low impedance outputs You can use as many speakers as you want as long as the total impedance matches the amplifiers output. Example 1: using the 4Ω output with two 8Ω speakers. Fig. -
Page 16: Connection Cables
Connection Cables Take care of your cables, always holding them by the connectors and avoiding knots and twists when coiling them: This gives the advantage of increasing their life and reliability. Periodically check your cables. A great number of problems (faulty contacts, ground hum, discharges, etc.) are caused entirely by using unsuitable or faulty cables. -
Page 17: Maintenance
Maintenance DAP Audio ZA-240VTU requires almost no maintenance. However, you should keep the unit clean. Disconnect the mains power supply, and then wipe the cover with a damp cloth. Do not immerse in liquid. Do not use alcohol or solvents. -
Page 18: Product Specifications
Product Specifications Output Power: 240 W (1 kHz) Power outputs: 4Ohm, 8 Ohm, 70V, 100V (terminal strip) Aux output: Input 1: Microphone (6.3mm Jack) Input 2: Microphone (XLR) Input 3: Microphone (XLR) Input 4: Line (RCA) Input 5: Line (Back, RCA / Front 3.5mm jack) Tuner Presets: Media player: MP3 format... - Page 19 2013 Dap Audio.


Need help?
Do you have a question about the ZA-240VTU and is the answer not in the manual?
Questions and answers