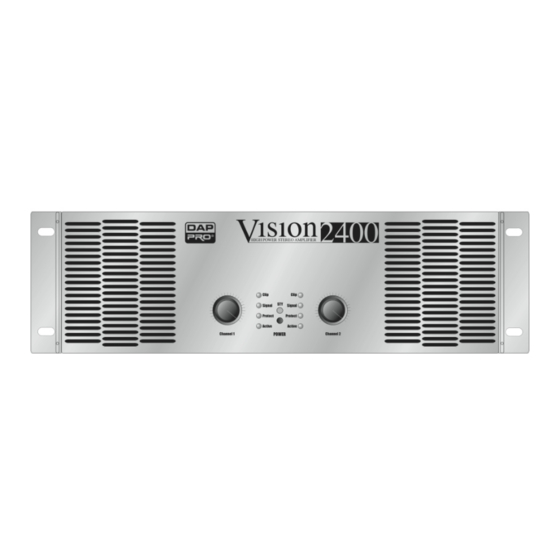
Summary of Contents for DAPAudio Vision 1600
- Page 1 Vision Vision 1600 ORDERCODE D4151 Vision 2400 ORDERCODE D4152 Vision 3500 ORDERCODE D4153...
- Page 2 Congratulations! You have bought a great, innovative product from DAP Audio. The DAP Audio Vision series bring excitement to any venue. Whether you want simple plug-&-play action or a sophisticated show, this product provides the effect you need. You can rely on DAP Audio, for more excellent audio products.
-
Page 3: Table Of Contents
DAP Audio DAP Audio Vision 1600, 2400, 3500 Product Guide Warning..…...................………………………………………….. Safety-instructions………………………………………………………………………………………….…. Operating Determinations……………………………………………………………………………………. Description..…................……….………………………………… Features………………………………………………………………………………….………………….…. Overview Front side..…………………………………………………………………………………..…… Overview Back side..…………………………………………………………………………………….…… Installation..............……………………………..………………………… Set Up and Operation..............……..…………………………….…… Connecting VISION 1600…………………..………………………………………………………..….……. Connecting VISION 2400 & 3500..………………….…………………………………………………..…. Maintenance………......…........………..………….…….………….….. Troubleshooting………......…........………..………….…….………….….. Product Specifications..............……………….…….…………………. -
Page 4: Warning
WARNING CAUTION! Keep this system away from rain and moisture! FOR YOUR OWN SAFETY, PLEASE READ THIS USER MANUAL CAREFULLY BEFORE YOUR INITIAL START-UP! SAFETY INSTRUCTIONS Every person involved with the installation, operation and maintenance of this system have to: be qualified follow the instructions of this manual CAUTION! Be careful with your operations. -
Page 5: Operating Determinations
• Always operate the unit with the AC ground wire connected to the electrical system ground. • Connecting amplifier outputs to oscilloscopes or other test equipment, while the amplifier is in bridged mode, may damage both the amplifier and test equipment. •... -
Page 6: Description
Description of the device Features The Vision 1600, 2400 and 3500 are professional high-end amplifiers : Vision 1600 • 2x Channel in and Link out • 2x Speakon out • Built-in Clip Limiter • Switch-able entrance sensitivity: 0.77V, 1V and 1.4V •... - Page 7 Overview 1. Air vents Don't obstruct or insert objects into air vents. 2. "POWER" Indicator This indicator lights when the power amplifier is switched on. 3. "CLIP" Indicator Any illumination of the clip indicates a state of over modulation (distortion at extremely high volumes). In this case, check the output signal of your mixer and turn down the input gain control.
- Page 8 6. LED "STAND BY” This indicator lights when you switch your power amplifier on and stays illuminated for a few seconds (during this time the power amplifier makes an auto-test). When the LED dims, it means the power Amplifier is ready to work. 7.
- Page 9 15. Channel 1 Turn lock Output Connect this turn lock output to a speaker. The branching is +1, -1 (except in bridge mode where the branching is +1, +2 for Vision 1600). 16. Channel 2 Turn Lock Output Connect this turn lock output to a speaker. The branching is +1, -1.
-
Page 10: Installation
You can connect the vision in 3 different modes: Stereo, Parallel and Bridged CONNECTING FOR VISION 1600 : Stereo mode: In this mode, connect the 2 inputs CH1 and CH2 to your mixer's outputs. - Page 11 Parallel mode: In this mode, connect the input CH1 to your mixer's outputs. Put the selector on the parallel position. Outputs volume can be adjusted by means of the two potentiometers. Connect the 2 turn lock outputs to the 2 speakers. Bridge mode: In this mode, connect the input CH1 to your mixer's outputs.
- Page 12 CONNECTING FOR VISION 2400, 3500 : Stereo mode: In this mode, connect the 2 inputs CH1 and CH2 to your mixer's outputs. Put the selector on the stereo position. Output volume can be adjusted by means of the two potentiometers. Connect the 2 turn lock outputs to the 2 speakers.
- Page 13 Parallel mode: In this mode, connect the input CH1 to your mixer's outputs. Put the selector on the parallel position. Outputs volume can be adjusted by means of the two potentiometers. Connect the 2 turn lock outputs to the 2 speakers. Bridge mode: In this mode, connect the input CH1 to your mixer's outputs.
-
Page 14: Maintenance
3. If all of the above appears to be O.K., plug the unit in again. 4. If you are unable to determine the cause of the problem, do not open the amplifier, as this may damage the unit and the warranty will become void. 5. Return the amplifier to your Dap Audio dealer. -
Page 15: Product Specifications
Product Specifications MODE VISION 1600 VISION 2400 VISION 3500 8ohm Stereo Power 520W 800W 1000W 4ohm Stereo Power 780W 1200W 1500W 8ohm Bridge Power 1560W 2400W 3000W Freq. Resp 20Hz-20KHz, 20Hz-20KHz(+0/-0.5dB) (+0/ 0.3,1W/8ohm) -3dB@100KHz THD+N <0.03% <0.03% <0.03% Slew Ratio... - Page 16 2003 Dap Audio.


Need help?
Do you have a question about the Vision 1600 and is the answer not in the manual?
Questions and answers