Subscribe to Our Youtube Channel
Summary of Contents for Gator HDDVR186
- Page 1 USER GUIDE HDDVR186...
- Page 2 Introduction Thank you for purchasing the Gator Digital Video Recorder 186. This product is designed to provide high quality recording of your trips for security and evidence in the case of an incident. Being portable, this convenient and durable multi-vehicle driving recorder can be used in a variety of situations for video recording.
- Page 3 Package Components: Mounting HD DVR 186 Bracket USB to Mini USB Car Charger 4G Micro SD HD DVR 186 Card User Guide...
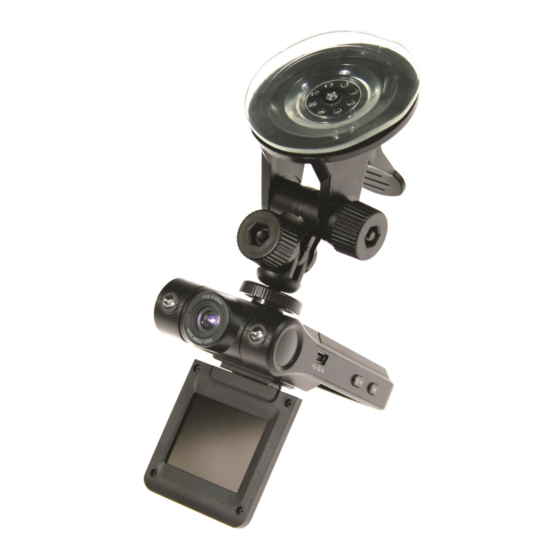
- Page 4 Product Structure: 1) LCD 9) Reset 2) Camera 10) Micro SD Card Slot 3) IR LEDs 11) MIC 4) Indicator LED 12) Bracket Hole 5) Ok/Record Button 13) Speaker 6) Power/Mode Button 14) Menu 7) Mini USB Output 15) Up Button 8) Battery Cover 16) Down Button...
- Page 5 Button Instructions Menu Button: Pressing this button once will open the menu. Pressing the menu button again while in the menu will change to the second settings tab. Up Button: The up button is used while in the menu to move the highlighted area for selecting. The up button can also be used to turn the IR LEDs on or off under standby while recording.
- Page 6 Extra Functions Auto Power On/Off: When turned on, once power is connected to the device, like when you start your car up, the DVR will automatically turn on and start recording. When the power is disconnected, or car is turned off, the DVR will automatically save the file and shutdown.
- Page 7 Basic Instructions for video and photo operation Powering on and off the device: To turn on the DVR hold down the power button, the red indication lamp will be light up if it is connected to a power source. To turn it off, hold down the power button and the device will turn off. WARNING: The device will automatically turn off once the battery hits critically low levels.
- Page 8 Menu setting features explained Before we begin, firstly there are two things that must be done before using the DVR. Go into the first menu (Video menu) and scroll down using the up/down arrow buttons on the side of the DVR until you get to the ‘Motion Detection’ setting, now highlighted in green. When setting is highlighted, press the OK button, on the side of your DVR, and select motion detection to ‘OFF’.
- Page 9 Light Frequency: This feature allows the best recording in conditions where street lights and ac lighting is used. The Australian standard frequency is 50HZ so it should be set to ‘50hz’. Date Input: This feature will allow you to change the year, month, day, time and date format using the up/down arrow buttons and using the OK button to move from year, month then day etc.
- Page 10 Product Specification Product Feature HQ Camera, HQ Recording LCD Size 1.8” TFT LCD Lens 120 Degree Wide Angle English/Simplified Chinese/Traditional Language Chinese/Japanese/French/Germany/Korean/Hebrew/Turkish/Russian/ /Spanish Video Format Video Resolution 640x480 (VGA) Loop Recording Recording with seamless Auto turn on/off while Supports turn on while car starts. And turn off while car turns off. car power on/off Motion Detection Supported...
- Page 11 Frequently Asked Questions Under normal operating conditions, if there are problems with the device, please refer to the following methods to resolve. Cannot take pictures or record video? Please check whether there is enough space on the micro SD card or internal storage. Stopping automatically while recording Due to the high amount of HD video data being recorded, please use a high speed micro SD card.
- Page 12 Technical Assistance If you need assistance setting up or using your Gator product now or in the future, call Gator Support. Australia TEL: 03 – 8587 8898 FAX: 03 – 8587 8866 Mon-Fri 9am – 5pm AEST Please retain this user guide for future reference.


Need help?
Do you have a question about the HDDVR186 and is the answer not in the manual?
Questions and answers