Sign In
Upload
Manuals
Brands
Tascam Manuals
Recording Equipment
DR-40
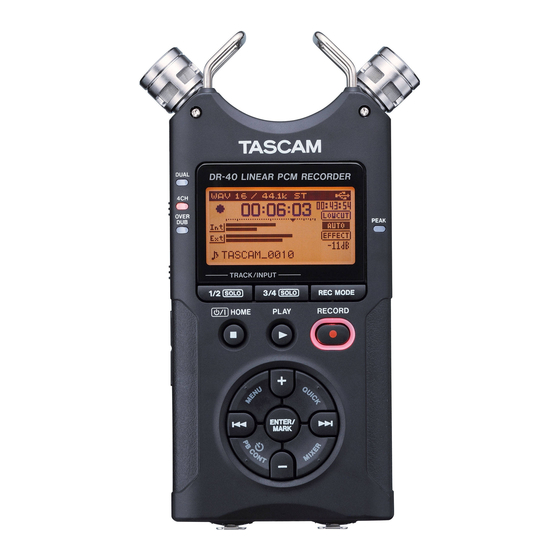
Tascam DR-40 Manuals
Manuals and User Guides for Tascam DR-40. We have
6
Tascam DR-40 manuals available for free PDF download: Owner's Manual, Reference Manual, Release Note
Tascam DR-40 Owner's Manual (140 pages)
Linear PCM Recorder
Brand:
Tascam
| Category:
Voice Recorder
| Size: 4.09 MB
Table of Contents
English
6
Declaration of Conformity
3
Table of Contents
6
Introduction
7
Included Items
7
Note about the Reference Manual
7
Precautions for Placement and Use
7
Beware of Condensation
7
Cleaning the Unit
7
Using the TEAC Global Site
7
User Registration
7
Names of Parts
8
Top
8
Front
8
Left Side
8
Right Side Panel
8
Bottom
9
Home Screen
9
Preparation
10
Powering the Unit
10
Turning the Unit on
10
Setting the Built-In Clock
11
Turning the Unit off
11
Connecting Monitoring Equipment
11
Attaching the Tilt Foot
11
Basic Operation Procedures
11
Menu Structure
11
Recording
12
Recording Screen
12
Note about Recording Standby
13
Recording Menu Structure
13
Manually Adjusting the Input Level
13
Using the Level Control Function
13
Recording
14
Setting the Low-Cut Filter
14
Playback
14
Playback Control Screen
14
Playback Menu Structure
15
Playing Back Recordings
15
Adjusting the Playback Volume
15
Selecting Files for Playback (Skipping)
15
Quick Operations
15
QUICK Button Overview
15
Connecting with a Computer
16
Connecting with a Computer Using USB
16
Exchanging Files with a Computer
16
Disconnecting from a Computer
16
Other Settings and Information
16
Turning the Built-In Speaker off
16
System Settings
16
Quick Reference for Using Various Functions
17
Messages
21
Troubleshooting
22
Specifications
23
Ratings
23
Inputs and Outputs
23
Control Input/Output Ratings
23
Audio Performance
23
Recording Times
24
Requirements for Connected Computers
24
General
24
Français
28
Attention À la Condensation
29
Introduction
29
Nettoyage de L'unité
29
Note À Propos du Manuel de Référence
29
Précautions Concernant L'emplacement Et L'emploi
29
Utilisation du Site Mondial TEAC
29
Éléments Fournis
29
Nomenclature des Parties
30
Face Supérieure
30
Face Avant
30
Face Latérale Gauche
30
Face Latérale Droite
30
Face Inférieure
31
Écran D'accueil
31
Préparation
32
Alimentation de L'unité
32
Mise Sous Tension de L'unité
32
Réglage de L'horloge Intégrée
33
Mise Hors Tension de L'unité
33
Branchement D'un Équipement D'écoute de Contrôle
33
Fixation du Pied D'inclinaison
33
Procédures D'édition de Base
33
Structure du Menu
33
Enregistrement
34
Écran D'enregistrement
34
Note Sur L'armement D'enregistrement
35
Structure du Menu D'enregistrement
35
Réglage Manuel du Niveau D'entrée
35
Emploi de la Fonction de Contrôle de Niveau
35
Enregistrement
36
Réglage du Filtre Coupe-Bas (LOW CUT)
36
Lecture
36
Écran de Contrôle de Lecture
36
Lecture des Enregistrements
37
Réglage du Volume de Lecture
37
Opérations Rapides
37
Sélection des Fichiers À Lire (Saut)
37
Présentation de la Touche QUICK
37
Structure du Menu de Lecture
37
Autres Réglages Et Informations
38
Désactivation du Haut-Parleur Intégré
38
Réglages du Système
38
Branchement À un Ordinateur
38
Branchement À un Ordinateur Par USB
38
Échange de Fichiers Avec un Ordinateur
38
Déconnexion D'un Ordinateur
38
Référence Rapide Pour L'emploi des Diverses Fonctions
39
Tascam Dr-
40
Messages
43
Guide de Dépannage
44
Caractéristiques Techniques
45
Données
45
Entrées Et Sorties
45
Performances Audio
45
Durées D'enregistrement
46
Configurations Informatiques Requises Pour Les Ordinateurs Connectés
46
Générales
46
Español
50
Cuidado con la Condensación
51
Elementos Incluidos
51
Introducción
51
Limpieza de la Unidad
51
Nota Acerca del Manual de Referencia
51
Precauciones sobre la Ubicación
51
Registro de Usuario
51
Uso de la Página Web Global de TEAC
51
Nombre de las Partes
52
Panel Superior
52
Panel Frontal
52
Panel Izquierdo
52
Panel Derecho
52
Panel Inferior
53
Pantalla Inicial
53
Preparativos
54
Alimentación de la Unidad
54
Encendido
54
Ajuste del Reloj Interno
55
Apagado
55
Conexión de Monitores
55
Colocación de la Pata
55
Operaciones Básicas
55
Estructura del Menú
55
Grabación
56
Pantalla de Grabación
56
Nota Acerca de la Espera de Grabación
57
Estructura del Menú de Grabación
57
Ajuste Manual del Nivel de Entrada
57
Uso de la Función de Control de Nivel
57
Grabación
58
Ajuste del Filtro de Corte de Graves
58
Reproducción
58
Pantalla de Control de Reproducción
58
Estructura del Menú de Reproducción
59
Reproducción de Grabaciones
59
Ajuste del Volumen de Reproducción
59
Selección de Ficheros para la Reproducción (Salto)
59
Operaciones Directas
59
Resumen del Botón QUICK
59
Conexión con un Ordenador
60
Conexión con un Ordenador Vía USB
60
Intercambio de Ficheros con un Ordenador
60
Desconexión de un Ordenador
60
Otros Ajustes E Información
60
Desactivación del Altavoz Interno
60
Ajustes del Sistema
60
Referencia Rápida para el Uso de Diversas Funciones
61
Mensajes
65
Resolución de Problemas
66
Especificaciones Técnicas
67
Formatos y Soportes
67
Entradas y Salidas
67
Entrada/Salida de Control
67
Rendimiento Audio
67
Tiempos de Grabación
68
Requisitos para la Conexión de Ordenadores
68
General
68
Deutsch
73
Wichtige Sicherheitshinweise
69
Hinweise und Warnungen
70
Auspacken/Lieferumfang
74
Bevor Sie Beginnen
74
Den Recorder Reinigen
74
Die Globale TEAC-Website Nutzen
74
Ergänzende Sicherheitshinweise zur Aufstellung
74
Kondensation Vermeiden
74
Hinweis zum Referenzhandbuch
74
Die Produktbestandteile IM Überblick
75
Geräteoberseite
75
Vorderseite
75
Linke Geräteseite
75
Rechte Geräteseite
75
Geräteunterseite
76
Die Hauptseite auf dem Display
76
Vorbereitende Schritte
77
Stromversorgung des Recorders
77
Den Recorder Einschalten
77
Datum und Uhrzeit der Eingebauten Uhr Einstellen
78
Den Recorder Ausschalten
78
Kopfhörer oder eine Monitoranlage Anschließen
78
Den Fuß für Schräge Aufstellung Befestigen
78
Grundsätze für die Verwendung des Menüs
78
Das Menü IM Überblick
79
Aufnehmen
79
Die Aufnahmeseite auf dem Display
79
Hinweise zur Aufnahmebereitschaft
80
Aufbau des Aufnahme-Menüs
80
Den Eingangspegel von Hand Anpassen
81
Die Automatische Pegel Anpassung Nutzen
81
Aufnehmen
81
Das Trittschallfilter Nutzen
81
Wiedergeben
82
Die Übungsfunktionen Nutzen
82
Aufbau des Wiedergabe-Menüs
82
Aufnahmen Wiedergeben
82
Die Wiedergabelautstärke Anpassen
82
Eine Datei mit den Sprungtasten Auswählen
82
Das Schnellmenü Nutzen
83
Das Schnellmenü IM Überblick
83
Eine Verbindung mit einem Computer Herstellen
83
Eine USB-Verbindung mit einem Computer Herstellen
83
Dateien mit einem Computer Austauschen
83
Die Verbindung mit dem Computer Trennen
83
Weitere Einstellungen und Informationen
83
Den Eingebauten Lautsprecher Ausschalten
83
Systemeinstellungen Vornehmen
83
Kurzreferenz für Häufig Verwendete Funktionen
84
Displaymeldungen
89
Fehlerbehebung
90
Technische Daten
91
Allgemein
91
Eingänge und Ausgänge
91
Leistungsdaten Audio
91
Aufnahmezeit
92
Systemanforderungen Computer
92
Stromversorgung und Sonstige Daten
92
Italiano
96
Articoli Inclusi
97
Attenzione Alla Condensa
97
Introduzione
97
Nota Sul Manuale DI Riferimento
97
Precauzioni Per Il Posizionamento E L'uso
97
Pulizia Dell'unità
97
Uso del Sito TEAC Global
97
Nomi Delle Parti
98
Sopra
98
Frontale
98
Pannello Laterale Sinistro
98
Pannello Laterale Destro
98
Pannello Sul Fondo
99
Registrazione Utente
98
Schermata Principale
99
Preparativi
100
Accensione Dell'unità
100
Avvio Dell'unità
100
Impostazione Dell'orologio Incorporato
100
Spegnimento Dell'unità
101
Collegamento del Monitoraggio
101
Montare Il Piede DI Inclinazione
101
Procedure Operative DI Base
101
Struttura del Menu
101
Registrazione
102
Schermata DI Registrazione
102
Nota Sull'attesa DI Registrazione
103
Struttura del Menu Registrazione
103
Regolare Manualmente Il Livello DI Ingresso
103
Usare la Funzione DI Controllo del Livello
103
Registrazione
104
Impostare Il Filtro Low Cut
104
Riproduzione
104
Schermata Playback Control
104
Struttura del Menu Riproduzione
105
Riproduzione Delle Registrazioni
105
Regolare Il Volume DI Riproduzione
105
Selezione Dei File Per la Riproduzione (Saltare)
105
Operazioni Quick
105
Panoramica del Pulsante QUICK
105
Altre Impostazioni E Informazioni
106
Disattivare L'altoparlante Incorporato
106
Impostazioni DI Sistema
106
Collegamento a un Computer
106
Collegamento a un Computer Tramite USB
106
Scambiare File con un Computer
106
Disconnessione da un Computer
106
Riferimento Rapido Per L'utilizzo DI Varie Funzioni
106
Riferimento Rapido Per Utilizzare Le Varie Funzioni
106
Messaggi
110
Risoluzione Dei Problemi
111
Specifiche
113
Dati Tecnici
113
Ingressi E Uscite
113
Prestazioni Audio
113
Tempi DI Registrazione
114
Requisiti Per I Computer Collegati
114
Generali
114
安全にお使いいただくために
115
電池の取り扱いについて
116
日本語
117
はじめに
117
リファレンスマニュアルについて
117
アフターサービス
118
ユーザー登録について
118
本製品の構成
118
結露について
118
製品のお手入れ
118
設置上の注意
118
トップパネル
119
フロントパネル
119
各部の名称
119
左サイドパネル
119
ホーム画面
120
ボトムパネル
120
右サイドパネル
120
内蔵時計の設定
121
電源の準備
121
電源をオンにする
121
チルトフットを取り付ける
122
メニュー構成
122
モニター用機器を接続する
122
基本的な操作方法
122
録音画面
122
電源をオフにする
122
レベルコントロール機能を使う
124
手動で入力レベルを調節する
124
録音する
124
録音メニュー構成
124
録音待機状態について
124
ローカットフィルターを設定する
125
再生する
125
再生の音量を調節する
125
再生コントロール画面
125
再生メニュー構成
125
Quickボタンの概要
126
クイック操作
126
パソコンとUsb接続する
126
パソコンとの接続を解除する
126
パソコンと接続する
126
パソコンへファイルを取り出す、 パソコンからファイルを取り込む
126
内蔵スピーカーをオフにする
126
再生するファイルを選択する (スキップ
126
各種設定および情報表示
126
環境設定(System
126
こんなことをするには
127
メッセージ
131
トラブルシューティング
133
オーディオ性能
134
入出力
134
接続するパソコンの動作条件
134
録音時間
134
Advertisement
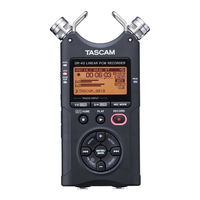
Tascam DR-40 Owner's Manual (120 pages)
Linear PCM Recorder
Brand:
Tascam
| Category:
Voice Recorder
| Size: 6.62 MB
Table of Contents
Important Safety Precautions
2
Important Safety Instructions
3
Safety Information
4
Table of Contents
6
Quick Start Guide
10
1 Introduction
12
Features
12
Items Included with the Product
14
Conventions Used in this Manual
14
Intellectual Property Rights
15
About SD Cards
16
Precautions for Use
16
Precautions for Placement and Use
17
Beware of Condensation
17
Cleaning the Unit
17
User Registration
17
2 Names and Functions of Parts
18
Top Panel
18
Front Panel
22
Left Side Panel
23
Right Side Panel
23
Bottom Panel
24
Home Screen
25
Recording Screen
27
Playback Control Screen
29
Menu Item List
30
Using Menus
31
Basic Operation
32
3 Preparation
34
Powering the Unit
34
Using AA Batteries
34
Using an AC Adaptor (Sold Separately)
35
Using USB Bus Power
35
Start-Up & Shutdown
36
Starting up the Unit
36
Shutting down
37
Resume Function
37
Setting the Date and Time
37
Inserting and Removing SD Cards
38
Inserting the SD Card
38
Removing the Card
39
Card Write Protection
39
Preparing an SD Card for Use
40
Using the Built-In Speaker
40
Connecting Monitors and Headphones
41
Using the Built-In Microphone
41
Setting the Mics to Record a Wide Stereo Sound (A-B Position)
41
Setting the Mics to Record a Clear Stereo Sound (X-Y Position)
42
Swapping the Left-Right Channels of the Built-In Microphone Pair
42
Microphone Position Detection
43
Attaching the Tilt Foot
44
4 Recording
45
Selecting File Format, Sampling Frequency, and Maximum File Size
45
Preparing the Recording Inputs
46
Recording with the Built-In Mics
46
Recording with External Mics (EXT MIC IN)
46
Recording an External Device (LINE IN)
47
Setting the External Input Type
48
Using Phantom Power
48
Adjusting the Input Level
49
Manually Adjusting the Input Level
49
Using the Level Control Function
50
Overview of Recording Modes
51
Recording (MONO/STEREO Recording)
52
Make Recording Settings
52
Set Where to Save the File
53
Starting the Recording
53
File Names When Recording in MONO/STEREO
54
Simultaneously Recording Two Files at Different Input Levels (DUAL REC)
54
Enabling Dual Recording
54
Starting Dual Recording
56
Dual Recording File Names
56
Recording 4 Channels
57
Making 4-Channel Recording Settings
57
Starting 4-Channel Recording
58
File Names When Recording in 4-Channel
58
Recording Playback and Input Sounds Together (Overdubbing)
58
Setting the Overdubbing Mode
59
Select the File You Want to Overdub
60
Start the Overdubbing
60
File Names When Recording in Overdubbing
61
Recording Automatically (AUTO REC)
62
Creating and Changeover to a New File During Continued Recording (Track Increment)
63
Manual Track Increment During Recording
64
Automatic Track Increment by File Size
64
Mark Function
65
Adding Marks Manually to a Recording
65
Adding Marks Automatically to a Recording
65
Moving to a Mark Position
65
Setting the Low Cut Filter
66
Recording the Moment before Pushing RECORD (PRE REC)
66
Self-Timer Function
67
Solo Function
67
Recording Duration
68
Tascam
69
5 Working with Files and Folders (BROWSE Screen)
69
Screen Navigation
69
Icons on the BROWSE Screen
70
File Operations
70
Folder Operations
72
Creating a New Folder
73
6 Playback
74
Adjusting Playback Volume
74
Setting the Playback Area (AREA)
74
Selecting a Folder for the Playback Area (1)
75
Selecting a Folder for the Playback Area (2)
76
Playlist
77
Adding Files to the Playlist
77
Editing the Playlist
77
Selecting Files for Playback (Skip)
79
Playback
79
Pausing
80
Stopping
80
Rewinding and Fast-Forwarding (Search)
80
Repeat Playback (REPEAT)
80
Special Playback Control Functions
81
Playback Control Screen
81
Repeated Playback of Selection (Loop Playback)
82
Changing the Playback Speed (VSA)
83
Using the Playback Equalizer (PLAY EQ)
83
Moving Back a few Seconds for Replay (Jump-Back Playback)
84
Playback of Files Recorded Using Dual Recording
84
OVERDUB INPUT MUTE Function (During Playback)
85
Solo Function
85
7 Quick Operations
86
Features of the QUICK Button
86
Quick Menu Screen
87
Closing the Quick Menu Screen
88
Deleting the Selected File (Quick Delete)
88
Dividing the Selected File (DIVIDE)
89
Increasing the Perceived Overall Sound Pressure to Enhance Listenability (Level Alignment)
90
Mixdown
91
8 Using the Effects
92
Setting the Effect
92
Effects Preset List
93
9 Mixer
94
Making Mixer Settings
94
Using the MS Decoder
95
Decoding the Input Sound as You Record
95
Decoding the Playback Sound
95
MS Decoder Settings
95
10 Tuning a Musical Instrument (Tuner)
97
Using the Tuner
97
Setting the Tuner
97
Tuning a Musical Instrument
97
11 - Connecting with a Computer
98
Transferring Files to a Computer
99
Transferring Files from a Computer
99
Disconnecting from a Computer
99
12 - Settings and Information
100
Viewing File Information
100
File Information Page
100
Card Information Page
101
System Information Page
101
System Settings and Formatting
101
Turning the Unit Power off Automatically
102
Setting the Backlight
102
Adjusting the Display Contrast
102
Setting the Type of AA Batteries
102
Setting the Phantom Power Voltage
102
Restoring the Factory Settings
103
Using QUICK FORMAT
103
Using FULL FORMAT
103
Setting the Format of File Names
104
File Name Format
104
Setting the WORD Item
105
Resetting the Number (COUNT)
105
13 - Using the REMOTE Jack
106
Footswitch (TASCAM RC-3F)
106
Setting Footswitch Operation
106
Using the Footswitch
107
Mode Functions
107
Remote Control (TASCAM RC-10)
107
Setting the Wired Remote Control
107
Using the Wired Remote Control
108
Overview of Mode Functions
108
14 - Messages
109
15 - Troubleshooting
112
16 - Specifications
114
Ratings
114
Input/Output Ratings
114
Analog Audio Input/Output Ratings
114
Control Input/Output Ratings
115
Audio Performance
115
Computer Compatibility
115
Other Specifications
116
Dimensional Drawings
117
Tascam DR-40 Reference Manual (116 pages)
Linear PCM Recorder
Brand:
Tascam
| Category:
Recording Equipment
| Size: 1.82 MB
Table of Contents
Table of Contents
2
1 Introduction
6
Features
6
Conventions Used in this Manual
8
2 Names and Functions of Parts
9
Top Panel
9
Front Panel
13
Left Side Panel
14
Right Side Panel
14
Bottom Panel
15
Home Screen
16
Recording Screen
18
Playback Control Screen
20
Menu Item List
21
Using Menus
22
Basic Operation
23
3 Preparation
25
Powering the Unit
25
Using AA Batteries
25
Using an AC Adaptor (Sold Separately)
26
Using USB Bus Power
26
Start-Up & Shutdown
27
Starting up the Unit
27
Shutting down
28
Resume Function
28
Setting the Date and Time
28
Inserting and Removing SD Cards
29
Inserting the SD Card
29
Removing the Card
30
Card Write Protection
30
Preparing an SD Card for Use
31
Using the Built-In Speaker
31
Connecting Monitors and Headphones
32
Using the Built-In Microphone
32
Setting the Mics to Record a Wide Stereo Sound (A-B Position)
32
Setting the Mics to Record a Clear Stereo Sound (X-Y Position)
33
Swapping the Left-Right Channels of the Built-In Microphone Pair
33
Microphone Position Detection
34
Attaching the Tilt Foot
35
4 Recording
36
Selecting File Format, Sampling Frequency
36
Preparing the Recording Inputs
37
Recording with the Built-In Mics
37
Recording with External Mics (EXT MIC IN)
37
Recording an External Device (LINE IN)
38
Setting the External Input Type
38
Using Phantom Power
39
Adjusting the Input Level
39
Manually Adjusting the Input Level
40
Independent L/R Channel EXT in Input Level Setting Function
41
Using the Level Control Function
42
Overview of Recording Modes
43
Recording (MONO/STEREO Recording)
44
Make Recording Settings
44
Set Where to Save the File
45
Starting the Recording
45
File Names When Recording in MONO/STEREO
46
Simultaneously Recording Two Files at Different Input Levels (DUAL REC)
46
Enabling Dual Recording
46
Starting Dual Recording
48
Dual Recording File Names
48
Recording 3 or 4 Channels
49
Making Settings for 3/4-Channel Recording
49
Starting 3/4-Channel Recording
50
File Names When Recording in 4-Channel
50
Recording Playback and Input Sounds Together (Overdubbing)
51
Setting the Overdubbing Mode
51
Select the File You Want to Overdub
52
Start the Overdubbing
53
File Names When Recording in Overdubbing
53
MIX Mode
54
Recording Automatically (AUTO REC)
55
Creating and Changeover to a New File During Continued Recording (Track Increment)
56
Manual Track Increment During Recording
56
Automatic Track Incrementation by Set Time
56
Mark Function
57
Adding Marks Manually to a Recording
57
Adding Marks Automatically to a Recording
58
Moving to a Mark Position
58
Setting the Low Cut Filter
58
Recording the Moment before Pushing RECORD (PRE REC)
59
Using the AUTO TONE Function
60
Setting the AUTO TONE Function
60
Setting Auto Tone Length
61
Adjusting the AUTO TONE Volume
61
Self-Timer Function
62
Solo Function
62
Recording Duration
63
5 Working with Files and Folders (BROWSE Screen)
64
Screen Navigation
64
Icons on the BROWSE Screen
65
File Operations
65
Folder Operations
67
Creating a New Folder
68
6 Playback
69
Adjusting Playback Volume
69
Setting the Playback Area (AREA)
69
Selecting a Folder for the Playback Area (1)
70
Selecting a Folder for the Playback Area (2)
71
Playlist
72
Adding Files to the Playlist
72
Editing the Playlist
72
Selecting Files for Playback (Skip)
74
Playback
74
Pausing
75
Stopping
75
Rewinding and Fast-Forwarding (Search)
75
Repeat Playback (REPEAT)
75
Special Playback Control Functions
76
Playback Control Screen
76
Repeated Playback of Selection (Loop Playback)
77
Changing the Playback Speed (VSA)
78
Using the Playback Equalizer (PLAY EQ)
78
Moving Back a few Seconds for Replay (Jump-Back Playback)
79
Playback of Files Recorded Using Dual Recording
79
OVERDUB INPUT MUTE Function (During Playback)
80
Solo Function
80
7 Quick Operations
81
Features of the QUICK Button
81
Quick Menu Screen
82
Closing the Quick Menu Screen
83
Deleting the Selected File (Quick Delete)
83
Dividing the Selected File (DIVIDE)
84
Dividing the Selected File Automatically at Marks (AUTO DIVIDE)
85
Increasing the Perceived Overall Sound Pressure to Enhance Listenability (Level Alignment)
86
Mixdown
87
8 Using the Effects
88
Setting the Effect
88
Effects Preset List
89
9 Mixer
90
Making Mixer Settings
90
Using the MS Decoder
91
Decoding the Input Sound as You Record
91
Decoding the Playback Sound
91
MS Decoder Settings
92
10 Tuning a Musical Instrument (Tuner)
93
Using the Tuner
93
Setting the Tuner
93
Tuning a Musical Instrument
94
11 - Connecting with a Computer
95
Transferring Files to a Computer
96
Transferring Files from a Computer
96
Disconnecting from a Computer
96
12 - Settings and Information
97
Viewing File Information
97
File Information Page
97
Card Information Page
98
System Information Page
98
System Settings and Formatting
99
Setting the Automatic Power Saving Function
99
Setting the Backlight
99
Adjusting the Display Contrast
99
Setting the Type of AA Batteries
99
Setting the Phantom Power Voltage
100
Restoring the Factory Settings
100
Using QUICK FORMAT
100
Using FULL FORMAT
100
Setting the Format of File Names
101
File Name Format
101
Setting the WORD Item
102
Resetting the Number (COUNT)
102
13 - Using the REMOTE Jack
103
Footswitch (TASCAM RC-3F)
103
Setting Footswitch Operation
103
Using the Footswitch
104
Mode Functions
104
Remote Control (TASCAM RC-10)
104
Setting the Wired Remote Control
104
Using the Wired Remote Control
105
Overview of Mode Functions
105
14 - Messages
106
15 - Troubleshooting
109
16 - Specifications
111
Ratings
111
Input/Output Ratings
111
Analog Audio Input/Output Ratings
111
Control Input/Output Ratings
112
Audio Performance
112
Computer Compatibility
112
Other Specifications
113
Dimensional Drawings
115
Advertisement
Tascam DR-40 Reference Manual (116 pages)
Linear PCM Recorder
Brand:
Tascam
| Category:
Recording Equipment
| Size: 1.91 MB
Table of Contents
Introduction
6
Conventions Used in this Manual
8
Names and Functions of Parts
9
Front Panel
13
Left Side Panel
14
Bottom Panel
15
Home Screen
16
Recording Screen
18
Playback Control Screen
20
Menu Item List
21
Using Menus
22
Basic Operation
23
Preparation
25
Using an AC Adaptor (Sold Separately)
26
Start-Up & Shutdown
27
Shutting down
28
Setting the Date and Time
29
Inserting and Removing SD Cards
30
Card Write Protection
30
Preparing an SD Card for Use
31
Using Built-In Speaker
31
Connecting Monitors and Headphones
32
Setting the Mics to Record a Clear Stereo Sound (X-Y Position)
33
Microphone Position Detection
34
Recording
36
Preparing the Recording Inputs
37
Recording an External Device (LINE IN)
38
Using Phantom Power
39
Adjusting Input Level
39
Tascam Dr-
40
Manually Adjusting Input Level
40
Independent L/R Channel EXT in Input Level Setting Function
41
Using the Level Control Function
42
Overview of Recording Modes
43
Set Where to Save the File
44
File Names When Recording in MONO/STEREO
45
Enabling Dual Recording
46
Starting Dual Recording
47
Dual Recording File Names
48
Starting 3/4-Channel Recording
50
Setting the Overdubbing Mode
51
Select the File You Want to Overdub
52
File Names When Recording in Overdubbing
53
Recording Automatically (AUTO REC)
54
Manual Track Increment During Recording
56
Mark Function
57
Setting the Low Cut Filter
58
Using the AUTO TONE Function
59
Setting the AUTO TONE Function
60
Self-Timer Function
61
Recording Duration
62
Working with Files and Folders (BROWSE Screen)
63
Icons on the BROWSE Screen
64
Folder Operations
66
Creating a New Folder
67
Playback
68
Selecting a Folder for the Playback Area (1)
69
Selecting a Folder for the Playback Area (2)
70
Playlist
71
Selecting Files for Playback (Skip)
73
Pausing
74
Special Playback Control Functions
75
Repeated Playback of Selection (Loop Playback)
76
Changing the Playback Speed (VSA)
77
Moving Back a few Seconds for Replay (Jump-Back Playback)
78
OVERDUB INPUT MUTE Function (During Playback)
79
Quick Operations
80
Quick Menu Screen
81
Closing the Quick Menu Screen
82
Deleting Selected File
82
Dividing the Selected File (DIVIDE)
83
Dividing the Selected File Automatically at Marks (AUTO DIVIDE)
84
Mixdown
86
Using the Effects
87
Effects Preset List
88
Mixer
89
Using the MS Decoder
90
MS Decoder Settings
91
Using the Tuner
92
Tuning a Musical Instrument
93
Connecting with a Computer
94
Transferring Files to a Computer
95
Settings and Information
96
Card Information
97
System Settings and Formatting
98
Setting the Phantom Power Voltage
99
Using QUICK FORMAT
100
Setting the Format of File Names
101
Using the REMOTE Jack
102
Using the Footswitch
103
Using the Wired Remote Control
104
Messages
105
Troubleshooting
108
Specifications
110
Audio Performance
111
Other Specifications
112
Dimensional Drawings
114
Tascam DR-40 Release Note (3 pages)
DR-40 Firmware Version 1.20 Release Notes
Brand:
Tascam
| Category:
Voice Recorder
| Size: 0.31 MB
Tascam DR-40 Release Note (2 pages)
DR-40 Firmware Version 1.01 Release Notes
Brand:
Tascam
| Category:
Voice Recorder
| Size: 0.15 MB
Advertisement
Related Products
Tascam dr-44wl
Tascam DR-2d
Tascam DR-100 MKIII
Tascam DR-680
Tascam DR-60D
Tascam DR-V1HD
Tascam DR-60DmkII
Tascam DR-10X
Tascam DR-10C
Tascam DR-10CH
Tascam Categories
Recording Equipment
Music Mixer
Voice Recorder
CD Player
Accessories
More Tascam Manuals
Login
Sign In
OR
Sign in with Facebook
Sign in with Google
Upload manual
Upload from disk
Upload from URL