Sign In
Upload
Manuals
Brands
Ricoh Manuals
All in One Printer
2015
Ricoh 2015 Manuals
Manuals and User Guides for Ricoh 2015. We have
3
Ricoh 2015 manuals available for free PDF download: General Settings Manual, Operating Instructions Manual, Manual
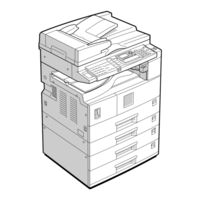
Ricoh 2015 General Settings Manual (814 pages)
Ricoh Printer/Scanner Operating Instructions
Brand:
Ricoh
| Category:
All in One Printer
| Size: 19.24 MB
Table of Contents
Table of Contents
9
Operating Instructions
1
Manuals for this Machine
3
Machine Types
5
What You Can Do with this Machine
6
Copier, Facsimile, Printer, and Scanner Functions
6
Paperless Fax Transmission
6
Fax Transmission and Reception through the Internet
7
Using the Scanner in a Network Environment
7
Administrating the Machine (Security Functions)
7
Monitoring the Machine Using a Computer
8
Table of Contents
9
Copyrights and Trademarks
13
Trademarks
13
Information about Installed Software
14
How to Read this Manual
19
Names of Major Options
19
ENERGY STAR Program
20
1 Getting Started
23
Guide to Components
23
Options
25
External Options
25
Internal Options
26
Control Panel
27
Display
29
Reading the Display and Using Keys
29
2 Combined Function Operations
31
Changing Modes
31
System Reset
32
Multi-Access
33
Function Compatibility
34
3 User Tools (System Settings)
36
User Tools Menu (System Settings)
37
Accessing User Tools (System Settings)
38
Changing Default Settings
38
Quitting User Tools
39
Settings You Can Change with User Tools
40
General Features
40
Tray Paper Settings
42
Timer Settings
44
Key Operator Tools
46
Print Counter List
47
Display/Print Counter
47
Destination List
50
User Code (for Machine with Copier Function Only)
51
Registering a New User Code
51
Changing a User Code
52
Deleting a User Code
52
Displaying the Counter for each User Code
53
Printing the Counter for each User Code
54
Clearing the Counter
54
Address Book
55
Registering Destination Information
56
Registering Sender Information
56
User Code (MFP)
57
Registering a New User Code
57
Changing a User Code
58
Deleting a User Code
61
Displaying the Counter for each User Code
64
Printing the Counter for each User Code
65
Clearing the Counter
66
Fax Destination
67
Registering a Fax Destination
67
Changing a Registered Fax Destination
69
Deleting a Registered Fax Destination
72
E-Mail Destination
76
Registering an E-Mail Destination
76
Changing a Registered E-Mail Destination
78
Deleting a Registered E-Mail Destination
81
Registering Destinations to a Group
85
Registering a New Group
85
Registering a Destination to a Group
86
Deleting a Destination from a Group
87
Displaying the Destinations Registered in Groups
90
Changing a Group Name
91
Deleting a Group
93
4 Troubleshooting
95
If Your Machine Does Not Operate as You Want
95
Clearing Misfeeds
97
Changing the Paper Size
100
Changing the Paper Size of the Paper Tray
100
Changing the Paper Size in the Optional Paper Tray Unit
102
5 Other Functions
105
Displaying the Total Counter
105
Changing the Language
105
6 Entering Text
107
Available Characters
107
Keys
107
How to Enter Text
107
Entering Letters
108
Entering Numbers
108
Entering Symbols
108
Deleting Characters
108
7 Security
109
Primary Security Functions
109
Extended Security Function
109
Operating Environment and Notes
111
Operating Environment
111
For Administrator
111
For User
111
8 Specifications
113
Main Unit
113
Options
117
Exposure Glass Cover
117
Auto Document Feeder (ADF)
117
Auto Document Feeder Capable of Scanning both Sides of a Sheet (ARDF)
118
Internal Tray 2 (1 bin Tray)
118
Paper Tray Unit (1-Tray Type)
119
Paper Tray Unit (2-Tray Type)
120
Copy Paper
121
Recommended Paper Sizes and Types
121
Unusable Paper
123
Paper Storage
124
Index
125
Table of Contents
135
Notice
139
How to Read this Manual
140
Names of Major Options
140
Safety Information
141
Safety During Operation
141
Positions of Labels and Hallmarks for R
143
R WARNING and R R CAUTION Labels
143
Machine Types
144
Control Panel
145
Main Power Indicator
146
On Indicator
146
Display
147
Reading the Display and Using Keys
147
Turning on the Power
149
Turning on the Main Power
149
Turning off the Power
150
Turning off the Main Power
150
Saving Energy
151
Originals
153
Sizes and Weights of Recommended Originals
153
Sizes Detectable with Auto Paper Select
154
Missing Image Area
155
1 Placing Originals
153
Placing Originals
156
Original Orientation
156
Placing Originals on the Exposure Glass
156
Placing Originals in the ADF or ARDF
157
Basic Procedure
159
How to Operate
159
2 Copying
159
Copying from the Bypass Tray
160
When Copying Onto Custom Size Paper
162
When Copying Onto Special Paper
162
When Copying Onto Envelopes
162
Copier Functions
164
Adjusting Image Density
164
Selecting Original Type Setting
164
Selecting Copy Paper
164
Rotated Copy
165
Preset Reduce/Enlarge
165
Zoom
166
Auto Reduce/Enlarge
167
Sort
168
Duplex (Type 3 Only)
169
One-Sided Combine
171
Two-Sided Combine (Type 3 Only)
173
Series Copies
175
If Your Machine Does Not Operate as You Want
177
When a Message Is Displayed
177
3 Troubleshooting
177
If You Cannot Make Clear Copies
178
If You Cannot Make Copies as You Want
179
When Memory Is Full
180
B Loading Paper
181
Loading Paper
181
Orientation-Fixed Paper or Two-Sided Paper
182
D Adding Toner
185
Handling Toner
185
Toner Storage
185
Used Toner
185
Removing Toner
186
Inserting Toner
187
Accessing User Tools (Copier Features)
189
Changing Default Settings
189
Quitting User Tools
190
4 User Tools (Copier Features)
189
Settings You Can Change with User Tools
191
APS/ Auto R/E Priority
191
Auto Tray Switching
191
Original Type Setting
191
Duplex Mode Priority
192
Orientation
192
Max. Number of Sets
192
Original Count Display
192
Reproduction Ratio
192
Preset R/E Priority
193
Duplex Margin
193
Rotate Sort
193
Rotate Sort:auto Continue
193
Letterhead Setting
193
Do's and Don'ts
195
5 Remarks
195
Where to Put Your Machine
196
Machine Environment
196
Moving
197
Power Connection
197
Access to the Machine
198
Maintaining Your Machine
199
Cleaning the Exposure Glass
199
Cleaning the Exposure Glass Cover
199
Cleaning the ADF or ARDF
199
Combination Chart
201
Supplementary Information
202
Table of Contents
206
Table of Contents
215
How to Read this Manual
217
Symbols
217
Names of Major Options
218
Outline
219
E-Mail
219
Network Delivery Scanner
220
Network TWAIN Scanner
221
1 Network Scanner
219
Control Panel
222
Reading the Display and Using Keys
224
Initial Scanner Setup
225
Scanner Features
225
Scan Settings
228
Destination List Settings
230
Send Settings
230
2 Preparations for Use as a Network Scanner
225
Installing Software
233
Auto Run Program
233
Software for Using a Network TWAIN Scanner
235
Software for Using the Network Delivery Scanner Function
236
Desktopbinder V2 Lite
237
Software Supplied on CD-ROM
237
Placing Originals
243
Placing on the Exposure Glass
244
Placing in the Auto Document Feeder
245
3 Setting Originals
243
Original Orientation and Scan Area
247
For E-Mail and a Network Delivery Scanner
247
For a Network TWAIN Scanner
249
Scanning Originals in Several Times Using the Exposure Glass
250
Sending Scan Files by E-Mail
251
E-Mail Screen
252
Procedure for Sending by E-Mail
253
Preparation for Sending by E-Mail
251
Checking the Status of E-Mail
265
Preparation for Delivering
267
Network Delivery Scanner Screen
268
5 Using the Network Delivery Scanner Function
267
Delivering Scan Files
270
Delivery Procedure
270
When Selecting a Subject from the List
279
Checking the Status of Delivery
280
Preparation for Using the Network TWAIN Scanner
281
Network TWAIN Scanner Screen
281
6 Using the Network TWAIN Scanner Function
281
Scanning Originals
282
Functions of the TWAIN Driver
284
7 Appendix
285
Relationship between Resolution and File Size
285
When Using as E-Mail or Network Delivery Scanner
285
When Using as a Network TWAIN Scanner
285
Max. Number of Addresses Which Can be Specified
286
Troubleshooting
287
When Scanning Is Not Performed as Expected
287
When the Delivery Function Does Not Work
287
When an Error Message Appears on the Control Panel
288
When an Error Message Appears on the Client Computer
290
Specifications
293
Index
294
Table of Contents
303
How to Read this Manual
305
Control Panel
307
Reading the Display and Using Keys
308
Initial Display
308
1 Getting Started
307
Preparing the Machine
309
Connecting the Machine
309
Setting Paper on the Bypass Tray
311
The Printer Driver
314
Printer Driver Help
314
2 Preparing to Print
309
Installing the Software
317
Auto Run
317
Quick Install
318
Installing the PCL 6/5E and RPCS™ Printer Driver
320
Setting up Options - PCL 6/5E and RPCS
324
Installing the Postscript 3 Printer Driver
326
Mac os - Installing the Postscript 3 Printer Driver and Utilities
331
Mac os X - Installing the Postscript 3 Printer Driver
333
Installing the Printer Driver Using USB
334
Installing the Printer Driver Using IEEE 1394
336
Installing Smartdevicemonitor for Client/Admin
340
Installing Font Manager 2000
340
Using Adobe Pagemaker Version 6.0, 6.5, or 7.0
341
Software and Utilities Included on the CD-ROM
342
Printer Drivers
342
Software and Utilities
343
Index
345
Table of Contents
355
How to Read this Manual
357
1 Setting up the Printer Driver and Canceling a Print Job
359
Accessing Printer Properties
359
Windows 95/98/Me - Accessing Printer Properties
359
Windows 2000/XP and Windows Server 2003 - Accessing Printer Properties
360
Windows NT 4.0 - Accessing Printer Properties
361
Macintosh - Setting up for Printing
363
Canceling a Print Job
364
Windows - Canceling a Print Job
364
Macintosh - Canceling a Print Job
365
2 Troubleshooting
367
Error & Status Messages on the Display
367
The Machine Does Not Print
371
Other Printing Problems
375
3 Printer Features
379
Printer Features Menu
379
Adjusting Printer Features
381
Printer Features Parameters
382
Paper Input
382
List/Test Print
382
Maintenance
385
System
387
Host Interface
389
PCL Menu
390
PS Menu
391
4 Appendix
393
User Defined Pages
393
System Settings (Parallel Connection)
394
Specifications
395
Options
396
Index
399
Fax Option Type
403
Table of Contents
408
How to Read this Manual
411
Symbols
411
Names of Major Option
412
Control Panel
413
Reading the Display
415
Reading the Display and Using Keys
415
Standby Display
416
Communication Display
417
User Code Entry Display
418
1 Getting Started
413
Transmission Modes
419
Switching between Memory Transmission and Immediate Transmission
420
2 Faxing
419
Placing Originals
421
Placing a Single Original on the Exposure Glass
422
Placing Originals in the Optional ADF or ARDF
423
Originals Unsuitable for the Optional ADF or ARDF
423
If the Machine Cannot Detect the Size of Your Original
424
Original Sizes Difficult to Detect
425
Memory Transmission
426
Broadcasting Sequence
428
Canceling a Memory Transmission
429
Before the Original Is Scanned
429
While the Original Is Being Scanned
429
While the Original Is Being Transmitted or before the Transmission Is Started
429
Immediate Transmission
431
Canceling an Immediate Transmission
434
Scan Settings
435
Resolution
435
Original Type
436
Image Density (Contrast)
437
Mixing Scan Settings for a Multiple
437
When Placing Originals in the Optional ADF or ARDF
438
Specifying a Destination
439
Entering a Fax Number
439
Pause
440
Tone
440
Entering an E-Mail Address
441
Using the Destination List
441
Specifying a Destination Using the Quick Dial Key
442
Checking the Specified Destination
443
Searching for a Destination
444
Search by Destination Name
444
Selecting from Destination List
445
Specifying a Registration Number
446
Search by Fax Number
447
Search by E-Mail Address
448
Reception
450
Switching the Reception Mode
450
Receiving a Fax in Manual Reception Mode
450
Internet Fax Functions
451
Internet Fax Precautions
452
Functions Not Supported by E-Mail Transmission
452
Functions Not Supported by E-Mail Reception
452
T.37 Full Mode
453
3 Using Internet Fax Functions
451
Transmitting Internet Fax
455
Confirming Reception
460
Canceling Internet Fax Transmission
461
Before the Original Is Scanned
461
While the Original Is Being Scanned
461
Receiving Internet Fax
462
Auto E-Mail Reception
462
Manual E-Mail Reception
462
Received Images
464
Initial Settings and Adjustments
465
Programming
466
Editing
467
Deleting
468
4 Programming
465
Programming Fax Numbers and E-Mail Addresses
470
Adjusting the Volume
471
5 Troubleshooting
471
When { { { { Facsimile} } } } Key Is Lit in Red
473
When Toner Runs out
474
Error Messages and Their Meanings
475
Solving Problems
479
When Things Don't Go as Expected
481
Advanced Features
487
Table of Contents
491
How to Read this Manual
495
Symbols
495
Names of Major Options
496
Sending at a Specific Time (Send Later)
497
1 Transmission Mode
497
User Transmission
499
Two-Sided Transmission (Double-Sided Transmission)
501
E-Mail Options
503
Fax Header Print
504
Label Insertion
505
Canceling a Transmission
507
2 Communication Information
507
Printing a List of Files in Memory (Print TX Standby File List)
509
Checking the Transmission Result (TX File Status)
510
Checking the Reception Result (RX File Status)
511
Printing a File (Print TX Standby File)
512
Printing a File Received with Memory Lock (Print Memory Lock File)
513
Printing the Journal
515
Journal
516
E-Mail Reception
518
Handy Dialing Functions
519
Chain Dial
519
(Example) 01133-155533
519
Redial
520
3 Other Transmission Features
519
On Hook Dial
521
Manual Dial
522
Transmission Features
523
Stamp
523
Detecting Blank Sheet
524
More Transmission Functions
525
If Memory Runs out While Storing an Original
525
Parallel Memory Transmission
525
Checking the Transmission Result
526
Automatic Redial
526
Batch Transmission
526
ECM (Error Correction Mode)
526
Dual Access
527
Transmission with Image Rotation
527
JBIG Transmission
527
Transmitting Journal by E-Mail
527
Journal by E-Mail
528
Printed Report
529
Memory Storage Report
529
Transmission Result Report (Memory Transmission)
529
Communication Failure Report
530
Transmission Result Report (Immediate Transmission)
530
Reception
531
Immediate Reception
531
Memory Reception
531
Substitute Reception
532
Receiving Messages Unconditionally
533
Receiving Messages According to Parameter-Specified Settings
533
4 Reception Features
531
Reception Functions
534
Forwarding Received Documents
534
SMTP Reception Using Internet Fax
535
Routing E-Mail Received Via SMTP
536
JBIG Reception
537
Auto Fax Reception Power-Up
537
Printing Options
538
Print Completion Beep
538
Checkered Mark
538
Centre Mark
538
Reception Time
539
Image Rotation
539
Combine Two Originals
539
Page Separation and Length Reduction
540
TSI Print (Transmitting Subscriber Identification Print)
540
When There Is no Paper of the Correct Size
541
Setting Priority Trays
542
Just Size Printing
542
Sending Fax Documents from Computers
543
Before Use
544
Installing the Software
544
Auto Run Program
544
Installing Individual Applications
545
LAN-Fax Driver
546
LAN-Fax Cover Sheet Editor
546
Setting LAN-Fax Properties
547
Basic Transmission
548
Attaching a Cover Sheet
550
Previewing Fax Images
550
Specifying Options
550
Printing and Saving
552
Editing Address Book
553
Editing Fax Cover Sheets
555
Creating a Cover Sheet
555
Attaching a Created Cover Sheet
555
LAN-Fax Operation Messages
557
LAN-Fax Error Report
557
LAN-Fax Result by E-Mail
557
5 Using Fax with Computers
543
Editing Receiver's Fax Information Via Web Browser
558
Function List
561
Key Operator Code
563
6 Facsimile Features
561
Accessing User Tools (Facsimile Features)
564
Quitting Default Settings
565
Print List/Report
565
General Settings/Adjust
566
Reception Settings
567
E-Mail Settings
567
Key Operator Tools List
569
7 Key Operator Setting
569
Using Key Operator Settings
570
Counters
570
Forwarding
570
Programming an End Receiver
571
Quitting the Forwarding Function
572
Forwarding Mark
572
Memory Lock
573
User Parameters
574
Changing the User Parameters
577
Printing the User Parameter List
578
Home Position
579
Special Senders to Treat Differently
583
Programming/ Changing Special Senders
585
Deleting a Special Sender
588
Programming Initial Set up of a Special Sender
589
Printing the Special Sender List
590
Programming a Memory Lock ID
591
Selecting Dial/Push Phone
592
G3 Analog Line
592
When an Error Report Is Printed
595
8 Solving Operation Problems
595
Turning off the Main Power/In Case of a Power Failure
596
When an Error Occurs Using Internet Fax
597
Error Mail Notification
597
Error Report (Mail)
597
Server-Generated Error E-Mail
597
9 Appendix
599
Replacing the Stamp Cartridge
599
Connecting the Machine to a Telephone Line and Telephone
600
Connecting the Telephone Line
600
Selecting the Line Type
600
Specifications
601
Compatible Machines
602
Acceptable Types of Originals
603
Maximum Values
606
Table of Contents
619
How to Read this Manual
623
Using Fax
626
Internet Fax
626
LAN-Fax
627
1 Functions Available over a Network
626
Network Scanner
628
E-Mail
628
Network Delivery Scanner
629
Network TWAIN Scanner
630
Confirming the Connection
631
Connecting to the Ethernet Interface
632
Using the IEEE 802.11B (Wireless LAN)
633
2 Connecting the Network Cable to the Network
631
User Tools Menu (System Settings)
635
Printer (LAN-Fax)
635
Internet Fax
637
E-Mail
640
Network Configuration
645
3 Setting up the Machine on a Network
635
Configuring TCP/IP
657
Configuring a Windows 95/98/Me Computer
657
Configuring a Windows 2000 Computer
657
Configuring a Windows XP Computer
658
4 Windows Configuration
657
Configuring Netbeui
660
Configuring a Windows 95/98/Me Computer
660
Configuring a Windows 2000 Computer
660
5 Using the Printer Function
663
Printing with Windows
667
Printing Without a Print Server
668
Printing with a Macintosh
671
Changing to Ethertalk
671
Configuring the Printer
672
Changing the Printer Name
672
Changing the Zone
672
Printing with Netware
673
Setting up as a Print Server
674
Setting up as a Remote Printer
678
Setting up a Client Computer
682
6 Using Smartdevicemonitor for Client
686
Smartdevicemonitor for Client
687
7 Using Smartdevicemonitor for Admin
690
Smartdevicemonitor for Admin
691
Changing the Network Interface Board Configuration
691
Displaying Machine Status
691
Locking the Control Panel Menu
692
Selecting the Paper Type
692
Managing User Information
693
Loading Fax Journal
693
Managing Address Information
694
Configuring Energy Saver Mode
694
8 Configuring the Network Interface Board Using a Web Browser
695
Going to the Top Page
696
Types of Menu Configuration and Mode
697
Verifying the Network Interface Board Settings
699
Configuring the Network Interface Board Settings
700
Using Help on the Web Browser
701
Downloading Help
701
9 Appendix
703
Remote Maintenance by Telnet
703
Using Telnet
703
Commands List
704
Using DHCP
719
Using Autonet
720
Snmp
721
Error Messages on the Display
722
Messages Without Code Numbers
722
Messages with Code Numbers
723
Understanding Displayed Information
725
Print Job Information
725
Print Log Information
725
Machine Status and Configuration
726
Configuring the Network Interface Board
730
Message List
735
System Log Information
735
Limitation
742
When Using Windows Terminal Service/Metaframe
742
Supported Printer Drivers
742
Precautions
744
Connecting a Dial-Up Router to a Network
744
Netware Printing
746
When Using IPP with Smartdevicemonitor for Client
746
When the IEEE 80211.B Interface Unit (Optional) Is Installed
747
Specifications
748
Table of Contents
755
How to Read this Manual
757
Installable Options
759
Setting up Options
759
Postscript
759
Printing a Document
761
Toner Saving, Edge Smoothing
764
Printer Utility for Mac
766
Installing Printer Utility for Mac
766
Starting Printer Utility for Mac
767
Printer Utility for Mac Functions
768
Downloading PS Fonts
769
Displaying Fonts
769
Deleting Fonts
770
Page Setup
770
Printing the Font Catalog
770
Printing Font Samples
771
Renaming the Machine
771
Restarting the Machine
772
Downloading Postscript Files
772
Selecting the Zone
773
Displaying the Machine Status
773
Launching the Dialog Console
774
Table of Contents
781
How to Read this Manual
783
UNIX Configuration
785
Before Setup
785
Using the "Lp"/"Lpr" Commands
785
Using the "Rsh"/"Rcp"/"Ftp" Commands
785
Using the Installation Shell Script
787
Executing the Installation Shell Script
787
After Executing the Installation Shell Script
791
Printing Methods
796
Printing with "Lpr" and "Lp
796
Printing with "Rsh", "Rcp", and "Ftp
796
Printer Status
799
Viewing Print Job Status with "Lpq" and "Lpstat
799
Viewing Printer Status with "Rsh" and "Ftp
799
Copying Information to a File
800
Specifying the Device Option
801
Configuring the Device Option
801
Printer Language
803
Text Printing
803
Input Tray
804
Paper Size
804
Paper Type
806
Output Tray
807
Copies
807
Collating
808
Duplex Printing
808
Binding
809
Orientation
809
Symbol Set
810
Advertisement
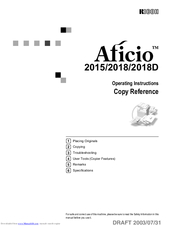
Ricoh 2015 Operating Instructions Manual (83 pages)
Brand:
Ricoh
| Category:
All in One Printer
| Size: 3.04 MB
Ricoh 2015 Manual (12 pages)
SAP Printing
Brand:
Ricoh
| Category:
Printer
| Size: 0.06 MB
Table of Contents
Table of Contents
2
1 The Concept
3
The Sap Systems Supported
3
The Device Models Supported
3
The Family of Provided Device Types
3
2 The Device Types
6
ZA00 (and ZA04)
6
ZA01 (and ZA05)
6
Zb00
7
3 The Documentation
8
Volume 1 = Readme
8
Volume 2 : [Device Type] = Device Type Specific Information
8
Volume 2B = Barcode and Ocr Text Printing
8
Volume 3 : [Device Class] = Device-Specific Information
8
4 Appendices
9
Appendix D: Device Models Supported
9
Advertisement
Advertisement
Related Products
Ricoh 2018
Ricoh Aficio 2018D
Ricoh SP 204SFNw
Ricoh Aficio 2090
Ricoh Aficio 2051 SP
Ricoh Aficio 200
Ricoh SP 203SFNw
Ricoh Aficio 2035
Ricoh Aficio 2060 SP
Ricoh 2045 - Type Print Server
Ricoh Categories
All in One Printer
Printer
Digital Camera
Copier
Printer Accessories
More Ricoh Manuals
Login
Sign In
OR
Sign in with Facebook
Sign in with Google
Upload manual
Upload from disk
Upload from URL