Sign In
Upload
Manuals
Brands
Mitsubishi Manuals
Control Unit
L Series
Mitsubishi L Series Manuals
Manuals and User Guides for Mitsubishi L Series. We have
4
Mitsubishi L Series manuals available for free PDF download: Service Manual, User Manual, Operation & Maintenance Manual
Mitsubishi L Series Service Manual (254 pages)
Brand:
Mitsubishi
| Category:
Engine
| Size: 6.77 MB
Table of Contents
General Contents
15
Table of Contents
15
General
17
External View
18
External View of L2A, L2C and L2E
18
External View of L3A, L3C and L3E
19
System Flow Diagrams
20
Fuel System - Flow Diagram
20
Lubrication System - Flow Diagram
20
Cooling System - Flow Diagram
21
Inlet and Exhaust System - Flow Diagram
21
Engine Serial Number Location
22
Indication of Engine Model and Total Displacement
22
Specifications
23
Specifications of L2A, L2C and L2E
23
Specifications of L3A, L3C and L3E
27
Tips on Disassembling and Reassembling
31
Disassembling
31
Reassembling
31
Service Data
33
1 Maintenance Service Data
34
Basic Engine
34
Fuel System
37
Cooling System
38
Inlet/Exhaust System
38
Lubrication System
38
Electrical System
39
Basic Engines
42
Fuel System
42
2 List of Tightening Torque
42
Major Bolts and Nuts Tightening Torque
42
Cooling System
43
Electrical System
43
Inlet and Exhaust Systems
43
Lubrication System
43
Standard Bolt and Nut Tightening Torque
44
High-Pressure Fuel Injection Pipe Tightening Torque
45
Standard Eyebolt Tightening Torque
45
Standard Union Nut Tightening Torque
45
Service Tools
47
Determination of Overhaul
51
Determining Overhaul Timing
52
Disassembly of Basic Engine
55
1 Disassembling and Inspecting Cylinder Head and Valve Mechanism
56
Disassembling Rocker Shaft Assembly
57
Removing Rocker Shaft Assembly
57
Removing Cylinder Head Assembly
58
Removing Cylinder Head Bolt
58
Removing Valve Stem Seal
59
Removing Valves and Valve Spring
59
2 Disassembling and Inspecting Flywheel
60
Removing Flywheel
61
Removing Flywheel Housing
61
Removing Oil Seal Case
61
Disassembling and Inspecting Gear Case, Timing Gear and Camshaft
62
3 Disassembling and Inspecting Gear Case, Timing Gears and Camshaft
62
Removing Crankshaft Pulley
63
Removing Gear Pump Housing
63
Removing Tappet
63
Removing Timing Gear Case
63
Removing Governor Shaft and Speed Control Lever
64
Removing Oil Pump
64
Removing PTO Gear
64
Removing Relief Valve
64
Measuring Timing Gear Backlash
65
Removing Idler Gear
65
Removing Camshaft
66
Removing Fuel Injection Pump Camshaft
67
Removing Front Plate
68
4 Disassembling and Inspecting Cylinder Block, Crankshaft, Piston and Oil Pan
69
Removing Oil Pan
70
Removing Oil Screen
70
Removing Connecting Rod Cap
70
Pulling out Piston
71
Removing Piston Ring
71
Removing Piston Pin
71
Measuring Crankshaft End Play
72
Removing Main Bearing Cap
72
Removing Crankshaft
72
Inspection and Repair of Basic Engine
73
1 Inspecting and Repairing Cylinder Head and Valve Mechanism
74
Measuring Clearance between Rocker Arm and Rocker Shaft
74
Measuring Valve Stem Outside Diameter and Valve Guide Inside Diameter
74
Replacing Valve Guide
75
Inspecting Valve Face
76
Refacing Valve Face
76
Measuring Perpendicularity and Free Length of Valve Spring
77
Lapping Valve and Valve Seat
77
Measuring Distortion of the Bottom Surface of the Cylinder Head
78
Measuring Push Rod Runout
78
2 Inspecting and Repairing Flywheel
79
Measuring Flatness of Flywheel
79
Inspecting Ring Gear
79
Replacing Ring Gear
79
Removing Ring Gear
79
Installing Ring Gear
79
3 Inspecting and Repairing Gear Case, Timing Gear and Camshaft
80
Measuring Timing Gear Backlash
80
Measuring Clearance between Idler Gear and Idler Shaft
80
Replacing Idler Shaft
80
Measuring Clearance between
80
Measuring Cam Lift
81
Measuring Cam Height of Fuel Injection Pump Camshaft
81
Inspecting Tappet
82
Measuring Clearance between Tappet and Tappet Guide Hole
82
4 Inspecting and Repairing Cylinder Block, Crankshaft, Piston and Oil Pan
83
Measuring Cylinder Inside Diameter
83
Reboring Cylinder
84
Measuring Piston Outside Diameter
84
Boring Finish Dimension
84
Measuring Piston Ring End Gap
85
Measuring Clearance between Piston Ring Groove and Piston Ring
85
Measuring Piston Pin Bore Diameter and Piston Pin Outside Diameter
86
Measuring Connecting Rod End Play
86
Inspecting Connecting Rod Bend and Twist6-15
87
Measuring Clearance between Connecting Rod Bearing and Crankpin
88
Measuring Clearance between Main Bearing and Crankshaft Journal
89
Measuring Crankshaft Runout
90
Replacing Crankshaft Gear
90
Removing Crankshaft Gear
90
Installing Crankshaft Gear
90
Measuring Distortion Cylinder Block Top Surface
91
Reassembly of Basic Engine
93
1 Reassembling Cylinder Block, Crankshaft, Piston and Oil Pan
94
Installing Main Bearing
94
Installing Crankshaft
94
Installing Main Bearing Cap
95
Inserting Side Seal
95
Installing Main Bearing Cap Bolt
96
Measuring Crankshaft End Play
96
Reassembling Piston and Connecting Rod
97
Installing Piston
98
Installing Piston and Connecting Rod
98
Installing Connecting Rod Cap
99
Installing Oil Screen
100
Installing Oil Pan
100
Reassembling Gear Case, Timing Gears and Camshaft
101
2 Reassembling Gear Case, Timing Gear and Camshaft
101
Installing Front Plate
101
Installing Fuel Injection Pump Camshaft
101
Rotating Crankshaft
101
Installing Camshaft
102
Installing Idler Gear
102
Inspecting and Adjusting Timing Gear after Installation
103
Inspecting Backlash
103
Installing Governor Weights and Sliding Shaft
103
Installing Oil Pump
104
Installing Relief Valve
104
Installing Speed Control Lever and Governor Shaft
104
Installing Crankshaft Pulley
105
Installing PTO Gear
105
Installing Timing Gear Case
105
Installing Gear Pump Housing
106
Installing Tappet
106
3 Reassembling Flywheel
107
Installing Oil Seal Case
107
Installing Flywheel Housing
107
Installing Flywheel
108
4 Reassembling Cylinder Head and Valve Mechanism
109
Cleaning Cylinder Head Bottom Surface
109
Installing Valve Stem Seal
109
Installing Valve Spring
109
Installing Valve Lock
110
Installing Cylinder Head Gasket
110
Installing Cylinder Head Assembly
110
Tightening Cylinder Head Bolts
111
Inserting Push Rod
111
Reassembling Rocker Shaft Assembly
112
Installing Rocker Shaft Assembly
112
Adjusting Valve Clearance
113
Installing Rocker Cover
113
Installing Torque Spring Set
113
Fuel System
115
1 Removing Fuel System
116
Removing Fuel Pipe and Fuel Injection Nozzle
116
Removing Fuel Injection Pipe
117
Removing Fuel Injection Nozzle
117
Removing Fuel Filter
118
Removing Governor
119
Disconnecting Tie Rod from Control Rack
120
Removing Governor Shaft and Speed Control Lever
120
Removing Fuel Injection Pump
121
2 Disassembling, Inspecting and Reassembling Fuel System
122
Disassembling and Inspecting Fuel Injection Nozzles
122
Inspecting and Adjusting Fuel Injection Valve Opening Pressure
123
Inspecting Fuel Spray Pattern of Fuel Injection Nozzle
124
Cleaning and Replacing Faulty Nozzle
124
Reassembling Fuel Injection Nozzles
125
Inspecting Fuel Injection Pump on Engine8-12
126
Disassembling and Inspecting Fuel Injection Pump
126
Removing Swivel Nipple
127
Removing Tappets
127
Removing Plunger
127
Removing Delivery Valve
128
Reassembling Fuel Injection Pump
129
Installing Plunger Barrel
129
Assembling Delivery Valve
130
Assembling Control Sleeve
130
Assembling Plunger
130
Installing Tappet
131
Installing Control Rack
131
Tightening Delivery Valve Holder
132
Inspecting Control Rack for Smooth Operation
132
Installing Lock Plate
132
Installing Swivel Nipple
132
Disassembling and Inspecting Governor Cover
133
Reassembling Governor Cover
133
Disassembling and Inspecting Torque Spring Set
134
Reassembling Torque Spring Set
134
Reassembling Torque Spring Set, Double Spring Type
136
Inspecting Fuel Pump
137
Disassembling, Inspecting and Reassembling Fuel Filter (Cock Switch Type, Push Botton)
138
Disassembling, Inspecting and Reassembling Fuel Filter (Cock Switch Type, Changover)
139
3 Installing Fuel System
140
Installing Fuel Injection Pump
140
Installing Governor
141
Installing Speed Control Lever and Governor Shaft
142
Connecting Tie Rod
142
Installing Torque Spring Set (Single Spring, Double Spring)
143
Installing Torque Set Spring (Double Spring, Two Point Control)
143
Installing Rack Set Screw
144
Installing Fuel Filter
145
Installing Fuel Pipe and Fuel Injection Nozzles
146
Installing Fuel Injection Nozzle
146
Installing Fuel Return Pipe and Fuel Injection Pipe
146
Lubrication System
147
1 Removing Lubrication System
148
Removing Oil Filter, Relief Valve and Oil Pressure Switch
148
Removing Oil Filter
149
Removing Relief Valve
149
Removing Oil Pressure Switch
149
Removing Oil Pump, Oil Pan and Oil Screen9-4
150
Removing Oil Pump
150
2 Disassembling, Inspecting and Reassembling Lubrication System
151
Inspecting Oil Pump
151
Measuring Clearance between Oil Pump Housing Inside Diameter and Oil Pump Outer Gear Outside Diameter
151
Measuring the End Clearance between Oil Pump Outer Gear Width and Oil Pump Housing Depth
151
Inspecting Relief Valve
152
Inspecting Oil Pressure Switch
152
3 Installing Lubrication System
153
Installing Oil Pump, Oil Pan and Oil Screen
153
Installing Oil Pump
153
Installing Oil Filter, Relief Valve and Oil Pressure
154
Installing Oil Pressure Switch
154
Installing Relief Valve
154
Installing Oil Filter
155
Cooling System
157
1 Removing Cooling System
158
Removing Cooling Fan, Fan Pulley, V-Belt, Thermostat, Thermoswitch and Water Pump
158
2 Disassembling, Inspecting and Reassembling Cooling System
159
Disassembling and Inspecting Thermostat10-3
159
Inspecting Thermostat
159
Reassembling Thermostat
160
Inspecting Thermoswitch
160
Inspecting Water Pump
160
Checking Water Pump for Smooth Rotation10-4
160
3 Installing Cooling System
161
Installing Cooling Fan, Fan Pulley, V-Belt, Thermostat, Thermoswitchand Water Pump
161
Inlet and Exhaust Systems
163
1 Removing Inlet and Exhaust Systems
164
Removing Inlet and Exhaust Sysytems
164
Removing Inlet Cover and Exhaust Manifold
164
2 Disassembling, Inspecting and Reassembling Inlet and Exhaust Systems
165
Inspecting Inlet Cover and Exhaust Manifold
165
Measuring Distortion of Inlet and Exhaust Manifold
165
3 Installing Inlet and Exhaust Systems
166
Installing Inlet Cover and Exhaust Manifold
166
Table of Contents
167
1 Removing Electrical System
169
Removing Starter
169
Inspection before Removing Alternator (A007TA0171B (12V-40A), A007TA8271A (24V-25A))
170
Inspecting Alternator Operation
170
Handling Precaution
170
Inspecting Regulated Voltage
171
Inspecting Output
171
Removing Alternator
172
Removing Stop Solenoid
172
Removing Glow Plug
173
2 Disassembling, Inspecting and Reassembling Electrical System
174
Inspection before Disassembling Starter (M000T60481 (12V-1.2Kw), M001T68381 (12V-1.7Kw))
174
Inspecting Pinion Clearance
174
No Load Test
176
Disassembling and Inspecting Starter (M000T60481 (12V-1.2Kw), M001T68381 (12V-1.7Kw))
177
Preparation before Disassembling
178
Removing Pinion Set
178
Removing Magnetic Switch
178
Removing Rear Bracket
179
Removing Brush Holder and Brush Assembly
179
Removing Armature and Yoke
179
Removing Overrunning Clutch
180
Removing Gear Shaft
180
Inspecting and Repairing Starter (M000T60481 (12V-1.2Kw), M001T68381 (12V-1.7Kw))
181
Inspecting Brushes for Wear
181
Measuring Brush Spring Load
181
Inspecting Brush Holder for Insulation
181
Measuring Commutator Radial Runout
182
Measuring Commutator Outside Diameter12-15
182
Measuring Undercut Depth
182
Checking Armature Coil
183
Inspecting Rear Bracket
183
Inspecting Overrunning Clutch
184
Inspecting Pinion
184
Inspecting Front Bracket
184
Inspecting Gears of Starter
184
Inspecting Continuity of Magnetic Switch (between M Terminal and Case)
184
Inspecting Insulation of Magnetic Switch
184
(Between M Terminal and B Terminal)
184
Reassembling Starter (M000T60481 (12V-1.2Kw), M001T68381 (12V-1.7Kw))
185
Applying Grease
185
Installing Pinion
186
Installing Gear Shaft
186
Installing Yoke and Armature
187
Installing Brush Holder and Brush Assembly
187
Installing Rear Bracket
187
Installing Magnetic Switch
187
Inspecting Pinion Clearance
189
Inspection before Disassembling Starter (M002T66071 (24V-3.2Kw))
189
No Load Test
191
Disassembling and Inspecting Starter (M002T66071 (24V-3.2Kw))
192
Preparation before Disassembling
193
Removing Magnetic Switch
193
Removing Rear Bracket
193
Removing Brushes, Brush Holder, Yoke and Armature
194
Removing Ball Bearing
194
Removing Cover Set
194
Removing Center Bracket
195
Removing Reduction Gear and Spring Set
195
Removing Pinion Set
195
Removing Lever and Pinion Shaft
195
Inspecting and Repairing Starter (M002T66071 (24V-3.2Kw))
196
Inspecting Brushes for Wear
196
Measuring Brush Spring Load
196
Inspecting Brush Holder for Insulation
196
Measuring Commutator Radial Runout
197
Measuring Commutator Outside Diameter12-30
197
Measuring Undercut Depth
197
Checking Armature Coil
198
Inspecting Continuity of Yoke Assembly
199
Inspecting Insulation between Yoke Body and Brush
199
Inspecting Center Bracket
199
Inspecting Overrunning Clutch
200
Inspecting Pinion
200
Inspecting Front Bracket
200
Inspecting Gears of Starter
200
(Between M Terminal and Case)
200
Inspecting Insulation of Magnetic Switch (ETS Type)
200
(Between M Terminal and B Terminal)
200
(M002T66071 (24V-3.2Kw))
201
Applying Grease
201
Installing Lever and Pinion Shaft
202
Installing Pinion
202
Installing Spring Set and Reduction Gear
202
Installing Center Bracket
202
Adjusting Pinion Shaft End Play
203
Installing Bearing
203
Installing Armature, Yoke, Brush and Brush Holder
203
Installing Rear Bracket
204
Installing Magnetic Switch
204
Inspecting Pinion Clearance
204
Disassembling and Inspecting Alternator12-38
205
Separating Front Bracket from Stator
206
Removing Pulley
206
Removing Rear Bearing
206
Removing Front Bearing
206
Removing Stator
207
Removing Regulator Assembly
207
Removing Rectifier Assembly
207
Inspecting and Repairing Alternator
208
Inspecting Rectifier
208
Inspecting Rotor
208
Inspecting Stator
209
Inspecting Brushes for Wear
209
Replacing Brushes
210
Reassembling Alternator
211
Installing Rectifier Assembly and Regulator Assembly
212
Installing Stator
212
Installing Front Bearing
212
Installing Rear Bearing
213
Installing Pulley
213
Assembling Stator and Front Bracket
213
Inspecting Glow Plug
214
3 Installing Electrical System
215
Installing Glow Plug
215
Installing Stop Solenoid
216
Installing Stop Solenoid (ETR Type)
216
Procedure for Installing Stop Solenoid (ETR Type)
216
Verification after Reassembling (ETR Type)
216
Adjustment and Operation
221
1 Inspection and Adjustment of Engine
222
Inspecting and Adjusting Valve Clearance13-2
222
Preparation for Valve Clearance Inspection13-2
222
Inspecting Valve Clearance
223
Inspecting Fuel Injection Timing
224
Adjusting Fuel Injection Timing
225
Inspecting and Adjusting Low Idle Speed and High Idle Speed
226
Preparation
226
Adjusting Low Idle Speed
226
Adjusting High Idle Speed
226
Bleeding Fuel System
227
Bleeding Air from Fuel Filter
227
Bleeding Air from Fuel Injection Pump
228
Adjusting V-Belt Tension
229
2 Break-In Operation
230
Starting up
230
Inspecting Engine Condition after Starting up
230
Break-In Operation Time
230
Inspection and Adjustment after Break-In Operation
230
3 Performance Test (JIS Standard)
231
Engine Equipment Condition
231
Test Items and Purposes
231
Operation Load Test
231
Continuous Load Test
231
Low Idle Test
231
Other Inspections
231
Engine Output Adjustment
231
Standard Atmospheric Conditions
231
Calculation of Corrected Power
232
Troubleshooting
233
Troubleshooting
234
Before Troubleshooting
234
Check Items before Troubleshooting
235
Problem: Starting Trouble
235
Starting Trouble
235
Check Items before Troubleshooting
236
Knocking
236
Problem: Knocking
236
Check Items before Troubleshooting
237
Overheating
237
Problem: Overheating
237
Check Items before Troubleshooting
238
Excessive Black Smoke
238
Problem: Excessive Black Smoke
238
Check Items before Troubleshooting
239
Idling Malfunction
239
Problem: Unstable Idling
239
Check Items before Troublshooting
240
Low Output
240
Problem: Low Output
240
Advertisement
Mitsubishi L Series User Manual (244 pages)
Analog-Digital Converter Module
Brand:
Mitsubishi
| Category:
Control Unit
| Size: 7.5 MB
Table of Contents
Safety Precautions
3
Conditions of Use for the Product
6
Introduction
7
Compliance with Emc and Low Voltage Directives
8
Relevant Manuals
9
Table of Contents
10
Manual Page Organization
13
Packing List
16
Terms
16
Chapter 1 A/D Converter Module
17
Application
17
Features
18
Chapter 2 Part Names
19
Chapter 3 Specifications
21
General Specifications
21
Performance Specifications
22
Number of Parameter Settings
24
Function List
25
I/O Signal List
27
List of Buffer Memory Addresses
28
Chapter 4 Procedures before Starting the Operation
41
Chapter 5 System Configuration
43
Overall System Configuration
43
Applicable System
44
Restrictions When A/D Converter Module Is Connected to Head Module
44
Chapter 6 Installation and Wiring
45
Installation Environment and Installation Position
45
Terminal Block
46
Wiring
48
External Wiring
49
Chapter 7 Various Settings
50
Addition of Modules
50
Switch Setting
51
Parameter Setting
52
Auto Refresh
55
Offset/Gain Setting
56
Setting from GX Works2 "Offset/Gain Setting
56
Setting from a Program
59
Chapter 8 Functions
63
Processing each Function
63
A/D Conversion Enable/Disable Function
65
A/D Conversion Method
65
Input Range Extended Mode Function
69
Conversion Speed Switch Function
70
Maximum and Minimum Values Hold Function
70
Input Signal Error Detection Function
71
Input Signal Error Detection Extension Function
76
Warning Output Function (Process Alarm)
79
Scaling Function
82
Shift Function
88
Digital Clipping Function
92
Difference Conversion Function
96
Logging Function
100
Flow Amount Integration Function
112
Error Log Function
121
Module Error Collection Function
124
Error Clear Function
125
Saving and Restoring Offset/Gain Values
126
Chapter 9 Display Unit
131
Display Unit
131
Menu Transition
131
List of Setting Value Change Screens
133
Checking and Clearing Errors
140
Chapter 10 Programming
142
Procedure for Programming
142
When Using the Module in a Standard System Configuration
143
When A/D Converter Module Is Connected to Head Module
150
Chapter 11 Troubleshooting
158
Checking on the Module Detailed Information
159
Checking by Latest Error Code (Un\G19)
160
Checking on the Module Error Collection Function
160
Error Code List
161
Alarm Code List
165
Troubleshooting
166
Checking the Status of the A/D Converter Module by the System Monitor
168
Appendices
169
Appendix 1 Details of I/O Signals
169
Appendix 1.1 Input Signal
169
Appendix 1.2 Output Signal
174
Appendix 2 Details of Buffer Memory Addresses
176
Appendix 3 I/O Conversion Characteristic of A/D Conversion
205
Appendix 4 A/D Conversion Accuracy
210
Appendix 5 Dedicated Instruction
211
Appendix 5.1 Instruction List
211
Appendix 5.2 G(P).OFFGAN
212
Appendix 5.3 G(P).OGLOAD
214
Appendix 5.4 G(P).OGSTOR
218
Appendix 6 Checking Serial Number and Function Version
222
Appendix 7 Addition and Change of Functions
222
Appendix 7.1 Addition of Functions
222
Appendix 7.2 Change of Functions
222
Appendix 8 Differences with Q Series
225
Appendix 8.1 Precautions for Applying Q Series Sequence Program
226
Appendix 9 When Using GX Developer or GX Configurator-AD
228
Appendix 9.1 Operation of GX Developer
228
Appendix 9.2 Operation of GX Configurator-AD
230
Appendix 10 External Dimensions
233
Index
235
Instruction Index
237
Revisions
238
Warranty
239
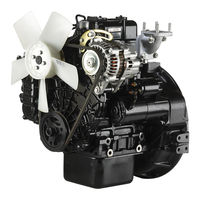
Mitsubishi Heavy Industries L Series Operation & Maintenance Manual (89 pages)
Diesel Engines
Brand:
Mitsubishi Heavy Industries
| Category:
Engine
| Size: 2.95 MB
Table of Contents
Limited Warranty
3
Warranted Parts
4
Warranty Coverage
4
Important Information
9
Table of Contents
12
Chapter 1 BASIC SAFETY PRECAUTIONS Fire and Explosions
18
Keep Flames Away
18
Keep Engine Surrounding Area Tidy and Clean
18
Care for Fuel, Oil and Exhaust Gas Leakage
18
Use Explosion-Proof Lighting Apparatus
18
Prevent Electrical Wires from Short-Circuiting
18
Keep Fire Extinguishers and a First-Aid Kit Handy
18
Stay Clear of All Rotating and Moving Parts
19
Install Protective Covers Around Rotating Parts
19
Check Work Area for Safety
19
Stay Clear of Moving Parts While Engine Is Running
19
Lockout and Tagout
19
Keep Engine Stopped During Servicing
19
Always Restore Engine Turning Tools after Use
19
Changing the Engine Speed Setting Is Prohibited
19
Be Careful of Exhaust Fume Poisoning
20
Operate Engine in a Well-Ventilated Area
20
Be Careful of Falling down
20
Lift Engine Carefully
20
Do Not Climb Onto the Engine
20
Always Prepare Stable Scaffold
20
Protect Ears from Noise
21
Wear Ear Plugs
21
Be Careful of Burns
21
Do Not Touch the Engine During or Immediately after Operation
21
Do Not Open the Radiator Filler Cap When the Engine Is Hot
21
Do Not Touch High Pressure Injection Fuel
21
Refill Coolant Only after the Coolant Temperature Dropped
21
Be Careful When Handling Fuel, Engine Oil or LLC
22
Use Only Specified Fuel, Engine Oil and LLC
22
Handle LLC Carefully
22
Proper Disposal of Waste Oil, LLC and Coolant
22
When Abnormality Occurs
22
Do Not Add Coolant Immediately after a Sudden Stop Due to Overheating
22
Avoid Immediate Restart after Abnormal Stop
22
Avoid Continuous Engine Operation at Low Oil Pressure
22
If Belt Breaks, Stop Engine Immediately
22
Service Battery
23
Handle the Battery Correctly
23
Other Cautions
24
Never Modify Engine
24
Observe Safety Rules at Work Site
24
Work Clothing and Protective Gear
24
Never Break Seals
24
Perform All Specified Pre-Operation Inspections and Periodic Inspections
24
Break-In the Engine
24
Warm up the Engine before Use
24
Never Operate the Engine in an Overloaded Condition
24
Conduct Cooling Operation before Stopping the Engine
25
Protection of the Engine against Water Entry
25
Conduct Proper Maintenance of Air Cleaner
25
Use of Tools Optimum for each Work
25
Avoidance of Prolonged Time of Starter Operation
25
Do Not Turn off the Battery Switch During Operation
25
Cautionary Instructions for Transporting the Engine
25
Chapter 2 NAME of PARTS
26
Engine External Diagrams
26
Equipment and Instrument
28
Starter Switch
28
Preheat Indicator
28
Water Temperature Meter and Thermo Unit
29
Ammeter
29
Hour Meter
29
Stop Solenoid
30
Engine Protection Devices
31
Oil Pressure Switch
31
Thermo Switch
31
Air Cleaner Indicator
31
Chapter 3 OPERATION
32
Preparations for Operation
32
Engine External - Inspect
32
Battery Electrolyte Level - Inspect
32
Fuel Tank Oil Level - Check
33
Engine Oil Level - Check
33
Coolant Level - Check
34
Starting
35
Automatic Glow Plug
35
Manual Glow Plug
35
Table 3-1 Preheat Duration
35
Table 3-2 Preheat Duration (Manual Grow Plug)
35
Warm up Operation
36
Checking Engine Oil Pressure
36
External Inspection During Warm up
36
Operation
37
Cautions When Operating
37
Inspection During Operation
37
Table 3-3 Standard Values at Rated Speed
37
Stopping
38
Inspection after Stopping
38
Chapter 4 FUEL
40
Recommended Fuel
40
Handling Fuel
40
Table 4-1 Recommended Limit and Use Limit of
41
Chapter 5 ENGINE OIL
44
Recommended Engine Oil
44
Selection of Oil Viscosity
44
Handling Engine Oil
44
Engine Oil Performance Requirements
45
Engine Oil Deterioration Mechanisms
45
Definition of Properties of Engine Oil
46
Viscosity
46
Total Base Number
46
Total Acid Number
46
Water Content
46
Flash Point
46
Insoluble
46
Service Limits of Engine Oil
47
Table 5-1 Engine Oil Properties
47
Chapter 6 COOLANT
48
Recommended Water for Coolant
48
Long Life Coolant (LLC)
48
Genuine LLC
48
Glassy - Llc
48
Table 6-1 Water Quality Standards
48
Other Brand Llcs
49
Standard for Other Brand LLC
49
General Demands of LLC
49
LLC Specification
50
Table 6-2 LLC Specification
50
Maintenance of LLC
52
Replacement Intervals of LLC
52
LLC Concentration
52
Table 6-3 Recommended LLC Concentration
52
Importance of LLC
53
Characteristics of LLC Additive and Important Notes
53
Examples of Abnormalities Caused by LLC (Amine Type)
53
Pitting of Iron Parts
53
Corrosion of Aluminum Parts
53
Pitting and Clogging of the Radiator
53
Chapter 7 MAINTENANCE SCHEDULE
54
How to Use the Maintenance Schedule
54
Maintenace Schedule
55
Table 7-1 Maintenace Schedule
55
Chapter 8 PERIODIC INSPECTION and MAINTENANCE PROCEDURES
56
Basic Engine
56
Belt and Belt Tension - Inspect and Adjust
56
Adjust
56
Fuel System
57
Fuel Tank - Drain Water
57
Solenoid Fuel Pump Filter - Inspect and Clean
57
Clean
57
Fuel System - Bleed Air
58
Fuel Filters (Cartridge Type) - Bleed Air
58
Water Sedimenter - Bleed Air
59
Water Sedimenter - Drain Water
60
Fuel Filter (Cartridge Type) - Replace
60
Fuel Filter Element (Switching Cock Type) - Replace
61
Solenoid Fuel Pump Filter - Replace
61
Lubricating System
62
Engine Oil and Oil Filter - Replace
62
Engine Oil - Refill
63
Oil Filter - Change
64
Oil Filter
64
Cooling System
65
Coolant - Change
65
Radiator Filler Cap
65
Coolant Drain Cock (Radiator)
65
Coolant Drain Plug (Engine)
66
Radiator Coolant Level
67
Reserve Tank
67
Radiator Fins - Check and Clean
68
Radiator Fins - Clean
68
Inlet and Exhaust Systems
69
Air Cleaner - Check
69
Air Cleaner Element - Clean and
69
Check
69
Air Cleaner Element - Clean, Check and Replace
70
Electrical System
71
Battery Electrolyte Level - Inspect
71
Specific Gravity of Battery Electrolyte
71
Check
71
Table 8-1 Specific Gravity of Electrolyte
71
Starter - Inspect
72
Alternator - Inspect
72
Chapter 9 LONG-TERM STORAGE
74
Storing the Engine in a Non-Operable Condition for 3 Months or more
74
Preparation for Storage
74
Maintenance During Storage
74
Table 9-1 Recommended Rust-Preventive Oil
74
Using the Engine after Storage
75
Storing the Engine in an Operable Condition for 3 Months or more
75
Operating the Engine for Maintenance
75
Chapter 10
76
Lifting the Engine
76
Hangers
76
Engine's Center of Gravity
76
(Standard Specification)
76
Chapter 11 TROUBLESHOOTING
78
General Precautions
78
Contact a Dealer of Mitsubishi Heavy Industries, Ltd. for Repair Service
78
Considerations before Work
78
Cautions against Contamination
78
Cautions Regarding Parts Handling
78
Work Safety
78
Troubleshooting
79
The Starter Does Not Crank or Cranks Slowly, Resulting in Start Failure
79
The Starter Cranks, but the Engine Does Not Start
79
Table 11-1 the Starter Does Not Crank or Cranks Slowly, Resulting in Start Failure
79
Table 11-2 the Starter Cranks, but the Engine
79
Output Decrease
80
Table 11-3 Output Decrease
80
Exhaust Smoke Is White or Blue
81
Table 11-4 Exhaust Smoke Is White or Blue
81
Exhaust Smoke Is Black or Charcoal
82
Table 11-5 Exhaust Smoke Is Black or Charcoal
82
Fuel Consumption Is High
83
Table 11-6 Fuel Consumption Is High
83
Engine Oil Consumption Is High
84
Table 11-7 Engine Oil Consumption Is High
84
Overheating
85
Low Engine Oil Pressure
85
Table 11-8 Overheating
85
Table 11-9 Low Engine Oil Pressure
85
When Fuel Has Run out
86
Advertisement
Mitsubishi L Series Service Manual (155 pages)
L-Series
Brand:
Mitsubishi
| Category:
Engine
| Size: 3.41 MB
Table of Contents
How to Use this Manual
1
ENGLISH Service Manual Mitsubishi L-Series Diesel Engines
4
Table of Contents
5
General
12
Model, Classification and Use
12
1 Engine Model and Engine Number
12
Engine Model Embossment and Engine Number Stamp
12
2 External View
14
Engine L2
14
Engine L3
15
3 Features
16
Aim of Development
16
Features of the New Series
16
4 Specifications
18
5 Maintenance
19
Engine Oil and Oil Filter
19
Retightening the Cylinder Head Bolts
21
Adjusting the Valve Clearance
22
Adjusting the Fan Belt Tension
23
Bleeding Air from the Fuel System
23
Replacing the Fuel Filter
24
Checking and Adjusting Injection Timing
26
Adjusting the Engine Speeds
27
Checking and Adjustment of Nozzles
28
Checking the Compression Pressure
29
6 Troubleshooting
31
Hints on Using the Trouble-Diagnosis Chart
31
Hard Starting
32
Knocking
33
Overheating
34
Black-Smoky Exhaust
35
Unsteady Idling
36
Low Output
37
Engine Main Parts
39
7 General
40
Specifications
40
Special Tools
41
8 Rocker Arms and Rocker Shaft
42
Disassembly
42
Removal and Installation
43
Inspection
43
9 Cylinder Head
44
Disassembly
44
Removal
45
Inspection and Repair
46
Replacement of Valve Guide
46
Service Manual Mitsubishi L-Series Diesel Engines ENGLISH
47
Repair of Valve Seat
47
Installation
48
10 Valves and Valve Springs
49
Disassembly
49
Engine Main Parts
49
Removal
50
Inspection and Repair
50
Installation
51
11 Inlet Manifold and Exhaust Manifold
52
Disassembly
52
Inspection
52
12 Gear Case and Oil Pump
54
Disassembly
54
Removal
55
Inspection
55
Replacement of Front Oil Seal
56
Replacement of Governor Shaft Bushings
56
Inspection of Governor System
57
Disassembly and Reassembly of Governor Levers
57
Installation of Gear Case Assembly
58
13 Timing Gears
59
Disassembly
59
Removal
60
Inspection
60
Installation of Timing Gears
61
14 Camshafts (Valve and Injection Pump)
62
Disassembly
62
Removal of Valve Camshaft
63
Inspection
64
Installation
65
15 Piston and Connection Rod
66
Disassembly
66
Removal
67
Inspection
68
Installation
69
16 Crankshaft
73
Disassembly
73
Removal
74
Inspection
74
Replacement of Crankshaft Rear Oil Seal
76
Installation
77
17 Cylinder Block
78
Disassembly
78
Inspection
79
Reboring of Cylinder
79
Lubrication System
81
General
82
19 Oil Filter and Oil Pressure Switch
83
Removal and Installation
84
Fuel System
85
General
86
Disassembly
88
21 Fuel Injection Pump
89
Inspecting the Injection Pump While Operating the Engine
90
Inspection
91
22 Injection Nozzle
92
Disassembly
93
Inspection
94
Installation
95
Governor System
97
General
98
Disassembly
99
24 Torque Spring
100
Single Spring Type
101
Inspection
102
Removal and Installation
103
Cooling System
105
General
106
Disassembly
107
26 Fan and Fan Belt
108
27 Water Pump
109
28 Thermostat
110
29 Water Temperature Gage Unit and Thermoswitch
111
30 Air Cleaner
113
Air Cleaner
114
Inspection
115
Air Cleaner Air Cleaner
116
Electrical System
117
General
118
31 General
120
Wiring Diagrams
120
32 Starter
122
Inspection (Assembly)
123
Disassembly
125
Inspection
126
Assembly and Adjustment
128
33 Alternator and Dynamo
129
Dynamo
130
Output Inspection
131
Inspection
132
Installation
135
34 Glow Plug
137
35 Key-Off Stop System
138
Fuel Cutoff Solenoid (ETR Type)
139
36 Glow Timer System
141
37 Periodic Inspection Chart
146
38 Specifications and Maintenance Standards
146
Lubrication System
148
Governor System
149
Electrical System
150
39 Tightening Torque Chart and Sealant Chart
152
Tightening Torque for Main Bolts
152
Tightening Torque for Common Bolts and Nuts
152
Tightening Torque for Common Plugs
153
Sealant Chart
153
Advertisement
Related Products
Mitsubishi MELSEC LJ71C24-R2
Mitsubishi MELSEC LJ71C24
Mitsubishi MELSEC L60DA4
Mitsubishi L60AD4
Mitsubishi LS2-1380
Mitsubishi LS2-190
Mitsubishi LS2-1180
Mitsubishi LS2-210
Mitsubishi Diamond LT-52246
Mitsubishi L26CPU-PBT
Mitsubishi Categories
Air Conditioner
Controller
Projector
Automobile
Engine
More Mitsubishi Manuals
Login
Sign In
OR
Sign in with Facebook
Sign in with Google
Upload manual
Upload from disk
Upload from URL