Sign In
Upload
Manuals
Brands
Konica Minolta Manuals
All in One Printer
bizhub 300
Konica Minolta bizhub 300 Manuals
Manuals and User Guides for Konica Minolta bizhub 300. We have
1
Konica Minolta bizhub 300 manual available for free PDF download: Service Manual
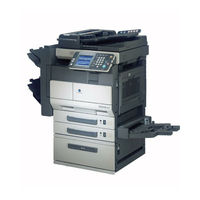
Konica Minolta bizhub 300 Service Manual (804 pages)
bizhub 200; bizhub 250; bizhub 300
Brand:
Konica Minolta
| Category:
All in One Printer
| Size: 15.81 MB
Table of Contents
Field Service Total
2
Bizhub 200/250/350 Main Unit
2
Standard Controller
2
Safety and Important Warning Items
4
Description Items for Danger, Warning and Caution
4
Important Notice
4
Safety Warnings
5
Checkpoints When Performing On-Site Service
7
Connection to Power Supply
7
Handling of Consumables
13
Internal Laser Radiation
16
Laser Caution Label
19
Laser Safety Label
19
Precautions for Handling the Laser Equipment
19
Warning Indications on the Machine
20
Measures to Take in Case of an Accident
23
Composition of the Service Manual
24
Notation of the Service Manual
25
Revision History
27
Table of Contents
2
Table of Contents
28
General
40
1 System Configuration
40
2 Product Specifications
42
Maintenance
46
3 Periodical Check
46
Service Schedule
46
Bizhub 200
46
Bizhub 250
46
Bizhub 350
46
Maintenance Items
47
Bizhub 350
47
Bizhub 250
49
Bizhub 200
52
Maintenance Parts
54
Replacement Parts
54
Cleaning Parts
55
Concept of Parts Life
56
Maintenance Procedure (Periodical Check Parts)
57
Replacing the Bypass Tray Feed Roller
57
Replacing the Bypass Tray Separation Roller Assy
58
Replacing the Tray 1 Feed Roller
59
Replacing the Tray 1 Pick-Up Roller
60
Replacing the Tray 1 Separation Roller Assy
62
Replacing the Tray 2 Feed Roller
64
Replacing the Tray 2 Pick-Up Roller
65
Replacing the Tray 2 Separation Roller
67
Replacing of the Registration Roller Bearings and Registration Roller Gears 1, 2
69
Cleaning of the Paper Dust Remover
70
Replacing of the Toner Filter (Developing Unit)
71
Replacement of the Ozone Filter
72
Replacing of the Toner Filter (Main Unit)
72
Replacement of the Developer
73
Replacing the Unit
76
Replacement of the Fusing Unit
76
Replacement of the Transfer Roller Unit
77
Replacement of the Photo Conductor Unit
78
Replacement of the Developing Unit
79
4 Service Tool
80
CE Tool List
80
Copy Materials
80
Developer
80
Photo Conductor Unit
80
Toner Bottle
80
5 Firmware Upgrade
81
Preparations for Firmware Rewriting
81
Checking ROM Version
81
Service Environment
81
Writing into the Compact Flash
81
Firmware Rewriting
81
Msc
81
Engine
83
6 Other
85
Disassembly/Adjustment Prohibited Items
85
Disassembly/Assembly/Cleaning List (Other Parts)
86
Disassembly/Assembly Parts List
86
Cleaning Parts List
87
Disassembly/Assembly Procedure
88
IR Upper Left Cover/Original Scanning Glass/Front Holding Bracket/Original Glass
88
Lower Rear Cover/Lower Right Rear Cover/Tray Rear Cover
88
Rear Right Cover/Front Right Cover
89
Upper Rear Cover
89
Front Door
90
IR Right Cover/Rear Cover
90
Paper Output Cover/Lower Front Cover
91
Upper Front Cover/Front Cover
92
IR Left Cover/Rear Left Cover/Left Cover
93
Rear Manual Bypass Cover/Front Manual Bypass Cover/Lower Right Cover
94
Control Panel
95
Mechanical Control Board Cover
96
FD Paper Size Board 1
97
FD Paper Size Board 2
98
Power Supply Unit
99
High Voltage Unit
100
MFBS Board
101
Inverter Board
102
BCRS Board
103
CCD Unit
104
Operation Board
108
Manual Bypass Unit
110
PH Unit
110
Toner Hopper Unit
113
Toner Replenishing Drive Unit
113
Duplex Unit
115
Switch Back Unit
115
Scanner Motor
116
Exposure Unit
117
Exposure Lamp
118
Scanner Drive Cables
119
IU Motor
124
Main Motor
124
Fusing Unit Cooling Fan Motor
125
Toner Suction Fan Motor
125
ATDC Sensor
126
Temperature/Humidity Sensor
126
Thermistor
128
Paper Exit Roll 1
130
Paper Exit Roll 2
130
Separation Claw
131
Cleaning Procedure
133
Manual Bypass Feed Roller
133
Manual Bypass Separation Roller
133
Tray 1 Feed Roller
134
Tray 1 Pick-Up Roller
135
Tray 1 Separation Roller
136
Tray 2 Feed Roller
137
Tray 2 Pick-Up Roller
137
Tray 2 Separation Roller
138
Paper Dust Remover
139
Registration Roller
139
Transport Roller
139
Bushings
140
Mirrors
140
Scanner Rails
140
Lens
141
Original Glass
141
Original Scanning Glass
141
Charge Neutralizing Plate
142
Ds Collar
142
Mount Kit MK-709
144
Option Counter
145
Installation Method for the Key Counter
145
Original Size Detecting Sensors
147
Original Size Detecting Sensor Layout
147
Mounting of the Original Size Detecting Sensors (Option)
148
Eeprom
149
Remounting of the EEPROM
149
Adjustment/Setting
150
7 How to Use the Adjustment Section
150
8 Utility/Counter Mode
151
Utility/Counter Mode Function Tree
151
Utility/Counter Mode Function Setting Procedure
155
Changing the Setting Value in Utility Mode Functions
155
Exiting
155
Procedure
155
Settings in the User Setting
156
User's Choice 1/6
156
User's Choice 2/6
157
User's Choice 3/6
158
User's Choice 4/6
159
User's Choice 5/6
160
User's Choice 6/6
162
Store Overlay
163
Alarm Volume
164
Confirmation Beep
164
Dehumidify
164
Job Complete Beep
164
Panel Cleaning
164
Settings in the User Management
164
Toner Supply
165
Admin. Set
166
Initial Setting
166
Settings in the Admin. Management
166
Account/User Auth
167
Network Setting
169
LDAP Setting
174
Frame Type Set
176
IP Filtering
177
Prefix/Suffix Settings
177
Ping
178
Printer Setting
178
Software SW
178
Security Setting
179
Delete Job
180
HDD Management
180
Memory Management
180
Default Set
182
MFP Set
182
Settings in the Printer Setting
182
PDL Set
184
Check Detail
185
Test Print
185
9 Adjustment Item List
187
10 Tech. Rep. Mode
189
10.1 Tech. Rep. Mode Function Setting Procedure
189
10.2 Tech. Rep. Mode Function Tree
190
10.3 Settings in the Tech. Rep. Choice
192
System Set
192
Printer
194
Sheet-Through-ADF
196
The Amount of Center Erase
197
Orientation Change
197
Finisher
197
Trail Erase (Dup)
197
10.4 Table of Temperatures for Adjusting the Fusing Temperature
198
Standard Paper
198
Ohp
199
Special Paper
199
Thin Paper
199
10.5 Settings in the System Input
200
Change Fixed Zoom
200
LCT Paper Size
200
Machine Configuration
200
Technical Memo
200
Hard Disk
201
Original Size Detecting Option
201
10.6 Settings in the Administrator # Initialize
201
10.7 Settings in the Counter
201
Checking the Counter Reading
201
Clearing Readings of All Counters at Once
201
Clearing the Reading of a Specific Counter
201
Jam Counter
202
Paper
202
Special Parts Counter
202
Application Counter
203
Maintenance Counter
203
Service Call Counter
203
10.8 Settings in the Function
203
F12
204
Hard Disk Format
205
FW Download
206
Org. Width Detect Adjust
206
10.9 I/O Check
207
Electrical Components Check Procedure through Input Data Check
207
I/O Check Screens
208
I/O Check List
210
10.10 Settings in the Operation Check
218
Adf
218
Exp. Lamp Check
218
Scanner
218
10.11 CS Remote Care
219
Outlines
219
Setting up the CS Remote Care
219
Software SW Setting for CS Remote Care
222
Calling the Center from the Administrator
227
Calling the Maintenance
227
Checking the Transmission Log
227
Setup Confirmation
227
Detail on Settings
228
List of the CS Remote Care Error Code
233
10.11.10 Troubleshooting for CS Remote Care
237
10.12 ROM Version
238
10.13 Level History
238
11 Service Security Mode
239
11.1 Service Security Mode Function Setting Procedure
239
Exiting
239
Procedure
239
11.2 Service Security Mode Function Tree
239
11.3 Settings in the Service Security Mode
239
Service Code Change
239
12 Counters
240
12.1 Counters Function Setting Procedure
240
Exiting
240
Procedure
240
12.2 Counters Function Tree
240
Large Size Counter
240
Total Counter
240
Copy Kit Counter
240
Copy Kit
242
Plug-In Counter
242
Key Counter
242
Vendor Mode
242
13 Adjust Mode
243
13.1 Adjust Mode Function Setting Procedure
243
Exiting
243
Procedure
243
13.2 Adjust Mode Function Tree
243
13.3 Settings in the Adjust Mode
244
Printer
244
Scanner
246
14 Initial Mode
250
14.1 Initial Mode Function Setting Procedure
250
Exiting
250
14.2 Initial Mode Function Tree
251
14.3 Settings in the Initial Mode
251
Total Clear
251
Image Data Clear
252
Marketing Area
252
Touch Panel Adjustment
252
Clear FAX Setting
253
Date/Time Setting
253
Trouble Reset
253
15 Mechanical Adjustment
254
15.1 Mechanical Adjustment of the Scanner Section
254
Scanner Position Adjustment
254
15.2 Mechanical Adjustment of the Bypass Tray Section
255
Adjustment of the Bypass Paper Size Unit
255
Manual Bypass Unit Installation Check
256
Adjustment of the Manual Bypass Take-Up Mechanical Clutch
257
16 Functions of Switches and Parts on Pwbs
259
Test Print Switch (S1)
259
Procedure
259
16.2 Read White Reference Position Adjustment
260
Jumper Switch Setting
260
Sub Power Switch (SW49)
261
16.4 Warm Restart Switch
261
Procedure
261
Troubleshooting
262
17 Jam Display
262
17.1 Misfeed Display
262
Misfeed Display Resetting Procedure
262
17.2 Sensor Layout
263
System Mounted with Pc
264
17.3 Solution
265
Initial Check Items
265
Misfeed at Tray 1 Take-Up Section
266
Misfeed at Image Transfer Section
267
Misfeed at Fusing/Paper Exit Section
268
Misfeed at Switch Back Unit/Duplex Unit Transport Section
269
Misfeed at Duplex Unit Take-Up Section
270
Misfeed at Tray 2 Take-Up/Vertical Transport Section
271
Misfeed at Manual Bypass Take-Up Section
272
Misfeed at Tray 3 Take-Up/Vertical Transport Section (PC-202)
273
Misfeed at Tray 4 Take-Up/Vertical Transport Section (PC-202)
274
Misfeed at LCT Take-Up/Vertical Transport Section (PC-402)
275
18 Malfunction Code
276
18.1 Trouble Code
276
Trouble Code List
276
18.2 How to Reset
280
18.3 Solution
281
C0202: Tray 1 Elevator Failure
281
C0204: Tray 2 Elevator Failure
281
C0206: Tray 3 Elevator Failure
281
C0208: Tray 4 Elevator Failure
281
C0211: Bypass Lifting Motion Failure
282
C0701: Manual Paper Size Detection Adjustment Failure
282
C1080: Exit Option Communication Failure
282
C2211: IU Motor Failure
283
C2351: Toner Suction Fan Motor Failure
283
C2557: ATDC Sensor Failure
284
C255C: ATDC Adjustment Failure
284
C2654: EEPROM Failure
284
C2702: Abnormal Image Transfer Voltage
284
C3451: Fusing Warm-Up Failure (Main)
285
C3452: Fusing Warm-Up Failure (Sub)
285
C3751: High Fuser Temperature Failure (Main)
285
C3752: High Fuser Temperature Failure (Sub)
285
C3851: Low Fuser Temperature Failure (Main)
286
C3852: Low Fuser Temperature Failure (Sub)
286
C4001: Main Unit Communication Failure
287
C4002: HSYNC Detection Failure
287
C4101: Polygon Motor Failure
288
C4721: Main Unit G/A Communication Failure
288
C5102: Main Motor Failure
288
C5351: Power Supply Cooling Fan Motor Failure
289
C5352: Cooling Fan Motor Failure
289
C5353: IU Cooling Fan Motor Failure
289
C7001: Engine Connection Error
290
CA052: MIO Device Failure
290
CC153: Flash ROM Failure
290
CD004: HDD Error
291
19 Power Supply Trouble
292
Machine Is Not Energized at All (PU1 Operation Check)
292
19.2 Only the Power Supply Cooling Fan Motor Turns
292
19.3 the Start Key (LED) on the Control Panel Blinks Orange
293
20 Image Quality Problem
294
20.1 How to Identify Problematic Part
294
Initial Check Items
294
Initial Check Items 1
294
Initial Check Items 2
294
20.3 Solution
296
Scanner System: Blank Copy or Black Copy
296
Scanner System: Low Image Density or Rough Image
297
Scanner System: Foggy Background
298
Scanner System: Black Streaks or Bands
299
Scanner System: Black Spots
300
Scanner System: White Streaks or Bands
301
Scanner System: Uneven Pitch
302
Printer System: Blank Copy or Black Copy
303
Printer System: Low Image Density or Rough Image
304
Printer System: Foggy Background
305
Printer System: Black Streaks or Bands
306
Printer System: Black Spots
307
Printer System: White Streaks or Bands
308
Printer System: Void Areas
309
Printer System: Smears on Back of Paper
310
Printer System: Uneven Image Density
311
Printer System: Gradation Reproduction Failure
312
Printer System: Uneven Pitch
313
21 Abort Codes
314
21.1 List of Abort Codes
314
22 Parts Layout Drawing
316
22.1 Main Unit
316
22.2 Duplex Unit
320
22.3 Switch Back Unit
321
Df-605
322
PC-102/PC-202 (Option)
323
Pc-402 (Option)
324
Js-502 (Option)
325
Fs-508 (Option)
326
Pu-501 (Option)
327
Mt-501 (Option)
328
Sd-502 (Option)
329
Appendix
316
23 Connector Layout Drawing
330
24 Timing Chart
332
24.1 Main Unit
332
Df-605
333
1-Sided Mode (A4 Two Sheets Feeding)
333
2-Sided Mode (A4 Two Sheets Feeding)
334
Fax Fine Mode (A4 Two Sheets Feeding)
336
Fax Real-Time Transmission Mode (A4 Two Sheets Feeding)
337
Table of Contents
340
1 Product Specifications
342
General
342
Maintenance
344
2 Other
344
Disassembly/Adjustment Prohibited Items
344
Disassembly/Assembly Procedure
345
Duplex Unit
345
Switch Back Unit
346
Disassembly/Assembly/Cleaning List
345
Cleaning Parts List
345
Disassembly/Assembly List
345
Cleaning Procedure
346
Cleaning of the Duplex Unit Ventilation Section
347
Cleaning of the Switch Back Unit Transport Roller/Roll
347
Adjustment/Setting
348
3 How to Use the Adjustment Section
348
4 I/O Check
349
Check Procedure
349
I/O Check List
349
I/O Check Screen
349
5 Adjustment
350
Adjusting the Paper Reference Position
350
Troubleshooting
352
6 Jam Display
352
Misfeed Display
352
Misfeed Display Resetting Procedure
352
Solution
354
Table of Contents
358
1 Controller Specifications
360
General
360
Maintenance
362
2 Firmware Upgrade
362
Firmware Rewriting
362
Msc
362
Preparations for Firmware Rewriting
362
Checking ROM Version
362
Service Environment
362
Writing into the Compact Flash
362
Troubleshooting
364
3 Troubleshooting Procedures
364
Unable to Print
364
Unable to Specify Desired Settings or Unable to Print as Specified
365
Table of Contents
370
General
374
1 Product Specifications
374
Maintenance
378
2 Other
378
Disassembly/Adjustment Prohibited Items
378
3 Connection
379
4 Disassembly/Reassembly
380
FAX Board (with G3 Multi Port Option)
380
Ni-MH Battery Replacement
382
Adjustment/Setting
384
5 How to Use the Adjustment Section
384
6 Utility/Counter Mode
385
Utility/Counter Mode Function Tree
385
Utility/Counter Mode Function Setting Procedure
387
Changing the Setting Value in Utility Mode Functions
387
Exiting
387
Procedure
387
Settings in the User Setting
388
User's Choice 5/6
388
User's Choice 6/6
388
FAX Regist
389
Settings in the User Management
390
Line Monitor Sound
390
Memory RX ON/OFF
390
Pop3 Rx
390
Settings in the Admin. Management
391
Initial Setting
391
Admin. Set
392
TX Settings
392
FAX Setting
394
RX Settings
394
Print Lists
395
Report Settings
395
Document Management
396
Settings in the Reports
397
Reports
397
7 Initial Mode
398
Initial Mode Function Setting Procedure
398
Exiting
398
Initial Mode Function Tree
398
Settings in the Initial Mode
399
Clear FAX Setting
399
8 Maintenance Mode
400
Maintenance Mode Function Setting Procedure
400
Maintenance Mode Function Tree
401
Settings in the Maintenance Mode
401
Mem. Contents
401
Memory Dump
401
File Display
402
File Dump
402
Soft Switch Set
402
Touch Panel Adjustment
402
Protocol Trace
403
Service Call Report
403
9 Tech. Rep. Mode
404
Tech. Rep. Mode Function Setting Procedure
404
Tech. Rep. Mode Function Tree
405
Settings in the Tech. Rep. Choice
405
Country Set
405
Settings in the System Input
406
Machine Configuration
406
Settings in the Counter
406
Application Counter
406
Checking the Counter Reading
406
Clearing Readings of All Counters at Once
406
Clearing the Reading of a Specific Counter
406
Fax Connection Error
407
Settings in the Function
407
Settings in the FAX Set
407
Service Call Set
407
Stamp
409
Terminal TX
409
10 Fax-Related Adjustment Items
410
CD/FD Zoom Ratio Correction (Fax)
410
11 Soft Switch List
411
11.2 List of Defaults
418
11.3 List of Soft Switches
428
Diagnosis by Alarm Code
562
Communication Error Codes
563
Errors in Operations
563
Communication Errors (Tx)
564
Terminal Alarm
564
Troubleshooting
564
Communication Errors (Rx)
566
Diagnosis by Symptoms
569
Table of Contents
576
1 Product Specifications
579
2 Periodical Check
582
Maintenance Procedure (Periodical Check Parts)
582
Replacing the Pick-Up Roller and Feed Roller
582
Replacing the Separation Roller
583
Cleaning of Miscellaneous Rolls
584
Cleaning of the Pick-Up Roller, Feed Roller and Separation Roller
584
Cleaning of Miscellaneous Rollers
585
Cleaning of the Reflective Sensor Section
586
Cleaning of the Scanning Guide
586
3 Other
587
Disassembly/Adjustment Prohibited Items
587
Disassembly/Assembly/Cleaning List (Other Parts)
588
Disassembly/Assembly Parts List
588
Disassembly/Assembly Procedure
588
Front Cover/Rear Cover/Original Feed Tray Rear Cover
588
Main Control Board
589
Variable Resistor
589
4 Firmware Upgrade
593
Adjustment/Setting
594
5 How to Use the Adjustment Section
594
6 Tech. Rep. Mode
595
Tech. Rep. Mode Function Setting Procedure
595
Setting in the Tech. Rep. Choice
595
Sheet-Through-ADF
595
Setting in the Function
595
Org. Width Detect Adjust
595
I/O Check
596
Sheet-Through-ADF (2-Sided)
596
Setting in the Operation Check
598
ADF Sensor Adjust
598
Backup Data Initialization
598
Paper Passage
598
7 Mechanical Adjustment
599
Leading Edge Skew Adjustment
599
Adjustment of the Scanning Zoom Ratio in the Main and Sub-Scanning Directions
600
Adjustment of the Scanning Start Position in the Main and
601
Adjustment of the Scanning Start Position in the Main and Sub-Scanning Directions
601
Document Size Detection Adjustment
603
Troubleshooting
604
8 Jam Display
604
Misfeed Display
604
Misfeed Display Resetting Procedure
604
Sensor Layout
604
Solution
605
Initial Check Items
605
Misfeed at Paper Take-Up Section
605
Misfeed at Transport Section
606
Misfeed at Turnover Section
606
Misfeed at Paper Exit Section
607
9 Malfunction Code
608
Trouble Code
608
Solution
608
C8301: ADF Cooling Fan Motor Failure
608
C9701: ADF Document Size Failure Adjustment
609
10 Set Error Detection
610
Adjustment/Setting
614
1 Product Specifications
617
2 Periodical Check
618
Maintenance Procedure (Periodical Check Parts)
618
Replacing the Separation Roller Assy
618
Replacing the Paper Take-Up Roller
619
Replacing the Pick-Up Roller
621
3 Other
623
Disassembly/Adjustment Prohibited Items
623
Disassembly/Assembly/Cleaning List (Other Parts)
624
Cleaning Parts List
624
Disassembly/Assembly Parts List
624
Disassembly/Assembly Procedure
625
Table of Contents
646
General
648
1 Product Specification
648
Maintenance
650
2 Periodical Check
650
Maintenance Procedure (Periodical Check Parts)
650
Replacing the Separation Roller Assy
650
Replacing the Paper Take-Up Roller
651
Replacing the Pick-Up Roller
653
3 Other
655
Disassembly/Adjustment Prohibited Items
655
Rear Cover
656
Right Door/Rear Right Cover/Lower Right Cover/Front Right Cover
656
Disassembly/Assembly/Cleaning List (Other Parts)
656
Cleaning Parts List
656
Disassembly/Assembly Parts List
656
Disassembly/Assembly Procedure
657
Rear Cover
657
Right Door/Rear Right Cover/Lower Right Cover/Front Right Cover
657
Drawer
658
Wire
658
Cleaning Procedure
661
Paper Take-Up Roller
661
Pick-Up Roller
661
Separation Roller
661
Vertical Transport Roller
662
Adjustment/Setting
664
5 I/O Check
665
Check Procedure
665
Shifter Movement Timing Belt Adjustment
671
Troubleshooting
672
7 Jam Display
672
Misfeed Display
672
Sensor Layout
673
Solution
674
8 Trouble Code
676
Trouble Code Display
676
Trouble Code List
676
Solution
679
Table of Contents
686
1 System Configuration
689
Adjustment/Setting
697
Periodical Check
704
2 Other
709
Disassembly/Adjustment Prohibited Items
709
Disassembly/Assembly/Cleaning List (Other Parts)
711
Disassembly/Assembly Parts List
711
Disassembly/Assembly Procedure
712
Upper Cover
717
Adjustment/Setting
722
4 How to Use the Adjustment Section
722
5 I/O Check
723
Check Procedure
723
I/O Check List
723
I/O Check Screen
723
Test Mode
725
Function Modes
726
6 Mechanical Adjustment
728
Staple Position Adjustment
728
Punch Hole Deviance Adjustment (Pu)
730
Punch Stop Position Adjustment (Pu)
731
Punch Loop Length Adjustment (Pu)
732
Troubleshooting
734
7 Jam Display
734
Misfeed Display
734
Misfeed Display Resetting Procedure
734
Sensor Layout
735
Solution
736
Initial Check Items
736
Finisher Staple Misfeed
738
Finisher Punch Misfeed (Pu)
738
Finisher Bundle Exit Misfeed
739
8 1 Trouble Code
740
10.2 Solution
741
C1183: Elevator Motor Ascent/Descent Drive Failure
741
C1190: Aligning Plate 1 Drive Failure
742
C1191: Aligning Plate 2 Drive Failure
742
C11A0: Paper Holding Drive Failure
743
C11A1: Exit Roller Pressure/Retraction Failure
743
C11A3: Shutter Drive Failure
744
C11B0: Staple Drive Failure
744
C11B2: Staple Drive Failure
745
C11C0: Punch Cam Motor Unit Failure
745
CC155: Finishing Option Flash ROM Failure
746
Table of Contents
768
General
770
1 Product Specifications
770
Maintenance
772
2 Periodical Check
772
Maintenance Procedure (Periodical Check Parts)
772
Cleaning of the Rollers and Rolls
772
3 Service Tool
772
CE Tool List
772
4 Other
773
Disassembly/Adjustment Prohibited Items
773
Disassembly/Assembly List (Other Parts)
774
Disassembly/Assembly Parts List
774
Disassembly/Assembly Procedure
774
Paper Output Tray/Front Cover
774
Rear Cover
775
Upper Cover
775
Saddle Unit
776
Crease Unit
777
Stapler Unit
778
In & out Guide Drive Motor
782
Crease Roller
784
Adjustment/Setting
788
5 How to Use the Adjustment Section
788
6 I/O Check
789
Check Procedure
789
I/O Check List
789
I/O Check Screen
789
7 Test Mode
791
Entering Function Mode
791
Function Modes
791
Fold Angle Adjustment
792
8 Mechanical Adjustment
792
Fold Position Adjustment
793
Center Staple Angle Adjustment
794
Center Staple Position Adjustment
795
Troubleshooting
796
9 Jam Display
796
Misfeed Display
796
Sensor Layout
796
Solution
797
Creasing Section Misfeed
797
Initial Check Items
797
Staple Unit Misfeed
798
Paper Bundle Exit Misfeed
799
10 Malfunction Code
800
10.1 Trouble Code
800
10.2 Solution
801
C11A2: Saddle Exit Roller Pressure/Retraction Failure
801
C11A4: Saddle Exit Motor Failure
801
C11A5: Saddle in & out Guide Motor Failure
802
C11A6: Saddle Layable Guide Drive Failure
802
C11B5: Side Staple 1 Drive Failure
803
C11B6: Side Staple 2 Drive Failure
803
C11D0: Crease Motor Drive Failure
803
Advertisement
Advertisement
Related Products
Konica Minolta bizhub 306/266
Konica Minolta bizhub 306
Konica Minolta BIZHUB 308
Konica Minolta bizhub 361
Konica Minolta bizhub 350
Konica Minolta bizhub 3602P
Konica Minolta Bizhub 3602
Konica Minolta bizhub 360i
Konica Minolta bizhub 3622
Konica Minolta BIZHUB 368
Konica Minolta Categories
All in One Printer
Printer
Digital Camera
Measuring Instruments
Copier
More Konica Minolta Manuals
Login
Sign In
OR
Sign in with Facebook
Sign in with Google
Upload manual
Upload from disk
Upload from URL