Sign In
Upload
Manuals
Brands
Canon Manuals
All in One Printer
imageClass DL370
Canon imageClass DL370 Manuals
Manuals and User Guides for Canon imageClass DL370. We have
2
Canon imageClass DL370 manuals available for free PDF download: Basic Operation Manual, Starter Manual
Canon imageClass DL370 Basic Operation Manual (174 pages)
imageCLASS D1370
Brand:
Canon
| Category:
Printer
| Size: 70.69 MB
Table of Contents
Table of Contents
8
Basic Operation Guide
1
Using the Fax Functions P
1
Contents
8
Manuals for the Machine
11
Available Features
12
How to Use this Manual
12
Symbols Used in this Manual
12
Important Safety Instructions
13
Power Supply
13
Maintenance and Inspections
15
Installation Requirements and Handling
17
Installation Space
17
Power Supply Requirements
17
Temperature and Humidity Conditions
17
Customer Support
18
Legal Notices
19
Users in Canada
21
Cdrh Regulations
23
Laser Safety
23
Chapter 1 Before Using the Machine
25
Before Using the Machine
25
Parts and Their Functions
26
Front Side
26
Back Side
27
Interior
27
Operation Panel
28
FAX Operation Panel (D1370/D1350 Only)
29
LCD (Standby Mode)
30
Copy Mode
30
Fax Mode (D1370/D1350 Only)
30
Scan Mode
30
USB Direct Print Mode
30
Navigating the Menu
31
Entering the Menu Screen
31
Scrolling the Menu
31
Selecting a Menu Item
31
Configuring Menus Using the Navigation Keys
31
Returning to the Default Screen
32
Entering Text
33
Changing the Entry Mode
33
Entering Text, Symbols, and Numbers
33
Moving the Cursor (Entering a Space)
33
Deleting Text, Symbols, or Numbers
33
Setting the Sleep Timer
35
Setting the Current Date and Time
36
Chapter 2 Document and Paper Handling
37
Document and Paper Handling
37
Document Type
38
Supported Document Types
38
Scan Area
38
Copy
38
Fax
39
Scan
39
Placing Documents
40
Placing Documents on the Platen Glass
40
Placing Documents in the Feeder
40
Supported Paper Types
42
Paper Size
42
Paper Type
43
Printable Area
44
Loading Paper
45
In the Paper Drawer
45
In the Multi-Purpose Tray
46
Precautions When Loading Paper
48
Paper Loading Capacity
48
Paper Loading Orientation
49
(Previously Printed Paper)
49
When Printing on Envelopes
49
When Printing Paper with a Letterhead or Logo
49
Setting the Paper Size and Type
50
For the Paper Drawer
50
Setting a Custom Paper Size
50
Registering the Default Paper Settings for the Multi-Purpose Tray
51
Selecting the Print Side
53
When <Print Speed Priority> Is Selected (the Default Setting)
53
When <Print Side Priority> Is Selected
53
Chapter 3 Copying
55
Copying
55
Basic Copy Operations
56
Checking and Canceling Copy Jobs
57
Canceling a Copy Job Using [ ] (Stop)
57
Checking and Canceling a Copy Job Using [ ] (Status Monitor/Cancel)
57
Copy Settings
58
Selecting Copy Papers
58
Adjusting the Density
59
Selecting the Document Type
59
Copy Settings
59
2-Sided Copying
60
Copy Settings
60
Enlarging/Reducing Copies
61
Copying Multiple Documents Onto One Sheet (N on 1)
61
Collating Copies
62
Erasing Dark Borders or Frame Lines ( Frame Erase)
62
Emphasizing the Outline of an Image (Sharpness)
62
Copying an ID Card
63
Registering and Using Combination of Copy Settings (Mode Memory)
64
Registering Mode Memory
64
Deleting Mode Memory
64
Calling and Copying Mode Memory
65
Changing the Default Settings
66
Viewing Copy Settings
66
Chapter 4 Printing from a Computer
67
Printing from a Computer
67
Preparing to Print from Your Computer
68
Printing from a Computer
69
Scaling Documents
69
Printing Multiple Pages on One Sheet
69
1-Sided Printing and 2-Sided Printing
70
Checking and Canceling Print Jobs
71
Chapter 5 Registering Destinations in the Address Book
73
Registering Destinations in the Address Book
73
The Address Book
74
Registering Destinations in the Address Book
74
One-Touch Keys
74
Coded Dial
74
Group Dialing
74
Registering and Editing One-Touch Keys
75
Registering and Editing from the Operation Panel
75
Registering and Editing One-Touch Keys Using the Remote UI
77
Registering and Editing Coded Dial Codes
78
Registering and Editing from the Operation Panel
78
Registering and Editing a Coded Dial Code Using the Remote UI
80
Registering and Editing Destinations for Group Dialing
81
Registering and Editing a Destination Group from the Operation Panel
81
Registering and Editing a Destination Group Using the Remote UI
84
Chapter 6 Using the Fax Functions
87
(D1370/D1350 Only)
87
Basic Procedures for Sending Faxes
88
Changing the Scan Settings (Fax)
89
Resolution Settings
89
Density Settings
89
2-Sided Original
89
Sharpness Settings
89
Specifying Destinations
90
Specifying Destinations by Entering the Fax Number
90
Specifying Destinations Using One-Touch Keys
90
Specifying Destinations Using Coded Dial Codes
90
Specifying Destinations Using Group Addresses
91
Specifying Destinations Using the Address Book
91
Canceling Fax Jobs
92
Redialing (Manual Redialing)
93
Useful Features
94
Notifying the Recipient of an Incoming Fax by Telephone
94
Push-Button Telephone for Tone Dialing
94
Sending a Fax Abroad (Adding Pauses)
95
Sending to Multiple Destinations at a Time
96
Sequential Broadcast
96
RX Mode
97
Auto Mode
97
Fax/Tel Mode
98
Answer Mode
99
Manual Mode
99
DRPD (Distinctive Ring Pattern Detection) Mode
99
Changing the Receive Mode
100
Advanced Settings for the Fax/Tel Auto Switch Mode
100
Forwarding Fax Documents
101
Setting Document Transfer (Automatic Forwarding)
101
Forwarding Received Faxes Stored in Memory to Other Destinations (Manual Forwarding)
101
Other Destinations (Manual Forwarding)
101
Configurating Operations for Transfer Errors
102
Re-Fowarding/Printing/Deleting Documents in Which Transfer Is Failed
103
Which Transfer Is Failed
103
Managing Faxes Stored in Memory
104
Checking and Canceling Fax Jobs
104
Combining and Printing the Received Documents You Saved
104
Checking and Deleting Received Faxes
105
Checking the History of Received/Sent Faxes
106
Changing the Default Fax Settings
107
Changing Fax Settings
108
Options
108
The Steps to Take for Configuring the Send Settings
108
Changing Fax Settings (Settings that Can be Specified Using the [Menu] Button)
108
Register Unit Telephone Number
109
Select Line Type
109
Off-Hook Alarm
109
Change Defaults
109
Register Unit Name (Fax)
109
Ecm Tx
109
Pause Time
109
Auto Redial
110
Sender ID
110
Check Dial Tone before Sending
110
The Steps to Take for Configuring the Receiving Settings
110
Options
111
2-Sided Printing
111
Auto RX Switch
111
Ecm Rx
111
Incoming Ring
111
Remote RX
111
Continue Printing When Toner Is Low
112
Reduce RX Size
112
RX Page Footer
112
The Steps to Take for Configuring the System Settings
112
Options
113
Address Book PIN
113
Memory Lock Settings
113
RX Start Speed
113
Select Country/Region
113
TX Start Speed
113
Allow Fax Driver TX
114
Fax No. Confirmation Re-Entry
114
Restrict History TX
114
Restrict New Destinations
114
Restrict Sequential Broadcast
114
Chapter 7 Using the Scan Functions
115
Using the Scan Functions
115
Basic Scan Operations
116
Scanning Using Keys on the Operation Panel
116
Saving Scanned Documents to USB Memory Device
118
E-Mailing Scanned Documents (D1370 Only)
119
Sending Scanned Documents to a File Server (D1370 Only)
120
Chapter 8 Maintenance
123
Maintenance
123
Cleaning the Machine
124
Cleaning the Exterior
124
Cleaning the Fixing Unit
124
Cleaning the Platen Glass
125
Cleaning the Feeder
125
Cleaning the Feeder Automatically
125
Precautions When Cleaning the Machine
126
Replacing Toner Cartridges
127
When a Message Appears (D1370/D1350 Only)
127
When White Streaks Appear on the Output or
127
The Output Is Partially Faded
127
About Replacement Toner Cartridge
128
Handling Toner Cartridge
128
Supplied Toner Cartridge
128
Purchasing Consumables
129
Storing Toner Cartridges
129
Using the Toner Saver Mode
129
Before Replacing the Toner Cartridge
130
Replacing the Toner Cartridge
130
Precautions When Replacing Toner Cartridge
131
Recycling Used Cartridges
133
The Clean Earth Campaign
133
U.s.a. Program
133
Packaging
133
Shipping
134
Canada Program-Canada Programme
135
Relocating the Machine
136
Precautions When Relocating the Machine
137
Chapter 9 Troubleshooting
139
Troubleshooting
139
Clearing Jams
140
Document Jams in the Feeder
140
Paper Jams in the Output Area
142
Paper Jams in the Multi-Purpose Tray
142
Paper Jams in the Paper Drawer (Drawer 1 or 2)
142
Paper Jams in the Back Cover and Duplex Unit
143
Paper Jams in the Front Cover
143
Paper Jams in the 2-Sided Transport Guide
144
Onscreen Message
146
Error Codes
146
When <Incorrect Size/Setting> Appears
149
Troubleshooting
150
Check the Following First
150
Are the Settings Properly Configured
150
Has the Power Switch Been Just Turned on
150
Is the Error Indicator on or Blinking
150
Is the Machine in the Sleep Mode
150
Is the Power Switched on
150
Does a Message Appear on the Screen
151
Is the Telephone Line Connected or Configured Properly
151
If You Cannot Solve a Problem
151
When a Power Failure Occurs
152
Printing Results Are Not Good
153
Paper Curls
153
Paper Creases
154
Vertical Streaks Appear on the Output
155
Toner Smudges and Spatters Appear Around Text and Images
156
The Bottom Edge of Paper or Following Paper Has Smudge Marks
156
A Portion of the Page Is Not Printed
157
When a Problem Cannot be Resolved
158
Customer Support (U.S.A.)
158
Customer Support (Canada)
158
Contents of the Setting Menu
159
Printing a User Data List
159
Setting Menu List
159
Setting Menu List
160
Address Book List
160
Print Reports
160
Appendix
167
Main Specifications
168
Copy Specifications
168
Machine Specifications
168
Printer Specification
168
Fax Specifications (D1370/D1350 Only)
169
Optional Drawer
169
Scanner Specifications
169
Telephone Specifications (D1370/D1350 Only)
169
Transmission Specification (D1370 Only)
169
For Macintosh Users
170
Are Unavailable on the Macintosh
170
Displaying a Driver's Help System
170
Displaying Driver Guides
170
Index
171
Advertisement
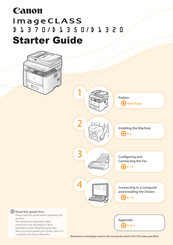
Canon imageClass DL370 Starter Manual (37 pages)
Brand:
Canon
| Category:
All in One Printer
| Size: 18.87 MB
Table of Contents
Setting up
2
Checking the Supplied Accessories
3
About the Supplied Manuals
5
Basic Operation Guide
5
Installation Site
6
The Toner Cartridge
8
Loading Paper
10
Connecting the Power Cord
11
Initial Settings
12
Turn on the Machine
12
Setting a Paper Size and Type
13
Connecting to the Machine
13
Telephone Cable
14
Connect the Telephone Line
16
Selecting the Method for Connecting to the Machine
18
Connect the Lan Cable
19
Installing Via Network Connection
19
For Macintosh
19
For Windows
20
Installing Via Network Connection
20
Connect the Usb Cable
23
Checking the Installation Results
24
Installing the Software
25
Connecting a Usb Cable
26
Usb Connection
29
Checking the Ip Address
32
Advertisement
Related Products
Canon imageClass DL350
Canon imageClass DL320
Canon IMAGECLASS D440
Canon imageCLASS D760
Canon imageRUNNER ADVANCE DX C7765i
Canon imageRUNNER ADVANCE DX C3730i
Canon imageRUNNER ADVANCE DX C3720i
Canon imageRUNNER ADVANCE DX 4745
Canon imageRUNNER ADVANCE DX 8986i
Canon imageRUNNER ADVANCE DX 8795
Canon Categories
Printer
Digital Camera
All in One Printer
Camcorder
Scanner
More Canon Manuals
Login
Sign In
OR
Sign in with Facebook
Sign in with Google
Upload manual
Upload from disk
Upload from URL